編輯:Android開發實例
首先我們先來看下官方API對SurfaceView的介紹
SurfaceView的API介紹
Provides a dedicated drawing surface embedded inside of a view hierarchy. You can control the format of this surface and, if you like, its size; the SurfaceView takes care of placing the surface at the correct location on the screen
The surface is Z ordered so that it is behind the window holding its SurfaceView; the SurfaceView punches a hole in its window to allow its surface to be displayed. The view hierarchy will take care of correctly compositing with the Surface any siblings of the SurfaceView that would normally appear on top of it. This can be used to place overlays such as buttons on top of the Surface, though note however that it can have an impact on performance since a full alpha-blended composite will be performed each time the Surface changes.
Access to the underlying surface is provided via the SurfaceHolder interface, which can be retrieved by calling getHolder().
The Surface will be created for you while the SurfaceView's window is visible; you should implement surfaceCreated(SurfaceHolder) and surfaceDestroyed(SurfaceHolder) to discover when the Surface is created and destroyed as the window is shown and hidden.
One of the purposes of this class is to provide a surface in which a secondary thread can render in to the screen. If you are going to use it this way, you need to be aware of some threading semantics:
•All SurfaceView and SurfaceHolder.Callback methods will be called from the thread running the SurfaceView's window (typically the main thread of the application). They thus need to correctly synchronize with any state that is also touched by the drawing thread.
•You must ensure that the drawing thread only touches the underlying Surface while it is valid -- between SurfaceHolder.Callback.surfaceCreated() and SurfaceHolder.Callback.surfaceDestroyed().
對應的中文翻譯
SurfaceView是視圖(View)的繼承類,這個視圖裡內嵌了一個專門用於繪制的Surface。你可以控制這個Surface的格式和尺寸。Surfaceview控制這個Surface的繪制位置。
surface是縱深排序(Z-ordered)的,這表明它總在自己所在窗口的後面。surfaceview提供了一個可見區域,只有在這個可見區域內 的surface部分內容才可見,可見區域外的部分不可見。surface的排版顯示受到視圖層級關系的影響,它的兄弟視圖結點會在頂端顯示。這意味者 surface的內容會被它的兄弟視圖遮擋,這一特性可以用來放置遮蓋物(overlays)(例如,文本和按鈕等控件)。注意,如果surface上面 有透明控件,那麼它的每次變化都會引起框架重新計算它和頂層控件的透明效果,這會影響性能。
你可以通過SurfaceHolder接口訪問這個surface,getHolder()方法可以得到這個接口。
surfaceview變得可見時,surface被創建;surfaceview隱藏前,surface被銷毀。這樣能節省資源。如果你要查看 surface被創建和銷毀的時機,可以重載surfaceCreated(SurfaceHolder)和 surfaceDestroyed(SurfaceHolder)。
surfaceview的核心在於提供了兩個線程:UI線程和渲染線程。這裡應注意:
1> 所有SurfaceView和SurfaceHolder.Callback的方法都應該在UI線程裡調用,一般來說就是應用程序主線程。渲染線程所要訪問的各種變量應該作同步處理。
2> 由於surface可能被銷毀,它只在SurfaceHolder.Callback.surfaceCreated()和 SurfaceHolder.Callback.surfaceDestroyed()之間有效,所以要確保渲染線程訪問的是合法有效的surface。
接下來呢,說說自己對它的理解
1、定義
可以直接從內存或者DMA等硬件接口取得圖像數據,是個非常重要的繪圖容器。
它的特性是:可以在主線程之外的線程中向屏幕繪圖上。這樣可以避免畫圖任務繁重的時候造成主線程阻塞,從而提高了程序的反應速度。在游戲開發中多用到SurfaceView,游戲中的背景、人物、動畫等等盡量在畫布canvas中畫出。
2、實現
首先繼承SurfaceView並實現SurfaceHolder.Callback接口
使用接口的原因:因為使用SurfaceView 有一個原則,所有的繪圖工作必須得在Surface 被創建之後才能開始(Surface—表面,這個概念在 圖形編程中常常被提到。基本上我們可以把它當作顯存的一個映射,寫入到Surface 的內容
可以被直接復制到顯存從而顯示出來,這使得顯示速度會非常快),而在Surface 被銷毀之前必須結束。所以Callback 中的surfaceCreated 和surfaceDestroyed 就成了繪圖處理代碼的邊界。
需要重寫的方法
(1)public void surfaceChanged(SurfaceHolder holder,int format,int width,int height){}
//在surface的大小發生改變時激發
(2)public void surfaceCreated(SurfaceHolder holder){}
//在創建時激發,一般在這裡調用畫圖的線程。
(3)public void surfaceDestroyed(SurfaceHolder holder) {}
//銷毀時激發,一般在這裡將畫圖的線程停止、釋放。
整個過程:繼承SurfaceView並實現SurfaceHolder.Callback接口 ----> SurfaceView.getHolder()獲得SurfaceHolder對象 ---->SurfaceHolder.addCallback(callback)添加回調函數---->SurfaceHolder.lockCanvas()獲得Canvas對象並鎖定畫布----> Canvas繪畫 ---->SurfaceHolder.unlockCanvasAndPost(Canvas canvas)結束鎖定畫圖,並提交改變,將圖形顯示。
3、SurfaceHolder
這裡用到了一個類SurfaceHolder,可以把它當成surface的控制器,用來操縱surface。處理它的Canvas上畫的效果和動畫,控制表面,大小,像素等。
幾個需要注意的方法:
(1)、abstract void addCallback(SurfaceHolder.Callback callback);
// 給SurfaceView當前的持有者一個回調對象。
(2)、abstract Canvas lockCanvas();
// 鎖定畫布,一般在鎖定後就可以通過其返回的畫布對象Canvas,在其上面畫圖等操作了。
(3)、abstract Canvas lockCanvas(Rect dirty);
// 鎖定畫布的某個區域進行畫圖等..因為畫完圖後,會調用下面的unlockCanvasAndPost來改變顯示內容。
// 相對部分內存要求比較高的游戲來說,可以不用重畫dirty外的其它區域的像素,可以提高速度。
(4)、abstract void unlockCanvasAndPost(Canvas canvas);
// 結束鎖定畫圖,並提交改變。
4、實例
這裡的例子實現了一個矩形和一個計時器
- package xl.test;
- import android.app.Activity;
- import android.content.Context;
- import android.graphics.Canvas;
- import android.graphics.Color;
- import android.graphics.Paint;
- import android.graphics.Rect;
- import android.os.Bundle;
- import android.view.SurfaceHolder;
- import android.view.SurfaceView;
- public class ViewTest extends Activity {
- /** Called when the activity is first created. */
- @Override
- public void onCreate(Bundle savedInstanceState) {
- super.onCreate(savedInstanceState);
- setContentView(new MyView(this));
- }
- //視圖內部類
- class MyView extends SurfaceView implements SurfaceHolder.Callback
- {
- private SurfaceHolder holder;
- private MyThread myThread;
- public MyView(Context context) {
- super(context);
- // TODO Auto-generated constructor stub
- holder = this.getHolder();
- holder.addCallback(this);
- myThread = new MyThread(holder);//創建一個繪圖線程
- }
- @Override
- public void surfaceChanged(SurfaceHolder holder, int format, int width,
- int height) {
- // TODO Auto-generated method stub
- }
- @Override
- public void surfaceCreated(SurfaceHolder holder) {
- // TODO Auto-generated method stub
- myThread.isRun = true;
- myThread.start();
- }
- @Override
- public void surfaceDestroyed(SurfaceHolder holder) {
- // TODO Auto-generated method stub
- myThread.isRun = false;
- }
- }
- //線程內部類
- class MyThread extends Thread
- {
- private SurfaceHolder holder;
- public boolean isRun ;
- public MyThread(SurfaceHolder holder)
- {
- this.holder =holder;
- isRun = true;
- }
- @Override
- public void run()
- {
- int count = 0;
- while(isRun)
- {
- Canvas c = null;
- try
- {
- synchronized (holder)
- {
- c = holder.lockCanvas();//鎖定畫布,一般在鎖定後就可以通過其返回的畫布對象Canvas,在其上面畫圖等操作了。
- c.drawColor(Color.BLACK);//設置畫布背景顏色
- Paint p = new Paint(); //創建畫筆
- p.setColor(Color.WHITE);
- Rect r = new Rect(100, 50, 300, 250);
- c.drawRect(r, p);
- c.drawText("這是第"+(count++)+"秒", 100, 310, p);
- Thread.sleep(1000);//睡眠時間為1秒
- }
- }
- catch (Exception e) {
- // TODO: handle exception
- e.printStackTrace();
- }
- finally
- {
- if(c!= null)
- {
- holder.unlockCanvasAndPost(c);//結束鎖定畫圖,並提交改變。
- }
- }
- }
- }
- }
- }
 Android本地化
Android應用程序可以在許多不同地區的許多設備上運行。為了使應用程序更具交互性,應用程序應該處理以適合應用程序將要使用的語言環境方面的文字,數字,文件等。在本章中,我
 android開發之方形圓角listview代碼分享
先看效果圖: 首先,你得寫一個類我們命名為CornerListView [java] 代碼如下:/** * 圓角ListView示例 * @
 Android MediaPlayer(多媒體播放)
Android提供了許多方法來控制播放的音頻/視頻文件和流。其中該方法是通過一類稱為MediaPlayer。Android是提供MediaPlayer類訪問內置的媒體播放
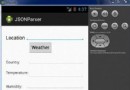
 Android JSON解析器
JSON代表JavaScript對象符號。它是一個獨立的數據交換格式,是XML的最佳替代品。本章介紹了如何解析JSON文件,並從中提取所需的信息。Android提供了四個