編輯:Android編程入門
LruCache的Lru指的是LeastRecentlyUsed,也就是近期最少使用算法。也就是說,當我們進行緩存的時候,如果緩存滿了,會先淘汰使用的最少的緩存對象。
為什麼要用LruCache?其實使用它的原因有很多,例如我們要做一個電子商務App,如果我們不加節制的向服務器請求大量圖片,那麼對於服務器來說是一個不少的負擔,其次,對於用戶來說,每次刷新都意味著流量的大量消耗以及長時間等待,所以緩存機制幾乎是每個需要聯網的App必須做的。
LruCache已經存在於官方的API中,所以無需添加任何依賴即可使用,而這個緩存只是一個內存緩存,並不能進行本地緩存,也就是說,如果內存不足,緩存有可能會失效,而且當App重啟的時候,緩存會重新開始生效。如果想要進行本地磁盤緩存,推薦使用DiskLruCache,雖然沒包含在官方API中,但是官方推薦我們使用,本文暫不討論。
使用方法:
使用LruCache其實非常簡單,下面以一個圖片緩存為例:
創建LruCache對象:
private static class StringBitmapLruCache extends LruCache<String, Bitmap> {
        public StringBitmapLruCache() {
            // 構造方法傳入當前應用可用最大內存的八分之一
            super((int) (Runtime.getRuntime().maxMemory() / 1024 / 8));
        }

        @Override
        // 重寫sizeOf方法,並計算返回每個Bitmap對象占用的內存
        protected int sizeOf(String key, Bitmap value) {
            return value.getByteCount() / 1024;
        }

        @Override
        // 當緩存被移除時調用,第一個參數是表明緩存移除的原因,true表示被LruCache移除,false表示被主動remove移除,可不重寫
        protected void entryRemoved(boolean evicted, String key, Bitmap oldValue, Bitmap
                newValue) {
            super.entryRemoved(evicted, key, oldValue, newValue);
        }

        @Override
        // 當get方法獲取不到緩存的時候調用,如果需要創建自定義默認緩存,可以在這裡添加邏輯,可不重寫
        protected Bitmap create(String key) {
            return super.create(key);
        }
    }
LruCache<String, Bitmap> mLruCache = new StringBitmapLruCache();
把圖片寫入緩存:
mLruCache.put(name, bitmap);
從緩存讀取圖片:
mLruCache.get(name);
從緩存中刪除圖片:
mLruCache.remove(name);
使用的方法很簡單,一般我們直接通過get方法讀取緩存,如果返回Null,再通過網絡訪問圖片,訪問之後,再把圖片put到緩存中,這樣下次訪問就可以獲取到。
至此,我們已經基本了解了LruCache的用法,我們不需要進行任何的淘汰處理,LruCache會自動幫我們完成淘汰的工作。
源碼分析:
構造方法:
public LruCache(int maxSize) {
        if (maxSize <= 0) {
            throw new IllegalArgumentException("maxSize <= 0");
        }
        this.maxSize = maxSize;
        this.map = new LinkedHashMap<K, V>(0, 0.75f, true);
    }
可以看到,構造方法中我們獲取了緩存的最大值,並且創建了一個LinkedHashMap對象,這個對象就是整個LruCache的關鍵,淘汰最少使用的算法,其實就是通過這個類來實現的,有興趣可以看看這個類的機制。
put方法:
public final V put(K key, V value) {
        if (key == null || value == null) {
            throw new NullPointerException("key == null || value == null");
        }

        V previous;
        synchronized (this) {
            putCount++;
            size += safeSizeOf(key, value);
            previous = map.put(key, value);
            if (previous != null) {
                size -= safeSizeOf(key, previous);
            }
        }

        if (previous != null) {
            entryRemoved(false, key, previous, value);
        }

        trimToSize(maxSize);
        return previous;
    }
解析:put方法中,先計算插入的對象類型的大小,調用的方法是safeSizeOf,這個方法其實只是簡單的調用了我們在構造的時候重寫的sizeOf方法,如果返回負數,則拋出異常。接著把我們需要緩存的對象插入LinkedHashMap中,如果緩存中有這個對象,就把size復位。如果緩存中有這個key對應的對象,則調用entryRemoved方法,這個方法默認為空,但是如果我們需要在緩存更新之後進行一些記錄的話,可以通過在構造時重寫這個方法來做到。接下來,調用trimToSize方法,這個方法是去檢查當前的size有沒有超過maxSize,這裡我們看看源碼
public void trimToSize(int maxSize) {
        while (true) {
            K key;
            V value;
            synchronized (this) {
                if (size < 0 || (map.isEmpty() && size != 0)) {
                    throw new IllegalStateException(getClass().getName()
                            + ".sizeOf() is reporting inconsistent results!");
                }

                if (size <= maxSize || map.isEmpty()) {
                    break;
                }

                Map.Entry<K, V> toEvict = map.entrySet().iterator().next();
                key = toEvict.getKey();
                value = toEvict.getValue();
                map.remove(key);
                size -= safeSizeOf(key, value);
                evictionCount++;
            }

            entryRemoved(true, key, value, null);
        }
    }
可以看到,這裡的判斷邏輯也很簡單,通過不斷的檢查,如果超過maxSize,則從LinkedHashMap中剔除一個,直到size等於或者小於maxSize,這裡同樣會調用entryRemoved方法。
get方法:
public final V get(K key) {
        if (key == null) {
            throw new NullPointerException("key == null");
        }

        V mapValue;
        synchronized (this) {
            mapValue = map.get(key);
            if (mapValue != null) {
                hitCount++;
                return mapValue;
            }
            missCount++;
        }

        /*
         * Attempt to create a value. This may take a long time, and the map
         * may be different when create() returns. If a conflicting value was
         * added to the map while create() was working, we leave that value in
         * the map and release the created value.
         */

        V createdValue = create(key);
        if (createdValue == null) {
            return null;
        }

        synchronized (this) {
            createCount++;
            mapValue = map.put(key, createdValue);

            if (mapValue != null) {
                // There was a conflict so undo that last put
                map.put(key, mapValue);
            } else {
                size += safeSizeOf(key, createdValue);
            }
        }

        if (mapValue != null) {
            entryRemoved(false, key, createdValue, mapValue);
            return mapValue;
        } else {
            trimToSize(maxSize);
            return createdValue;
        }
    }
解析:這裡可以看到,當我們調用get方法的時候,直接從LinkedHashMap中get一個當前key的對象並返回,如果返回的為Null,則會調用create方法來創建一個對象,而create方法默認也是一個空方法,直接返回null,所以,如果你需要在get失敗的時候創建一個默認的對象,可以在構造的時候重寫create方法。如果重寫了create方法,那麼下面的代碼會被執行,先進行LinkedHashMap的插入方法,如果已經存在,則返回存在的對象,否則返回我們創建的對象。這裡可以看到,這裡重復判斷列表中是否已經存在相同的對象,原因是,如果create方法處理的時間過長,有可能create出來的對象已經被put到LinkedHashMap中了。
remove方法:
public final V remove(K key) {
        if (key == null) {
            throw new NullPointerException("key == null");
        }

        V previous;
        synchronized (this) {
            previous = map.remove(key);
            if (previous != null) {
                size -= safeSizeOf(key, previous);
            }
        }

        if (previous != null) {
            entryRemoved(false, key, previous, null);
        }

        return previous;
    }
解析:這裡邏輯也很清晰,跟上面的兩個方法也很類似,就不唠嗑了。
其他的一些地方,看看源碼就行,睡了,晚安。
 Android應用的閃退(crash)分析
阿裡客戶端工程師試題簡析——Android應用的閃退(crash)分析1. 問題描述 閃退(Crash)是客戶端程序在運行時遭遇無法處理的異常或
 寫一個Android輸入法01——最簡步驟
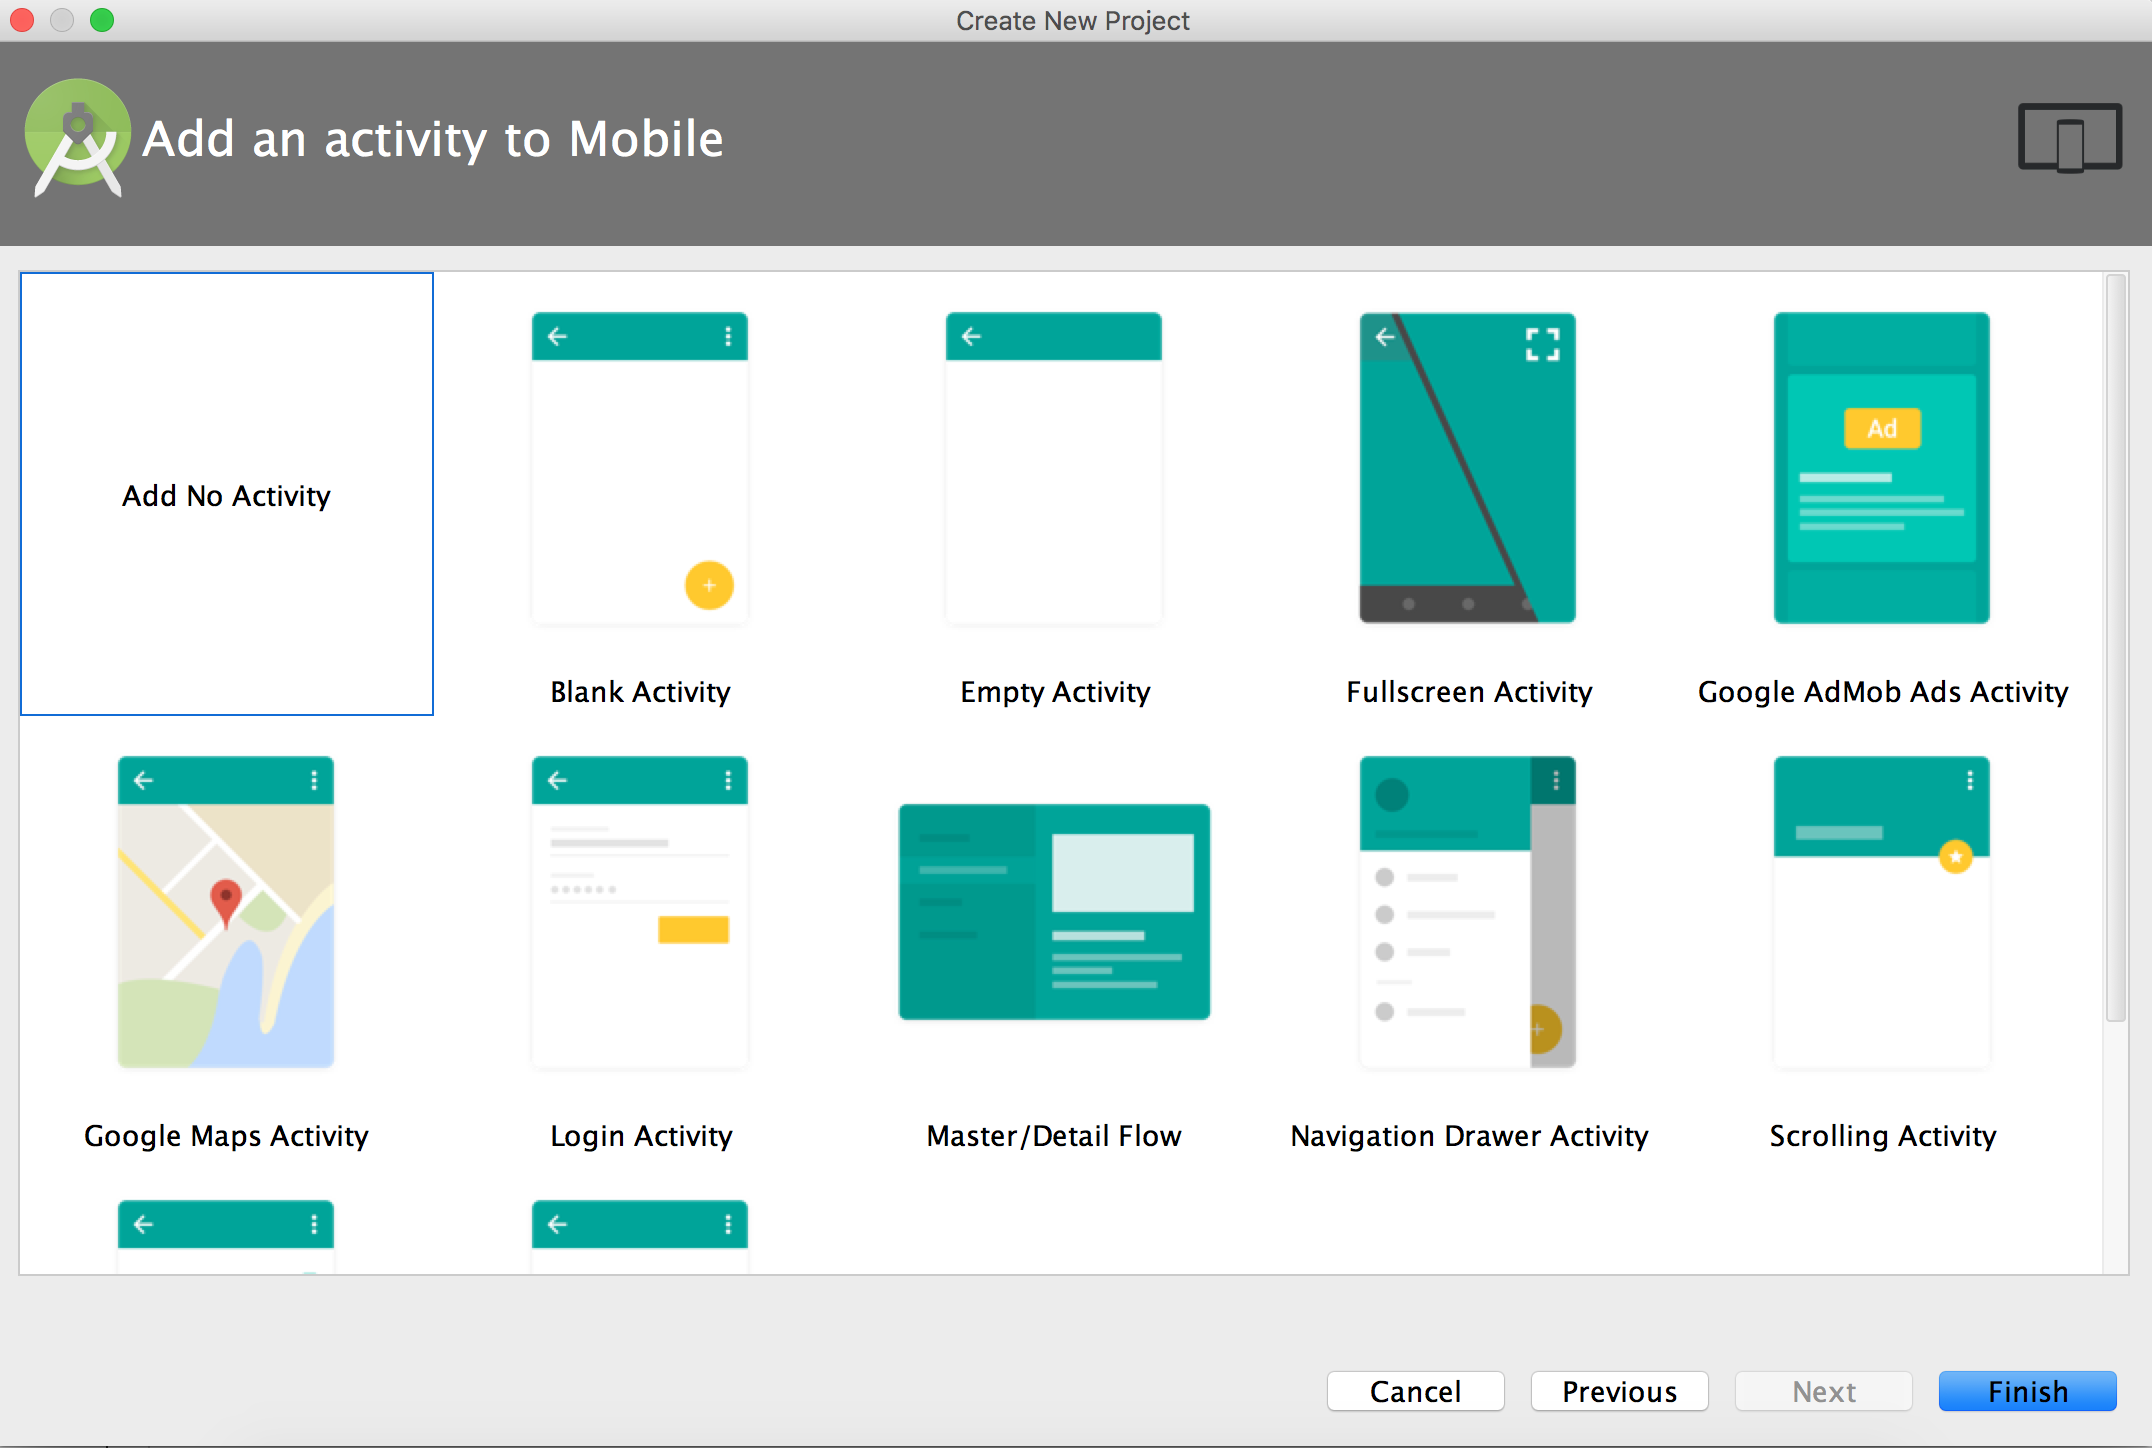
下一篇本文演示用Android Studio寫一個最簡單的輸入法。界面和交互都很簡陋,只為剔肉留骨,彰顯寫一個Android輸入法的要點。1、打開Android Stud
 深入了解View的繪制流程
1. ViewRoot ViewRoot是連接WindowManager與DecorView的紐帶,View的整個繪制流程的三大步(
 Android課程---關於數據存儲的學習
activity_data1.xml<?xml version=1.0 encoding=utf-8?><LinearLayout xmlns:andr