編輯:關於android開發
MainActivity.java
這段代碼的作用是從數據庫中獲取到數據並顯示在界面上
import java.util.ArrayList;
import java.util.List;

import com.itheima.showdata.domain.Person;

import android.os.Bundle;
import android.app.Activity;
import android.database.Cursor;
import android.database.sqlite.SQLiteDatabase;
import android.view.Menu;
import android.widget.LinearLayout;
import android.widget.TextView;

public class MainActivity extends Activity {

    List personList;
    @Override
    protected void onCreate(Bundle savedInstanceState) {
        super.onCreate(savedInstanceState);
        setContentView(R.layout.activity_main);

        personList = new ArrayList();
        //把數據庫的數據查詢出來
        //在這裡寫成this,是由於在MyOpenHelper的super構造器中,已經寫死了另外三個參數;
        MyOpenHelper oh = new MyOpenHelper(this);
        SQLiteDatabase db =  oh.getWritableDatabase();
        Cursor cursor = db.query(person, null, null, null, null, null, null, null);
        while(cursor.moveToNext()){
            String _id = cursor.getString(0);
            String name = cursor.getString(1);
            String salary = cursor.getString(2);
            String phone = cursor.getString(3);

            //把這幾個值封裝在一個類中,這種思想要學會;由於p在這裡是一局部變量,所以定義了
            //一個List的全局變量的容器去存放Person類型的變量p;關鍵學會別人的這種思想;
            Person p = new Person(_id, name, phone, salary);
            personList.add(p);
        }

        LinearLayout ll = (LinearLayout) findViewById(R.id.ll);
        //把數據顯示至屏幕
        for (Person p : personList) {
            //注意,TextView除了在layout裡邊布局之外,也可以單獨new出來,
            //因為其也是一個類,是View類下邊的一個子類,只是此時的TextView
            //和layout還沒有關聯起來,所以記得加上第3步
            //1.集合中每有一條元素,就new一個textView
            TextView tv = new TextView(this);
            //2.把人物的信息設置為文本框的內容
            tv.setText(p.toString());
            tv.setTextSize(18);
            //設置完上述兩條語句並不會把TextView顯示在界面上,
            //所以需要第三步,將其與layout關聯起來;
            //3.把textView設置為線性布局的子節點
            ll.addView(tv);
        }
    }
}
注:當我們數據很多的時候,那麼new出來的person也很多,與此同時,
new出來的TextView也很多,那麼此時內存有可能扛不住;所以我們應該
做的就是:我們需要什麼數據顯示在界面上的時候,就創建什麼數據,
而不是一下子全部創建出來,所以我們在盡可能使用ListView對其進行
進一步優化。
import java.sql.ResultSet;
import android.content.Context;
import android.database.sqlite.SQLiteDatabase;
import android.database.sqlite.SQLiteDatabase.CursorFactory;
import android.database.sqlite.SQLiteOpenHelper;

public class MyOpenHelper extends SQLiteOpenHelper {

    public MyOpenHelper(Context context) {
        super(context, people.db, null, 1);
        // TODO Auto-generated constructor stub
    }

    //數據庫創建時,此方法會調用
    @Override
    public void onCreate(SQLiteDatabase db) {
        db.execSQL(create table person(_id integer primary key autoincrement, name char(10), salary char(20), phone integer(20)));

    }

    //數據庫升級時,此方法會調用
    @Override
    public void onUpgrade(SQLiteDatabase db, int oldVersion, int newVersion) {
        System.out.println(數據庫升級了);
    }
}
這段代碼的作用是添加數據進數據庫
import com.itheima.showdata.MyOpenHelper;
import android.content.ContentValues;
import android.database.sqlite.SQLiteDatabase;
import android.test.AndroidTestCase;

public class TestCase extends AndroidTestCase {

    private MyOpenHelper oh;
    private SQLiteDatabase db;
    //測試框架初始化完畢之後,在測試方法執行之前,此方法調用
    @Override
    protected void setUp() throws Exception {
        super.setUp();

        oh = new MyOpenHelper(getContext());
        db = oh.getWritableDatabase();
    }

    //測試方法執行完畢之後,此方法調用
    @Override
    protected void tearDown() throws Exception {
        // TODO Auto-generated method stub
        super.tearDown();
        db.close();
    }

    public void insertApi(){
        //把要插入的數據全部封裝至ContentValues對象
        for (int i = 0; i < 50; i++) {
            ContentValues values = new ContentValues();
            values.put(name, 趙+i);
            values.put(phone, 159+i+i);
            values.put(salary, 160+i+i);
            db.insert(person, null, values);
        }
    }
}
 Android逆向之旅---解析編譯之後的Dex文件格式
Android逆向之旅---解析編譯之後的Dex文件格式 一、前言 新的一年又開始了,大家是否還記得去年年末的時候,我們還有一件事沒有做,那就是解析Android中編
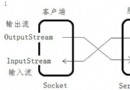 Android網絡編程的Socket通信總結
Android網絡編程的Socket通信總結 創建服務器端的步驟: 1,指定端口實例化一個ServerSocket 2,調用ServerSocket的accept方法等待
 android TextView實現跑馬燈效果
android TextView實現跑馬燈效果 最近忙著項目,很久沒有總結提交博客和提交github了。接下來我打算整理下項目中用到的比較有用的發表到博客上。也打算總
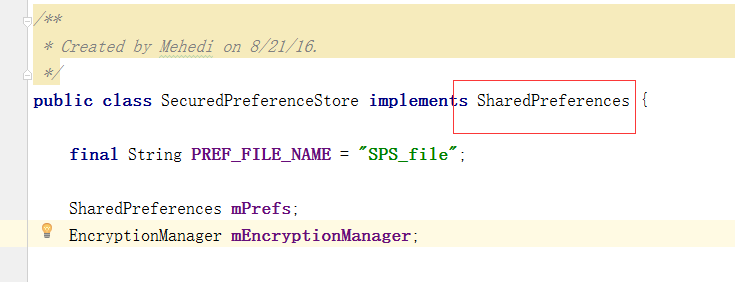
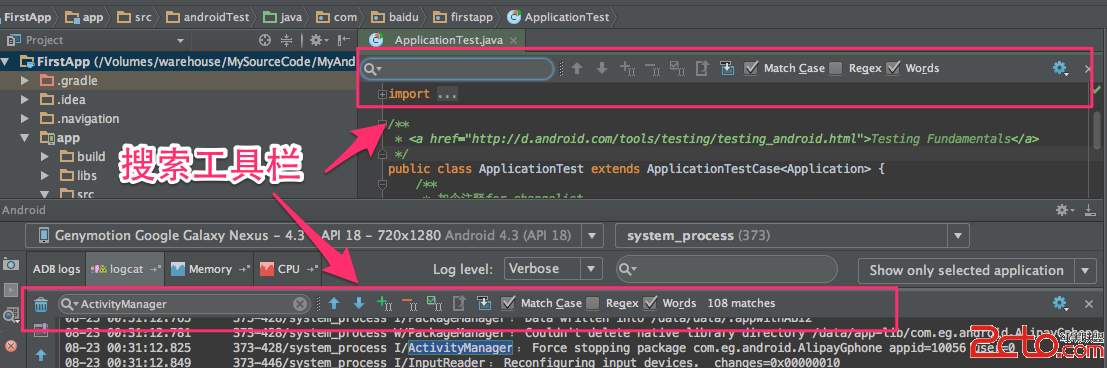 《Android Studio實用指南》12.18 文本搜索工具
《Android Studio實用指南》12.18 文本搜索工具 Android Studio中提供了非常方便的搜索工具,可以在編輯器的文件中使用,也可以在andr