編輯:關於android開發
分類:C#、Android、VS2015;
創建日期:2016-02-29
上一節介紹了通知(Notification)相關的基本內容。這一節先用一個簡單示例演示創建和發布本地通知的基本用法,下一節再演示更多的用法。
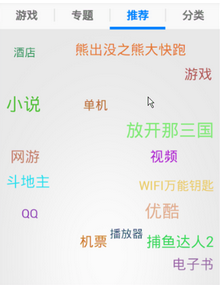
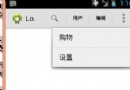
在穿ch1502MainActivity屏幕上(左側圖)單擊【發布通知】按鈕後,屏幕左上角就會顯示一個通知圖標,下拉該圖標,就會顯示通知區域(中間的圖)。單擊通知區域中上面的那個示例通知,就會顯示ch1502SecondActivity屏幕(未截圖),並在此屏幕上顯示在ch1502MainActivity屏幕中單擊按鈕的次數。
1、添加通知用的圖標
在drawable文件夾下添加一個ch1502statButton.png圖片,作為通知的圖標。或者自己做一個圖標。
2、添加ch1502_Main.axml
在layout文件夾下添加該文件。
<?xml version="1.0" encoding="utf-8"?>
<LinearLayout xmlns:android="http://schemas.android.com/apk/res/android"
    android:orientation="vertical"
    android:layout_width="fill_parent"
    android:layout_height="fill_parent">
    <Button
        android:id="@+id/ch1502_btn1"
        android:layout_width="fill_parent"
        android:layout_height="wrap_content"
        android:text="發布通知" />
</LinearLayout>
3、添加ch1502_Second.axml文件
在layout文件夾下添加該文件。
<?xml version="1.0" encoding="utf-8"?>
<LinearLayout xmlns:android="http://schemas.android.com/apk/res/android"
    android:orientation="vertical"
    android:layout_width="fill_parent"
    android:layout_height="fill_parent"
    android:minWidth="25px"
    android:minHeight="25px">
    <TextView
        android:text=""
        android:textAppearance="?android:attr/textAppearanceLarge"
        android:layout_width="fill_parent"
        android:layout_height="wrap_content"
        android:id="@+id/ch1502_textView1" />
</LinearLayout>
4、添加ch1502SecondActivity.cs文件
在SrcDemos文件夾下添加該文件。
using Android.App;
using Android.Content;
using Android.OS;
using Android.Widget;

namespace MyDemos.SrcDemos
{
    [Activity(Label = "【例15-2】Notification基本用法")]
    public class ch1502SecondActivity : Activity
    {
        protected override void OnCreate(Bundle savedInstanceState)
        {
            base.OnCreate(savedInstanceState);

            // 獲取MainActivity中傳遞的count值,如果不存在count則返回-1
            int count = Intent.Extras.GetInt("count", -1);

            // 如果沒有傳遞count,直接返回
            if (count <= 0)
            {
                return;
            }

            SetContentView(Resource.Layout.ch1502_Second);
            TextView txtView = FindViewById<TextView>(Resource.Id.textView1);
            txtView.Text = string.Format("你單擊了 {0} 次按鈕。", count);
        }
    }
}
5、添加ch1502MainActivity.cs文件
在SrcDemos文件夾下添加該文件。
using System;
using Android.App;
using Android.Content;
using Android.OS;
using Android.Widget;

namespace MyDemos.SrcDemos
{
    [Activity(Label = "ch1502MainActivity")]
    public class ch1502MainActivity : Activity
    {
        // 通知的唯一ID號
        private static readonly int ButtonClickNotificationId = 1000;

        // 單擊按鈕的次數
        private int count = 1;

        protected override void OnCreate(Bundle savedInstanceState)
        {
            base.OnCreate(savedInstanceState);
            SetContentView(Resource.Layout.ch1502_Main);
            Button button = FindViewById<Button>(Resource.Id.ch1502_btn1);
            button.Click += Button_Click;
        }

        private void Button_Click(object sender, EventArgs e)
        {
            // 傳遞count到下一個activity:
            Bundle valuesForActivity = new Bundle();
            valuesForActivity.PutInt("count", count);

            // 當用戶單擊通知時,啟動SecondActivity
            Intent resultIntent = new Intent(this, typeof(ch1502SecondActivity));

            resultIntent.PutExtras(valuesForActivity);

            // 為跨任務導航構造back stack
            TaskStackBuilder stackBuilder = TaskStackBuilder.Create(this);
            stackBuilder.AddParentStack(Java.Lang.Class.FromType(typeof(ch1502SecondActivity)));
            stackBuilder.AddNextIntent(resultIntent);

            // 為 back stack 創建 PendingIntent
            PendingIntent resultPendingIntent = stackBuilder.GetPendingIntent(0, PendingIntentFlags.UpdateCurrent);

            // 創建通知
            Notification.Builder builder = new Notification.Builder(this)
                .SetAutoCancel(true)                    // 單擊通知時取消通知(讓通知消失)
                .SetContentIntent(resultPendingIntent)  // 單擊Intent時啟動activity
                .SetContentTitle("簡單通知示例")        // 標題
                .SetNumber(count)                       // 在Content Info中顯示count的值
                .SetDefaults(NotificationDefaults.Sound | NotificationDefaults.Vibrate) //顯示通知時播放聲音並振動
                .SetSmallIcon(Resource.Drawable.ch1502statButton) // 顯示的通知圖標
                .SetContentText(string.Format("你已經單擊了 {0} 次按鈕。", count)); // 顯示的消息

            // 發布通知
            NotificationManager notificationManager = GetSystemService(NotificationService) as NotificationManager;
            notificationManager.Notify(ButtonClickNotificationId, builder.Build());

            // 按鈕次數加1
            count++;
        }
    }
}
 Android SurfaceView的生命周期,androidsurfaceview
Android SurfaceView的生命周期,androidsurfaceview本文利用SurfaceView來實現視頻的播放 本文地址:http://www.cn
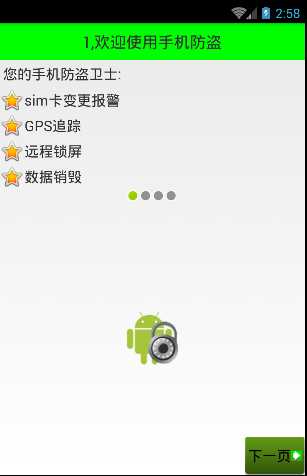 Android 手機衛士--導航界面2,android衛士
Android 手機衛士--導航界面2,android衛士本文地址:http://www.cnblogs.com/wuyudong/p/5947504.html,轉載請注
 谷歌電子市場5--推薦,谷歌電子市場5--
谷歌電子市場5--推薦,谷歌電子市場5-- 1.RecommendFragment public class RecommendFragment exten
 [android] 標題部分管理,android標題
[android] 標題部分管理,android標題 1.1 普通標題 1.1.1 標題內容管理 1.1.2 幫助和返回的按鈕 1.2 未登錄的標題 1.3