編輯:關於android開發
在講訴具體實現之前說一下涉及的知識點
Java虛擬機啟動流程
啟動Java虛擬機,創建ClassLoader,將java字節碼加載進入ClassLoader,隨即找到入口函數,執行。當需要創建一個對象的時候,向Java虛擬機發送一個請求,Java虛擬機接收到請求以後,首先在內存中進行尋找,若存在,則解析class,找到相應的方法執行。若內存中不存在,則讓ClassLoader對相應的.class文件通過import 路徑進行加載到內存中,然後進行解析,找到對應的方法執行。(ClassLoader實際上為虛擬機的一個部分,Java虛擬機並不會一次性將java字節碼中的所有class文件進行加載,是需要什麼,在內存中尋找不到的時候,再通過ClassLoader將對應的.class文件通過路徑方式,加載進入內存,供他人使用)。Android dalvik虛擬機對於ClassLoader的處理與Java虛擬機類似。
在說之前,先提出一個問題:
我們知道DexClassLoader加載的Activity是沒有生命周期的,而我們知道dalvik對於類的查找以及加載流程了,那麼我們是不是可以將我們加載的dex讓Android虛擬機幫我們管理呢,因為虛擬機要加載類同樣也是通過ClassLoader進行加載的。
**
這便有產生一個想法,Android程序運行過程中,所需要的類都是采用上述方式進行加載,那麼可不可以找到虛擬機中的ClassLoader,將需要動態加載的dex或者APK文件進行加載,便於去尋找。
首先找到ZygoteInit.java文件 這個是創建應用進程的入口
static void invokeStaticMain(ClassLoader loader,
119             String className, String[] argv)
120             throws ZygoteInit.MethodAndArgsCaller {
121         Class cl;
122
123         try {
124             cl = loader.loadClass(className);
125         } catch (ClassNotFoundException ex) {
126             throw new RuntimeException(
127                     "Missing class when invoking static main " + className,
128                     ex);
129         }
130
131         Method m;
132         try {//在此處調用ActivityThread.java的main方法
133             m = cl.getMethod("main", new Class[] { String[].class });
134         } catch (NoSuchMethodException ex) {
135             throw new RuntimeException(
136                     "Missing static main on " + className, ex);
137         } catch (SecurityException ex) {
138             throw new RuntimeException(
139                     "Problem getting static main on " + className, ex);
140         }
141
142         int modifiers = m.getModifiers();
143         if (! (Modifier.isStatic(modifiers) && Modifier.isPublic(modifiers))) {
144             throw new RuntimeException(
145                     "Main method is not public and static on " + className);
146         }
147
148         /*
149          * This throw gets caught in ZygoteInit.main(), which responds
150          * by invoking the exception's run() method. This arrangement
151          * clears up all the stack frames that were required in setting
152          * up the process.
153          */
154         throw new ZygoteInit.MethodAndArgsCaller(m, argv);
155     }
在此處創建了一個新的ActivityThread對象
    public static void main(String[] args) {
        SamplingProfilerIntegration.start();

        // CloseGuard defaults to true and can be quite spammy.  We
        // disable it here, but selectively enable it later (via
        // StrictMode) on debug builds, but using DropBox, not logs.
        CloseGuard.setEnabled(false);

        Environment.initForCurrentUser();

        // Set the reporter for event logging in libcore
        EventLogger.setReporter(new EventLoggingReporter());

        Security.addProvider(new AndroidKeyStoreProvider());

        // Make sure TrustedCertificateStore looks in the right place for CA certificates
        final File configDir = Environment.getUserConfigDirectory(UserHandle.myUserId());
        TrustedCertificateStore.setDefaultUserDirectory(configDir);

        Process.setArgV0("");

        Looper.prepareMainLooper();

        ActivityThread thread = new ActivityThread();
        thread.attach(false);

        if (sMainThreadHandler == null) {
            sMainThreadHandler = thread.getHandler();
        }

        if (false) {
            Looper.myLooper().setMessageLogging(new
                    LogPrinter(Log.DEBUG, "ActivityThread"));
        }

        Looper.loop();

        throw new RuntimeException("Main thread loop unexpectedly exited");
    }
現在我們看一下ActivityThread實例中的變量
    // These can be accessed by multiple threads; mPackages is the lock.
    // XXX For now we keep around information about all packages we have
    // seen, not removing entries from this map.
    // NOTE: The activity and window managers need to call in to
    // ActivityThread to do things like update resource configurations,
    // which means this lock gets held while the activity and window managers
    // holds their own lock.  Thus you MUST NEVER call back into the activity manager
    // or window manager or anything that depends on them while holding this lock.
    final ArrayMap> mPackages
            = new ArrayMap>();
    final ArrayMap> mResourcePackages
            = new ArrayMap>();
    final ArrayList mRelaunchingActivities
            = new ArrayList();
我們看見其中有mPackages,mResourcePackages, mRelaunchingActivities其他兩個不用理會,我們關注mPackages,我們轉而進入LoadedApk.java;去看看裡面有什麼東西。
 /**
  75  * Local state maintained about a currently loaded .apk.
  76  * @hide
  77  */
  78 public final class LoadedApk {
  79
  80     private static final String TAG = "LoadedApk";
  81
  82     private final ActivityThread mActivityThread;
  83     private ApplicationInfo mApplicationInfo;
  84     final String mPackageName;
  85     private final String mAppDir;
  86     private final String mResDir;
  87     private final String[] mSplitAppDirs;
  88     private final String[] mSplitResDirs;
  89     private final String[] mOverlayDirs;
  90     private final String[] mSharedLibraries;
  91     private final String mDataDir;
  92     private final String mLibDir;
  93     private final File mDataDirFile;
  94     private final ClassLoader mBaseClassLoader;
  95     private final boolean mSecurityViolation;
  96     private final boolean mIncludeCode;
  97     private final boolean mRegisterPackage;
  98     private final DisplayAdjustments mDisplayAdjustments = new DisplayAdjustments();
  99     Resources mResources;
 100     private ClassLoader mClassLoader;
 101     private Application mApplication;
 102
 103     private final ArrayMap> mReceivers
 104         = new ArrayMap>();
 105     private final ArrayMap> mUnregisteredReceivers
 106         = new ArrayMap>();
 107     private final ArrayMap> mServices
 108         = new ArrayMap>();
 109     private final ArrayMap> mUnboundServices
 110         = new ArrayMap>();
 111
 112     int mClientCount = 0;
 113
 114     Application getApplication() {
 115         return mApplication;
 116     }
在上述的變量中我們發現有一個非final類型的ClassLoader對象,在這裡樓主做了一些求證,為了證明該ClassLoader對象是我所需要的,我將日志輸入進去,並編譯了整個源碼,運行了一個測試程序,發現這個的確是我所需要的ClassLoader。
因此到此為止,我們已經找到我們所需要的東西。
接下來我們說一下Android中的ClassLoader機制
大家都知道,Android對外開發的有2個ClassLoader, 一個叫做PathClassLoader,另外一個叫做DexClassLoader。他們都是繼承BaseDexClassLoader,當我們實例化一個DexClassLoader的時候,
public DexClassLoader(String dexPath, String optimizedDirectory, String libraryPath, ClassLoader parent)
上述為DexClassLoader的構造函數, 傳入的parent是做什麼用途的呢 ?
一個ClassLoader的加載類的流程為,首先通過最頂層的classLoader中進行查找該classLoader中是否已經存在了該類,若沒有,則在次一層的classLoader中進行查找,當上層的classLoader都沒有找到該類的時候,則跑到最後一層中對該類進行查找,若找到則返回該類,若沒有找到則返回ClassNotFound的異常。
一言以蔽之:加載一個類,首先在內存中查找,沒有則通過dex文件進行路徑查找該類,若找到,加載至內存,若沒有則返回ClassNotFound異常。以下為classLoader的查找類函數。
  protected Class loadClass(String className, boolean resolve) throws ClassNotFoundException {
        Class clazz = findLoadedClass(className);

        if (clazz == null) {
            ClassNotFoundException suppressed = null;
            try {
                clazz = parent.loadClass(className, false);
            } catch (ClassNotFoundException e) {
                suppressed = e;
            }

            if (clazz == null) {
                try {
                    clazz = findClass(className);
                } catch (ClassNotFoundException e) {
                    e.addSuppressed(suppressed);
                    throw e;
                }
            }
        }

        return clazz;
    }
因此我們可以得出,當我們實例化一個DexClassLoader,並將其構造函數的parent設置為LoadedApk.java中的mClassLoader,並將其替換,這樣不就可以實現讓Android幫我們自動管理我們所動態加載的Activity了嘛。
因為這樣並不會導致原來的類查找不到,因為我已經將原來載入了主APK的ClassLoader設置為我們替代的DexClassLoader的parent。這樣當虛擬機去加載類的時候,同樣還是可以加載原有的,同時又可以加載我們動態加載的dex。
到此為止,我們已經從理論上實現了動態加載Activity,並讓Android本身幫助我們管理動態加載的Activity,並且帶有生命周期。
以下是動態加載DEX的代碼:
public class MainActivity extends AppCompatActivity {

    private static final String ACTIVITY_THREAD_CLASS_PATH = "android.app.ActivityThread";
    private static final String GET_CURRENT_ACTIVITY_THREAD_METHOD_NAME = "currentActivityThread";
    private static final String ACTIVITY_THREAD_PACKAGES = "mPackages";
    private static final String LOAD_APK_CLASS_PATH = "android.app.LoadedApk";
    private static final String LOAD_APK_CLASS_LOADER_FILED_NAME = "mClassLoader";

    private static final String APK_NAME = "app-debug.apk";
    private static final String PLUGIN_APK_PATH = Environment.getExternalStorageDirectory().getPath() + File.separator + APK_NAME;
    private static String PLUGIN_APK_INTENER_PATH;
    private static String DEX_OUT_PUT_PATH = Environment.getExternalStorageDirectory().getPath();

    @Override
    protected void onCreate(Bundle savedInstanceState) {
        super.onCreate(savedInstanceState);
        setContentView(R.layout.activity_main);
        DEX_OUT_PUT_PATH = getApplicationContext().getFilesDir().getPath();
        init();
        initLoadPlugin();
    }

    @Override
    public void onResume(){
        super.onResume();
        DynamicApplication.getApplication().resetResource();
    }

    private void init() {
        View button = findViewById(R.id.buttonPanel);
        button.setOnClickListener(new View.OnClickListener() {
            @Override
            public void onClick(View v) {
                DynamicApplication.getApplication().loadPlugInResources(PLUGIN_APK_INTENER_PATH);
                Intent intent = new Intent();
                intent.setClassName(MainActivity.this, "smither.gionee.com.plugin.PluginActivity");
                ResolveInfo info =  getPackageManager().resolveActivity(intent, 0);
                if (null != info) {
                    startActivity(intent);
                }
            }
        });
    }

    private void replaceApkClassLoader(DexClassLoader classLoader) throws Exception {
        Object currentActivityThread = RefInvoke.invokeStaticMethod(ACTIVITY_THREAD_CLASS_PATH,
                GET_CURRENT_ACTIVITY_THREAD_METHOD_NAME, new Class[]{}, new Object[]{});
        String currentPackageName = getPackageName();
        ArrayMap activityThreadPackages = (ArrayMap) RefInvoke.getFieldOjbect(ACTIVITY_THREAD_CLASS_PATH,
                currentActivityThread, ACTIVITY_THREAD_PACKAGES);

        WeakReference loadApk = (WeakReference) activityThreadPackages.get(currentPackageName);
        RefInvoke.setFieldOjbect(LOAD_APK_CLASS_PATH, LOAD_APK_CLASS_LOADER_FILED_NAME, loadApk.get(), classLoader);
    }

    private void initLoadPlugin() {
        if (new File(PLUGIN_APK_PATH).exists()){
            try {
                String copyApkPath = copyDex().getPath();
                DexClassLoader classLoader = new DexClassLoader(copyApkPath,
                        DEX_OUT_PUT_PATH, null, getClassLoader());
                replaceApkClassLoader(classLoader);
            } catch (Exception e) {
                e.printStackTrace();
            }
        }else {
            Toast.makeText(this, "PLUGIN_APK_PATH is not exists", Toast.LENGTH_SHORT).show();
        }

    }

    private File copyDex() throws IOException {
        File file = new File(getApplicationContext().getFilesDir() + File.separator + APK_NAME);
        File plugIn1 = new File(PLUGIN_APK_PATH);
        if (!file.exists()) {
            file.createNewFile();
        }

        if (plugIn1.length() != file.length()) {
            FileOutputStream outputStream = new FileOutputStream(file);
            FileInputStream fileInputStream = new FileInputStream(plugIn1);
            byte[] buffer = new byte[fileInputStream.available()];
            fileInputStream.read(buffer);
            fileInputStream.close();
            outputStream.write(buffer);
            outputStream.close();
        }
        PLUGIN_APK_INTENER_PATH = file.getPath();
        return file;
    }
}
需要動態加載的APK的代碼我就不貼出來了,那裡面只有一個空的Activity; 名字為smither.gionee.com.plugin.PluginActivity
現在可以去運行了,哈哈,不過你突然發現,我明明可以加載Activity,但是跳轉到dex中的Activity為何還會報錯?
這是因為當你用DexClassLoader進行加載APK的時候,並不會將你的AndroidManifest文件進行加載,因此你需要在主程序的AndroidManifest中聲明該Activity。
接下來你就可以啟動該Activity了。
接下來又產生一個新的問題
你會發現View不見了,或者跳轉到的Acitivty的View並非你所指定的View
這是因為采用DexClassLoader動態加載進來的APK並沒有將資源文件加載進來,而當插件APK中調用setContentView(int layoutId),所訪問的R文件其實是調用插件中的R文件,而插件中的R文件,與宿主本身的R文件不一樣,因此當引用插件R文件中的資源ID的時候,實際上是通過該資源ID去宿主中去尋找資源文件,這樣肯定是找不到的。因為不同的APK的R資源都是不一樣的。所以是無法直接使用R.layout.customer_layout來訪問的。因為這樣所訪問的資源ID其實是不存在的。
那麼有沒有辦法呢?
首先我們可以確定通過DexClassLoader加載進來的APK中的Activity並沒有產生新的Application, 而跳轉到插件中的Activity實際上還是使用的同一個Application。因為一個Application的產生需要通過Zygote fork出一個新的進程,進而去加載APK資源,產生Application。通常正常情況下,一個應用是只有一個Application,當我們通過上述方式獲取Application的時候,其實還是獲取到宿主的Application。
因此在此時可以通過重寫Application.getResource()等方法,當切換到插件工程中的Activity的時候,可以將對應的在Application中切換資源的獲取。在設置View,獲取layout,String等資源文件的時候,采用Application.getResource(),而這個實際上獲取到的就是我們手動加載進來的插件工程中的資源文件。
接下來看一下代碼的實現:
首先看一下宿主工程的Application
public class DynamicApplication extends Application{

    private Resources mResource;
    private Resources.Theme mTheme;
    private AssetManager mAssetManager;
    private static DynamicApplication mApplication;

    public static DynamicApplication getApplication(){
        return mApplication;
    }

    public void onCreate() {
        super.onCreate();
        mApplication = this;
    }

    public void resetResource(){
        mResource = super.getResources();
        mTheme = super.getTheme();
    }

    @Override
    public Resources getResources() {
        return mResource == null ? super.getResources() : mResource;
    }

    @Override
    public Resources.Theme getTheme() {
        return mTheme == null ? super.getTheme() : mTheme;
    }

    public void loadPlugInResources(String dexPath) {
        try {
            AssetManager assetManager = AssetManager.class.newInstance();
            Method addAssetPathMethod = assetManager.getClass().getMethod("addAssetPath", String.class);
            Object obj = addAssetPathMethod.invoke(assetManager, dexPath);
            mAssetManager = assetManager;
            Resources superResources = super.getResources();
            mResource = new Resources(assetManager, superResources.getDisplayMetrics(), superResources.getConfiguration());
            mTheme = mResource.newTheme();
            mTheme.setTo(super.getTheme());

        } catch (InstantiationException e) {
            e.printStackTrace();
        } catch (IllegalAccessException e) {
            e.printStackTrace();
        } catch (NoSuchMethodException e) {
            e.printStackTrace();
        } catch (InvocationTargetException e) {
            e.printStackTrace();
        }
    }
}
接下來是插件工程中Activity獲取資源的方式需要稍微修改一下:
  View view = LayoutInflater.from(getApplication()).inflate(R.layout.activity_plugin, null);

  view = LayoutInflater.from(getApplication()).inflate(getApplication().getResources().getLayout(R.layout.activity_plugin), null);
        /**
         * 該處的兩種加載XML layout的方式都是可行的。效果是一樣的  走的也是同一套流程 在inflate函數中同樣也調用了getResources().getLayout()方式。
         */
        setContentView(view);
在此處我有試過將獲取的日志進行輸出(可以參看下面的日志信息):
public class PluginActivity extends AppCompatActivity {

    @Override
    protected void onCreate(Bundle savedInstanceState) {
        super.onCreate(savedInstanceState);
        /**
         * 當該apk由另外一個APK啟動的時候,此時獲取的getApplication()實際上為啟動該ACTIVITY的應用的Application。
         * 且我在主工程的Application已經對該APK的資源進行了加載,且對getResource等方法進行了重寫。因此當調用getApplication(),
         * 實際上獲取的是主工程的DynamicApplication,因為插件的Application並未啟動,而在DynamicApplication中又對getResource進行了重寫,
         * 因此此刻獲取到的實際上是插件工程中的資源文件。這樣便可以實現調用
         */
        Log.v("PluginActivity", "onCreate");
        /**
         * 該處返回的所指定的Context所生成的LayoutInflater 可以參看LayoutInflater的構造函數
         * Obtains the LayoutInflater from the given context.
         * public static LayoutInflater from(Context context) {
         * LayoutInflater LayoutInflater =
         *      (LayoutInflater) context.getSystemService(Context.LAYOUT_INFLATER_SERVICE);
         * if (LayoutInflater == null) {
         *   throw new AssertionError("LayoutInflater not found.");
         * }
         * return LayoutInflater;
         *}
         */
        LayoutInflater inflater = LayoutInflater.from(getApplication());
        Log.v("PluginActivity", "LayoutInflater inside Context:" + inflater.getContext() + " Application:" + getApplication());
        Log.v("PluginActivity", "LayoutInflater inside Context  == getApplication() :" + (inflater.getContext() == getApplication()));
        /**
         *  public View inflate(@LayoutRes int resource, @Nullable ViewGroup root, boolean attachToRoot) {
         *      final Resources res = getContext().getResources();
         *      if (DEBUG) {
         *          Log.d(TAG, "INFLATING from resource: \"" + res.getResourceName(resource) + "\" ("
         *           + Integer.toHexString(resource) + ")");
         *   }

         *  final XmlResourceParser parser = res.getLayout(resource);
         *  try {
         *      return inflate(parser, root, attachToRoot);
         *  } finally {
         *      parser.close();
         *  }
         *  }
         *  以下為輸出日志LayoutInflater inside Context:smither.gionee.com.dynamicmain.DynamicApplication@e6b7a3 Application:smither.gionee.com.dynamicmain.DynamicApplication@e6b7a3
         *  從上文可以看出由於Context為相同的  因此其調用的 getResources實際上為在DynamicApplication@重寫的getResources,因此能夠正常加載
         *  同理可以獲取String等資源
         *  為何一樣的原因請參看https://docs.google.com/document/d/10EYlyuxDw1KPy7LJlGtgMz69gwMO-pjDHS2GRtppvZg/edit?pref=2&pli=1
         *
         *  下列為下面所有日志打印的輸出:
         *  01-15 08:47:31.027 V/PluginActivity(14208): onCreate
         *  01-15 08:47:31.028 V/PluginActivity(14208): LayoutInflater inside Context:smither.gionee.com.dynamicmain.DynamicApplication@e6b7a3 Application:smither.gionee.com.dynamicmain.DynamicApplication@e6b7a3
         *  01-15 08:47:31.028 V/PluginActivity(14208): LayoutInflater inside Context  == getApplication() :true
         *  01-15 08:47:31.030 V/PluginActivity(14208): LayoutInflater.from(getApplication()).inflate(R.layout.activity_plugin, null):false
         *  01-15 08:47:31.040 V/PluginActivity(14208): LayoutInflater.from(getApplication()).inflate(getResources().getLayout(R.layout.activity_plugin), null):false
         *  01-15 08:47:31.040 V/PluginActivity(14208): Current Package Name:smither.gionee.com.dynamicmain Real package name:smither.gionee.com.plugin
         *  01-15 08:47:31.040 V/PluginActivity(14208): getApplication Current Package Name:smither.gionee.com.dynamicmain Real package name:smither.gionee.com.plugin
         *  01-15 08:47:31.040 V/PluginActivity(14208): getResources().getString(R.string.app_name):DynamicMain real app name:Plugin
         *  01-15 08:47:31.040 V/PluginActivity(14208): getApplication getResources().getString(R.string.app_name):Plugin real app name:Plugin
         */
        View view = LayoutInflater.from(getApplication()).inflate(R.layout.activity_plugin, null);
        Log.v("PluginActivity", "LayoutInflater.from(getApplication()).inflate(R.layout.activity_plugin, null):" + (null == view ? true : false));

        view = LayoutInflater.from(getApplication()).inflate(getApplication().getResources().getLayout(R.layout.activity_plugin), null);
        /**
         * 該處的兩種加載XML layout的方式都是可行的。效果是一樣的  走的也是同一套流程 在inflate函數中同樣也調用了getResources().getLayout()方式。
         */
        setContentView(view);
        Log.v("PluginActivity", "LayoutInflater.from(getApplication()).inflate(getResources().getLayout(R.layout.activity_plugin), null):" + (null == view ? true : false));
     //   setContentView(R.layout.activity_plugin);
        Log.v("PluginActivity", "Current Package Name:" + getPackageName() + " Real package name:smither.gionee.com.plugin");
        Log.v("PluginActivity", "getApplication Current Package Name:" + getApplication().getPackageName() + " Real package name:smither.gionee.com.plugin");
        Log.v("PluginActivity", "getResources().getString(R.string.app_name):" + getResources().getString(R.string.app_name) + " real app name:Plugin");
        Log.v("PluginActivity", "getApplication getResources().getString(R.string.app_name):" + getApplication().getResources().getString(R.string.app_name) + " real app name:Plugin");

    }
}
此時,就可以正常使用插件工程中的Activity了。
好了,此次免安裝方式動態加載APK就講到此處。
 Adapter模式實戰-重構鴻洋的Android建行圓形菜單
Adapter模式實戰-重構鴻洋的Android建行圓形菜單 對於很多開發人員來說,炫酷的UI效果是最吸引他們注意力的,很多人也因為這些炫酷的效果而去學習一些比較知名
 添加頁面切換動畫, 避免冷啟動
添加頁面切換動畫, 避免冷啟動 在啟動Android應用時, 直接顯示頁面, 就稱之為冷啟動(Cold Start). 為了增強用戶體驗, 可以添加控件動畫, 讓啟動
 android插件開發-就是你了!啟動吧!插件的activity(一)
android插件開發-就是你了!啟動吧!插件的activity(一) 通過之前的例子例子,我們學習了如何尋找hook點,並且做一些非常無聊的事情。
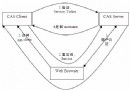 CAS實現SSO單點登錄原理
CAS實現SSO單點登錄原理1.CAS簡介1.1.What is CAS?CAS(Central Authentication Service) 是Yale大學發起的一個