編輯:關於android開發
本文地址:http://www.cnblogs.com/wuyudong/p/5947504.html,轉載請注明出處。
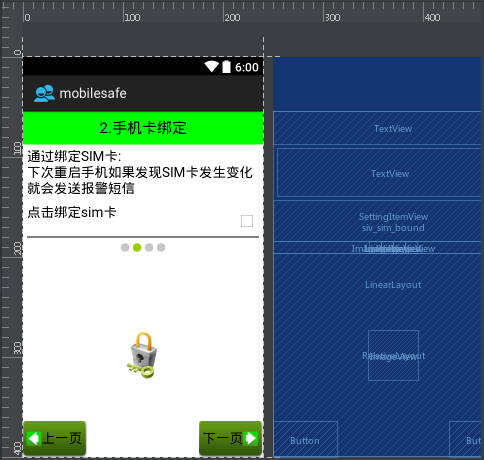
在之前的文章中,實現了導航界面1布局編寫與相關的邏輯代碼,如下圖所示:
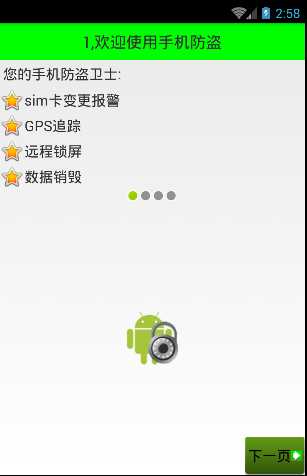
點擊“下一頁”
public class Setup1Activity extends Activity{
    @Override
    protected void onCreate(Bundle savedInstanceState) {
        super.onCreate(savedInstanceState);
        setContentView(R.layout.activity_setup1);
    }

    public void nextPage(View view) {
        Intent intent = new Intent(getApplicationContext(), Setup2Activity.class);
        startActivity(intent);
        finish();
    }
}
進入新的activity:
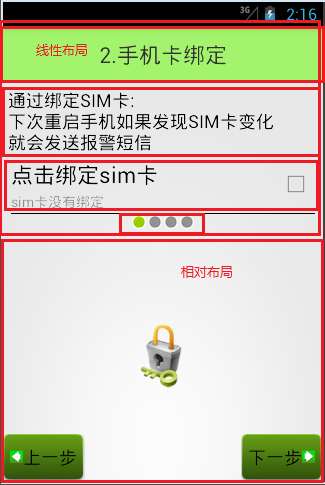
可以看到,布局和之前的類似,代碼如下:
<?xml version="1.0" encoding="utf-8"?>
<LinearLayout xmlns:android="http://schemas.android.com/apk/res/android"
    android:layout_width="match_parent"
    android:layout_height="match_parent"
    android:orientation="vertical">

    <TextView
        style="@style/TitleStyle"
        android:text="2.手機卡綁定" />

    <TextView
        android:layout_width="wrap_content"
        android:layout_height="wrap_content"
        android:textColor="#000"
        android:textSize="18sp"
        android:layout_margin="5dp"
        android:text="通過綁定SIM卡:\n下次重啟手機如果發現SIM卡發生變化\n就會發送報警短信" />
    <com.wuyudong.mobilesafe.view.SettingItemView
        xmlns:mobilesafe="http://schemas.android.com/apk/res/com.wuyudong.mobilesafe"
        android:id="@+id/siv_sim_bound"
        android:layout_width="match_parent"
        android:layout_height="wrap_content"
        mobilesafe:destitle="點擊綁定sim卡"
        mobilesafe:desoff="sim卡未綁定"
        mobilesafe:deson="sim卡已綁定" >
    </com.wuyudong.mobilesafe.view.SettingItemView>

    <!-- 讓內部點的空間水平居中 -->
    <LinearLayout
        android:layout_width="match_parent"
        android:layout_height="wrap_content"
        android:gravity="center_horizontal">

        <ImageView
            android:layout_width="wrap_content"
            android:layout_height="wrap_content"
            android:background="@android:drawable/presence_invisible" />
        <ImageView
            android:layout_width="wrap_content"
            android:layout_height="wrap_content"
            android:background="@android:drawable/presence_online" />

        <ImageView
            android:layout_width="wrap_content"
            android:layout_height="wrap_content"
            android:background="@android:drawable/presence_invisible" />

        <ImageView
            android:layout_width="wrap_content"
            android:layout_height="wrap_content"
            android:background="@android:drawable/presence_invisible" />
    </LinearLayout>

    <RelativeLayout
        android:layout_width="match_parent"
        android:layout_height="match_parent">

        <ImageView
            android:layout_width="wrap_content"
            android:layout_height="wrap_content"
            android:layout_centerInParent="true"
            android:background="@mipmap/bind" />
        <!-- 圖片選擇器,在選中和未選中的過程中,切換展示圖片 -->
        <Button style="@style/preBtn" />
        <Button style="@style/nextBtn" />

    </RelativeLayout>

</LinearLayout>
效果如下:
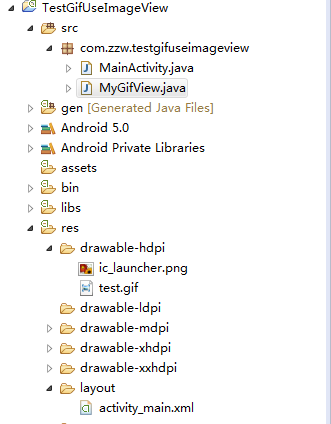 讓ImageView可以使用gif的方法,imageviewgif
讓ImageView可以使用gif的方法,imageviewgif在自己的包中添加MyGifView.java(直接復制,粘貼),讀取gif資源在MyGifView中第2
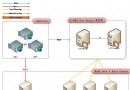 主流MySQL集群實現架構優劣勢與適用場景分析
主流MySQL集群實現架構優劣勢與適用場景分析本文主要分析總結了目前主流的幾種MySQL集群架構實現方法及優缺點,現發出來以供大家參考學習、共同進步,如有不妥之處,請不吝
 Android-Universal-Image-Loader (圖片異步加載緩存庫)對Bitmap的優化處理
Android-Universal-Image-Loader (圖片異步加載緩存庫)對Bitmap的優化處理 前言: 前面兩篇分別介紹了: Android-Unive
 Android 巧妙實現圖片和文字上下布局或者左右布局,
Android 巧妙實現圖片和文字上下布局或者左右布局,最近去了一家新公司,然後開始做新的項目,看其代碼發現了一個很巧妙的方法來實現圖片在上面文字在下面的布局方式。只需要