編輯:關於android開發
首先,先簡單介紹一下ble的特征(注意:藍牙4.0只有android4.3或4.3以上才支持)
1.BLE(Bluetooth Low Energy),藍牙4.0核心profile,主要特點是快速搜索,快速連接,超低功耗保持連接和數據傳輸,缺點:數據傳輸速率低,由於其具有低功耗特點,所以經常用在可穿戴設備之中。
2.關於BLE數據傳輸:
a.profile可以理解為一種規范,一個標准的通信協議,其存在於手機中,藍牙組織規定了一些標准的profile:HID OVER GATT ,防丟器等,每個profile中包含了多個service。
b.service 可以理解為一個服務,在BLE從機中有多個服務,電量信息,系統服務信息等,每一個service中包含了多個characteristic特征值,每一個具體的characteristic特征值才是BLE通信的主題。
c.characteristic特征值:BLE主機從機通信均是通過characteristic進行,可以將其理解為一個標簽,通過該標簽可以讀取或寫入相關信息。
d. UUID(統一標識碼):service和characteristic均需要這個唯一的UUID進行標識。
e. 角色和職責,看到這裡我覺得您老人家應該知道了,就是中心設備和外圍設備(GATT server vs. GATT client.),不過呢在這裡我就不這樣說了,其實也不太懂那麼的官方說法,我就簡單粗暴點就是運用了ble的app和ble設備之間的通信,當app搜索到了ble設備,app會收到ble反饋過來的信息比如電量什麼的,對於怎麼得來的不用說都知道肯定是在一個規范好的一個對象中啦(先不需要知道這個對象是什麼鬼東西因為我也不知道,官方叫characteristic也就是上面說的特征值),相反我們app也可以通過寫入一些信息到這個對象(characteristic)發送給設備,設備收到之後就會執行我們的要它做的動作了。其實也就和平常我們的對象賦值一樣(setValue("fuzhi")),只是方法不同而已,一個是set一個是write。
最後來舉個例子簡答說明一下:其實說白了characteristic特征值就好比一支球隊的各個球員,service好比這個球隊的名稱,profile就當國家吧,假如我們要找到某一個球員,世界這麼多國家第一需要知道是哪個國家的,第二需要知道是哪個球隊的,最後才知道是那個球員,只有這樣最後才能了解這個球員的一些信息(類似從ble設備獲取信息),相反也只有這樣找到球員後告訴這個球員應該怎麼打球的(類似對ble設備設置信息)。例子很難懂吧,如果你看懂了說明你和我一樣小學畢業,看不懂的話就直接看代碼吧,因為本人小學畢業,識字不多,腦袋不能轉太快,怕翻車,,,
/****************************************************代碼塊*****************************************************
1、 權限和相關屬性這是最基本的啦
<uses-featureandroid:name="android.hardware.bluetooth_le"android:required="true"/>
<uses-permissionandroid:name="android.permission.BLUETOOTH"/>
<uses-permissionandroid:name="android.permission.BLUETOOTH_ADMIN"/>
2、初始化藍牙,這個方法一般可以寫在項目的啟動activity,不然怕在寫完ble代碼執行後發現沒有打開藍牙還需要手動去打開對項目體驗感不好,當然只要您老人家開心,寫不寫都可以。
private void initBluetooth() {
BluetoothManager mBluetoothManager = (BluetoothManager) this.getSystemService(Context.BLUETOOTH_SERVICE);
if (mBluetoothManager != null) {
BluetoothAdapter mBluetoothAdapter = mBluetoothManager.getAdapter();
if (mBluetoothAdapter != null) {
if (!mBluetoothAdapter.isEnabled()) {
mBluetoothAdapter.enable(); //打開藍牙
}
}
}
}
3、獲取本地ble對象(BluetoothAdapter),它對應本地Android設備的藍牙模塊,可能這麼稱呼為本地ble對象不太准確,但我老人家開心這麼稱呼。從此段代碼開始可以把這些有關ble通信的代碼寫到一個class中當做一個ble工具class,以便代碼清晰查看和方便調用。這裡我們就當這個工具類叫BleManager
private BluetoothAdapter mBluetoothAdapter;
private BluetoothDevice mBluetoothDevice;
private BluetoothGatt mBluetoothGatt;
private boolean isScanning = false;
//以上所定義的對象在下面的方法中都有用到,(建議在看藍牙這方面的東西時,不管看誰的文章,都先把以上或者還有些藍牙基本用的對象先熟悉是什麼意思和基本作用)。
private BleManager(Context context) {
this.mContext = context;
BluetoothManager bluetoothManager = (BluetoothManager) context.getSystemService(Context.BLUETOOTH_SERVICE); //BluetoothManager只在android4.3以上有
if (bluetoothManager == null) {
TLog.e(TAG, "Unable to initialize BluetoothManager.");
return;
}
mBluetoothAdapter = bluetoothManager.getAdapter();
}
4、既然獲得了BluetoothAdapter對象,那麼接下來就可以搜索ble設備了,這時就需要用到BluetoothAdapter的startLeScan()這個方法了
public void startLeScan() {
if (mBluetoothAdapter == null) {
return;
}
if (isScanning) {
return;
}
isScanning = true;
mBluetoothAdapter.startLeScan(mLeScanCallback); //此mLeScanCallback為回調函數
mHandler.sendEmptyMessageDelayed(STOP_LESCAN, 10000); //這個搜索10秒,如果搜索不到則停止搜索
}
在4.3之前的api是通過注冊廣播來處理搜索時發生的一些事件,而支持ble的新的api中,是通過回調的方式來處理的,而mLeScanCallback就是一個接口對象
private LeScanCallback mLeScanCallback = new LeScanCallback() {
@Override
public void onLeScan(BluetoothDevice device, int arg1, byte[] arg2) {
TLog.i(TAG, "onLeScan() DeviceName------>"+device.getName()); //在這裡可通過device這個對象來獲取到搜索到的ble設備名稱和一些相關信息
if(device.getName() == null){
return;
}
if (device.getName().contains("Ble_Name")) { //判斷是否搜索到你需要的ble設備
TLog.i(TAG, "onLeScan() DeviceAddress------>"+device.getAddress());
mBluetoothDevice = device; //獲取到周邊設備
stopLeScan(); //1、當找到對應的設備後,立即停止掃描;2、不要循環搜索設備,為每次搜索設置適合的時間限制。避免設備不在可用范圍的時候持續不停掃描,消耗電量。
connect(); //連接
}
}
};
//
private Handler mHandler = new Handler() {
public void handleMessage(android.os.Message msg) {
switch (msg.what) {
case STOP_LESCAN:
T.showLong(mContext, mContext.getResources().getString(R.string.msg_connect_failed));
mBluetoothAdapter.stopLeScan(mLeScanCallback);
broadcastUpdate(Config.ACTION_GATT_DISCONNECTED);
isScanning = false;
TLog.i(TAG, "Scan time is up");
break;
}
};
};
5、搜索到當然就是連接了,就是上面那個connect()方法了
public boolean connect() {
if (mBluetoothDevice == null) {
TLog.i(TAG, "BluetoothDevice is null.");
return false;
}
//兩個設備通過BLE通信,首先需要建立GATT連接。這裡我們講的是Android設備作為client端,連接GATT Server
mBluetoothGatt = mBluetoothDevice.connectGatt(mContext, false, mGattCallback); //mGattCallback為回調接口
if (mBluetoothGatt != null) {
if (mBluetoothGatt.connect()) {
TLog.d(TAG, "Connect succeed.");
return true;
} else {
TLog.d(TAG, "Connect fail.");
return false;
}
} else {
TLog.d(TAG, "BluetoothGatt null.");
return false;
}
}
private final BluetoothGattCallback mGattCallback = new BluetoothGattCallback() {
@Override
public void onConnectionStateChange(BluetoothGatt gatt, int status, int newState) {
if (newState == BluetoothProfile.STATE_CONNECTED) {
gatt.discoverServices(); //執行到這裡其實藍牙已經連接成功了
TLog.i(TAG, "Connected to GATT server.");
} else if (newState == BluetoothProfile.STATE_DISCONNECTED) {
if(mBluetoothDevice != null){
TLog.i(TAG, "重新連接");
connect();
}else{
TLog.i(TAG, "Disconnected from GATT server.");
}
}
}
public void onServicesDiscovered(BluetoothGatt gatt, int status) {
if (status == BluetoothGatt.GATT_SUCCESS) {
TLog.i(TAG, "onServicesDiscovered");
getBatteryLevel(); //獲取電量
} else {
TLog.i(TAG, "onServicesDiscovered status------>" + status);
}
}
@Override
public void onCharacteristicRead(BluetoothGatt gatt, BluetoothGattCharacteristic characteristic, int status) {
TLog.d(TAG, "onCharacteristicRead------>" + Utils.bytesToHexString(characteristic.getValue()));
//判斷UUID是否相等
if (Values.UUID_KEY_BATTERY_LEVEL_CHARACTERISTICS.equals(characteristic.getUuid().toString())) {
}
}
@Override
public void onCharacteristicChanged(BluetoothGatt gatt, BluetoothGattCharacteristic characteristic) {
TLog.d(TAG, "onCharacteristicChanged------>" + Utils.bytesToHexString(characteristic.getValue()));
//判斷UUID是否相等
if (Values.UUID_KEY_BATTERY_LEVEL_CHARACTERISTICS.equals(characteristic.getUuid().toString())) {
}
}
//接受Characteristic被寫的通知,收到藍牙模塊的數據後會觸發onCharacteristicWrite
@Override
public void onCharacteristicWrite(BluetoothGatt gatt, BluetoothGattCharacteristic characteristic, int status) {
TLog.d(TAG,"status = " + status);
TLog.d(TAG, "onCharacteristicWrite------>" + Utils.bytesToHexString(characteristic.getValue()));
}
};
public void getBatteryLevel() {
BluetoothGattCharacteristic batteryLevelGattC = getCharcteristic(
Values.UUID_KEY_BATTERY_LEVEL_SERVICE, Values.UUID_KEY_BATTERY_LEVEL_CHARACTERISTICS);
if (batteryLevelGattC != null) {
readCharacteristic(batteryLevelGattC);
setCharacteristicNotification(batteryLevelGattC, true); //設置當指定characteristic值變化時,發出通知。
}
}
6、獲取服務與特征
//a.獲取服務
public BluetoothGattService getService(UUID uuid) {
if (mBluetoothAdapter == null || mBluetoothGatt == null) {
TLog.e(TAG, "BluetoothAdapter not initialized");
return null;
}
return mBluetoothGatt.getService(uuid);
}
//b.獲取特征
private BluetoothGattCharacteristic getCharcteristic(String serviceUUID, String characteristicUUID) {
//得到服務對象
BluetoothGattService service = getService(UUID.fromString(serviceUUID)); //調用上面獲取服務的方法
if (service == null) {
TLog.e(TAG, "Can not find 'BluetoothGattService'");
return null;
}
//得到此服務結點下Characteristic對象
final BluetoothGattCharacteristic gattCharacteristic = service.getCharacteristic(UUID.fromString(characteristicUUID));
if (gattCharacteristic != null) {
return gattCharacteristic;
} else {
TLog.e(TAG, "Can not find 'BluetoothGattCharacteristic'");
return null;
}
}
//獲取數據
public void readCharacteristic(BluetoothGattCharacteristic characteristic) {
if (mBluetoothAdapter == null || mBluetoothGatt == null) {
TLog.e(TAG, "BluetoothAdapter not initialized");
return;
}
mBluetoothGatt.readCharacteristic(characteristic);
}
public boolean setCharacteristicNotification(BluetoothGattCharacteristic characteristic, boolean enabled) {
if (mBluetoothAdapter == null || mBluetoothGatt == null) {
TLog.e(TAG, "BluetoothAdapter not initialized");
return false;
}
return mBluetoothGatt.setCharacteristicNotification(characteristic, enabled);
}
7、寫入數據,在上面的方法中我們已經得到了設備服務和服務裡的特征characteristic,那麼就可以對這個特征寫入或者說是賦值
public void write(byte[] data) { //一般都是傳byte
//得到可寫入的characteristic Utils.isAIRPLANE(mContext) &&
if(!mBleManager.isEnabled()){
TLog.e(TAG, "writeCharacteristic 開啟飛行模式");
//closeBluetoothGatt();
isGattConnected = false;
broadcastUpdate(Config.ACTION_GATT_DISCONNECTED);
return;
}
BluetoothGattCharacteristic writeCharacteristic = getCharcteristic(Values.UUID_KEY_SERVICE, Values.UUID_KEY_WRITE); //這個UUID都是根據協議號的UUID
if (writeCharacteristic == null) {
TLog.e(TAG, "Write failed. GattCharacteristic is null.");
return;
}
writeCharacteristic.setValue(data); //為characteristic賦值
writeCharacteristicWrite(writeCharacteristic);
}
public void writeCharacteristicWrite(BluetoothGattCharacteristic characteristic) {
if (mBluetoothAdapter == null || mBluetoothGatt == null) {
TLog.e(TAG, "BluetoothAdapter not initialized");
return;
}
TLog.e(TAG, "BluetoothAdapter 寫入數據");
boolean isBoolean = false;
isBoolean = mBluetoothGatt.writeCharacteristic(characteristic);
TLog.e(TAG, "BluetoothAdapter_writeCharacteristic = " +isBoolean); //如果isBoolean返回的是true則寫入成功
}
8、寫到這其實基本差不多了,最後再就是在activity中調用了,其實在調用的時候直接在需要搜索藍牙的activity調用startLeScan()這個方法就可以了,至於搜索到的結果也顯示在這個方法裡面了,找到了對應的設備名稱然後再連接,對於中間一系列的回調函數,不管是成功還是失敗都是根據您老人家的實際項目需求去寫的,你可以用一個廣播把回調信息發送出來到activity,告訴activity應該做什麼........
舉個簡單的例子:
在MainActivity調用搜索藍牙的方法
public class MainActivity extends Activity{
private BleManager manager;
@Override
protected void onCreate(Bundle savedInstanceState) {
super.onCreate(savedInstanceState);
manager = new BleManager(this); //這個this是一個上下文,只要在上面的BleManager工具類定義一個有參數就好
manager.startLeScan(); //調用此方法,如果搜索到有設備則自然的去連接它了,到時候連接時回回調mGattCallback 這個回調函數,如果成功你可以發送一個廣播出來提醒用戶藍牙與設備連接成功
}
搜索成功後,你就可以根據你的需要寫入信息傳送了。簡單說說,就是你在一個button事件中調用上面的write(byte[] byte)這個方法,對於裡面的參數byte就是根據你們所設置的byte了,最後寫入的成功與否就看writeCharacteristicWrite這個方法下面的返回值是true還是false了,true表示成成功。
9、總結了,菜鳥我其實也剛接觸藍牙不久,也是看了一些文章,然後結合自己的一些總結,寫出了這麼一篇小學生文章(也是想為自己增加一些印象),請各位老人家們多多理解,當然要是有哪位大神看不過去或者覺得那裡不對了請指教出來,不要讓小菜鳥一直錯下去,謝謝!
 《Android源碼設計模式解析與實戰》讀書筆記(二十)
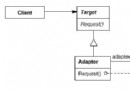
《Android源碼設計模式解析與實戰》讀書筆記(二十) 第二十章、適配器模式 適配器模式是結構型設計模式之一,它在我們的開發中使用率極高,比如ListView、Gr
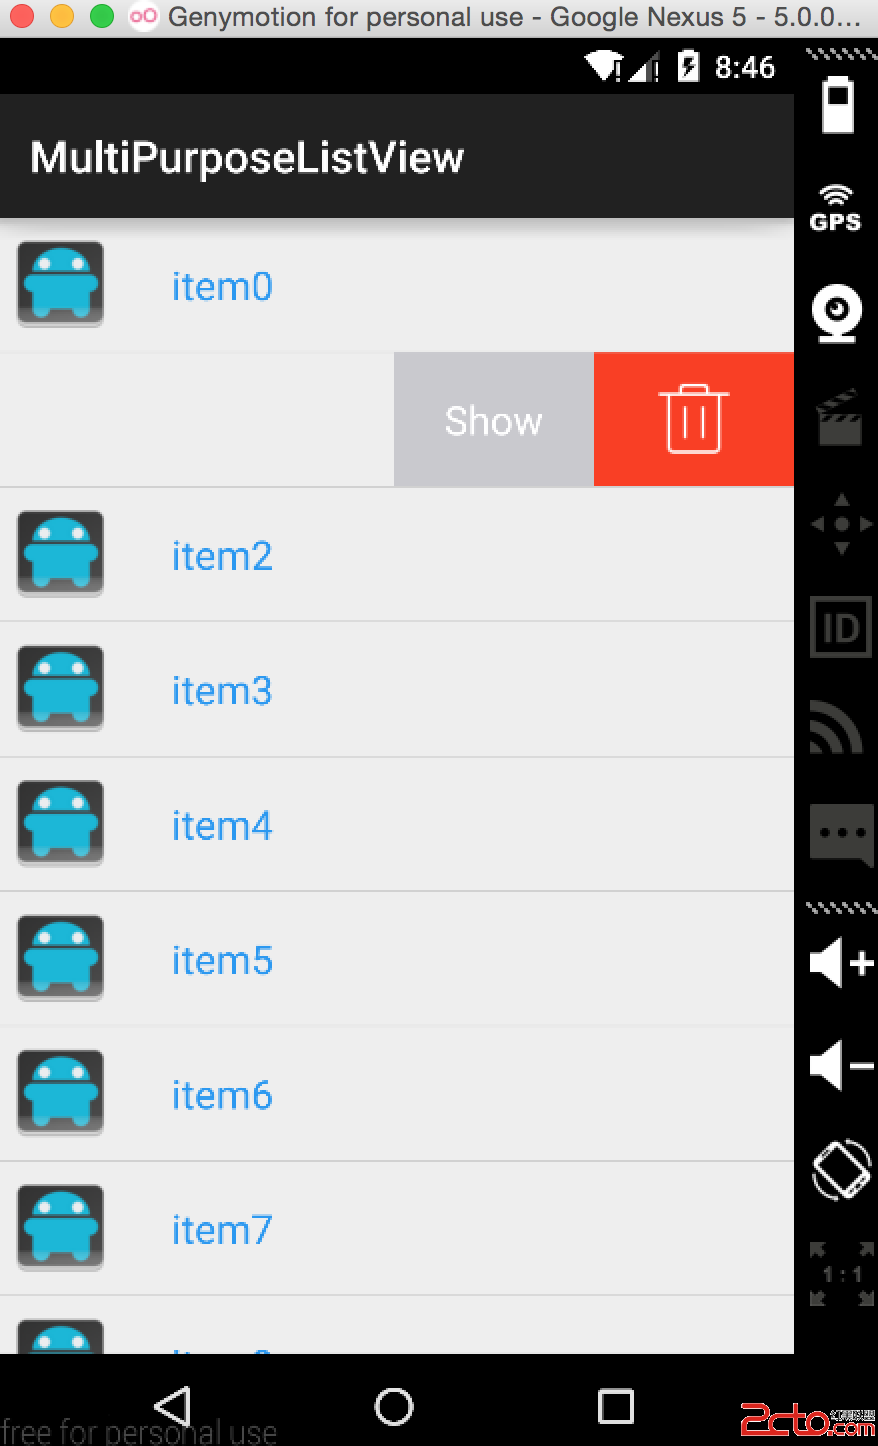 Android源碼解析--SwipeMenuListView仿QQ聊天左滑
Android源碼解析--SwipeMenuListView仿QQ聊天左滑 緒論: 好久沒寫博客了,最近比較懶,不想寫博客,但是在看書,看一些Android進階的書,
 Android中SQLite應用詳解
Android中SQLite應用詳解 上次我向大家介紹了SQLite的基本信息和使用過程,相信朋友們對SQLite已經有所了解了,那今天呢,我就和大家分享一下在Andro
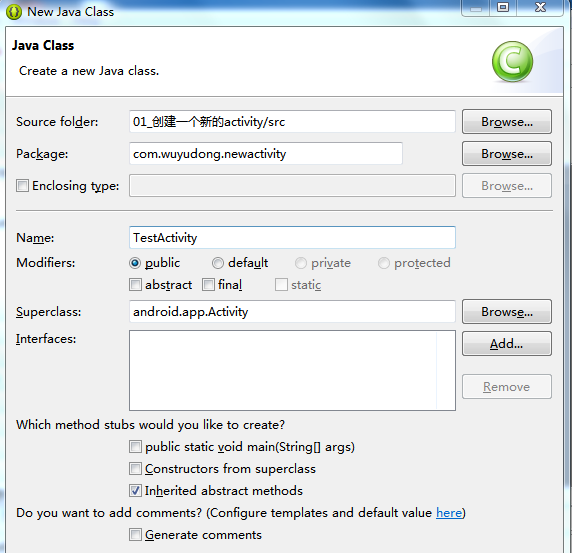 Android 創建一個新的Activity,androidactivity
Android 創建一個新的Activity,androidactivity本文轉載自:http://www.cnblogs.com/wuyudong/p/5658020