編輯:關於android開發
從ImageButton這個字面意思上來看,它是一個圖片按鈕,那麼我們就可以使用它做一個我們想要的圖片按鈕了,但是我們在實際使用的過程當中,就會發現該按鈕的使用並沒有想像中的那麼簡單,需要再增加一些代碼或再配置XML才能實現圖片按鈕按下的效果
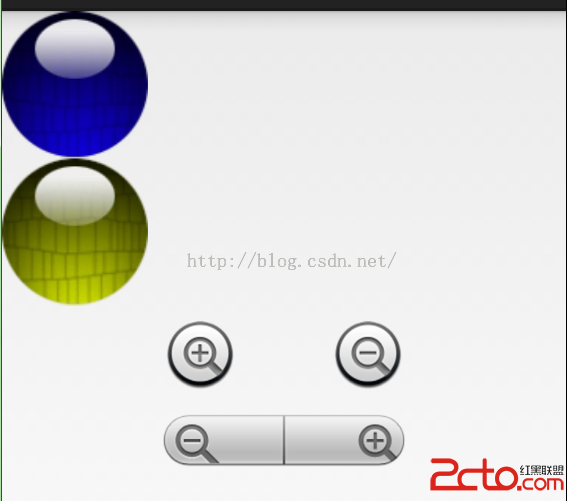
ImageButton 還直接派生了ZoomButton組件,只是Android默認提供了btn_minus,btn_plus兩個Drawable資源,只要為ZoomButton的android:src屬性分別指著兩個android提供的資源,即可實現“放大”,“縮小”按鈕,ZoomButton組件僅僅是android:src屬性默認使用的是android的資源,添加了一些方法可實現放大縮小。
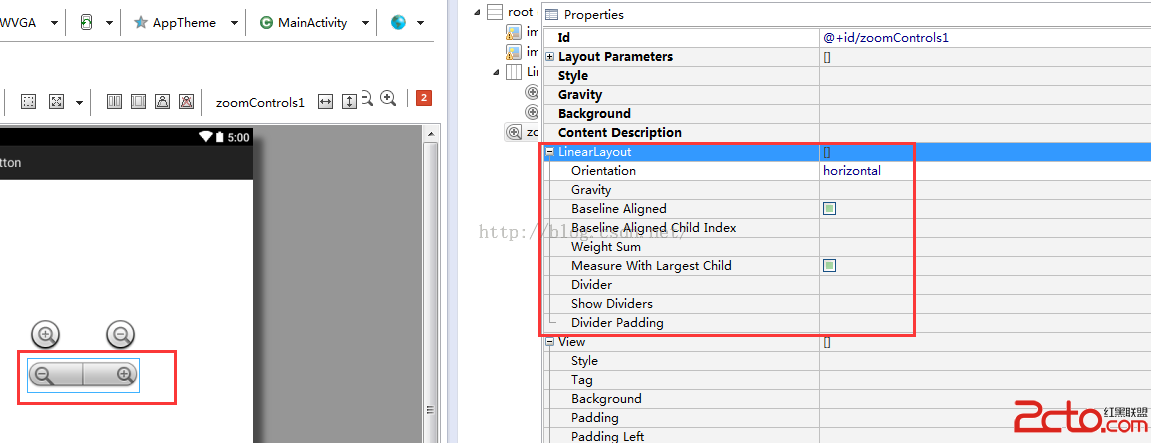
android還提供了一個ZoomControls組件,該組件繼承了是LeanerLayout布局組件,把兩個放大縮小的按鈕水平線性的組合在一起,並允許分別為兩個按鈕綁定不同的事件監聽器
圖片按鈕正常狀態的效果:
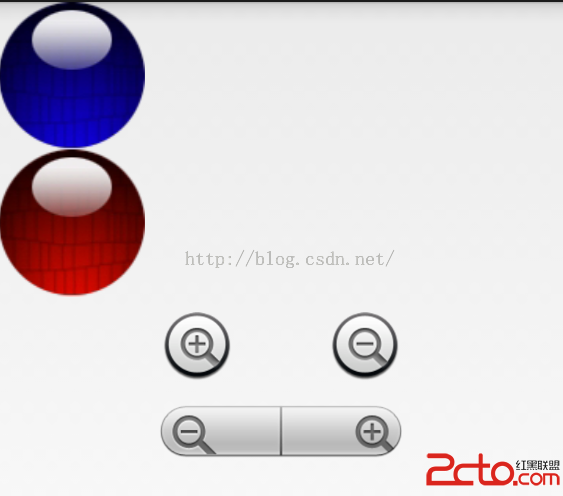
第二個按鈕按下是的效果
實現圖片按鈕按下的效果有兩種方式可以實現:一是增加代碼,二配置XML。
一、在java中為圖片按鈕增加觸摸監聽的函數來實現圖片切換
[java] view plaincopy


代碼比較簡單,就是當圖片按下時,修改按鈕的背景圖片,當抬起時再修改為正常的圖片顯示
二、通過給按鈕配置XML文件來實現圖片按鈕的背景切換效果
main.xml
需要特別注意的是:在ImageButton中,如果使用XML配置文件來設置圖片的效果的話,就不要再指定它的android:src=""屬性值了,否則圖片的按下效果就出不來了。
這兩種方法各有各的好處,在實際運用過種當種可以根據自己的需要進行選擇。
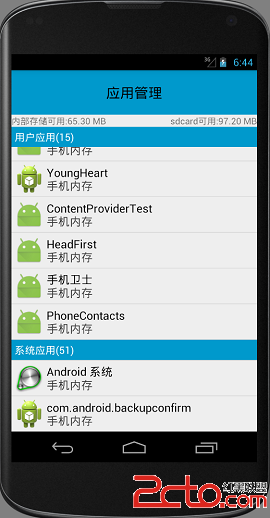 Android項目:手機安全衛士(16)—— 復雜 ListView淺析
Android項目:手機安全衛士(16)—— 復雜 ListView淺析 Android項目:手機安全衛士(16)—— 復雜 ListView 1
 RecyclerView和PullToRefreshListView的對比,recyclerview
RecyclerView和PullToRefreshListView的對比,recyclerview項目中上拉刷新和下拉加載一直都是比較常見的;以前一般都是重寫ListV
 Android多點觸控技術,實現對圖片的放大縮小平移,慣性滑動等功能
Android多點觸控技術,實現對圖片的放大縮小平移,慣性滑動等功能 首先推薦一下鴻洋大大的打造個性的圖片預覽與多點觸控視頻教程,這套教程教我們一步一步實現了多點觸控
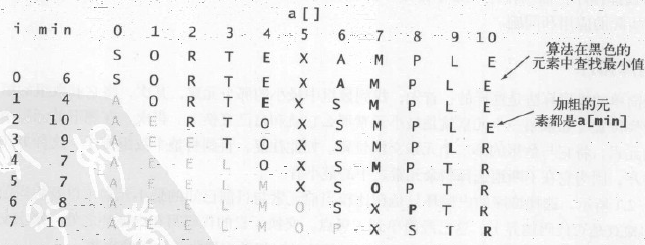 算法—1.選擇排序,算法排序
算法—1.選擇排序,算法排序1.基本思想 首先,找到數組中最小的那個元素,其次,將它和數組的第一個元素交換位置(如果第一個元素就是最小元素那麼它就和自己交換)。再次,在剩