編輯:關於android開發
首先搭建模擬web 服務器,新建動態web項目,servlet代碼如下:
package com.wuyudong.web;

import java.io.IOException;

import javax.servlet.ServletException;
import javax.servlet.annotation.WebServlet;
import javax.servlet.http.HttpServlet;
import javax.servlet.http.HttpServletRequest;
import javax.servlet.http.HttpServletResponse;

import org.apache.catalina.User;

/**
 * Servlet implementation class LoginServlet
 */
@WebServlet("/LoginServlet")
public class LoginServlet extends HttpServlet {
    private static final long serialVersionUID = 1L;

    /**
     * @see HttpServlet#doGet(HttpServletRequest request, HttpServletResponse
     *      response)
     */
    protected void doGet(HttpServletRequest request,
            HttpServletResponse response) throws ServletException, IOException {
        String username = request.getParameter("username");
        String password = request.getParameter("password");
        System.out.println("用戶名:" + username);
        System.out.println("用戶名:" + password);
        if ("wuyudong".equals(username) && "123".equals(password)) {
            response.getOutputStream().write("login success".getBytes());
        } else {
            response.getOutputStream().write("login failed".getBytes());

        }
    }

    /**
     * @see HttpServlet#doPost(HttpServletRequest request, HttpServletResponse
     *      response)
     */
    protected void doPost(HttpServletRequest request,
            HttpServletResponse response) throws ServletException, IOException {
        // TODO Auto-generated method stub
    }

}
再新建一個jsp頁面
<%@ page language="java" contentType="text/html; charset=UTF-8"
    pageEncoding="UTF-8"%>
<!DOCTYPE html PUBLIC "-//W3C//DTD HTML 4.01 Transitional//EN" "http://www.w3.org/TR/html4/loose.dtd">
<html>
<head>
<meta http-equiv="Content-Type" content="text/html; charset=UTF-8">
<title>登錄頁面</title>
</head>
<body>
    <form action="LoginServlet" method="get">

        用戶名:<input name="username" type="text"><br> 密碼:<input
            name="password" type="password"><br> <input
            type="submit">

    </form>

</body>
</html>
新建android項目,頁面布局:
<LinearLayout xmlns:android="http://schemas.android.com/apk/res/android"
    xmlns:tools="http://schemas.android.com/tools"
    android:layout_width="match_parent"
    android:layout_height="match_parent"
    android:orientation="vertical"
    tools:context=".MainActivity" >

    <EditText
        android:id="@+id/et_name"
        android:layout_width="match_parent"
        android:layout_height="wrap_content"
        android:hint="請輸入用戶名"
        android:inputType="text" />

    <EditText
        android:id="@+id/et_pwd"
        android:layout_width="match_parent"
        android:layout_height="wrap_content"
        android:hint="請輸入密碼"
        android:inputType="textPassword" />
    <Button
        android:onClick="login"
        android:layout_width="match_parent"
        android:layout_height="wrap_content"
        android:text="登錄"
        />

</LinearLayout>
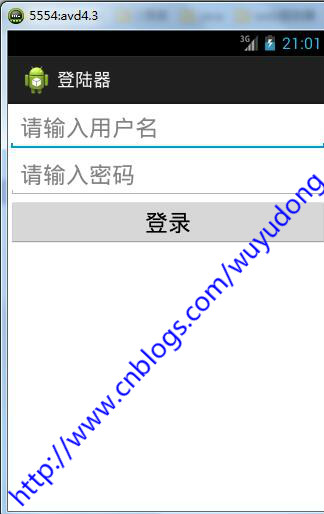
代碼如下:
package com.wuyudong.loginclient;

import java.io.ByteArrayOutputStream;
import java.io.InputStream;
import java.net.HttpURLConnection;
import java.net.URL;

import android.os.Bundle;
import android.app.Activity;
import android.text.Editable;
import android.text.TextUtils;
import android.view.Menu;
import android.view.View;
import android.widget.EditText;
import android.widget.Toast;

public class MainActivity extends Activity {
    private EditText et_name;
    private EditText et_pwd;

    @Override
    protected void onCreate(Bundle savedInstanceState) {
        super.onCreate(savedInstanceState);
        setContentView(R.layout.activity_main);

        et_name = (EditText) findViewById(R.id.et_name);
        et_pwd = (EditText) findViewById(R.id.et_pwd);

    }

    public void login(View view) {

        String name = et_name.getText().toString().trim();
        String pwd = et_pwd.getText().toString().trim();

        if (TextUtils.isEmpty(name) || TextUtils.isEmpty(pwd)) {
            Toast.makeText(this, "用戶名密碼不能為空", 0).show();
        } else {
            // 模擬http請求,提交數據到服務器
            String path = "http://169.254.168.71:8080/web/LoginServlet?username="
                    + name + "&password=" + pwd;
            try {
                URL url = new URL(path);
                // 2.建立一個http連接
                HttpURLConnection conn = (HttpURLConnection) url
                        .openConnection();
                // 3.設置一些請求方式
                conn.setRequestMethod("GET");// 注意GET單詞字幕一定要大寫
                conn.setRequestProperty(
                        "User-Agent",
                        "Mozilla/5.0 (Windows NT 6.1; WOW64) AppleWebKit/537.36 (KHTML, like Gecko) Chrome/45.0.2454.101 Safari/537.36");

                int code = conn.getResponseCode(); // 服務器的響應碼 200 OK //404 頁面找不到
                                                    // // 503服務器內部錯誤
                if (code == 200) {
                    InputStream is = conn.getInputStream();
                    // 把is的內容轉換為字符串
                    ByteArrayOutputStream bos = new ByteArrayOutputStream();
                    byte[] buffer = new byte[1024];
                    int len = -1;
                    while ((len = is.read(buffer)) != -1) {
                        bos.write(buffer, 0, len);
                    }
                    String result = new String(bos.toByteArray());
                    is.close();
                    Toast.makeText(this, result, 0).show();

                } else {
                    Toast.makeText(this, "請求失敗,失敗原因: " + code, 0).show();
                }

            } catch (Exception e) {
                e.printStackTrace();
                Toast.makeText(this, "請求失敗,請檢查logcat日志控制台", 0).show();
            }

        }

    }

}
添加權限:android.permission.INTERNET
運行項目後點擊按鈕後提示錯誤:
06-18 21:08:16.237: W/System.err(7417): android.os.NetworkOnMainThreadException
android強行讓4.0以後的版本不去檢查主線程訪問網絡。
解決辦法,可以在onCreate裡面加上下面這段代碼:
StrictMode.ThreadPolicy policy=new StrictMode.ThreadPolicy.Builder().permitAll().build();
StrictMode.setThreadPolicy(policy);
搞定
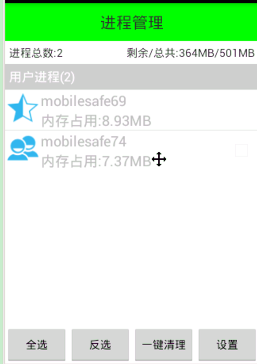 Android 手機衛士12--進程管理,android12--
Android 手機衛士12--進程管理,android12-- 1.本進程不能被選中,所以先將checkbox隱藏掉--手機衛士 不能自殺 if(getItem(po
 Android基礎入門教程——9.3 使用Camera拍照
Android基礎入門教程——9.3 使用Camera拍照 Android基礎入門教程——9.3 使用Camera拍照 標簽(空格分隔): A
 Android 6.0 Changes
Android 6.0 Changes Android 6.0 變化 Android 6.0 Changes In this
 Linux內核系列—10.操作系統開發之內核HelloWorld,linuxhelloworld
Linux內核系列—10.操作系統開發之內核HelloWorld,linuxhelloworlda.我們先來體驗一下在Linux下用匯編編程的感覺,見代碼 [secti