編輯:關於android開發
主要實現功能:
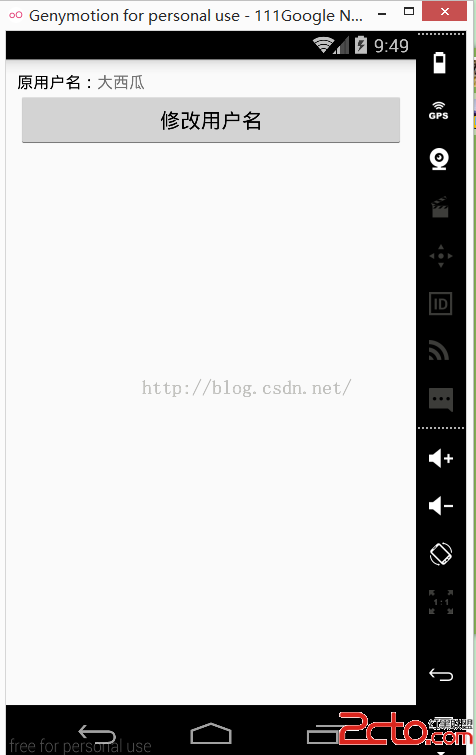
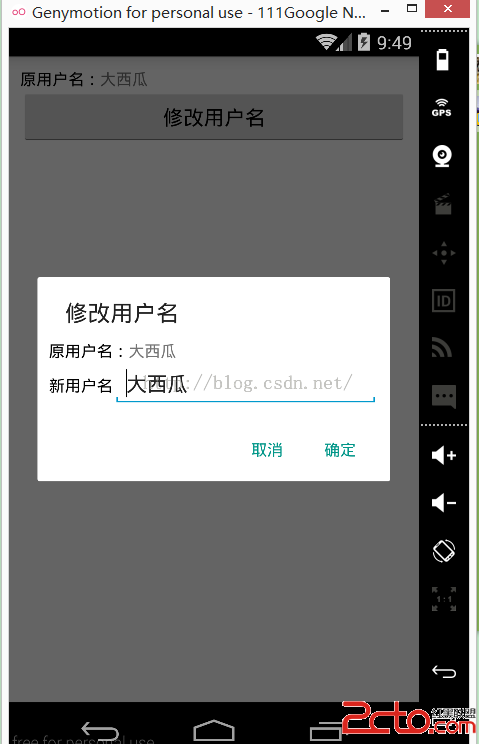
1、從Activity的TextView中獲取字符串設置到AlertDialog的TextView和EditText中
2、將AlertDialog的EditText中的值設置到Activity的TextView中
效果:
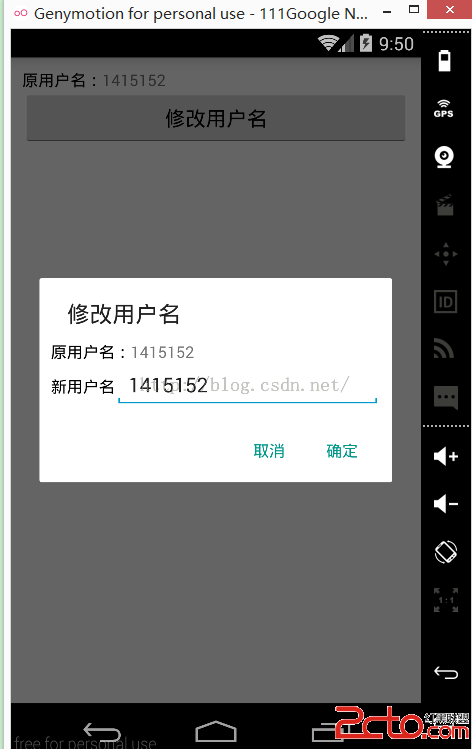
新手在自定義AlertDialog上的疑問筆者猜測主要有兩個:
1、自定義的layout如何放到AlertDialog中?
解答:
獲取到layout的view之後,直接調用AlertDialog.Builder的setView方法即可。
2、如何對自定義AlertDialog中的控件進行操作?
解答:
於fragment中的操作類似,首先要獲取該layout的view,然後通過該view獲取到其中控件進行操作。
MainActivity:
package com.example.myalertdialog;

import android.app.Activity;
import android.content.DialogInterface;
import android.support.v7.app.AlertDialog;
import android.support.v7.app.AppCompatActivity;
import android.os.Bundle;
import android.view.View;
import android.widget.Button;
import android.widget.EditText;
import android.widget.LinearLayout;
import android.widget.TextView;
import android.widget.Toast;

public class MainActivity extends Activity {

    TextView old_name;
    Button bt_change_name;

    @Override
    protected void onCreate(Bundle savedInstanceState) {
        super.onCreate(savedInstanceState);
        setContentView(R.layout.activity_main);

        old_name = (TextView) findViewById(R.id.tv_name);
        bt_change_name = (Button) findViewById(R.id.bt_name);

        bt_change_name.setOnClickListener(new View.OnClickListener() {
            @Override
            public void onClick(View v) {
                //獲取自定義AlertDialog布局文件的view
                LinearLayout change_name = (LinearLayout) getLayoutInflater()
                        .inflate(R.layout.my_dialog, null);
                TextView tv_name_dialog = (TextView) change_name.findViewById(R.id.tv_name_dialog);
                //由於EditText要在內部類中對其進行操作,所以要加上final
                final EditText et_name_dialog = (EditText) change_name.findViewById(R.id.et_name_dialog);

                //設置AlertDialog中TextView和EditText顯示Activity中TextView的內容
                tv_name_dialog.setText(old_name.getText().toString());
                et_name_dialog.setText(old_name.getText().toString());
                new AlertDialog.Builder(MainActivity.this)
                        .setTitle("修改用戶名")
                        .setView(change_name)
                        .setPositiveButton("確定", new DialogInterface.OnClickListener() {
                            @Override
                            public void onClick(DialogInterface dialog, int which) {
                                //將Activity中的textview顯示AlertDialog中EditText中的內容
                                //並且用Toast顯示一下
                                old_name.setText(et_name_dialog.getText().toString());
                                Toast.makeText(MainActivity.this, "設置成功!", Toast.LENGTH_SHORT).show();
                            }
                        })
                        //由於“取消”的button我們沒有設置點擊效果,直接設為null就可以了
                        .setNegativeButton("取消", null)
                        .create()
                        .show();

            }
        });


    }
}
activity_main.xml:
<!--{cke_protected}{C}%3C!%2D%2D%3Fxml%20version%3D%221.0%22%20encoding%3D%22utf-8%22%3F%2D%2D%3E-->
<linearlayout xmlns:android="http://schemas.android.com/apk/res/android" android:layout_width="match_parent" android:layout_height="match_parent" android:orientation="vertical" android:padding="10dp">

<linearlayout android:layout_width="match_parent" android:layout_height="wrap_content" android:orientation="horizontal">
    <textview android:layout_width="wrap_content" android:layout_height="wrap_content" android:textcolor="#000" android:text="原用戶名:">
    <textview android:id="@+id/tv_name" android:layout_width="match_parent" android:layout_height="wrap_content" android:text="大西瓜">
</textview></textview></linearlayout><button android:id="@+id/bt_name" android:layout_width="match_parent" android:layout_height="wrap_content" android:text="修改用戶名"></button></linearlayout>
my_dialog.xml:
<!--{cke_protected}{C}%3C!%2D%2D%3Fxml%20version%3D%221.0%22%20encoding%3D%22utf-8%22%3F%2D%2D%3E-->
<linearlayout xmlns:android="http://schemas.android.com/apk/res/android" android:layout_width="match_parent" android:layout_height="match_parent" android:orientation="vertical" android:padding="10dp">

<linearlayout android:layout_width="match_parent" android:layout_height="wrap_content" android:orientation="horizontal">
    <textview android:layout_width="wrap_content" android:layout_height="wrap_content" android:textcolor="#000" android:text="原用戶名:">
    <textview android:id="@+id/tv_name_dialog" android:layout_width="match_parent" android:layout_height="wrap_content" android:text="Hello World!">
</textview></textview></linearlayout>

    <linearlayout android:layout_width="match_parent" android:layout_height="wrap_content" android:orientation="horizontal">
        <textview android:layout_width="wrap_content" android:layout_height="wrap_content" android:textcolor="#000" android:text="新用戶名">
        <edittext android:id="@+id/et_name_dialog" android:layout_width="match_parent" android:layout_height="wrap_content" android:text="Hello World!">
    </edittext></textview></linearlayout>

</linearlayout>
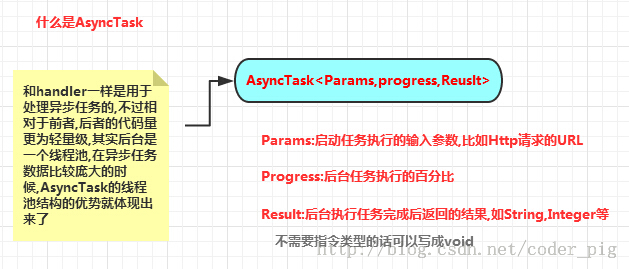 android AsynTask處理返回數據和AsynTask使用get,post請求,androidasyntask
android AsynTask處理返回數據和AsynTask使用get,post請求,androidasyntaskAndroid是一個單線程模型,Android界面(
 圖片放大縮小(和ViewPager配合使用流暢顯示)--第三方開源--PhotoView,
圖片放大縮小(和ViewPager配合使用流暢顯示)--第三方開源--PhotoView, 圖片的放大縮小實現效果是使用的github上的一個開源項目photoView實
 JRebel for Android 1.0發布!,jrebelandroid
JRebel for Android 1.0發布!,jrebelandroid 什麼是JRebel for Android? 一款Android studio插件&m
 Android捕獲崩潰異常,Android捕獲崩潰
Android捕獲崩潰異常,Android捕獲崩潰開發中最讓人頭疼的是應用突然爆炸,然後跳回到桌面。而且我們常常不知道這種狀況會何時出現,在應用調試階段還好,還可以通過調