編輯:關於android開發
Android tests are based on JUnit, and you can run them either as local unit tests on the JVM or as instrumented tests on an Android device. This page provides an introduction to the concepts and tools for building Android tests.
// Android的測試基於JUnit
When using Android Studio to write any of your tests, your test code must go into one of two different code directories (source sets). For each module in your project, Android Studio includes both source sets, corresponding to the following test types:
//對於每一個項目的模塊,Androidstudio都會包含這兩個類型的source sets
module-name/src/test/java/.
These tests run on the local JVM and do not have access to functional Android framework APIs.
// 這些測試運行在本地JAVA虛擬機上,不會訪問Android框架層的api
To get started, see Building Local Unit Tests.
module-name/src/androidTest/java/.
These are all tests that must run on an Android hardware device or an Android emulator.
//這些測試必須運行在Android硬件設備上或者模擬器上
Instrumented tests are built into an APK that runs on the device alongside your app under test. The system runs your test APK and your app under tests in the same process, so your tests can invoke methods and modify fields in the app, and automate user interaction with your app.
//instruments test構建了一個apk和你的app一起安裝,系統會讓你的app和測試apk一同運行在同一個進程,這樣你的測試可以調用應用中的方法並且 可以修改變量,讓和應用的交互變得自動化
For information about how to create instrumented tests, see the following topics:

However, the local unit tests and instrumented tests described above are just terms that help distinguish the tests that run on your local JVM from the tests that run on the Android platform (on a hardware device or emulator). The real testing types that you should understand when building a complete test suite are described in the following table.
//然而上面描述的local unit test and instrumentes test只是幫助區分他們一個是運行在本地虛擬機,一個是運行在Android平台上。真正的測試類型的分類應該是如下表描述的:
Instrumentationinformation, such as the Context of the app you are testing. Use these tests when your tests have Android dependencies that mock objects cannot satisfy.
Integration Tests
Components within your app only
This type of test verifies that the target app behaves as expected when a user performs a specific action or enters a specific input in its activities. For example, it allows you to check that the target app returns the correct UI output in response to user interactions in the app’s activities. UI testing frameworks like Espressoallow you to programmatically simulate user actions and test complex intra-app user interactions.
Cross-app Components
This type of test verifies the correct behavior of interactions between different user apps or between user apps and system apps. For example, you might want to test that your app behaves correctly when the user performs an action in the Android Settings menu. UI testing frameworks that support cross-app interactions, such as UI Automator, allow you to create tests for such scenarios.
The following are common APIs used for testing apps on Android.
You should write your unit or integration test class as a JUnit 4 test class. The framework offers a convenient way to perform common setup, teardown, and assertion operations in your test.
A basic JUnit 4 test class is a Java class that contains one or more test methods. A test method begins with the @Test annotation and contains the code to exercise and verify a single functionality (that is, a logical unit) in the component that you want to test.
The following snippet shows an example JUnit 4 integration test that uses the Espresso APIs to perform a click action on a UI element, then checks to see if an expected string is displayed.
@RunWith(AndroidJUnit4.class)
@LargeTest
public class MainActivityInstrumentationTest {

    @Rule
    public ActivityTestRule mActivityRule = new ActivityTestRule<>(
            MainActivity.class);

    @Test
    public void sayHello(){
        onView(withText("Say hello!")).perform(click());

        onView(withId(R.id.textView)).check(matches(withText("Hello, World!")));
    }
}
In your JUnit 4 test class, you can call out sections in your test code for special processing by using the following annotations:
//你可以通過下面的注解喚起一些代碼段用戶特殊的處理
@Before: Use this annotation to specify a block of code that contains test setup operations. The test class invokes this code block before each test. You can have multiple @Before methods but the order in which the test class calls these methods is not guaranteed. // 用before注解來指定包含test代碼構建操作的代碼塊。測試類調用這個代碼塊在所有測試代碼之前,你可以有多個before聲明的代碼塊,但是他們的相對運行順序是沒法保證的@After: This annotation specifies a block of code that contains test tear-down operations. The test class calls this code block after every test method. You can define multiple @After operations in your test code. Use this annotation to release any resources from memory // after注解指定了包含有測試類的拆除工作的代碼塊。測試類調用這個代碼在所有測試方法之後,你可以定義多個after注解代碼塊。使用這個注解來釋放內存中的資源@Test: Use this annotation to mark a test method. A single test class can contain multiple test methods, each prefixed with this annotation. //使用test注解來標記測試方法,一個測試類可以包含多個測試方法,每一個方法都帶有test前綴@Rule: Rules allow you to flexibly add or redefine the behavior of each test method in a reusable way. In Android testing, use this annotation together with one of the test rule classes that the Android Testing Support Library provides, such as ActivityTestRule or ServiceTestRule. //rule允許你靈活添加和沖定義每一個測試方法的行為以便重用。在Android 測試中,會以它和其他的測試規則類一起使用,例如ActivityTestRule or ServiceTestRule. @BeforeClass: Use this annotation to specify static methods for each test class to invoke only once. This testing step is useful for expensive operations such as connecting to a database. //使用這個注解來指定一個對於每一個測試類只會調用一次的靜態方法,這個測試搭建方法對於開銷較大的操作例如連接數據庫等是非常有幫助的。@AfterClass: Use this annotation to specify static methods for the test class to invoke only after all tests in the class have run. This testing step is useful for releasing any resources allocated in the @BeforeClass block.@Test(timeout=): Some annotations support the ability to pass in elements for which you can set values. For example, you can specify a timeout period for the test. If the test starts but does not complete within the given timeout period, it automatically fails. You must specify the timeout period in milliseconds, for example: @Test(timeout=5000). //一些注釋支持添加可以設置值的元素的功能,例如你可以指定一個超市時間對於這個測試。如果測試開始但是沒有在超時時間內完成,他會自動失敗,超時時間以毫秒指定For more annotations, see the documentation for JUnit annotations and the Android annotations.
Use the JUnit Assert class to verify the correctness of an object's state. The assert methods compare values you expect from a test to the actual results and throw an exception if the comparison fails. Assertion classes describes these methods in more detail.
The Android Testing Support Library provides a set of APIs that allow you to quickly build and run test code for your apps, including JUnit 4 and functional UI tests. The library includes the following instrumentation-based APIs that are useful when you want to automate your tests:
AndroidJUnitRunnerA JUnit 4-compatible test runner for Android.EspressoA UI testing framework; suitable for functional UI testing within an app.UI AutomatorA UI testing framework suitable for cross-app functional UI testing between both system and installed apps.Because Android Testing Support Library APIs extend JUnit, you can use assertion methods to display the results of tests. An assertion method compares an actual value returned by a test to an expected value, and throws an AssertionException if the comparison test fails. Using assertions is more convenient than logging, and provides better test performance.
To simplify test development, you should use the Hamcrest library, which lets you create more flexible tests using the Hamcrest matcher APIs.
The Android SDK includes two tools for functional-level app testing:
monkeyrunner command-line tool.The following documents provide more detail about how to build and run a variety of test types:
 手機安全衛士——閃屏頁相關處理,手機安全衛士
手機安全衛士——閃屏頁相關處理,手機安全衛士根據功能模塊劃分(Android開發推薦此方法) - Activity mo
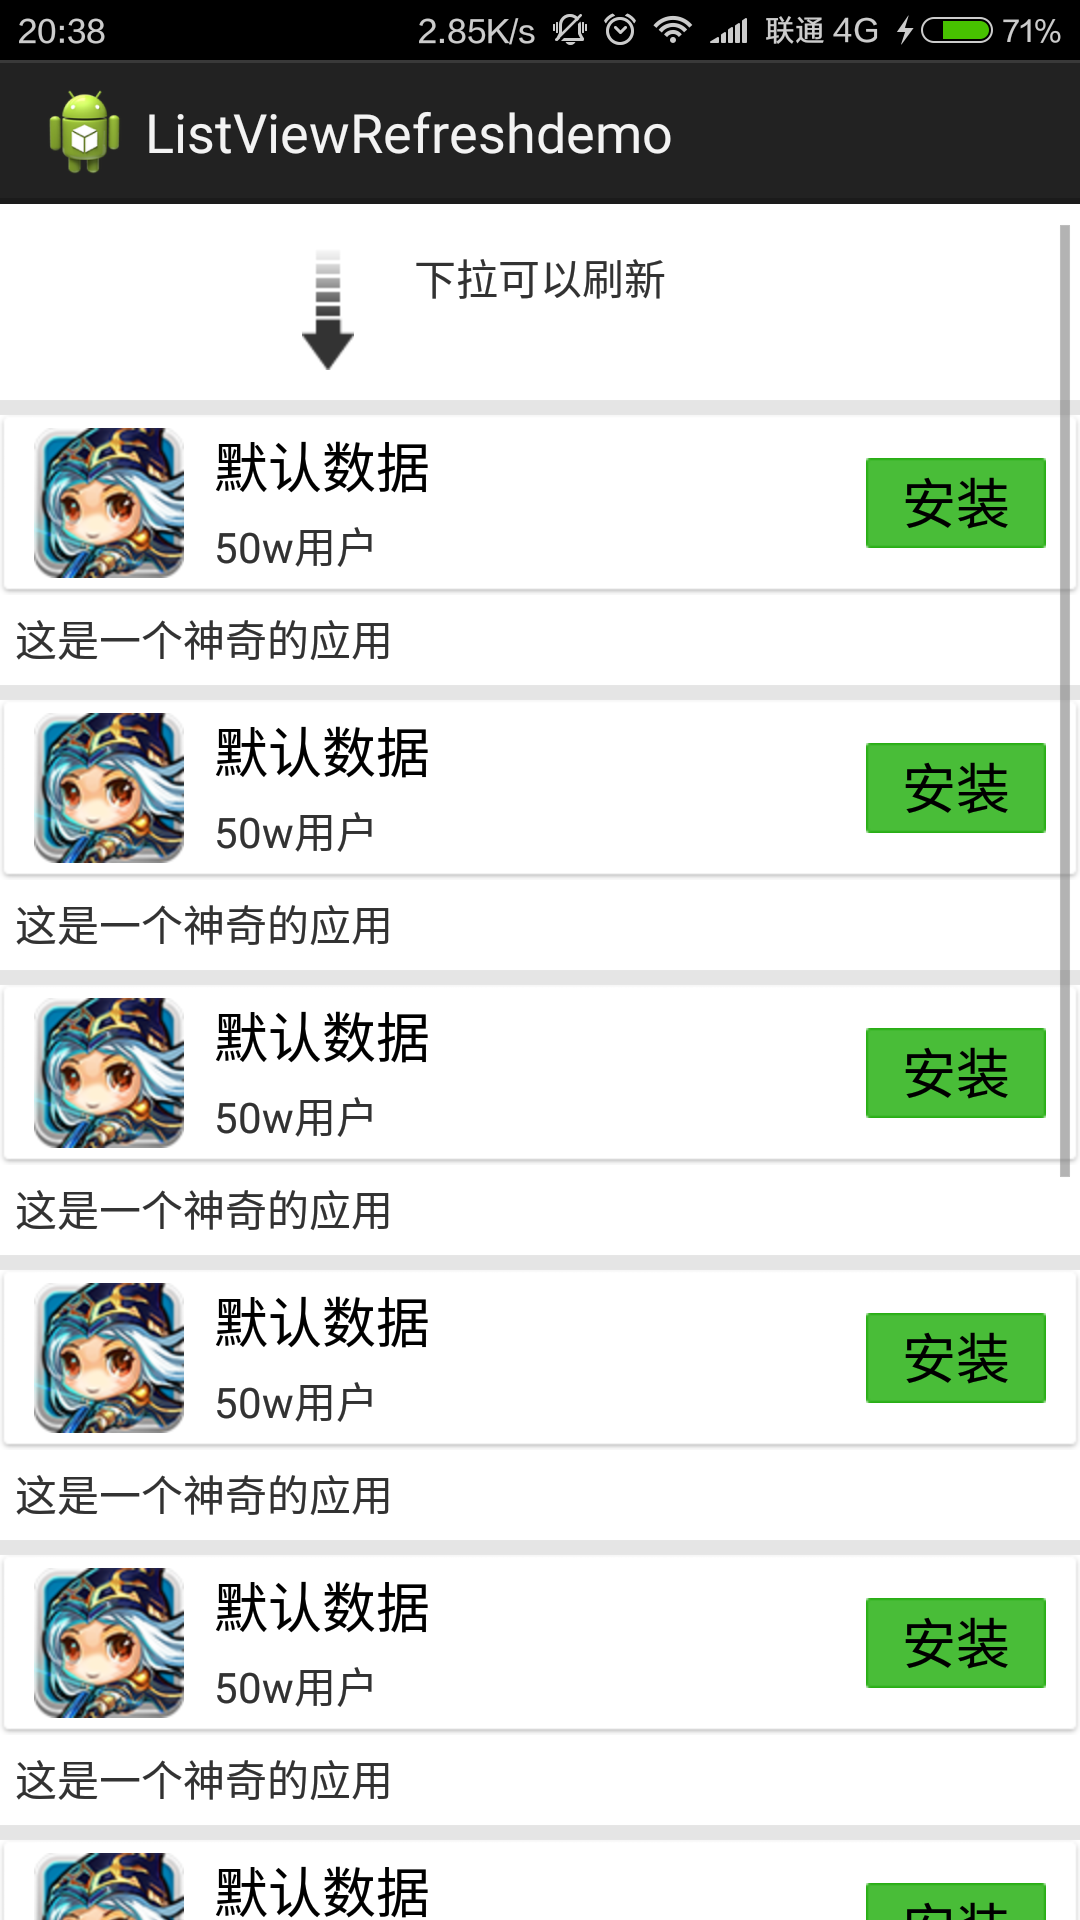 Android--ListView下拉刷新,android--listview
Android--ListView下拉刷新,android--listview整理了下以前寫的小項目,ListView的下拉刷新,雖然小但還是想紀念下。。適合新手看,大神
 Android面試准備 第二天 第五例 數據存儲
Android面試准備 第二天 第五例 數據存儲 5、Activity用SharedPreferences保存數據,大小有木有限制? 個人理解:SharedPrefere
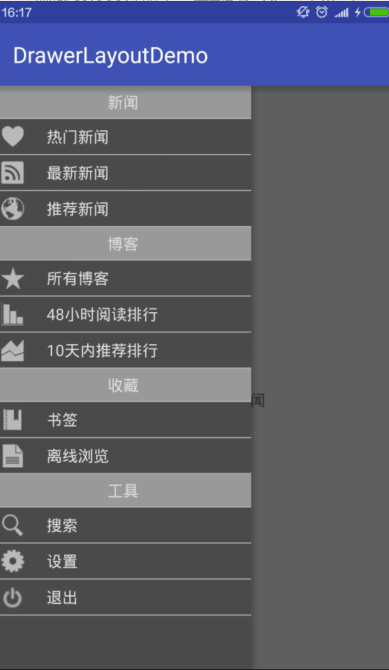 android 官方DrawerLayout的介紹和使用,androiddrawerlayout
android 官方DrawerLayout的介紹和使用,androiddrawerlayout南塵:愛編程,愛安卓,每天進步一點點。 drawerLayout是Supp