編輯:關於android開發
Notification可以讓我們在獲得消息的時候,在狀態欄,鎖屏界面來顯示相應的信息,很難想象如果沒有Notification,那我們的qq和微信以及其他應用沒法主動通知我們,我們就需要時時的看手機來檢查是否有新的信息和提醒著實讓人煩心,也體現出Notification重要性。這裡會介紹三種Notification,分別是普通的Notification,折疊式Notification和懸掛式Notification。
1. 普通Notification
首先創建Builder 對象,用PendingIntent 控制跳轉,這裡跳轉到網頁
Notification.Builder builder = new Notification.Builder(this);
Intent mIntent = new Intent(Intent.ACTION_VIEW, Uri.parse(http://blog.csdn.net/itachi85/));
PendingIntent pendingIntent = PendingIntent.getActivity(this, 0, mIntent, 0);
有了builder 我們就可以給Notification添加各種屬性:
 builder.setContentIntent(pendingIntent);
 builder.setSmallIcon(R.drawable.lanucher);
 builder.setLargeIcon(BitmapFactory.decodeResource(getResources(),     R.drawable.lanucher));
 builder.setAutoCancel(true);
 builder.setContentTitle(普通通知);
最後是創建NotificationManager調用notify方法:
  notificationManager = (NotificationManager) getSystemService(NOTIFICATION_SERVICE);
  notificationManager.notify(0, builder.build());
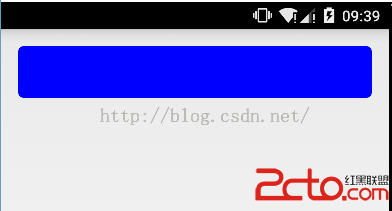
來看看效果:

2. 折疊式Notification
折疊式Notification是一種自定義視圖的Notification,用來顯示長文本和一些自定義的布局的場景。它有兩種狀態,一種是普通狀態下的視圖(如果不是自定義的話和上面普通通知的視圖樣式一樣),一種是展開狀態下的視圖。和普通Notification不同的是,我們需要自定義的視圖,而這個視圖顯示的進程和我們創建視圖的進程不再一個進程,所以我們需要使用RemoteViews,首先要使用RemoteViews來創建我們的自定義視圖:
 //用RemoteViews來創建自定義Notification視圖
RemoteViews remoteViews = new RemoteViews(getPackageName(), R.layout.view_fold);
視圖的布局文件:
我們需要把自定義的視圖賦值給Notification的視圖,下面代碼是把自定義視圖賦值給Notification展開時的視圖
//指定展開時的視圖
notification.bigContentView = remoteViews;
當然我們也可以把自定義視圖賦值給Notification普通狀態時的視圖
//指定普通狀態時的視圖
notification.contentView = remoteViews;
其他的代碼和普通Notification沒什麼區別,折疊式Notification完整代碼:
        Notification.Builder builder = new Notification.Builder(this);
        Intent mIntent = new Intent(Intent.ACTION_VIEW, Uri.parse(http://blog.csdn.net/itachi85/));
        PendingIntent pendingIntent = PendingIntent.getActivity(this, 0, mIntent, 0);
        builder.setContentIntent(pendingIntent);
        builder.setSmallIcon(R.drawable.foldleft);
        builder.setLargeIcon(BitmapFactory.decodeResource(getResources(), R.drawable.lanucher));
        builder.setAutoCancel(true);
        builder.setContentTitle(折疊式通知);
        //用RemoteViews來創建自定義Notification視圖
        RemoteViews remoteViews = new RemoteViews(getPackageName(), R.layout.view_fold);
        Notification notification = builder.build();
        //指定展開時的視圖
        notification.bigContentView = remoteViews;
        notificationManager.notify(1, notification);
如果不是自定義普通狀態視圖的話,折疊式Notification普通狀態下和普通Notification沒什麼區別

我們接著往下拉,使折疊式Notification完全展開就會出現我們自定義的視圖

3. 懸掛式Notification
懸掛式Notification是android5.0新增加的方式,和前兩種顯示方式不同的是,前兩種需要下拉通知欄才能看到通知,而 懸掛式Notification不需要下拉通知欄就直接顯示出來懸掛在屏幕上方並且焦點不變仍在用戶操作的界面因此不會打斷用戶的操作,過幾秒就會自動消失。
和前兩種Notification不同的是,他需要調用setFullScreenIntent來將Notification變為懸掛式Notification
 //如果描述的PendingIntent已經存在,則在產生新的Intent之前會先取消掉當前的
        PendingIntent hangPendingIntent = PendingIntent.getActivity(this, 0, hangIntent, PendingIntent.FLAG_CANCEL_CURRENT);
        builder.setFullScreenIntent(hangPendingIntent, true);
實現懸掛式Notification完整代碼:
        Notification.Builder builder = new Notification.Builder(this);
        Intent mIntent = new Intent(Intent.ACTION_VIEW, Uri.parse(http://blog.csdn.net/itachi85/));
        PendingIntent pendingIntent = PendingIntent.getActivity(this, 0, mIntent, 0);
        builder.setContentIntent(pendingIntent);
        builder.setSmallIcon(R.drawable.foldleft);
        builder.setLargeIcon(BitmapFactory.decodeResource(getResources(), R.drawable.lanucher));
        builder.setAutoCancel(true);
        builder.setContentTitle(懸掛式通知);
        //設置點擊跳轉
        Intent hangIntent = new Intent();
        hangIntent.setFlags(Intent.FLAG_ACTIVITY_NEW_TASK);
        hangIntent.setClass(this, MyNotificationActivity.class);
        //如果描述的PendingIntent已經存在,則在產生新的Intent之前會先取消掉當前的
        PendingIntent hangPendingIntent = PendingIntent.getActivity(this, 0, hangIntent, PendingIntent.FLAG_CANCEL_CURRENT);
        builder.setFullScreenIntent(hangPendingIntent, true);
        notificationManager.notify(2, builder.build());
來看看效果

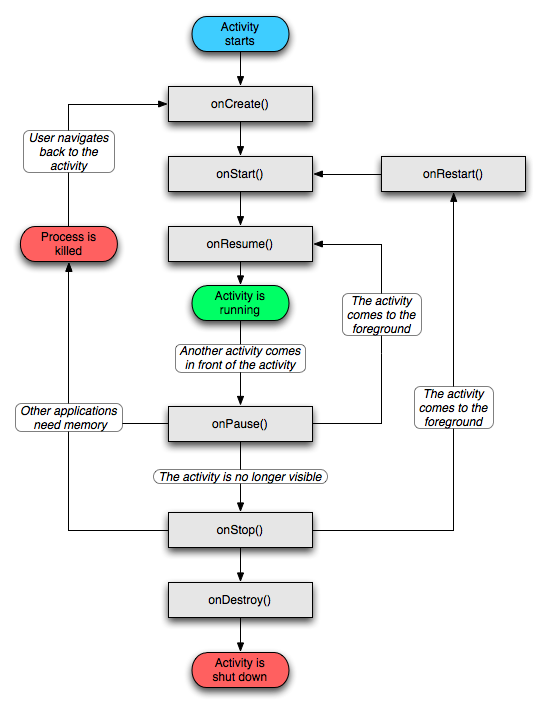
4. Notification的顯示等級
android5.0加入了一種新的模式Notification的顯示等級,共有三種:
VISIBILITY_SECRET 在安全鎖和沒有鎖屏的情況下顯示通知
設置非常簡單只要調用setVisibility方法就可以了
builder.setVisibility(Notification.VISIBILITY_PUBLIC);
我在這裡寫了個方法來設置Notification等級,用radioGroup來演示Notification的各個顯示等級,詳情請參照源碼。
  private void selectNotofovatiomLevel(Notification.Builder builder) {
        switch (radioGroup.getCheckedRadioButtonId()) {
            case R.id.rb_public:
                builder.setVisibility(Notification.VISIBILITY_PUBLIC);
                builder.setContentText(public);
                break;
            case R.id.rb_private:
                builder.setVisibility(Notification.VISIBILITY_PRIVATE);
                builder.setContentText(private);
                break;
            case R.id.rb_secret:
                builder.setVisibility(Notification.VISIBILITY_SECRET);
                builder.setContentText(secret);
                break;
            default:
                builder.setVisibility(Notification.VISIBILITY_PUBLIC);
                builder.setContentText(public);
                break;

        }
    }
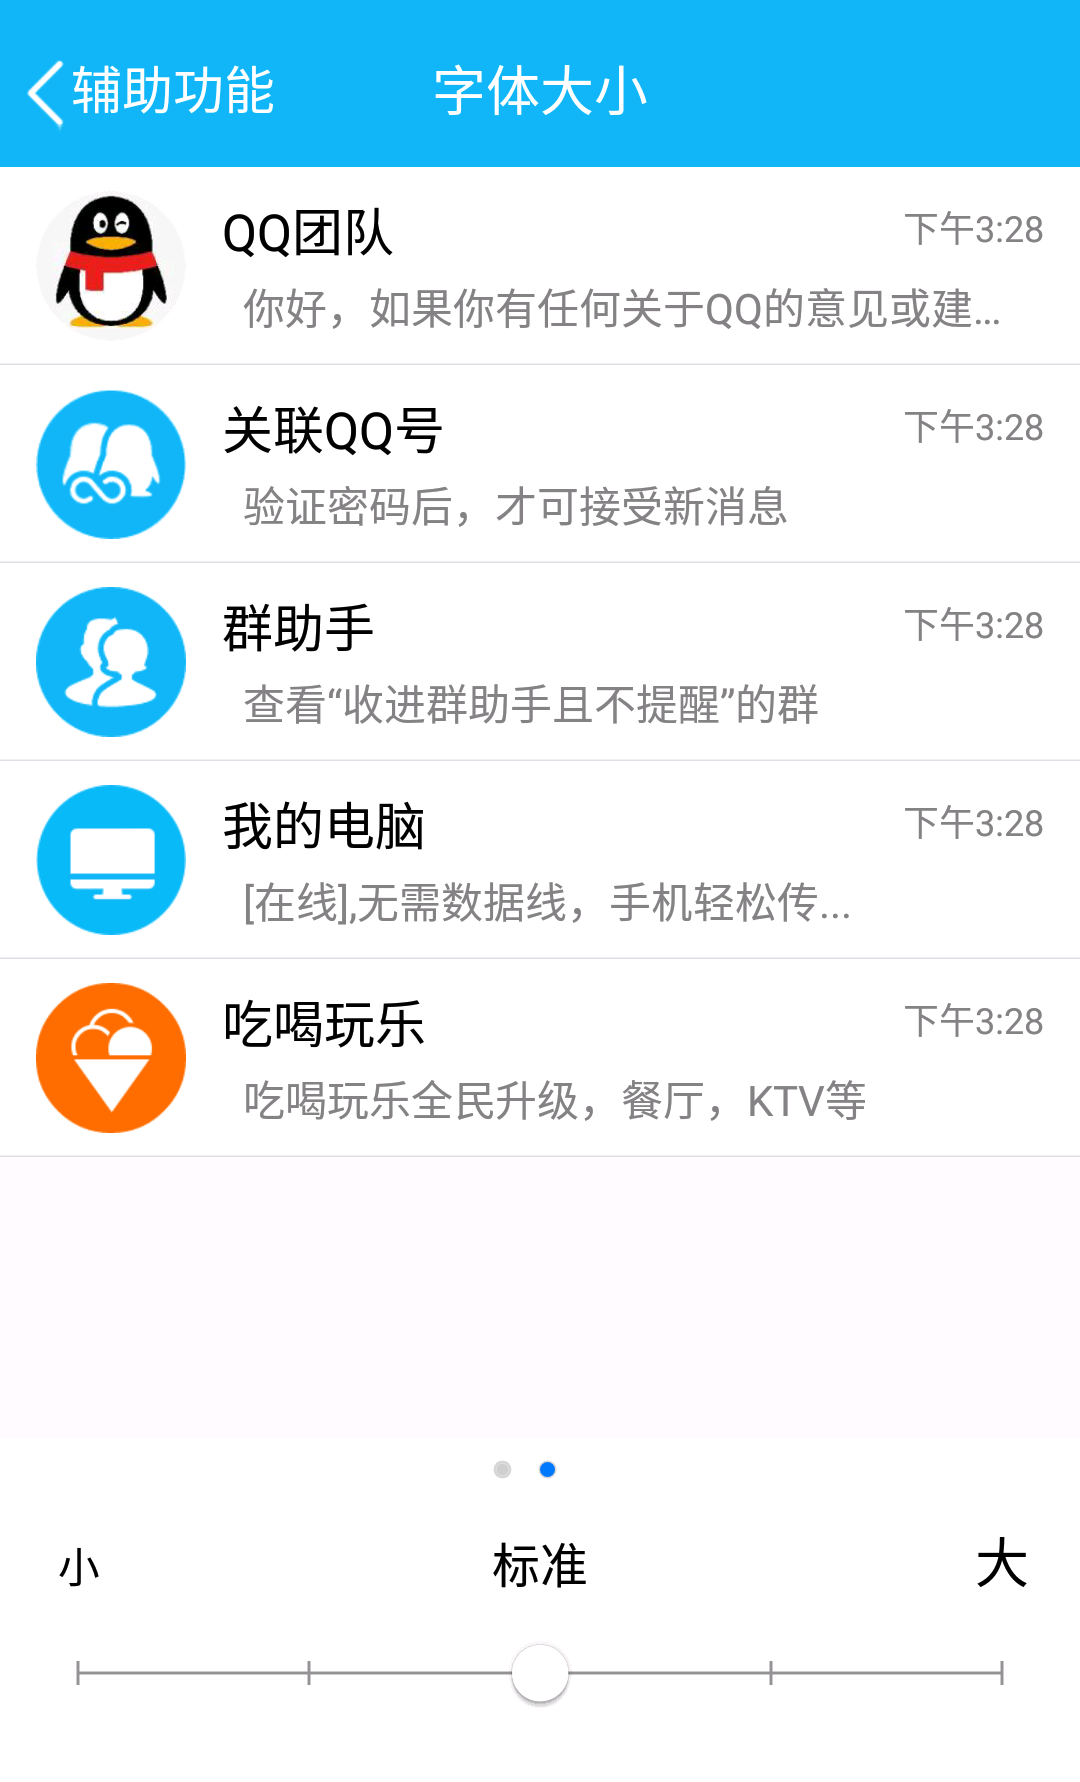 Android項目實戰(二十三):仿QQ設置App全局字體大小,androidapp
Android項目實戰(二十三):仿QQ設置App全局字體大小,androidapp一、項目需求: 因為產品對象用於中老年人,所以產品設計添加了APP全局字體調整大小功能
 Android學習指南之十二:列表組件ListView
Android學習指南上一節中講的是ProgressBar、SeekBar和R
 Android應用開發教程之二十:API動畫學習與擴展總結
今天就借助官方 API的動畫來擴展總結下之前學習與使用過的一些知識點,風格不變,先看效果,再看代碼
 Android實用工具類-GrallyAndPhotoUtils圖片處理工具
Android實用工具類-GrallyAndPhotoUtils圖片處理工具 目錄 目錄 概述 前言 拍照 創建存儲拍照圖片的文件 調用系統拍照程序 讀取相