Android項目實戰(二十三):仿QQ設置App全局字體大小,androidapp
一、項目需求:
因為產品對象用於中老年人,所以產品設計添加了APP全局字體調整大小功能。
這裡仿做QQ設置字體大小的功能。
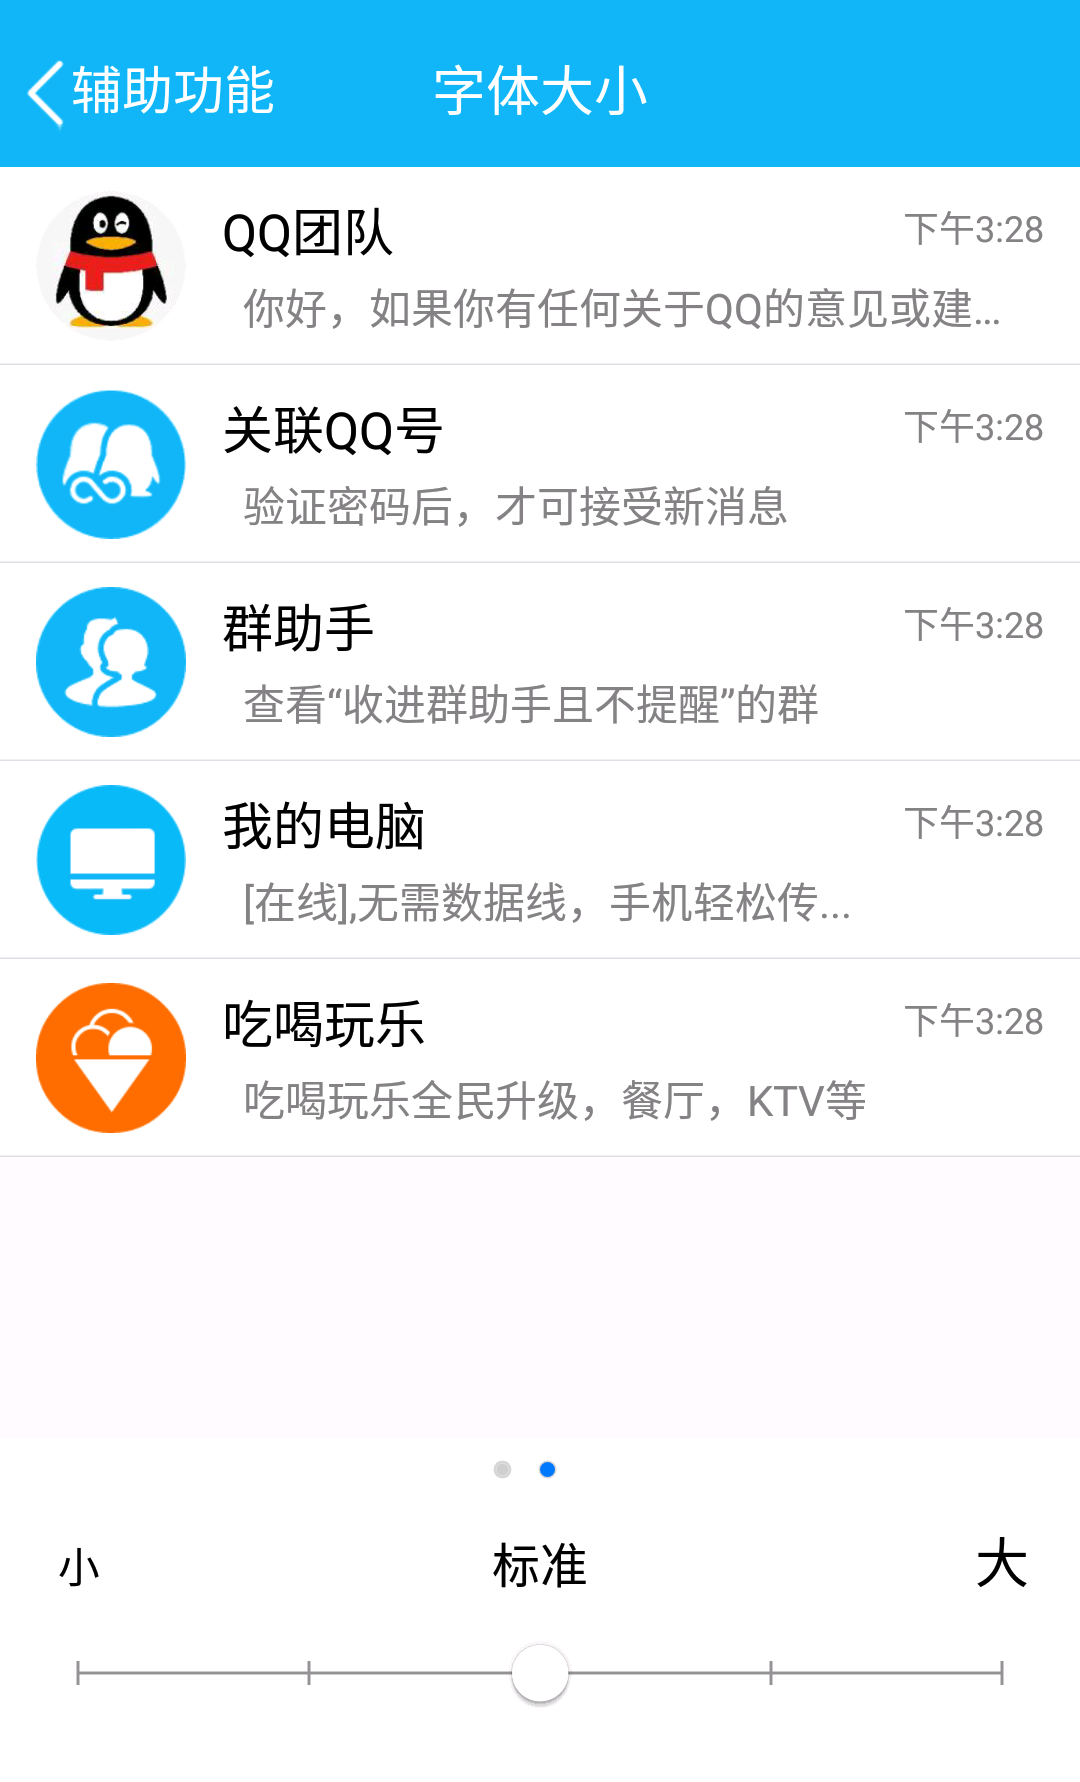
QQ實現的效果是,滾動下面的seekbar,當只有seekbar到達某一個刻度的時候,這時候上部分的效果展示部分會改變文字大小,
但是在拖動過程中字體不會改變。關閉此界面,就可以看到改變文字後app整體的實際文字大小效果了。
-----------------------------------------------------------------------------------------------------------------------------
二、理清一下實現思路:
1、先將一個APP內所有的文本設置級別,大概3--5個級別(具體看項目需求),比如標題欄的TextView我們給他設置級別1(默認24sp) ,類似設置 級別2(默認22sp)等等。
這樣做的目的可以方便的我們設置,如果每個Textview大小都亂亂的,那這個文字大小改變的功能也沒什麼意義了。
2、創建一個類Constant,類中創建一個靜態變量,這個變量用於記錄當我們拖動seekbar的時候 對應改變。取值范圍就是我們seekbar的界點。
Demo我們限制文字大小有四個界點:小、標准、大、特大。
那麼靜態變量 TEXT_SIZE 取值就有0,1,2,3
public static int TEXT_SIZE = 0;
3、滑動seekbar,當達到界點的時候,改變靜態變量TEXT_SIZE的值,並且刷新列表適配器(這個列表是展示文字大小效果的,所以數據是我們自己寫死的,
要求達到某個界點才會刷新適配器,絕不可能seekbar有滑動操作我們就執行刷新適配器的)
4、在退出設置字體界面的時候,用sharedPreferences保存,每次進入app的時候讀取。
這樣在每個Activity或者Fragment 創建View的過程中在 TextView創建的時候給控件動態設置文字的大小
textview.setTextSize(級別默認文字大小+seekbar級別*3);
思路就是這麼簡單,看懂的可以自己去實現了,有點懵的看下面的例子來深入了解下。
整體思路就是: 一個標記變量,記錄要顯示文字大小的級別,sharedpreference保存。然後在每個要打開的新的界面創建View的過程中 給TextView動態設置文字大小
注意:不是我修改文字大小之後,整個APP所有界面的TextView都立馬改變。
-----------------------------------------------------------------------------------------------------------------------------
三、代碼實現
1、首先就是這個SeekBar控件,上面需要有刻度,需要有文字,顯然我們用android提供的自帶的SeekBar控件已經不滿足我們的需求了。
但是,這裡我找到了一個很好的自定義控件可以完美的實現這個問題:
資料來源: Android 自定義帶刻度的seekbar
這裡我加了一些注釋

![]()
1 public class CustomSeekbar extends View {
2 private final String TAG = "CustomSeekbar";
3 private int width;
4 private int height;
5 private int downX = 0;
6 private int downY = 0;
7 private int upX = 0;
8 private int upY = 0;
9 private int moveX = 0;
10 private int moveY = 0;
11 private float scale = 0;
12 private int perWidth = 0;
13 private Paint mPaint;
14 private Paint mTextPaint;
15 private Paint buttonPaint;
16 private Canvas canvas;
17 private Bitmap bitmap;
18 private Bitmap thumb;
19 private Bitmap spot;
20 private Bitmap spot_on;
21 private int hotarea = 100;//點擊的熱區
22 private int cur_sections = 2;
23 private ResponseOnTouch responseOnTouch;
24 private int bitMapHeight = 38;//第一個點的起始位置起始,圖片的長寬是76,所以取一半的距離
25 private int textMove = 60;//字與下方點的距離,因為字體字體是40px,再加上10的間隔
26 private int[] colors = new int[]{0xffdf5600,0x33000000};//進度條的橙色,進度條的灰色,字體的灰色
27 private int textSize;
28 private int circleRadius;
29 private ArrayList<String> section_title;
30 public CustomSeekbar(Context context) {
31 super(context);
32 }
33 public CustomSeekbar(Context context, AttributeSet attrs) {
34 this(context, attrs, 0);
35 }
36 public CustomSeekbar(Context context, AttributeSet attrs, int defStyleAttr) {
37 super(context, attrs, defStyleAttr);
38 cur_sections = 0;
39 bitmap = Bitmap.createBitmap(900, 1100, Bitmap.Config.ARGB_8888);
40 canvas = new Canvas();
41 canvas.setBitmap(bitmap);
42 thumb = BitmapFactory.decodeResource(getResources(), R.mipmap.img_setting_seekbar_thumbe_large); //這個是滑動圖標
43 spot = BitmapFactory.decodeResource(getResources(),R.mipmap.img_setting_seekbar_thumbe); //這個是未滑動到的界點的圖標
44 spot_on = BitmapFactory.decodeResource(getResources(),R.mipmap.img_setting_seekbar_thumbe); //這個是已經滑動過的界點的圖標
45 bitMapHeight = thumb.getHeight()/2; //這裡影響點中的圖標的位置 這個正好 不用改
46 textMove = bitMapHeight+ 5; //xqx 這裡參數大小要改,不是固定的,具體看項目效果
47 textSize = (int) TypedValue.applyDimension(TypedValue.COMPLEX_UNIT_SP, 20, getResources().getDisplayMetrics()); //文字大小,第二個參數個人設置
48 circleRadius = (int) TypedValue.applyDimension(TypedValue.COMPLEX_UNIT_DIP, 3, getResources().getDisplayMetrics());
49 mPaint = new Paint(Paint.DITHER_FLAG);
50 mPaint.setAntiAlias(true);//鋸齒不顯示
51 mPaint.setStrokeWidth(3);
52 mTextPaint = new Paint(Paint.DITHER_FLAG);
53 mTextPaint.setAntiAlias(true);
54 mTextPaint.setTextSize(textSize);
55 mTextPaint.setColor(0xffb5b5b4);
56 buttonPaint = new Paint(Paint.DITHER_FLAG);
57 buttonPaint.setAntiAlias(true);
58
59 }
60 /**
61 * 實例化後調用,設置bar的段數和文字
62 */
63 public void initData(ArrayList<String> section){
64 if(section != null){
65 section_title = section;
66 }else {
67 //如果沒有傳入正確的分類級別數據,則默認使用“低”“中”“高”
68 String[] str = new String[]{"低", "中", "高"};
69 section_title = new ArrayList<String>();
70 for (int i = 0; i < str.length; i++) {
71 section_title.add(str[i]);
72 }
73 }
74 }
75
76 @Override
77 protected void onMeasure(int widthMeasureSpec, int heightMeasureSpec) {
78 super.onMeasure(widthMeasureSpec, heightMeasureSpec);
79
80 int widthMode = MeasureSpec.getMode(widthMeasureSpec);
81 int widthSize = MeasureSpec.getSize(widthMeasureSpec);
82 int heightMode = MeasureSpec.getMode(heightMeasureSpec);
83 int heightSize = MeasureSpec.getSize(heightMeasureSpec);
84
85 width = widthSize;
86 float scaleX = widthSize / 1080;
87 float scaleY = heightSize / 1920;
88 scale = Math.max(scaleX,scaleY);
89 //控件的高度
90 //height = 185;
91 height = (int) TypedValue.applyDimension(TypedValue.COMPLEX_UNIT_DIP, 62, getResources().getDisplayMetrics());
92 setMeasuredDimension(width, height);
93 width = width-bitMapHeight/2;
94 perWidth = (width - section_title.size()*spot.getWidth() - thumb.getWidth()/2) / (section_title.size()-1);
95 hotarea = perWidth/2;
96 }
97
98 @Override
99 protected void onDraw(Canvas canvas) {
100 super.onDraw(canvas);
101 mPaint.setColor(Color.WHITE);
102 mPaint.setStyle(Paint.Style.FILL);
103 mPaint.setAlpha(0);
104 canvas.drawRect(0, 0, getMeasuredWidth(), getMeasuredHeight(), mPaint);
105 canvas.drawBitmap(bitmap, 0, 0, null);
106 mPaint.setAlpha(255);
107 mPaint.setColor(colors[1]);
108 canvas.drawLine(bitMapHeight, height * 2 / 3, width - bitMapHeight - spot_on.getWidth() / 2, height * 2 / 3, mPaint);
109 int section = 0;
110 while(section < section_title.size()){
111 if(section < cur_sections) {
112 mPaint.setColor(colors[0]);
113 canvas.drawLine(thumb.getWidth()/2 + section * perWidth + (section+1) * spot_on.getWidth(),height * 2 / 3,
114 thumb.getWidth()/2 + section * perWidth + (section+1) * spot_on.getWidth() + perWidth,height * 2 / 3,mPaint);
115 canvas.drawBitmap(spot_on, thumb.getWidth()/2 + section * perWidth + section * spot_on.getWidth(),height * 2 / 3 - spot_on.getHeight()/2,mPaint);
116 }else{
117 mPaint.setAlpha(255);
118 if(section == section_title.size()-1){
119 canvas.drawBitmap(spot, width - spot_on.getWidth() - bitMapHeight/2, height * 2 / 3 - spot.getHeight() / 2, mPaint);
120 }else {
121 canvas.drawBitmap(spot, thumb.getWidth()/2 + section * perWidth + section * spot_on.getWidth(), height * 2 / 3 - spot.getHeight() / 2, mPaint);
122 }
123 }
124
125 if(section == section_title.size()-1) {
126 canvas.drawText(section_title.get(section), width - spot_on.getWidth()- bitMapHeight/4 - textSize / 2, height * 2 / 3 - textMove, mTextPaint);
127 }else{
128 canvas.drawText(section_title.get(section), thumb.getWidth()/2 + section * perWidth + section * spot_on.getWidth(), height * 2 / 3 - textMove, mTextPaint);
129 }
130 section++;
131 }
132 if(cur_sections == section_title.size()-1){
133 canvas.drawBitmap(thumb, width - spot_on.getWidth() - bitMapHeight/2 - thumb.getWidth() / 2,
134 height * 2 / 3 - bitMapHeight, buttonPaint);
135 }else {
136 canvas.drawBitmap(thumb, thumb.getWidth()/2 + cur_sections * perWidth + cur_sections * spot_on.getWidth() - thumb.getWidth()/4 ,
137 height * 2 / 3 - bitMapHeight, buttonPaint);
138 }
139 }
140
141 @Override
142 public boolean onTouchEvent(MotionEvent event) {
143 super.onTouchEvent(event);
144 switch (event.getAction()) {
145 case MotionEvent.ACTION_DOWN:
146 thumb = BitmapFactory.decodeResource(getResources(), R.mipmap.img_setting_seekbar_thumbe_large);
147 downX = (int) event.getX();
148 downY = (int) event.getY();
149 responseTouch(downX, downY);
150 break;
151 case MotionEvent.ACTION_MOVE:
152 thumb = BitmapFactory.decodeResource(getResources(), R.mipmap.img_setting_seekbar_thumbe_large);
153 moveX = (int) event.getX();
154 moveY = (int) event.getY();
155 responseTouch(moveX, moveY);
156 break;
157 case MotionEvent.ACTION_UP:
158 thumb = BitmapFactory.decodeResource(getResources(), R.mipmap.img_setting_seekbar_thumbe_large);
159 upX = (int) event.getX();
160 upY = (int) event.getY();
161 responseTouch(upX, upY);
162 responseOnTouch.onTouchResponse(cur_sections);
163 break;
164 }
165 return true;
166 }
167 private void responseTouch(int x, int y){
168 if(x <= width-bitMapHeight/2) {
169 cur_sections = (x + perWidth / 3) / perWidth;
170 }else{
171 cur_sections = section_title.size()-1;
172 }
173 invalidate();
174 }
175
176 //設置監聽
177 public void setResponseOnTouch(ResponseOnTouch response){
178 //注意 ,這裡是接口,實現你到達界點的監聽事件,因為這個自定義控件繼承的View而不是SeekBar,所以只能使用接口實現監聽
179 responseOnTouch = response;
180 }
181
182
183 //設置進度
184 public void setProgress(int progress){
185 cur_sections = progress;
186 invalidate();
187 }
188 }
CustomSeekbar.class
2、根據這個自定義CustomSeekbar控件,我們首先要建一個接口
public interface ResponseOnTouch {
    public void onTouchResponse(int volume);
}
3、創建一個類。設置一個靜態屬性
public class Constant {
    public static int TEXT_SIZE = 0;
}
4、接下來寫字體設置後的效果界面:qq的效果界面有兩個,一個是聊天的界面,一個是列表的界面。
這裡我們只展示列表的界面
列表代碼就不展示了
直接看如何使用CustomSeekbar
 1         private CustomSeekbar seekBar;
 2         seekBar = (CustomSeekbar) findViewById(R.id.progressBar);
 3      //這個集合用於給自定義SeekBar設置界點級別,集合裡有幾個數據,就有幾個界點
 4         ArrayList<String> volume_sections = new ArrayList<String>();
 5         volume_sections.add("小");
 6         volume_sections.add("標准");
 7         volume_sections.add("大");
 8         volume_sections.add("特大");
 9         seekBar.initData(volume_sections);
10         seekBar.setProgress(0); //設置默認級別
11
12
13         seekBar.setResponseOnTouch(this);//activity實現了下面的接口ResponseOnTouch,每次touch會回調onTouchResponse
實現接口:
@Override
    public void onTouchResponse(int volume) {
        Toast.makeText(this,"volume-->"+volume,Toast.LENGTH_SHORT).show();
        //參數volume就是級別,如果我們集合有4個數據 那麼volume的取值就為0、1、2、3
     Constant.TEXT_SIZE = volume;
     //這裡寫sharedpreferences保存該靜態變量
     //刷新列表 ,查看文字改變後的效果
        adapter.notifyDataSetChanged();
    }
列表適配器中對textview設置大小的代碼:
holder.community_doctor_name.setTextSize(該TextView控件級別默認文字大小+ Constant.TEXT_SIZE*5);
效果圖:
後續補上。
個人思路,實現的局限性是有的,大家有修改意見歡迎提出。
 NDK開發_筆記0,ndk開發筆記
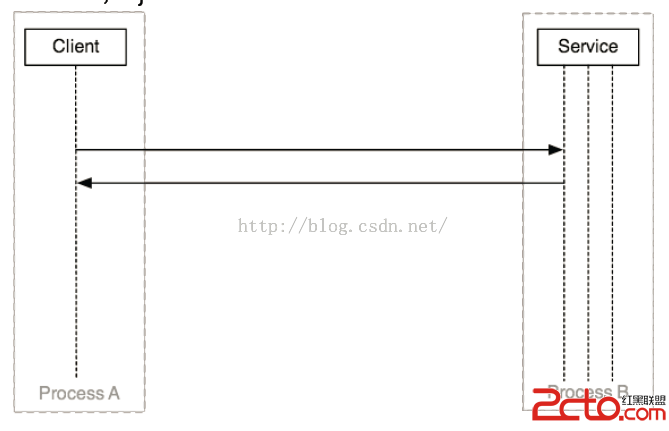
 AIDL使用解析,aidl解析
 安卓開源項目周報0104,安卓開源項目0104
 酷歐天氣(CoolWeather)應用源碼,coolweather