編輯:高級開發
找LOG :adb logcat -b main -b radio -b system -v time >log.txt
如果要抓Message的話,還要加上adb shell setprop log.tag.Mms:transaction VERBOSE
在ubuntu下安裝手機驅動
在 ubuntu 通過usb連接 cci 設備,使用 adb 時,會返回無法找到設備,解決辦法如下:
1) 在終端運行 lsusb
會發現結果有會有如下類似記錄:
Bus 002 Device 001: ID 1d6b:0001 Linux Foundation 1.1 root hub
Bus 003 Device 001: ID 1d6b:0001 Linux Foundation 1.1 root hub
Bus 004 Device 005: ID 1219:0102 #這行就是cci手機
Bus 004 Device 001: ID 1d6b:0001 Linux Foundation 1.1 root hub
Bus 005 Device 001: ID 1d6b:0001 Linux Foundation 1.1 root hub
這時鍵入
sudo gedit /etc/udev/rules.d/53-android.rules
在打開的文件中增加以下文本:
SUBSYSTEM=="usb", SYSFS{idVendor}=="1219", MODE="0666"
SUBSYSTEM=="usb", ATTR{idVendor}=="1219", ATTR{idProduct}=="0102", SYMLINK+="android_adb"
2) 運行以下命令:
sudo chmod a+rx /etc/udev/rules.d/53-android.rules
sudo /etc/init.d/udev restart
3) 在 android sdk 的 tools 目錄下運行 (這一步很重要,必須要sudo,否則沒效果)
cd cci-base/
cd out/host/Linux-x86/bin/
sudo ./adb kill-server
sudo ./adb devices
sudo ./adb remount
然後,就可以直接用 adb shell來進行操作了。
1. compile 7015 code use make
#cd 7015
#make #wait 3 hours
2. use the new system.img and userdata.img instead of the sdk's img,backup first
#mv /yournamedir/android-sdk-linux_86/platforms/android-8/images/system.img /yournamedir/android-sdk-Linux_86/platforms/android-8/images/system.img.old
#mv /yournamedir/android-sdk-Linux_86/platforms/android-8/images/userdata.img
/yournamedir/android-sdk-Linux_86/platforms/android-8/images/userdata.img.old
接上頁
#ln -s 7015/out/target/product/generic/system.img /yournamedir/android-sdk-Linux_86/platforms/android-8/images/system.img
#ln -s 7015/out/target/product/generic/userdata.img /yournamedir/android-sdk-Linux_86/platforms/android-8/images/userdata.img
then create a avd in eclipse, this avd will use the new system.img.
Start it!
3. modify aPPS
Change Contacts for example,change Java files in packages and save.
#cd 7015
#mmm packages/aPPS/Contacts #wait sevaral minutes
#adb remount #after remount the /symstem in emulator will be mounted writable
use the new generated apk replace the same apk in emulator dir /system/app,you can use adb push command or push file in ddms.
#adb push out/target/product/generic/system/app/Contacts.apk /system/app
#adb push out/target/product/generic/data/app/ContactsTests.apk /system/app
4. modify framework files
Change frameworks/base/core/res/ for example
edit String.XML and save
#mmm frameworks/base/core/res/
this will generate out/target/product/generic/system/framework/framework-res.apk, then use mkyaffs2image make new system.img
#out/host/Linux-x86/bin/mkyaffs2image -f out/target/product/generic/system out/target/product/generic/system.img
restart the emulator, the new system.img will be used.
 Android 如何調整launcher screen的布局
android系統默認的啟動之後的icon布局是4行4列,第一行由search widget完全占據。這樣的設計對於小屏幕的手機比較合適,但是對於大屏幕的tablet
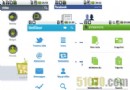 Dashboard Android用戶自定義UI設計模板
Dashboard,一種專門針對入口界面設計的應用程序,Dashboard (為儀表板之意)原來是蘋果公司 Mac OS X v10.4 Tiger 作業系統中的應用程
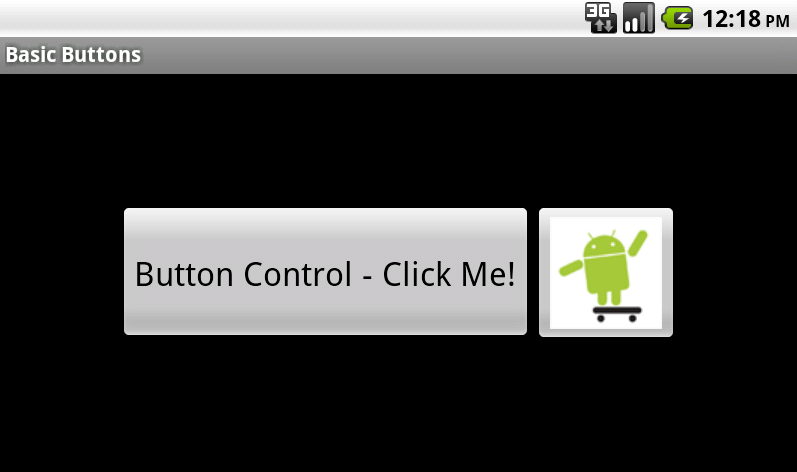 Android用戶界面設計:基本按鈕
本文向你展示了在你的android應用程序中創建一個簡單的Button或ImageButton控件的步驟。首先,你會學到如何向你的布局文件中添加按鈕控件。然後你會學習如
 Android開發者將獲得Sprint網絡資源支持
android最近很火爆,這對android開發者來說對開發的壓力增大。為了更好的幫助廣大android開發者,Sprint將提供網絡資源支持。一般而言,手機操作系統廠