編輯:關於Android編程
1)Service重啟
2)進程守護
3)Receiver觸發
4)AlarmManager or JobScheduler循環觸發
5)與系統Service捆綁—–可以不考慮,了解即可
下面將圍繞這幾點展開討論。
1.什麼才叫應用進程保活
應用進程保活可以理解為應用位於後台永遠不能被殺死。這裡的可以簡略地分為兩種情況,第一種是當系統資源緊俏的時候或者基於某種系統自身的後台運行規則選擇殺死你的後台應用來獲得更多的資源,第二種是用戶手動調用某些安全軟件的清理功能干掉你的後台應用。對於Android 5.0以前的系統我們可以考慮以上兩種情況下的後台常駐,而對於Android 5.0以及以後的版本我們只能基於第一種情況考慮後台常駐,因為從Android 5.0開始對進程的管理更為嚴格,殺得也更為暴力。
2.Android進程的生命周期
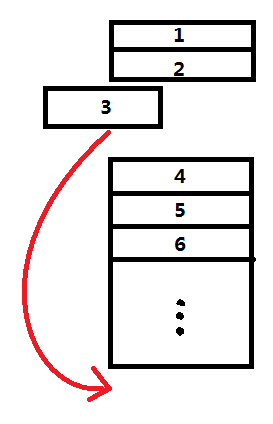
Android系統會盡力保持應用的進程,但是有時為了給新的進程和更重要的進程回收一些內存空間,它會移除一些舊的進程。
為了決定哪些進程留下,哪些進程被殺死,系統根據在進程中在運行的組件及組件的狀態,為每一個進程分配了一個優先級等級。
優先級最低的進程首先被殺死。
這個進程重要性的層次結構有五個等級,下面就列出這五種進程,按照重要性來排列,最重要的放在最前。
1)前台進程 Foreground process
處於該狀態下的進程表示其當前正在與用戶交互,是必須存在的,無論如何系統都不會去干掉一個前台進程除非系統出現錯誤或者說用戶手動殺掉。那麼系統是通過怎樣的一個規則去判斷某個進程是否前台進程呢?下面是一些具體的情景:
某個進程持有一個正在與用戶交互的Activity並且該Activity正處於resume的狀態。
某個進程持有一個Service,並且該Service與用戶正在交互的Activity綁定。
某個進程持有一個Service,並且該Service調用startForeground()方法使之位於前台運行。
某個進程持有一個Service,並且該Service正在執行它的某個生命周期回調方法,比如onCreate()、 onStart()或onDestroy()。
某個進程持有一個BroadcastReceiver,並且該BroadcastReceiver正在執行其onReceive()方法。
可以看到使進程位於前台的方法還是蠻多的,但是你要知道的事Android是一個碎片化非常嚴重的系統,很多定制的ROM都會修改一部分系統邏輯來做所謂的優化,所以說上述的情景以及下述我們將要講到的其它進程狀態其實都只能說可以在原生系統上完美生效而如果在一些定制ROM中則有可能無效甚至出現詭異的現象。
2)可見進程 Visible process
可見進程與前台進程相比要簡單得多,首先可見進程不包含任何前台組件,也就是說不會出現上述前台進程的任何情境,其次,可見進程依然會影響用戶在屏幕上所能看到的內容,一般來說常見的可見進程情景可以分為兩種:
某個進程持有一個Activity且該Activty並非位於前台但仍能被用戶所看到,從代碼的邏輯上來講就是調用了onPause()後還沒調用onStop()的狀態,從視覺效果來講常見的情況就是當一個Activity彈出一個非全屏的Dialog時。
某個進程持有一個Service並且這個Service和一個可見(或前台)的Activity綁定。
3)服務進程 Service process
服務進程要好理解很多,如果某個進程中運行著一個Service且該Service是通過startService()啟動也就是說沒有與任何Activity綁定且並不屬於上述的兩種進程狀態,那麼該進程就是一個服務進程。
4)後台進程 Background process
這裡需要注意的是,我們這兒所說的後台進程只是指的進程的一種狀態,與我們前後文提到的“後台進程”是兩個概念,切記。當某個進程處於後台進程時,其一般會持有一個不可見的Activity,也就是說當Activity隱藏到後台但未退出時,從代碼的邏輯上來講就是該Activity的onStop被調用但onDestory未被執行的狀態,後台進程會被系統存儲在一個LRU表中以確保最近使用的進程最後被銷毀。
5)空進程 Empty process
如果一個進程不包含任何活躍的應用組件,則認為是空進程。保存這種進程的唯一理由是為了緩存的需要,為了加快下次要啟動這個進程中的組件時的啟動時間。系統為了平衡進程緩存和底層內核緩存的資源,經常會殺死空進程。
這五種狀態的進程相對於系統來說的重要性從上至下排列,空進程容易被殺死,其次是後台進程,然後是服務進程甚至是可見進程,而前台進程一般則不會被輕易干掉。系統殺進程會遵循一套規則,而這套規則則是建立在系統可用資源的基礎上,打個比方,如果我的設備有高達3GB的運行內存且可用的內存還有2GB,那麼即便是空進程系統也不會去干掉它,相反如果的設備只有256M的運行內存且可用內存不足16M,這時即便是可見進程也會被系統考慮干掉。這套依據系統資源來殺掉進程的規則Android稱之為Low Memory Killer,而且Android在上述五種進程狀態的基礎上衍生出了更多的進程相關定義,比較重要的兩個是進程的Importance等級以及adj值,關於這兩個定義大家可以不必深究,但是要有一定的理解,這兩個玩意是具體決定了系統在資源吃緊的情況下該殺掉哪些進程。其中Importance等級在ActivityManager.RunningAppProcessInfo中聲明:
public static class RunningAppProcessInfo implements Parcelable {
   /**
     * Constant for {@link #importance}: This process is running the
     * foreground UI; that is, it is the thing currently at the top of the screen
     * that the user is interacting with.
     */
    public static final int IMPORTANCE_FOREGROUND = 100;

    /**
     * Constant for {@link #importance}: This process is running a foreground
     * service, for example to perform music playback even while the user is
     * not immediately in the app.  This generally indicates that the process
     * is doing something the user actively cares about.
     */
    public static final int IMPORTANCE_FOREGROUND_SERVICE = 125;

    /**
     * Constant for {@link #importance}: This process is running the foreground
     * UI, but the device is asleep so it is not visible to the user.  This means
     * the user is not really aware of the process, because they can not see or
     * interact with it, but it is quite important because it what they expect to
     * return to once unlocking the device.
     */
    public static final int IMPORTANCE_TOP_SLEEPING = 150;

    /**
     * Constant for {@link #importance}: This process is running something
     * that is actively visible to the user, though not in the immediate
     * foreground.  This may be running a window that is behind the current
     * foreground (so paused and with its state saved, not interacting with
     * the user, but visible to them to some degree); it may also be running
     * other services under the system's control that it inconsiders important.
     */
    public static final int IMPORTANCE_VISIBLE = 200;

    /**
     * Constant for {@link #importance}: This process is not something the user
     * is directly aware of, but is otherwise perceptable to them to some degree.
     */
    public static final int IMPORTANCE_PERCEPTIBLE = 130;

    /**
     * Constant for {@link #importance}: This process is running an
     * application that can not save its state, and thus can't be killed
     * while in the background.
     * @hide
     */
    public static final int IMPORTANCE_CANT_SAVE_STATE = 170;

    /**
     * Constant for {@link #importance}: This process is contains services
     * that should remain running.  These are background services apps have
     * started, not something the user is aware of, so they may be killed by
     * the system relatively freely (though it is generally desired that they
     * stay running as long as they want to).
     */
    public static final int IMPORTANCE_SERVICE = 300;

    /**
     * Constant for {@link #importance}: This process process contains
     * background code that is expendable.
     */
    public static final int IMPORTANCE_BACKGROUND = 400;

    /**
     * Constant for {@link #importance}: This process is empty of any
     * actively running code.
     */
    public static final int IMPORTANCE_EMPTY = 500;

    /**
     * Constant for {@link #importance}: This process does not exist.
     */
    public static final int IMPORTANCE_GONE = 1000;
}
而adj值則在ProcessList中定義:
final class ProcessList {
// OOM adjustments for processes in various states:

// Adjustment used in certain places where we don't know it yet.
// (Generally this is something that is going to be cached, but we
// don't know the exact value in the cached range to assign yet.)
static final int UNKNOWN_ADJ = 16;

// This is a process only hosting activities that are not visible,
// so it can be killed without any disruption.
static final int CACHED_APP_MAX_ADJ = 15;
static final int CACHED_APP_MIN_ADJ = 9;

// The B list of SERVICE_ADJ -- these are the old and decrepit
// services that aren't as shiny and interesting as the ones in the A list.
static final int SERVICE_B_ADJ = 8;

// This is the process of the previous application that the user was in.
// This process is kept above other things, because it is very common to
// switch back to the previous app.  This is important both for recent
// task switch (toggling between the two top recent apps) as well as normal
// UI flow such as clicking on a URI in the e-mail app to view in the browser,
// and then pressing back to return to e-mail.
static final int PREVIOUS_APP_ADJ = 7;

// This is a process holding the home application -- we want to try
// avoiding killing it, even if it would normally be in the background,
// because the user interacts with it so much.
static final int HOME_APP_ADJ = 6;

// This is a process holding an application service -- killing it will not
// have much of an impact as far as the user is concerned.
static final int SERVICE_ADJ = 5;

// This is a process with a heavy-weight application.  It is in the
// background, but we want to try to avoid killing it.  Value set in
// system/rootdir/init.rc on startup.
static final int HEAVY_WEIGHT_APP_ADJ = 4;

// This is a process currently hosting a backup operation.  Killing it
// is not entirely fatal but is generally a bad idea.
static final int BACKUP_APP_ADJ = 3;

// This is a process only hosting components that are perceptible to the
// user, and we really want to avoid killing them, but they are not
// immediately visible. An example is background music playback.
static final int PERCEPTIBLE_APP_ADJ = 2;

// This is a process only hosting activities that are visible to the
// user, so we'd prefer they don't disappear.
static final int VISIBLE_APP_ADJ = 1;

// This is the process running the current foreground app.  We'd really
// rather not kill it!
static final int FOREGROUND_APP_ADJ = 0;

// This is a process that the system or a persistent process has bound to,
// and indicated it is important.
static final int PERSISTENT_SERVICE_ADJ = -11;

// This is a system persistent process, such as telephony.  Definitely
// don't want to kill it, but doing so is not completely fatal.
static final int PERSISTENT_PROC_ADJ = -12;

// The system process runs at the default adjustment.
static final int SYSTEM_ADJ = -16;

// Special code for native processes that are not being managed by the system (so
// don't have an oom adj assigned by the system).
static final int NATIVE_ADJ = -17;
}
Importance等級與adj值在ActivityManagerService中被關聯起來,相較於Importance等級而言adj值可以賦予我們更多的參考價值,從上述adj值的定義中我們可以看到,值越小優先級越高,比如native進程的adj值為-17,對於這個adj值的進程來說,系統根本不會動它一分一毫,實質上當進程的adj值去到2時系統就很少會因為其它原因而去殺死它。在平時的開發中,我們可以通過查看節點目錄proc下的相關進程來獲取其相應的adj值:(進程相關查看,請查看前面一篇文章)
adb shell
cat /proc/32366/oom_adj
注意“32366”為進程ID,你可以通過上面我們提到過的ps命令獲取相關進程的ID。
cat查看進程的adj值後我們會得到其返回結果“0”,說明當前進程正位於前台,此刻我們再按返回鍵退出應用後再次查看adj值發現其會變為“8”,也就是說進程優先級變得很低了。這裡需要注意的是上述操作均在原生的Android系統上執行,如果是其它的定制ROM則輸出及結果可能會有出入,adj值僅僅能作為一個參考而非絕對的常量。
上面說了這麼多,其實我們也差不多能總結出一套規律,要想讓我們的後台進程長存,我們首先要應付的就是系統的“自殺”機制,而後台進程被殺的首要原因就是我們的進程優先級太低同時系統可用資源太少,其次如果真的被系統干掉,那麼我們得重新拉起進程讓它重復上次的故事,因此我們的進程後台常駐策略最終可以歸結為兩點:
1.輕量化進程
所謂輕量化進程,其實就是迫使我們的進程占用盡量少的資源,但是我們知道的是一個運行中的App就算功能再少也會占用相當一部分資源,因此在這裡我們是不應該去想著讓我們的應用主進程在後台常駐,讓一個沒有看不見的界面在後台跑既沒意義也沒必要,因此大多數情況下我們都會使用一個新的進程去常駐在後台,而這個進程一般會持有一個Service,後台所有的龌龊事都會交由它去處理,畢竟在Android中干這種龌龊事的也只有Service了:
如上所示我們聲明一個services並通過startService的方式啟動它,在這個Service中我們通過一個死循環來不斷Toast一段信息:
package com.test.daemon.services;

import android.app.Service;
import android.content.Intent;
import android.os.Handler;
import android.os.IBinder;
import android.os.SystemClock;
import android.widget.Toast;

/**
 *
 * @author caoyinfei
 * @version [版本號, 2016/5/11]
 * @see [相關類/方法]
 * @since [產品/模塊版本]
 */
public class DaemonService extends Service {
    private static boolean sPower = true;
    private Handler handler = new Handler();

    @Override
    public IBinder onBind(Intent intent) {
        return null;
    }

    @Override
    public int onStartCommand(Intent intent, int flags, int startId) {
        new Thread(new Runnable() {
            @Override
            public void run() {
                while (sPower) {
                    if (System.currentTimeMillis() >= 123456789000000L) {
                        sPower = false;
                    }
                    handler.post(new Runnable() {
                        @Override
                        public void run() {
                            Toast.makeText(DaemonService.this, "====" +
                                    System.currentTimeMillis(), Toast.LENGTH_SHORT).show();
                        }
                    });
                    SystemClock.sleep(3000);
                }
            }
        }).start();
        return super.onStartCommand(intent, flags, startId);
    }
}
如果你想在進程中的Service裡處理更復雜的邏輯,務必盡量多地使用弱引用或軟引用,或者說盡量多地去置空一些不必要的引用並在需要的時候再賦值,其次Service本身也提供了onTrimMemory方法來告訴我們系統何時需要釋放掉不必要的資源,靈活使用這類方法可以最大程度的讓我們的後台Service長盛不衰。還是那句話,盡量讓我們的後台進程做更少的事情,及時釋放資源,才是硬道理。
2.被殺後重啟
可以這麼說,沒有任何一個應用進程可以做到永遠不被殺死,除非系統給你開了後門,進程被殺並不可怕,可怕的是殺掉後就永遠GG思密達了,所以如何使我們的進程可以在被殺後重啟呢?這就需要使用到一個叫做守護進程的東西,原理很簡單,多開一個進程,讓這個進程輪詢檢查目標進程是否存活,死了的話將其拉起,同時目標進程也需要做一個輪詢檢查守護進程是否存活,死了的話也將其拉起,相互喚醒一起龌龊。不過即便如此有時候意外也是難免的,在Android中我們還可以通過AlarmManager和系統廣播來在一定條件下喚醒逝去的進程。後面會詳細說明。
1 盡量保證進程不被殺死
我們上面曾說到adj值越小的進程越不容易被殺死,相對普通進程來說能讓adj去到0顯然是最完美的,可是我們如何才能讓一個完全沒有可見元素的後台進程擁有前台進程的狀態呢?Android給了Service這樣一個功能:startForeground,它的作用就像其名字一樣,將我們的Service置為前台,不過你需要發送一個Notification:
public class DaemonService extends Service {
    @Override
    public void onCreate() {
        if (Build.VERSION.SDK_INT >= Build.VERSION_CODES.JELLY_BEAN_MR2) {
            Notification.Builder builder = new Notification.Builder(this);
            builder.setSmallIcon(R.mipmap.ic_launcher);
            startForeground(250, builder.build());
        } else {
            startForeground(250, new Notification());
        }
    }
}
值得注意的是在Android 4.3以前我們可以通過構造一個空的Notification,這時通知欄並不會顯示我們發送的Notification,但是自從4.3以後谷歌似乎意識到了這個問題,太多流氓應用通過此方法強制讓自身悄無聲息置為前台,於是從4.3開始谷歌不再允許構造空的Notification,如果你想將應用置為前台那麼請發送一個可見的Notification以告知用戶你的應用進程依然在後台運行,這麼就比較惡心了,本來我的進程是想後台龌龊地運行,這下非要讓老子暴露出來,因此我們得想辦法將這個Notification給干掉。上面的代碼中我們在發送Notification的時候給了其一個唯一ID,那麼問題來了,假設我啟動另一個Service同時也讓其發送一個Notification使自己置為前台,並且這個Notification的標志值也跟上面的一樣,然後再把它取消掉再停止掉這個Service的前台顯示會怎樣呢:
public class DaemonService extends Service {
    @Override
    public void onCreate() {
        super.onCreate();
        if (Build.VERSION.SDK_INT >= Build.VERSION_CODES.JELLY_BEAN_MR2) {
            Notification.Builder builder = new Notification.Builder(this);
            builder.setSmallIcon(R.mipmap.ic_launcher);
            startForeground(250, builder.build());
            startService(new Intent(this, CancelService.class));
        } else {
            startForeground(250, new Notification());
        }
    }

    @Nullable
    @Override
    public IBinder onBind(Intent intent) {
        return null;
    }

    @Override
    public int onStartCommand(Intent intent, int flags, int startId) {
        return super.onStartCommand(intent, flags, startId);
    }
}
public class CancelService extends Service {
    @Override
    public IBinder onBind(Intent intent) {
       return null;
    }

    @Override
    public void onCreate() {
        super.onCreate();
    }
    @Override
    public int onStartCommand(Intent intent, int flags, int startId) {
        if (Build.VERSION.SDK_INT >= Build.VERSION_CODES.JELLY_BEAN_MR2) {
            Notification.Builder builder = new Notification.Builder(this);
            builder.setSmallIcon(R.mipmap.ic_launcher);
            startForeground(250, builder.build());
            new Thread(new Runnable() {
                @Override
                public void run() {
                    SystemClock.sleep(1000);
                    stopForeground(true);
                    NotificationManager manager =
                            (NotificationManager) getSystemService(NOTIFICATION_SERVICE);
                    manager.cancel(250);
                    stopSelf();
                }
            }).start();
        }
        return super.onStartCommand(intent, flags, startId);
    }
}
tips:
android:enabled=”true”這個屬性要注意一下:
該屬性用來標示,其它應用的組件是否可以喚醒service或者和這個service進行交互:true可以,false不可以。如果為false,只有同一個應用的組件或者有著同樣user ID的應用可以啟動這個service或者綁定這個service。
默認值根據當前service是否有intent filter來定。如果沒有任何filter意味著當前service只有在被詳細的描述class name後才會被喚醒。這意味這當前service只能在應用內部使用(因為其它應用不知道這個class name).所以在這種情況下它的默認值為 false.從另一方面講,如果至少有一個filter的話那麼就意味著這個service可以被外部應用使用,這種情況下默認值為true。
其實,不只有這個屬性可以指定service是否暴露給其它應用。你也可以使用permission來限制外部實體喚醒當前service
如上代碼所示,我們先在DaemonService中發送一個Notification並將其置為前台,而後如果是4.3及其以上的版本的話我們就start另外一個CancelService,這個CancelService的邏輯很簡單,發送與DaemonService中ID相同的Notification然後將其取消並取消自己的前台顯示,然後停止,大家看到這裡可能覺得很奇葩,其實我們就是自導自演裝了一次逼。其實就是個小技巧而已,雖然我們通過CancelService干掉了前台顯示需要的Notification,但是,請大家查看一下當前進程的adj值,你就會發現,我們DaemonService所在的進程竟然還是可見進程!
 vcjD19S8urXEuvPMqL34s8yzo9eko6y1q8rH1eK49re9t6jT0Lj20KHQobXEYnVno6zU2tK70KnK1rv6yc+jrLeiy83HsMyozajWqrvhu73Q0cnosbiyorXjwcHGwcS7o6zV4tH5u+G63LrEtee2+MfS1Nq158G/udzA7b3nw+bPtc2zu7m74c2zvMa1vcTjtcS9+LPMtePBwcbBxLu1xLTOyv2jrLK7yse63LrDoaM8L3A+DQo8cD6z/cHLyrlTZXJ2aWNl1sPOqsewzKjP1Mq+wLTM4ciozeKjrLu509C63LbgsrvKx7rcyrXTw7XEt73KvaOsscjI58zhyf3Txc/IvLa6zcq508NwZXJzaXN0ZW50yKjP3rXIo7o8L3A+DQo8cHJlIGNsYXNzPQ=="brush:java;">
不過這些方法意義都不會很大。
2 進程被殺死後復活
任何一個普通的應用進程都會有被干掉的那麼一天,除非你跟系統有關系有契約,說白了就是ROM是定制的且可以給你開特殊權限,不然的話,系統總會在某個時刻因為某些原因把你殺掉,被殺掉不可怕,可怕的是被殺掉後就再也活不過來了……因此,我們得制定各種策略,好讓進程能在被殺後可以自啟。
1)Service重啟
Android的Service是一個非常特殊的組件,按照官方的說法是用於處理應用一些不可見的後台操作,對於Service我們經常使用,也知道通過在onStartCommand方法中返回不同的值可以告知系統讓系統在Service因為資源吃緊被干掉後可以在資源不緊張時重啟:
@Override
public int onStartCommand(Intent intent, int flags, int startId) {
    return START_REDELIVER_INTENT;
}
關於onStartCommand方法的返回值,系統一共提供了四個:
START_STICKY
如果Service進程因為系統資源吃緊而被殺掉,則保留Service的狀態為起始狀態,但不保留傳遞過來的Intent對象,隨後當系統資源不緊張時系統會嘗試重新創建Service,由於服務狀態為開始狀態,所以創建服務後一定會調用onStartCommand方法,如果在此期間沒有任何啟動命令被傳遞到Service,那麼參數Intent將為null。
START_STICKY_COMPATIBILITY
START_STICKY的兼容版本,不同的是其不保證服務被殺後一定能重啟。
START_NOT_STICKY
與START_STICKY恰恰相反,如果返回該值,則在執行完onStartCommand方法後如果Service被殺掉系統將不會重啟該服務。
START_REDELIVER_INTENT
同樣地該值與START_STICKY不同的是START_STICKY重啟後不會再傳遞之前的Intent,但如果返回該值的話系統會將上次的Intent重新傳入。
一般情況下,作為一個後台常駐的Service,個人建議是盡量不要傳遞Intent進來,避免有時候邏輯不好處理。同時需要注意的是,默認情況下Service的返回值就是START_STICKY或START_STICKY_COMPATIBILITY:
因此如果沒有什麼特殊原因,我們也沒必要更改。
雖然Service默認情況下是可以被系統重啟的,但是在某些情況or某些定制ROM上會因為各種原因而失效,因此我們不能單靠這個返回值來達到進程重啟的目的。
2)進程守護
關於進程守護其實也不是什麼高深的技術,其邏輯也很簡單,AB兩個進程,A進程裡面輪詢檢查B進程是否存活,沒存活的話將其拉起,同樣B進程裡面輪詢檢查A進程是否存活,沒存活的話也將其拉起,而我們的後台邏輯則隨便放在某個進程裡執行即可,一個簡單的例子是使用兩個Service:
使用兩個進程分別裝載兩個Service,在兩個Service中開輪詢,互相喚醒:
public class DaemonService extends Service {
    private static boolean isRunning;

    @Override
    public IBinder onBind(Intent intent) {
        return null;
    }

    @Override
    public int onStartCommand(Intent intent, int flags, int startId) {
        if (!isRunning) {
            isRunning = true;
            new Thread(new Runnable() {
                @Override
                public void run() {
                   startService(new Intent(DaemonService.this, ProtectService.class));
                   SystemClock.sleep(3000);
                }
            }).start();
        }
        return super.onStartCommand(intent, flags, startId);
    }
}
public class ProtectService extends Service {
    private static boolean isRunning;

    @Override
    public IBinder onBind(Intent intent) {
        return null;
    }

    @Override
    public int onStartCommand(Intent intent, int flags, int startId) {
        if (!isRunning) {
            isRunning = true;
            new Thread(new Runnable() {
                @Override
                public void run() {
                    SystemClock.sleep(1500);
                    startService(new Intent(ProtectService.this, DaemonService.class));
                }
            }).start();
        }
        return super.onStartCommand(intent, flags, startId);
    }
}
在原生系統及相當一部分的ROM下上述方法就已經很有用了,即便應用主進程被用戶在Recent Task中被清理也無妨上述進程的進行,該方法直至Android 6.0也相當有效,但是對於一些深度定制的ROM就顯得很雞肋,比如魅族、小米。
有些時候,我們會使用一個更為純淨的進程來作為守護進程而非借助Service,你可以使用C層fork,也可以直接Java創建一個新的進程,在5.0以前的版本中,這兩種方式創建的進程有一定的區別,不過5.0以後已經變得不再那麼重要了,不依賴Android環境的進程唯一的好處是可以做到更輕量,除此之外並無卵用,這裡以Java為例,使用Java的方式創建進程有兩種途徑,一是通過Runtime;二是通過ProcessBuilder,後者提供了更多的選擇,使用ProcessBuilder創建進程的過程也很簡單,三部曲:構建環境變量、指定用戶目錄、執行命令:(這邊不詳細介紹了)
3)Receiver觸發
使用Receiver來檢測目標進程是否存活不失為一個好方法,靜態注冊一系列廣播,什麼開機啟動、網絡狀態變化、時區地區變化、充電狀態變化等等,這聽起來好像很6,而且在大部分手機中都是可行的方案,但是對於深度定制的ROM,是的,又是深度定制,你沒有看錯,而且代表性人物還是魅族、小米,這兩個業界出了名的喜歡“深度定制”系統。
大部分手機可行的方法如下:
在眾多的Intent的action動作中,Intent.ACTION_TIME_TICK是比較特殊的一個,根據SDK描述:
Broadcast Action: The current time has changed. Sent every minute. You can not receive this through components declared in manifests, only by exlicitly registering for it withContext.registerReceiver()
意思是說這個廣播動作是以每分鐘一次的形式發送。但你不能通過在manifest.xml裡注冊的方式接收到這個廣播,只能在代碼裡通過registerReceiver()方法注冊。
1.在manifest裡面注冊TIME_TICK廣播
2.服務裡面注冊廣播
 /**
 * 調用startForeground,提高進程adj值
 * 該進程為需要保護的進程
 */
public class DaemonService extends Service {
    private static boolean isRunning;

    AlarmManager mAlarmManager = null;
    PendingIntent mPendingIntent = null;

    @Override
    public void onCreate() {
        super.onCreate();
        //服務啟動廣播接收器,使得廣播接收器可以在程序退出後在後天繼續執行,接收系統時間變更廣播事件
        TimeChangeReceiver receiver=new TimeChangeReceiver();
        registerReceiver(receiver,new IntentFilter(Intent.ACTION_TIME_TICK));
    }
3.廣播裡面判斷服務是否存在,不存在則開啟服務。
public class TimeChangeReceiver extends BroadcastReceiver {

    @Override
    public void onReceive(Context context, Intent intent) {
        //啟動service
        boolean isServiceRunning = false;
        System.out.println("TimeChangeReceiver");
        if (intent.getAction().equals(Intent.ACTION_TIME_TICK)) {
            //檢查Service狀態
            ActivityManager manager = (ActivityManager) context.getSystemService(Context.ACTIVITY_SERVICE);
            for (ActivityManager.RunningServiceInfo service : manager.getRunningServices(Integer.MAX_VALUE)) {
                if ("so.xxxx.xxxxService".equals(service.service.getClassName())) {
                    isServiceRunning = true;
                }
            }
            if (!isServiceRunning) {
                Intent i = new Intent(context, DaemonService.class);
                context.startService(i);
            }
        }
    }
}
自從Android 3.1開始系統對我們的應用增加了一種叫做STOPPED的狀態,什麼叫STOPPED?就是安裝了之後從未啟動過的,大家可能經常在網上看到對開機廣播的解釋,說要想應用正確接收到開機廣播那麼就得先啟動一下應用,這個說法的技術支持就來源於此,因為自Android 3.1後所有的系統廣播都會在Intent添加一個叫做FLAG_EXCLUDE_STOPPED_PACKAGES的標識,說白了就是所有處於STOPPED狀態的應用都不可以接收到系統廣播,是不是感到很蛋疼菊緊?沒事、更蛋疼的還在後面。在原生的系統中,當應用初次啟動後就會被標識為非STOPPED狀態,而且再也沒有機會被打回原形除非重新安裝應用,但是,但是,但是,一些深(fang)度(ni)定(gou)制(pi)的ROM按耐不住了,這樣的話,如果每個應用都這麼搞豈不是後台一大堆進程在跑?所以這些深度定制的ROM會在它們的清理邏輯中,比如小米的長按Home,魅族的Recent Task加入了將應用重置為STOPPED的邏輯,也就是直接或間接地調用ActivityManagerService中的forceStopPackageLocked:
private void forceStopPackageLocked(final String packageName, int uid, String reason) {
    // 省略一行代碼……

    Intent intent = new Intent(Intent.ACTION_PACKAGE_RESTARTED,
            Uri.fromParts("package", packageName, null));

    // 省略多行代碼……

    broadcastIntentLocked(null, null, intent,
            null, null, 0, null, null, null, AppOpsManager.OP_NONE,
            null, false, false, MY_PID, Process.SYSTEM_UID, UserHandle.getUserId(uid));
}
可以看到上面的代碼裡發送了一個ACTION_PACKAGE_RESTARTED廣播,這個廣播會調用broadcastIntentLocked等方法來將相應的應用重置為STOPPED狀態,因此一旦我們的應用被重置為STOPPED則再也無法接受到相應的系統廣播除非再次啟動一下應用清除掉STOPPED標識。
4) AlarmManager or JobScheduler循環觸發
使用AlarmManage間隔一定的時間來檢測並喚醒進程不失為一個好方法,雖然說從Android 4.4和小米的某些版本開始AlarmManage已經變得不再准確但是對我們拉活進程來說並不需要太精確的時間,對於4.4以前的版本,我們只需通過AlarmManage的setRepeating方法即可達到目的:
 Intent sendIntent = new Intent(getApplicationContext(), DaemonService.class);
        mAlarmManager = (AlarmManager)getSystemService(ALARM_SERVICE);
        mPendingIntent = PendingIntent.getService(this, 0, sendIntent, PendingIntent.FLAG_UPDATE_CURRENT);
        long now = System.currentTimeMillis();
        mAlarmManager.setInexactRepeating(AlarmManager.RTC, now, 60000, mPendingIntent);
而對於4.4及其以上的版本來說如果我們想精確的方式重復啟動的話,就得使用一點小手段,在4.4及其以上的版本中Android提供給我們一個新的API:setExact,顧名思義就是精確啟動,但是與之前版本不同的是,4.4開始並不能精確地重復啟動,也就是不能像setRepeating那樣,setExact只能被喚醒一次,那麼該如何做到重復精確呢?其實很簡單,我們每次通過AlarmManager喚醒時都發送一個廣播,在這個廣播裡我們處理一些必要的邏輯,爾後又設置一次AlarmManager,如此往復循環,實質就是對廣播做一個遞歸以達到目的:
public class DReceiver extends BroadcastReceiver {
    private PendingIntent mPendingIntent;
    private AlarmManager am;

    @Override
    public void onReceive(Context context, Intent intent) {
        if (null == intent) return;
        if (null == mPendingIntent) {
            Intent i = new Intent(context, DReceiver.class);
            i.putExtra("time", System.currentTimeMillis() + 3000);
            mPendingIntent = PendingIntent.getService(context, 0x123, i,
                    PendingIntent.FLAG_UPDATE_CURRENT);
        }
        if (null == am)
            am = (AlarmManager) context.getSystemService(Context.ALARM_SERVICE);
        long time = intent.getLongExtra("time", System.currentTimeMillis());
        am.setExact(AlarmManager.ELAPSED_REALTIME_WAKEUP, time, mPendingIntent);
    }
}
上述代碼中我們使用Intent來傳遞數據,事實上我們應該使用持久化的數據來存儲這個time值,盡量少用甚至不用Intent。
看到這裡很多朋友會問是不是OK了啊?很遺憾地告訴你NO!為什麼呢?不知道大家是否在開發的過程中遇到這樣的問題,你設置的Alarm在應用退出後發現過不了多久居然就沒了,特別是在某些深度定制的系統上,上面我們曾提到Receiver如果應用被置為STOPPED狀態就再也無法接收到廣播,很不幸地告訴你AlarmManager也一樣,在AlarmManagerService中有一個BroadcastReceiver,這個BroadcastReceiver會接收上面我們曾說的ACTION_PACKAGE_RESTARTED廣播:
class UninstallReceiver extends BroadcastReceiver {
    public UninstallReceiver() {
        IntentFilter filter = new IntentFilter();
        filter.addAction(Intent.ACTION_PACKAGE_REMOVED);
        filter.addAction(Intent.ACTION_PACKAGE_RESTARTED);
        filter.addAction(Intent.ACTION_QUERY_PACKAGE_RESTART);
        filter.addDataScheme("package");
        getContext().registerReceiver(this, filter);

        // 省去幾行代碼……
    }

    @Override
    public void onReceive(Context context, Intent intent) {
        synchronized (mLock) {
            String action = intent.getAction();
            String pkgList[] = null;
            if (Intent.ACTION_QUERY_PACKAGE_RESTART.equals(action)) {
                // 省去幾行代碼……

            } else if (Intent.ACTION_EXTERNAL_APPLICATIONS_UNAVAILABLE.equals(action)) {
                pkgList = intent.getStringArrayExtra(Intent.EXTRA_CHANGED_PACKAGE_LIST);
            } else if (Intent.ACTION_USER_STOPPED.equals(action)) {
                // 省去幾行代碼……

            } else if (Intent.ACTION_UID_REMOVED.equals(action)) {
                // 省去幾行代碼……

            } else {
                // 省去幾行代碼……

                Uri data = intent.getData();
                if (data != null) {
                    String pkg = data.getSchemeSpecificPart();
                    if (pkg != null) {
                        pkgList = new String[]{pkg};
                    }
                }
            }
            if (pkgList != null && (pkgList.length > 0)) {
                for (String pkg : pkgList) {
                    removeLocked(pkg);

                    // 省去幾行代碼……
                }
            }
        }
    }
}
從上述的源碼來看當該廣播接收者收到ACTION_PACKAGE_RESTARTED廣播時會執行removeLocked這個方法,這個方法就像它的名字那樣會移除掉與應用相關的Alarm並刷新Alarm的狀態:
void removeLocked(String packageName) {
    boolean didRemove = false;
    for (int i = mAlarmBatches.size() - 1; i >= 0; i--) {
        Batch b = mAlarmBatches.get(i);
        didRemove |= b.remove(packageName);
        if (b.size() == 0) {
            mAlarmBatches.remove(i);
        }
    }
    for (int i = mPendingWhileIdleAlarms.size() - 1; i >= 0; i--) {
        if (mPendingWhileIdleAlarms.get(i).operation.getTargetPackage().equals(packageName)) {
            mPendingWhileIdleAlarms.remove(i);
        }
    }
    if (didRemove) {
        rebatchAllAlarmsLocked(true);
        rescheduleKernelAlarmsLocked();
        updateNextAlarmClockLocked();
    }
}
因此,對於某些手機可以在清理應用時將其置為STOPPED狀態而言,即便設置AlarmManager也是沒卵用的。
與AlarmManager類似的在5.0新鮮出爐的JobScheduler相較而言要比AlarmManager好一些,鑒於兩者使用原理類似,這裡就不再逼逼了。
5)與系統Service捆綁
Android系統提供給我們一系列的Service,注意這裡我們所指的系統Service並非“SystemService”提供的那些玩意,而是類似於系統廣播的便於我們使用的Service,常見常用的就是IntentService,當然還有其它更多更不常用的系統Service,那麼為什麼要在這裡提到這玩意呢?因為某些系統Service一旦綁定就像擁有開了掛一樣的權限,這在大部分機型包括某些深度定制系統上簡直就像BUG般存在,以最BUG的NotificationListenerService為例,大家可能很少會用到這玩意,這玩意是用來讀取通知的,也就是說只要是通知不管你誰發的,NotificationListenerService都可以檢測到,使用它也很簡單,和IntentService一樣定義一個類繼承一下即可:
package teach.focus.notificatio;

import android.service.notification.NotificationListenerService;
import android.service.notification.StatusBarNotification;

public class DService extends NotificationListenerService {
    @Override
    public void onNotificationPosted(StatusBarNotification sbn) {
    }

    @Override
    public void onNotificationRemoved(StatusBarNotification sbn) {
    }
}
裡面什麼邏輯都不用實現,是的你沒聽錯,什麼邏輯都不需要,然後在AndroidManifest中聲明權限:
這裡為了區別主進程,我將該Service置於一個單獨的進程中,然後啟動應用,注意,這裡我們的應用什麼邏輯都沒有,剔除掉上面所做的所有有關進程保護的邏輯,運行之後你發現看不到你NotificationListenerService所在的進程:
先別急,NotificationListenerService是個特殊的系統Service,需要非常特別的權限,需要你手動在“設置-提示音和通知-通知使用權限”中打開,注意這個“通知使用權限”選項,如果你設備裡沒有需要使用通知使用權限換句話說就是沒有含有NotificationListenerService的應用的話,這個設置選項是不可見的:
所以,你想好如何騙你的用戶勾選這個勾勾了麼,一旦勾上,一發不可收拾,這時你就會看到我們的進程啟動起來了:
好了,這時候,見證奇跡的時候來了,不管是某米、某族還是某某,請嘗試下它們的一鍵清理,你會發現不管怎麼殺,我們的進程都還在,除了一小部分名不經傳的手機因為修改系統邏輯將其殺死外,絕大部分手機都不會殺掉該進程,為什麼呢?好事的朋友一定會去check該進程的adj值:
root@vbox86p:/ # ps|grep notification
u0_a1701 10615 286 762696 27832 sys_epoll_ 00000000 S teach.focus.notification
root@vbox86p:/ # cat /proc/10615/oom_adj
0
你會發現我們的進程被置為前台進程了,而且不僅僅是這樣哦,即便你重啟設備開機,它也會首先被啟動,因為其內部邏輯會使其在系統啟動時綁定並開始監聽通知,當然我們這裡並沒有任何關於通知的邏輯,那麼你可能會問這又有什麼用呢?我們又不能在NotificationListenerService裡處理與通知不相關的邏輯,沒錯,是這樣,但是我們也沒必要啊,我們只需新建一個Service並使其與NotificationListenerService在同一進程下,那麼我們的這個Sefvice不就一樣不死了嗎:
<code class=" hljs xml"><manifest xmlns:android="http://schemas.android.com/apk/res/android" package="teach.focus.notification">

    <application>
        <service android:name=".DaemonService" android:process=":service">
        <service android:name=".DService" android:permission="android.permission.BIND_NOTIFICATION_LISTENER_SERVICE" android:process=":service">
            <intent-filter>
                <action android:name="android.service.notification.NotificationListenerService">
            </action></intent-filter>
        </service>
    </service></application>
</manifest></code>
這種方式唯一的一個缺點就是你需要欺騙用戶手動去開啟通知權限,需要給用戶一個合理的理由,所以對於跟通知權限根本不沾邊的應用想想還是算了吧。
以多種方式去相互喚醒相互拉活是目前來說最穩定最安全的方式,各大牛逼點的應用都有類似行為,當然對於很多小應用來說,依然可以使用一些第三方的網絡服務,比如XX推送,一旦設備上的某應用通過XX的推送獲得消息時,是可以間接喚醒其它應用並推送與其相關的消息的。前提是某推送服務也做了保活措施。
 Android中實現多行、水平滾動的分頁的Gridview實例源碼
功能要求: (1)比如每頁顯示2X2,總共2XN,每個item顯示圖片+文字(點擊有鏈接)。 如果單行水平滾動,可以用Horizontalscrollview實現。 如果
 android之View和LinearLayout的重寫(實現背景氣泡和波紋效果)
前兩天看了仿android L裡面水波紋效果的兩篇博客 Android L中水波紋點擊效果的實現 Android自定義組件系列【14】—&mda
 Android 實現切圓圖作為頭像使用實例
Android 切圓圖效果圖如下:MyView 類public class MyView extends View { Bitmap bmp; Paint paint
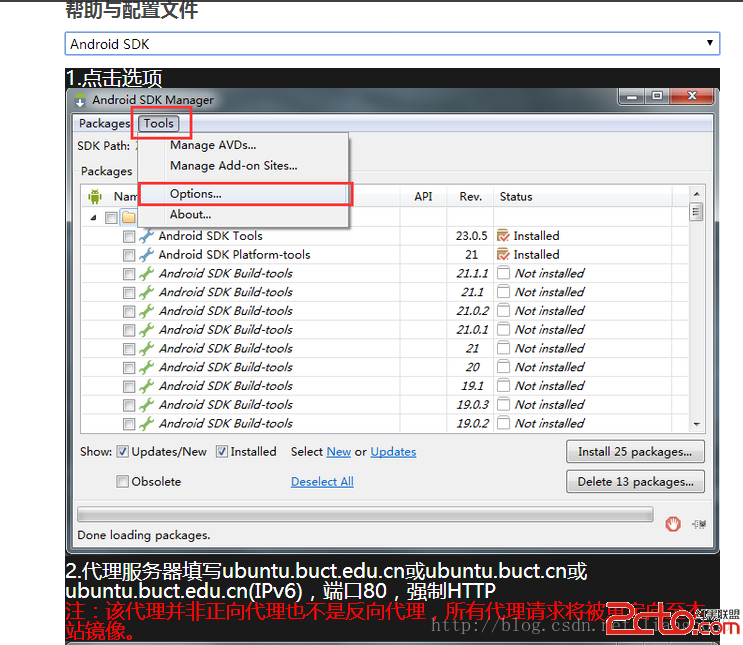 解決國內android sdk無法更新,google不能的簡單辦法
在國內屏蔽了許多外國網站,連google 和android都屏蔽了,做程序員的就苦了!不過車到山前必有路,我們也有我們的辦法!首先要先進去google等的一系列網站,那麼