編輯:關於Android編程
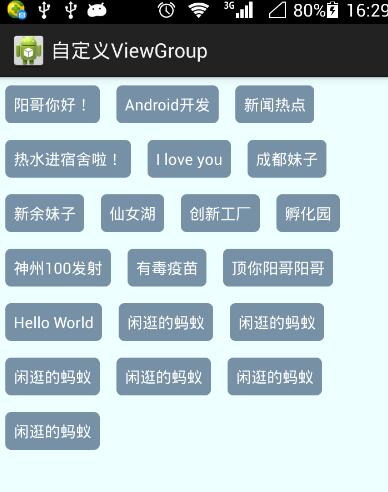
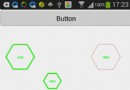
前面在學習鴻洋大神的一些自定義的View文章,看到了自定義ViewGroup實現浮動標簽,初步看了下他的思路以及結合自己的思路完成了自己的浮動標簽的自定義ViewGroup。目前實現的可以動態添加標簽、可點擊。效果圖如下:
1、思路
首先在onMeasure方法中測量ViewGroup的寬和高,重點是處理當我們自定義的ViewGroup設置為wrap_content的情況下,如何去測量其大小的問題。當我們自定義的ViewGroup設置為wrap_content時,我們需要讓子View先去測量自己,當子View測量完後,再通過子View的getMeasuredWidth和getMeasureHeight方法獲得其子View的寬和高。每次在測量一個子View之前,都需要判斷如果加入該子View,當前行是否能夠容納下該子View,如果不能,則需要新開一行,並記錄下當前行的最大高度。
在onLayout方法中,核心人物是給每個子View擺放位置,也就是為該ViewGroup中每個子View找到盒子模型上面的兩個點也就是左上角和右下角,即點(l,t)和點(r,b),確定了兩個點,子View的位置也就確定了。
2、實現
基本思路有了就可以嘗試實現了,代碼如下:
自定義的ViewGroup:
/**
 * 流式標簽(動態的,根據傳入的數據動態添加標簽)
 */
public class DynamicTagFlowLayout extends ViewGroup {

 private List<String> mTags = new ArrayList<String>();

 public DynamicTagFlowLayout(Context context, AttributeSet attrs, int defStyle) {
 super(context, attrs, defStyle);
 }

 public DynamicTagFlowLayout(Context context, AttributeSet attrs) {
 super(context, attrs);
 }

 public DynamicTagFlowLayout(Context context) {
 super(context);
 }

 @Override
 protected void onMeasure(int widthMeasureSpec, int heightMeasureSpec) {
 int widthMode = MeasureSpec.getMode(widthMeasureSpec);
 int widthSize = MeasureSpec.getSize(widthMeasureSpec);
 int heightMode = MeasureSpec.getMode(heightMeasureSpec);
 int heightSize = MeasureSpec.getSize(heightMeasureSpec);

 //當前ViewGroup的總高度
 int totalHeight= 0;
 //所有行中的最大寬度
 int maxLineWidth = 0;

 //當前行的最大高度
 int lineMaxHeight = 0;
 //當前行的總寬度
 int currentLineWidth = 0;

 //每個childView所占用的寬度
 int childViewWidthSpace = 0;
 //每個childView所占用的高度
 int childViewHeightSpace = 0;

 int count = getChildCount();
 MarginLayoutParams layoutParams;

 for(int i = 0; i < count; i++){
  View child = getChildAt(i);

  if(child.getVisibility() != View.GONE){//只有當這個View能夠顯示的時候才去測量
  //測量每個子View,以獲取子View的寬和高
  measureChild(child, widthMeasureSpec, heightMeasureSpec);

  layoutParams = (MarginLayoutParams) child.getLayoutParams();

  childViewWidthSpace = child.getMeasuredWidth() + layoutParams.leftMargin + layoutParams.rightMargin;
  childViewHeightSpace = child.getMeasuredHeight() + layoutParams.topMargin + layoutParams.bottomMargin;

  if(currentLineWidth + childViewWidthSpace > widthSize){//表示如果當前行再加上現在這個子View,就會超出總的規定寬度,需要另起一行
   totalHeight += lineMaxHeight;
   if(maxLineWidth < currentLineWidth){//如果行的最長寬度發生了變化,更新保存的最長寬度
   maxLineWidth = currentLineWidth;
   }
   currentLineWidth = childViewWidthSpace;//另起一行後,需要重置當前行寬
   lineMaxHeight = childViewHeightSpace;
  }else{//表示當前行可以繼續添加子元素
   currentLineWidth += childViewWidthSpace;
   if(lineMaxHeight < childViewHeightSpace){
   lineMaxHeight = childViewHeightSpace;
   }
  }
  }
 }

 setMeasuredDimension(widthMode == MeasureSpec.EXACTLY ? widthSize : maxLineWidth, heightMode == MeasureSpec.EXACTLY ? heightSize : totalHeight);

 }

 @Override
 protected void onLayout(boolean changed, int l, int t, int r, int b) {
 //當前是第幾行
 int currentLine = 1;
 //存放每一行的最大高度
 List<Integer> lineMaxHeightList = new ArrayList<Integer>();

 //每個childView所占用的寬度
 int childViewWidthSpace = 0;
 //每個childView所占用的高度
 int childViewHeightSpace = 0;

 //當前行的最大高度
 int lineMaxHeight = 0;
 //當前行的總寬度
 int currentLineWidth = 0;

 int count = getChildCount();
 MarginLayoutParams layoutParams;

 for(int i = 0; i < count; i++){
  int cl= 0, ct = 0, cr = 0, cb = 0;
  View child = getChildAt(i);
  if(child.getVisibility() != View.GONE){//只有當這個View能夠顯示的時候才去測量

  layoutParams = (MarginLayoutParams) child.getLayoutParams();
  childViewWidthSpace = child.getMeasuredWidth() + layoutParams.leftMargin + layoutParams.rightMargin;
  childViewHeightSpace = child.getMeasuredHeight() + layoutParams.topMargin + layoutParams.bottomMargin;

  System.out.println("getWidth()---->"+getWidth());

  if(currentLineWidth + childViewWidthSpace > getWidth()){//表示如果當前行再加上現在這個子View,就會超出總的規定寬度,需要另起一行
   lineMaxHeightList.add(lineMaxHeight);//此時先將這一行的最大高度加入到集合中
   //新的一行,重置一些參數
   currentLine++;
   currentLineWidth = childViewWidthSpace;
   lineMaxHeight = childViewHeightSpace;

   cl = layoutParams.leftMargin;
   if(currentLine > 1){
   for(int j = 0; j < currentLine - 1; j++){
    ct += lineMaxHeightList.get(j);
   }
   ct += layoutParams.topMargin ;
   }else{
   ct = layoutParams.topMargin;
   }
  }else{//表示當前行可以繼續添加子元素
   cl = currentLineWidth + layoutParams.leftMargin;
   if(currentLine > 1){
   for(int j = 0; j < currentLine - 1; j++){
    ct += lineMaxHeightList.get(j);
   }
   ct += layoutParams.topMargin;
   }else{
   ct = layoutParams.topMargin;
   }
   currentLineWidth += childViewWidthSpace;
   if(lineMaxHeight < childViewHeightSpace){
   lineMaxHeight = childViewHeightSpace;
   }
  }

  cr = cl + child.getMeasuredWidth();
  cb = ct + child.getMeasuredHeight();

  child.layout(cl, ct, cr, cb);

  }
 }
 }

 @Override
 public LayoutParams generateLayoutParams(AttributeSet attrs) {
 return new MarginLayoutParams(getContext(), attrs);
 }

 public void setTags(List<String> tags){
 if(tags!= null){
  mTags.clear();
  mTags.addAll(tags);
  for(int i = 0; i < mTags.size(); i++){
  TextView tv = new TextView(getContext());
  MarginLayoutParams lp = new MarginLayoutParams(MarginLayoutParams.WRAP_CONTENT, MarginLayoutParams.WRAP_CONTENT);
  lp.setMargins(15, 15, 15, 15);
//  lp.width = MarginLayoutParams.WRAP_CONTENT;
//  lp.height = MarginLayoutParams.WRAP_CONTENT;
  tv.setLayoutParams(lp);
  tv.setBackgroundResource(R.drawable.tv_bg);
  /*
   * setPadding一定要在setBackgroundResource後面使用才有效!!!
   * http://stackoverflow.com/questions/18327498/setting-padding-for-textview-not-working
   */
  tv.setPadding(15, 15, 15, 15);
  tv.setTextColor(Color.WHITE);

  tv.setText(mTags.get(i));

  tv.setOnClickListener(new OnClickListener() {
   @Override
   public void onClick(View v) {
   if(listener != null){
    listener.onClick(v);
   }
   }
  });

  addView(tv);
  }
  requestLayout();
 }
 }

 private OnTagItemClickListener listener;
 public interface OnTagItemClickListener{
 public void onClick(View v);
 }
 public void setOnTagItemClickListener(OnTagItemClickListener l){
 listener = l;
 }

}
MainActivity:
public class MainActivity extends Activity {

 private DynamicTagFlowLayout dynamicTagFlowLayout;

 List<String> tags = new ArrayList<String>();

 @Override
 protected void onCreate(Bundle savedInstanceState) {
 super.onCreate(savedInstanceState);
 setContentView(R.layout.activity_dynamic_tagflowlayout);

 dynamicTagFlowLayout = (DynamicTagFlowLayout) findViewById(R.id.dynamic_tag);
 dynamicTagFlowLayout.setOnTagItemClickListener(new OnTagItemClickListener() {
  @Override
  public void onClick(View v) {
  TextView tv = (TextView) v;
  Toast.makeText(MainActivity.this, tv.getText().toString(), Toast.LENGTH_SHORT).show();
  }
 });

 initData();
 dynamicTagFlowLayout.setTags(tags);
 }

 private void initData() {
 tags.add("陽哥你好!");
 tags.add("Android開發");
 tags.add("新聞熱點");
 tags.add("熱水進宿捨啦!");
 tags.add("I love you");
 tags.add("成都妹子");
 tags.add("新余妹子");
 tags.add("仙女湖");
 tags.add("創新工廠");
 tags.add("孵化園");
 tags.add("神州100發射");
 tags.add("有毒疫苗");
 tags.add("頂你陽哥陽哥");
 tags.add("Hello World");
 tags.add("閒逛的螞蟻");
 tags.add("閒逛的螞蟻");
 tags.add("閒逛的螞蟻");
 tags.add("閒逛的螞蟻");
 tags.add("閒逛的螞蟻");
 tags.add("閒逛的螞蟻");
 }

}
源碼下載:Android流式標簽可動態添加FlowLayout
以上就是本文的全部內容,希望對大家的學習有所幫助,也希望大家多多支持本站。
 Android手勢密碼的實現
一、大致界面介紹:圖1圖2圖3圖4圖1:手勢密碼繪制界面 【主要是繪制上方的9個提示圖標和9個宮格密碼圖標】圖2:設置手勢密碼 【監聽手勢的輸入,TouchEvent的事
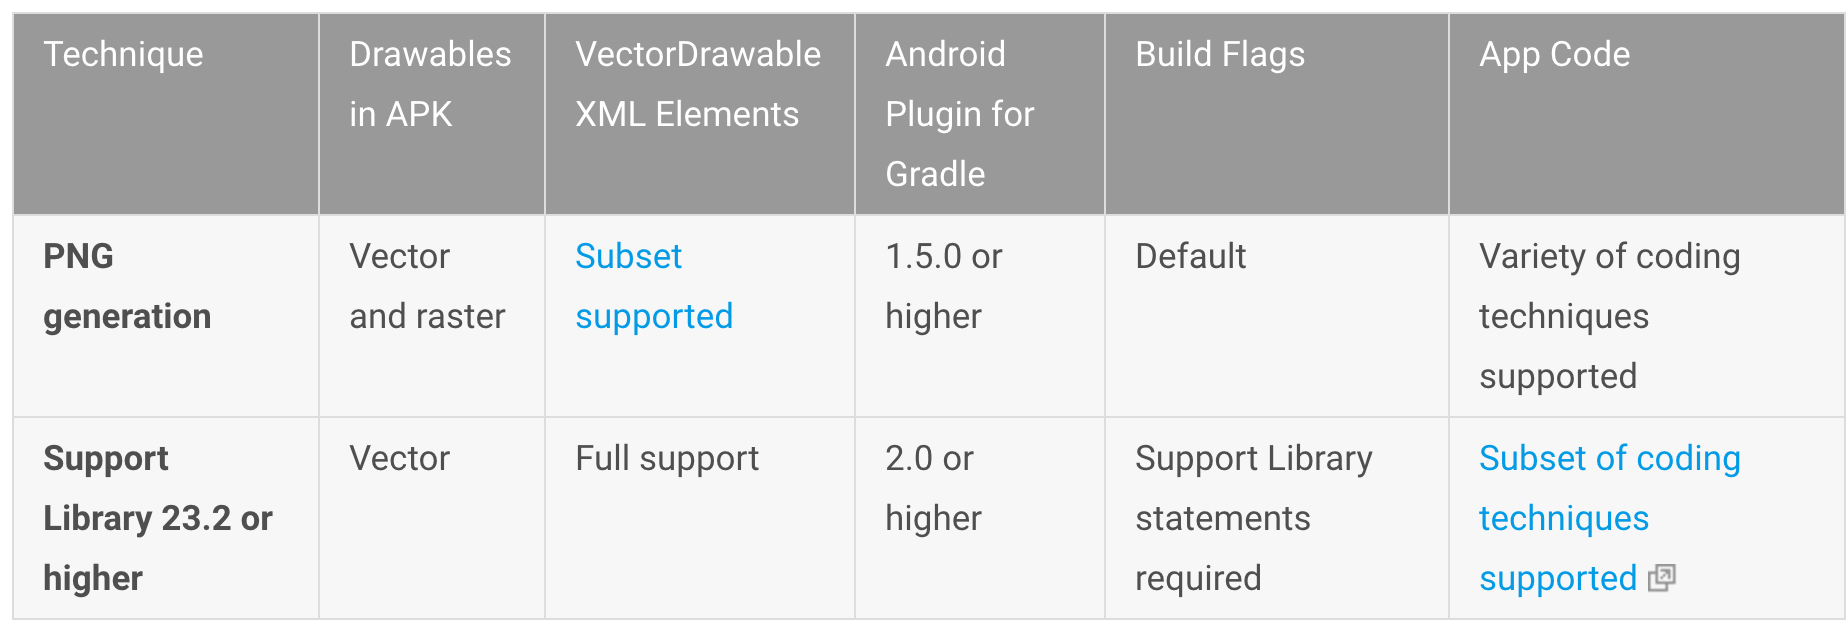 Android Studio官方文檔之添加多種密度的矢量圖形
Android Studio中有一個被叫矢量工具(Vector Asset Studio)它能幫助我們增加多種圖標和導入可以拉伸的矢量圖形文件作為矢量資源圖片在項目中。利
 Android Wear 控件——WearableListView(附Demo)
WearableListView是適用於android小型設備如智能手表顯示列表的組件,可以村子滾動,非常方便的在只能手表上顯示列表控件,每次顯示三個列表在屏幕中間位置。
 自定義Android六邊形進度條(附源碼)
本文實例講述了Android自定義圓形進度條,分享給大家供大家參考。具體如下:大家也可以參考這兩篇文章進行學習: 《自定義Android圓形進度條(附源碼)》