編輯:關於Android編程
說到圖片,第一反映就是bitmap,那就先來認識一下bitmap
Bitmap是Android系統中的圖像處理的最重要類之一。用它可以獲取圖像文件信息,進行圖像剪切、旋轉、縮放等操作,並可以指定格式保存圖像文件
Bitmap實現在android.graphics包中。但是Bitmap類的構造函數是私有的,外面並不能實例化,只能是通過JNI實例化。這必然是 某個輔助類提供了創建Bitmap的接口,而這個類的實現通過JNI接口來實例化Bitmap的,這個類就是BitmapFactory
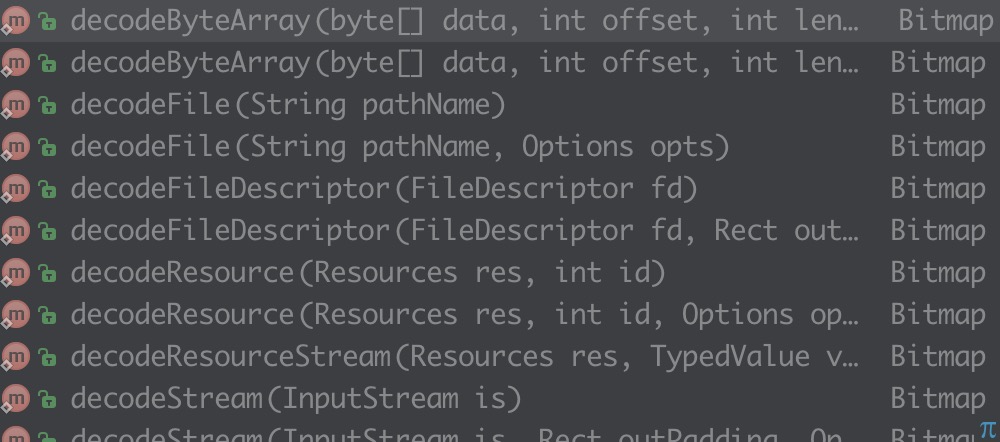
 vc+zo9PDtcS8uLj2o6zG5NPgtcS/tNK7z8LUtMLrtcTXor3ivs3WqrXAPC9wPg0KZGVjb2RlUmVzb3VyY2UgZGVjb2RlRmlsZSBkZWNvZGVTdHJlYW0NCjxwPr3iwuvXytS0o6y94sLrzsS8/qOsveLC68H3o6y4+b7dy/y1xMP719a+zdaqtcDBy8v50qq809TYtcTXytS0o6zA/cjnc2S/qLXEzsS8/r3iwuu/ycrHyrnTw2RlY29kZUZpbGW3vbeoo6zN+MLnyc+1xM28xqy/ydLUyrnTw2RlY29kZVN0cmVhbbe9t6ijrNfK1LTOxLz+1tC1xM28xqy/ydLUyrnTw2RlY29kZVJlc291cmNlt723qKOstbHIu9XiuPayu8rHucy2qM6o0ru1xKOs0vLOqseww+bBvbj2t723qLa8ysfNqLn9ttS12sj9uPa3vbeotcSw/NewyrXP1rXEPC9wPg0KPHA+zqrBy7fA1rnNvMasT09No6zL/Lu5zOG5qcHLT3B0aW9uc9XiuPayzsr9PC9wPg0KaW5KdXN0RGVjb2RlQm91bmRzIGluU2FtcGxlU2l6ZSBvdXRXaWR0aCBvdXRIZWlnaHQgaW5QcmVmZXJyZWRDb25maWcgb3V0TWltZVR5cGUNCjxwPiZoZWxsaXA7PC9wPg0KPHA+yOe5+2luSnVzdERlY29kZUJvdW5kc8no1sPOqnRydWWjrNTK0O2y6dGvzrvNvKOstavKx7K7t9bF5MTatOa3tbvY1rXOqm51bGyjrLWryse/ydLUtsHIoc28xqy1xLPftOe6zcDg0M3Qxc+ioaM8YnIgLz4NCmluU2FtcGxlU2l6ZbXE1rXU2r3izvbNvMaszqpCaXRtYXDKsdTas6S/7cG9uPa3vc/yyc/P8cvYy/XQobXEsbbK/aOsxKzIz9a1us3X7tCh1rXOqjGjqLWx0KHT2jHKsaOssLTV1TG0psDto6mjrMfS1Nq089PaMcqxo6y4w9a11rvE3M6qMrXEw92jqLWxsrvOqjK1xMPdyrGjrL3iwuvG97vhyKHT67jD1rXX7r3Tvfy1xDK1xMPdo6k8YnIgLz4NCmluUHJlZmVycmVkQ29uZmlnxKzIz86qQVJHQl84ODg4o6y1sci70rK/ydLUuLPG5Mv71rWjrMD9yOejukFMUEhBXzgsIFJHQl81NjUsIEFSR0JfNDQ0NKOsy8TW1s/xy9jA4NDNo6zDv7j2z/HL2NW808PL+dW8tcTX1r3ayv2yu82sPC9wPg0KPHA+z8LD5sC0yrXP1s28xqy1xLHku7s8L3A+DQo8cD7L9dCho7o8L3A+DQo8cHJlIGNsYXNzPQ=="brush:java;">
public void scalePic(int reqWidth,int reqHeight) {
        BitmapFactory.Options options = new BitmapFactory.Options();
        options.inJustDecodeBounds = true;
        BitmapFactory.decodeResource(getResources(), R.mipmap.demo, options);
        options.inSampleSize = PhotoUtil.calculateInSampleSize(options, reqWidth,reqHeight);
        options.inJustDecodeBounds = false;
        bitmap = BitmapFactory.decodeResource(getResources(), R.mipmap.demo, options);

        postInvalidate();
    }
public static int calculateInSampleSize(BitmapFactory.Options options,int reqWidth, int reqHeight) {
        final int height = options.outHeight;
        final int width = options.outWidth;
        int inSampleSize = 1;
        if (height > reqHeight || width > reqWidth) {
            final int heightRatio = Math.round((float) height / (float) reqHeight);
            final int widthRatio = Math.round((float) width / (float) reqWidth);
            inSampleSize = heightRatio < widthRatio ? heightRatio : widthRatio;
        }
        return inSampleSize;
    }
主要使用通過屬性inSampleSize實現圖片縮小,當然這個方法不是為了實現縮放的,我們這裡只是說明一下,它的主要目的還是預防OOM,當加載一張圖片時,當對於圖片的大小不確定時,要做一下限制,以防出現OOM,下面給出真正放大,縮小的代碼
public void scalePicByMatrix(float scaleWidth, float scaleHeight){
        Matrix matrix = new Matrix();
        matrix.setScale(scaleWidth,scaleHeight);
        bitmap = Bitmap.createBitmap(bitmap,0,0,bitmap.getWidth(),bitmap.getHeight(),matrix,false);
        postInvalidate();
    }
旋轉:
public void rotatePic(int angle) {
        Matrix matrix = new Matrix();
        matrix.setRotate(angle);
        bitmap = Bitmap.createBitmap(bitmap,0,0,bitmap.getWidth(),bitmap.getHeight(),matrix,false);
        postInvalidate();
    }
剪裁:
public void cutPic(int reqWidth, int reqHeight) {
        if (bitmap.getWidth() > reqWidth && bitmap.getHeight() > reqHeight) {
            bitmap = Bitmap.createBitmap(bitmap, 0, 0, reqWidth, reqHeight);
        }else {
            bitmap = Bitmap.createBitmap(bitmap, 0, 0, bitmap.getWidth(), bitmap.getHeight());
        }
        postInvalidate();
    }
圖片保存:
public void savePic(String path) {
        File file = new File(path);
        FileOutputStream fileOutputStream = null;
        try {
            file.createNewFile();
            fileOutputStream = new FileOutputStream(file);
            bitmap.compress(Bitmap.CompressFormat.PNG, 100, fileOutputStream);
            fileOutputStream.flush();
        } catch (IOException e) {
            e.printStackTrace();
        } finally {
            try {
                if (fileOutputStream != null) {
                    fileOutputStream.close();
                }
            } catch (IOException e) {
                e.printStackTrace();
            }
        }
    }
以上給出的只是其中的一種方法,具體操作看應用場景
 安卓之ViewFlipper實現漸變視差導航頁
前言以前的導航頁總是使用viewPager配套fragment來實現的,某天一個妹子說其實導航頁也可以使用ViewFilpper 來實現,哈哈確實不錯,前段時間就用Vie
 Android簡易實戰教程--第三十話《撕衣美女》
此篇邪惡一些,給單身屌絲發點“福利”,通過圖片的繪制,給美女脫掉衣服。原理:圖片覆蓋圖片,通過畫筆對頂端的圖片做一些特效處理,即手指觸摸的地方,設
 MPAndroidChart折線圖二
3. public LineChartTools( LinkedList
 Android短信驗證碼自動填充功能
筆者發現在很多應用中,都有自動獲取驗證碼的功能:點擊獲取驗證碼按鈕,收到短信,當前應用不需要退出程序就可以獲取到短信中的驗證碼,並自動填充。覺得這種用戶體驗很贊,無須用戶