編輯:Android開發實例
本文實例講述了Android編程實現ImageView圖片拋物線動畫效果的方法。分享給大家供大家參考,具體如下:
想實現拋物線動畫,必須知道拋物線的方程,這時候數學其作用了,假如有如圖的拋物線:
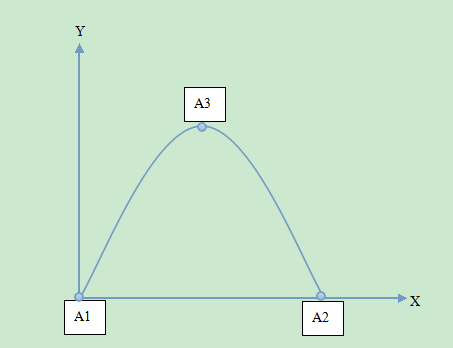
按照拋物線的方程特別,知道任何的三點可以確定一條拋物線,由已知拋物線的標注
方程為 y = ax² + bx + c;假設A1坐標為(0,0),A2坐標為(300,0),A3坐標為(150,300);聯合解方程得知該拋物線的方程為 y = -1/75 x² + 4x;由此方程,我們可以確定拋物線x和y的關系了,下面的事情就簡單了。
在新的API中,有ObjectAnimator動畫,在這個動畫裡面,我們可以做一些我們想要的東西了。關於ObjectAnimator的用法,大家自己找資料去看吧:下面直接給出源碼:
//分300步進行移動動畫
final int count = 300;
/**
* 要start 動畫的那張圖片的ImageView
* @param imageView
*/
private void startAnimation(final ImageView imageView) {
  Keyframe[] keyframes = new Keyframe[count];
  final float keyStep = 1f / (float) count;
  float key = keyStep;
  for (int i = 0; i < count; ++i) {
   keyframes[i] = Keyframe.ofFloat(key, i + 1);
   key += keyStep;
  }
  PropertyValuesHolder pvhX = PropertyValuesHolder.ofKeyframe("translationX", keyframes);
  key = keyStep;
  for (int i = 0; i < count; ++i) {
   keyframes[i] = Keyframe.ofFloat(key, -getY(i + 1));
   key += keyStep;
  }
  PropertyValuesHolder pvhY = PropertyValuesHolder.ofKeyframe("translationY", keyframes);
  ObjectAnimator yxBouncer = ObjectAnimator.ofPropertyValuesHolder(imageView, pvhY, pvhX).setDuration(1500);
  yxBouncer.setInterpolator(new BounceInterpolator());
  yxBouncer.start();
}
final float a = -1f / 75f;
/**
* 這裡是根據三個坐標點{(0,0),(300,0),(150,300)}計算出來的拋物線方程
*
* @param x
* @return
*/
private float getY(float x) {
  return a * x * x + 4 * x;
}
調用的時候很簡單:startAnimation(imageView) 即可,PropertyValuesHolder,等等自己查資料吧。
附上已知拋物線三點求拋物線方程的算法:
package com.freesonfish;
public class ParabolaAlgorithm {
 public static void main(String[] args) {
  final float[][] points = { { 6, 15 }, { 15, 70 }, { 40, 60 } };
  calculate(points);
 }
 /**
  * a = (y1 * (x2 - x3) + y2 * (x3 - x1) + y3 * (x1 - x2)) / (x1 * x1 * (x2 -
  * x3) + x2 * x2 * (x3 - x1) + x3 * x3 * (x1 - x2))
  * b = (y1 - y2) / (x1 - x2) - a * (x1 + x2);
  * c = y1 - (x1 * x1) * a - x1 * b;
  */
 private static void calculate(float[][] points) {
  float x1 = points[0][0];
  float y1 = points[0][1];
  float x2 = points[1][0];
  float y2 = points[1][1];
  float x3 = points[2][0];
  float y3 = points[2][1];
  final float a = (y1 * (x2 - x3) + y2 * (x3 - x1) + y3 * (x1 - x2))
    / (x1 * x1 * (x2 - x3) + x2 * x2 * (x3 - x1) + x3 * x3 * (x1 - x2));
  final float b = (y1 - y2) / (x1 - x2) - a * (x1 + x2);
  final float c = y1 - (x1 * x1) * a - x1 * b;
  System.out.println("-a->" + a + " b->" +b + " c->" +c);
 }
}
希望本文所述對大家Android程序設計有所幫助。
 Android MediaPlayer(多媒體播放)
Android提供了許多方法來控制播放的音頻/視頻文件和流。其中該方法是通過一類稱為MediaPlayer。Android是提供MediaPlayer類訪問內置的媒體播放
 Android提高之TelephonyManager功能探秘
前面文章介紹了如何使用JAVA的反射機制來調用藍牙的隱藏API,本文繼續來練習JAVA的反射機制,探秘TelephonyManager在Framework裡包含卻
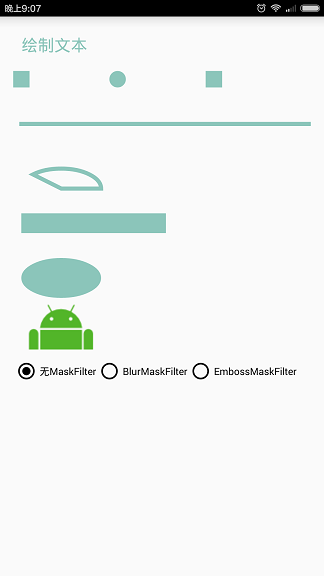 Android Canvas繪圖之MaskFilter圖文詳解(附源碼下載)
本文著重講解如何使用MaskFilter創建模糊陰影以及浮雕效果。 我們知道Canvas中的各種
 Android編程單元測試實例詳解(附源碼)
本文實例講述了Android編程單元測試。分享給大家供大家參考,具體如下: 完整實例代碼代碼點擊此處本站下載。 本文是在上一篇文章《java編程之單元測試(Jun