編輯:Android開發實例
- view plaincopy to clipboardprint?
- <?xml version="1.0" encoding="utf-8"?>
- <LinearLayout xmlns:android="http://schemas.android.com/apk/res/android"
- android:orientation="vertical"
- android:layout_width="fill_parent"
- android:layout_height="fill_parent"
- >
- <TextView
- android:id="@+id/text"
- android:layout_width="fill_parent"
- android:layout_height="wrap_content"
- android:text="@string/hello"
- />
- </LinearLayout>
三、修改PreferenceDemo.java的代碼,全部代碼如下:
四、運行代碼,實現上述效果. 五、查看Preferences文件,首先打開命令終端:adb shell一下,然後cd data/data進入該目錄,ls一下我們會發現一大堆包文件,入下圖所示: cd com.android.tutor (這裡是我程序的包名) /shared_prefs,ls一下會發現.xml文件如下圖: 打開.xml文件,格式如下(為什麼這樣大家自己去理解): view plaincopy to clipboardprint?
- view plaincopy to clipboardprint?
- package com.android.tutor;
- import android.app.Activity;
- import android.content.SharedPreferences;
- import android.os.Bundle;
- import android.preference.PreferenceManager;
- import android.widget.TextView;
- public class PreferencesDemo extends Activity {
- /** Called when the activity is first created. */
- @Override
- public void onCreate(Bundle savedInstanceState) {
- super.onCreate(savedInstanceState);
- setContentView(R.layout.main);
- SharedPreferences mPerferences = PreferenceManager
- .getDefaultSharedPreferences(this);
- int counter = mPerferences.getInt("counter", 0);
- TextView mTextView = (TextView)findViewById(R.id.text);
- mTextView.setText("This app has been started " + counter + " times.");
- SharedPreferences.Editor mEditor = mPerferences.edit();
- mEditor.putInt("counter", ++counter);
- mEditor.commit();
- }
- }
本文出自 “Android_Tutor” 博客,請務必保留此出處http://weizhulin.blog.51cto.com/1556324/311440
 Android筆記之:onConfigurationChanged詳解
從事Android開發,免不了會在應用裡嵌入一些廣告SDK,在嵌入了眾多SDK後,發現幾乎每個要求在AndroidManifest.xml申明Activity
 android sdk安裝及開發環境部署
引言在windows安裝Android的開發環境不簡單也說不上算復雜,本文寫給第一次想在自己Windows上建立Android開發環境投入Android浪潮的朋友
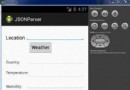 Android JSON解析器
JSON代表JavaScript對象符號。它是一個獨立的數據交換格式,是XML的最佳替代品。本章介紹了如何解析JSON文件,並從中提取所需的信息。Android提供了四個
 Android本地化
Android應用程序可以在許多不同地區的許多設備上運行。為了使應用程序更具交互性,應用程序應該處理以適合應用程序將要使用的語言環境方面的文字,數字,文件等。在本章中,我