編輯:關於Android編程
本文實例講述了Android編程實現仿優酷圓盤旋轉菜單效果的方法。分享給大家供大家參考,具體如下:
目前,用戶對安卓應用程序的UI設計要求越來越高,因此,掌握一些新穎的設計很有必要.
比如菜單,傳統的菜單已經不能滿足用戶的需求. 其中優酷中圓盤旋轉菜單的實現就比較優秀,這裡我提供下我的思路及實現,僅供參考.
該菜單共分裡外三層導航菜單.可以依次從外向裡關閉三層菜單,也可以反向打開,並且伴有圓盤旋轉的動畫效果
首先,看下效果:

以下是具體的代碼及解釋:
1. 菜單布局文件:
大家看到主要有三個RalativeLayout,就是大家看到的三層,但是關於圖片的傾斜 是怎樣實現的呢?實際上是個假象,圖片是正放的,裡面圖像是傾斜的
<RelativeLayout xmlns:android="http://schemas.android.com/apk/res/android"
  xmlns:tools="http://schemas.android.com/tools"
  android:layout_width="fill_parent"
  android:layout_height="fill_parent" >
  <RelativeLayout
    android:layout_width="100dip"
    android:layout_height="50dip"
    android:layout_alignParentBottom="true"
    android:layout_centerHorizontal="true"
    android:background="@drawable/level1" >
    <ImageButton
      android:id="@+id/home"
      android:layout_width="wrap_content"
      android:layout_height="wrap_content"
      android:layout_centerInParent="true"
      android:background="@drawable/icon_home" />
  </RelativeLayout>
  <RelativeLayout
    android:layout_width="180dip"
    android:layout_height="90dip"
    android:layout_alignParentBottom="true"
    android:layout_centerHorizontal="true"
    android:id="@+id/level2"
    android:background="@drawable/level2" >
    <ImageButton
      android:id="@+id/search"
      android:layout_width="wrap_content"
      android:layout_height="wrap_content"
      android:layout_alignParentBottom="true"
      android:layout_margin="10dip"
      android:background="@drawable/icon_search" />
    <ImageButton
      android:id="@+id/menu"
      android:layout_width="wrap_content"
      android:layout_height="wrap_content"
      android:layout_centerHorizontal="true"
      android:layout_margin="6dip"
      android:background="@drawable/icon_menu" />
    <ImageButton
      android:id="@+id/myyouku"
      android:layout_width="wrap_content"
      android:layout_height="wrap_content"
      android:layout_alignParentBottom="true"
      android:layout_alignParentRight="true"
      android:layout_margin="10dip"
      android:background="@drawable/icon_myyouku" />
  </RelativeLayout>
  <RelativeLayout
    android:layout_width="280dip"
    android:layout_height="140dip"
    android:layout_alignParentBottom="true"
    android:layout_centerHorizontal="true"
    android:id="@+id/level3"
    android:background="@drawable/level3" >
    <ImageButton
      android:id="@+id/c1"
      android:layout_width="wrap_content"
      android:layout_height="wrap_content"
      android:layout_alignParentBottom="true"
      android:layout_marginBottom="6dip"
      android:layout_marginLeft="12dip"
      android:background="@drawable/channel1" />
    <ImageButton
      android:id="@+id/c2"
      android:layout_width="wrap_content"
      android:layout_height="wrap_content"
      android:layout_above="@id/c1"
      android:layout_marginBottom="12dip"
      android:layout_marginLeft="28dip"
      android:background="@drawable/channel2" />
    <ImageButton
      android:id="@+id/c3"
      android:layout_width="wrap_content"
      android:layout_height="wrap_content"
      android:layout_above="@id/c2"
      android:layout_marginBottom="6dip"
      android:layout_marginLeft="8dip"
      android:layout_toRightOf="@id/c2"
      android:background="@drawable/channel3" />
    <ImageButton
      android:id="@+id/c4"
      android:layout_width="wrap_content"
      android:layout_height="wrap_content"
      android:layout_centerHorizontal="true"
      android:layout_margin="6dip"
      android:background="@drawable/channel4" />
        <ImageButton
      android:id="@+id/c5"
      android:layout_width="wrap_content"
      android:layout_height="wrap_content"
      android:layout_above="@+id/c6"
      android:layout_marginBottom="6dip"
      android:layout_marginRight="8dip"
      android:layout_toLeftOf="@+id/c6"
      android:background="@drawable/channel5" />
        <ImageButton
      android:id="@+id/c6"
      android:layout_width="wrap_content"
      android:layout_height="wrap_content"
      android:layout_above="@+id/c7"
      android:layout_marginBottom="12dip"
      android:layout_marginRight="28dip"
      android:layout_alignParentRight="true"
      android:background="@drawable/channel6" />
        <ImageButton
      android:id="@+id/c7"
      android:layout_width="wrap_content"
      android:layout_height="wrap_content"
      android:layout_alignParentBottom="true"
      android:layout_marginBottom="6dip"
      android:layout_marginRight="12dip"
      android:layout_alignParentRight="true"
      android:background="@drawable/channel7" />
  </RelativeLayout>
</RelativeLayout>
2. MainActivity;
import android.os.Bundle;
import android.app.Activity;
import android.view.Menu;
import android.view.View;
import android.view.View.OnClickListener;
import android.widget.ImageButton;
import android.widget.RelativeLayout;
public class MainActivity extends Activity {
  private ImageButton home;
  private ImageButton menu;
  private RelativeLayout level2;
  private RelativeLayout level3;
  private boolean isLevel2Show = true;
  private boolean isLevel3Show = true;
  @Override
  public void onCreate(Bundle savedInstanceState) {
    super.onCreate(savedInstanceState);
    setContentView(R.layout.activity_main);
    home = (ImageButton) findViewById(R.id.home);
    menu = (ImageButton) findViewById(R.id.menu);
    level2 = (RelativeLayout) findViewById(R.id.level2);
    level3 = (RelativeLayout) findViewById(R.id.level3);
    menu.setOnClickListener(new OnClickListener() {
      @Override
      public void onClick(View v) {
        if(isLevel3Show){
          //隱藏3級導航菜單
          MyAnimation.startAnimationOUT(level3, 500, 0);
        }else {
          //顯示3級導航菜單
          MyAnimation.startAnimationIN(level3, 500);
        }
        isLevel3Show = !isLevel3Show;
      }
    });
    home.setOnClickListener(new OnClickListener() {
      @Override
      public void onClick(View v) {
        if(!isLevel2Show){
          //顯示2級導航菜單
          MyAnimation.startAnimationIN(level2, 500);
        } else {
          if(isLevel3Show){
            //隱藏3級導航菜單
            MyAnimation.startAnimationOUT(level3, 500, 0);
            //隱藏2級導航菜單
            MyAnimation.startAnimationOUT(level2, 500, 500);
            isLevel3Show = !isLevel3Show;
          }
          else {
            //隱藏2級導航菜單
            MyAnimation.startAnimationOUT(level2, 500, 0);
          }
        }
        isLevel2Show = !isLevel2Show;
      }
    });
  }
}
3. 自定義動畫類MyAnimation:
import android.view.View;
import android.view.ViewGroup;
import android.view.animation.Animation;
import android.view.animation.Animation.AnimationListener;
import android.view.animation.RotateAnimation;
public class MyAnimation {
  //入動畫
  public static void startAnimationIN(ViewGroup viewGroup, int duration){
    for(int i = 0; i < viewGroup.getChildCount(); i++ ){
      viewGroup.getChildAt(i).setVisibility(View.VISIBLE);//設置顯示
      viewGroup.getChildAt(i).setFocusable(true);//獲得焦點
      viewGroup.getChildAt(i).setClickable(true);//可以點擊
    }
    Animation animation;
    /**
     * 旋轉動畫
     * RotateAnimation(fromDegrees, toDegrees, pivotXType, pivotXValue, pivotYType, pivotYValue)
     * fromDegrees 開始旋轉角度
     * toDegrees 旋轉到的角度
     * pivotXType X軸 參照物
     * pivotXValue x軸 旋轉的參考點
     * pivotYType Y軸 參照物
     * pivotYValue Y軸 旋轉的參考點
     */
    animation = new RotateAnimation(-180, 0, Animation.RELATIVE_TO_SELF, 0.5f, Animation.RELATIVE_TO_SELF, 1.0f);
    animation.setFillAfter(true);//停留在動畫結束位置
    animation.setDuration(duration);
    viewGroup.startAnimation(animation);
  }
  //出動畫
  public static void startAnimationOUT(final ViewGroup viewGroup, int duration , int startOffSet){
    Animation animation;
    animation = new RotateAnimation(0, -180, Animation.RELATIVE_TO_SELF, 0.5f, Animation.RELATIVE_TO_SELF, 1.0f);
    animation.setFillAfter(true);//停留在動畫結束位置
    animation.setDuration(duration);
    animation.setStartOffset(startOffSet);
    animation.setAnimationListener(new AnimationListener() {
      @Override
      public void onAnimationStart(Animation animation) {
        // TODO Auto-generated method stub
      }
      @Override
      public void onAnimationRepeat(Animation animation) {
        // TODO Auto-generated method stub
      }
      @Override
      public void onAnimationEnd(Animation animation) {
        for(int i = 0; i < viewGroup.getChildCount(); i++ ){
          viewGroup.getChildAt(i).setVisibility(View.GONE);//設置顯示
          viewGroup.getChildAt(i).setFocusable(false);//獲得焦點
          viewGroup.getChildAt(i).setClickable(false);//可以點擊
        }
      }
    });
    viewGroup.startAnimation(animation);
  }
}
這樣,一個高仿優酷三級導航圓盤旋轉菜單就完成了.,以後完全可以借鑒這些優秀的UI設計,甚至根據新的需求,可以做出更好的UI.
附:完整實例代碼點擊此處本站下載。
更多關於Android相關內容感興趣的讀者可查看本站專題:《Android布局layout技巧總結》、《Android開發入門與進階教程》、《Android調試技巧與常見問題解決方法匯總》、《Android基本組件用法總結》、《Android視圖View技巧總結》及《Android控件用法總結》
希望本文所述對大家Android程序設計有所幫助。
 Android多媒體-支持的多媒體格式
1.Network Protocols RTSP (RTP, SDP) HTTP progressive streaming HTTP live streaming dr
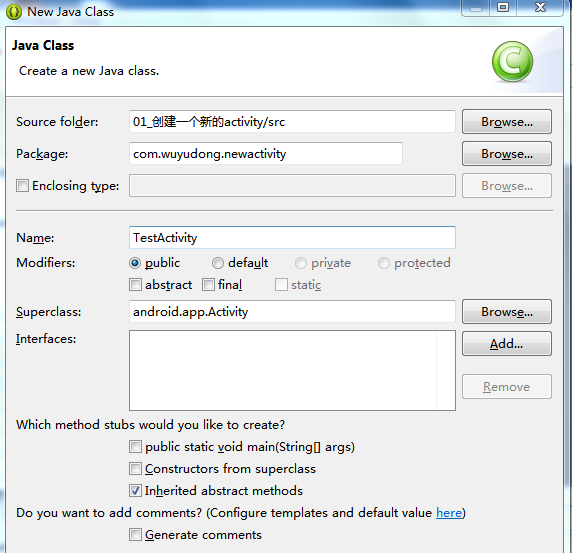 Android 創建一個新的Activity
新建一個項目,創建一個java類,繼承自Activity新建一個Android.xml文件:activity_test.xml這裡需要在清單文件裡面配置一下
 android 動態創建Fragment
前一遍文章我們講了靜態創建Fragment,這個在實際的開發中幾乎不用,都是動態創建的,所謂動態創建就是根據某個條件動態創建Fragment, 現在創建一個android
 Android實現炫酷的網絡直播彈幕功能
現在網絡直播越來越火,網絡主播也逐漸成為一種新興職業,對於網絡直播,彈幕功能是必須要有的,如下圖:首先來分析一下,這個彈幕功能是怎麼實現的,首先在最下面肯定是一個游戲界面