編輯:關於Android編程
一般來說我們在Android中用XML布局要方便很多同時也要快捷。但是有時候在一些特殊的情況我們也可以用代碼代替XML的布局,其效果一樣的。如TextView的布局:
1
<TextView
2
ndroid:text="@+id/TextView01"
3
android:id="@+id/TextView01"
4
android:layout_width="wrap_content"
5
android:layout_height="wrap_content">
6
</TextView>
其代碼也相當於:
1
LinearLayout.LayoutParams param =
2
new LinearLayout.LayoutParams(LinearLayout.LayoutParams.FILL_PARENT, LinearLayout.LayoutParams.WRAP_CONTENT);
3
final TextView tv = new TextView(this);
4
tv.setText("Hello Android!");
5
tv.setGravity(1);
6
tv.setId(TestView01);
7
layout.addView(tv,param);
8
setContentView(layout);
下面是一個實例來演示一下
001
package AdView.AD.android;
002
import java.io.IOException;
003
import java.io.InputStream;
004
import java.net.HttpURLConnection;
005
import java.net.MalformedURLException;
006
import java.net.URL;
007
import android.app.Activity;
008
import android.graphics.Bitmap;
009
import android.graphics.BitmapFactory;
010
import android.os.Bundle;
011
import android.os.Handler;
012
import android.os.Message;
013
import android.widget.ImageView;
014
import android.widget.LinearLayout;
015
016
017
public class AdView extends Activity
018
{
019
020
private static final int myImageView1 = 0;
021
private ImageView mImageView1;
022
023
boolean run=true;
024
String uriPic = "http://up.2cto.com/2012/0816/20120816104135808.gif";
025
/** Called when the activity is first created. */
026
@Override
027
public void onCreate(Bundle savedInstanceState)
028
{
029
super.onCreate(savedInstanceState);
030
031
032
LinearLayout layout = new LinearLayout(this);
033
layout.setOrientation(LinearLayout.VERTICAL);
034
035
LinearLayout.LayoutParams params =
036
new LinearLayout.LayoutParams(LinearLayout.LayoutParams.FILL_PARENT,LinearLayout.LayoutParams.WRAP_CONTENT);
037
ImageView iv= new ImageView(this);
038
iv.setId(myImageView1);
039
layout.addView(iv,params);
040
setContentView(layout);
041
042
mImageView1 = (ImageView) findViewById(myImageView1);
043
044
new Thread(mTasks).start();
045
}
046
public void onDestroy(){
047
run=false;
048
super.onDestroy();
049
}
050
public void getimage(){
051
mImageView1.setImageBitmap(getURLBitmap());
052
053
}
054
public Bitmap getURLBitmap()
055
{
056
URL imageUrl = null;
057
Bitmap bitmap = null;
058
try
059
{
060
/* new URL對象將網址傳入 */
061
imageUrl = new URL(uriPic);
062
} catch (MalformedURLException e)
063
{
064
e.printStackTrace();
065
}
066
try
067
{
068
/* 取得聯機 */
069
HttpURLConnection conn = (HttpURLConnection) imageUrl
070
.openConnection();
071
conn.connect();
072
/* 取得回傳的InputStream */
073
InputStream is = conn.getInputStream();
074
/* 將InputStream變成Bitmap */
075
bitmap = BitmapFactory.decodeStream(is);
076
/* 關閉InputStream */
077
is.close();
078
079
} catch (IOException e)
080
{
081
e.printStackTrace();
082
}
083
return bitmap;
084
}
085
private Runnable mTasks =new Runnable(){
086
public void run()
087
{
088
while(run){
089
try{
090
Thread.sleep(500);
091
mHandler.sendMessage(mHandler.obtainMessage());
092
}catch(InterruptedException e)
093
{
094
e.printStackTrace();
095
}
096
}
097
}
098
};
099
Handler mHandler = new Handler(){
100
public void handleMessage(Message msg)
101
{
102
super.handleMessage(msg);
103
getimage();
104
}
105
};
106
}
其中在Androidmainfest.xml中要插入:< uses- permission android:name="android.permission.INTERNET"></uses-permission>
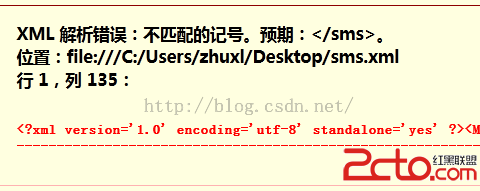 Android 存儲學習之保存系統短信到SD卡(使用XML序列化器)
上節中我們是手動拼接xml文件,但是上節中那樣的做法會有一個問題,比如: //插入消息的內容sBuffer.append(); sBuffer.append(s
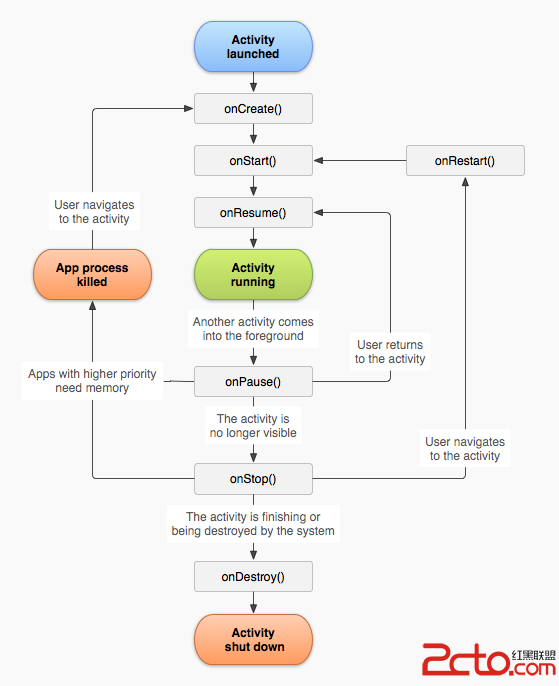 從零開始學android(ACtivity的生命周期.三十九.)
意圖是指兩個UI主界面的轉換,要想了解意圖就必須學習ACtivity的生命周期 默認在UI界面顯示的為運行為運行狀態,而在後台的為onPause方法 主線:
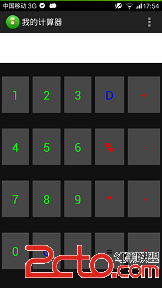 Android初識之簡易計算器
之前自己的編程完全是在PC上進行的,而且主要是在算法和數據結構上。由於某些需要加之認識到Android的重要性,且大學走到現在基本上沒什麼課了,空閒時間很多,於是就開始學
 android拍照圖片選取與圖片剪裁
最近從以前的項目中扒下來一個常用的模塊,在這裡有必要記錄一下的,就是android上獲取圖片以及裁剪圖片,怎麼樣?這個功能是不是很常用啊,你隨便打開一個Ap