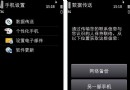
Tab選項卡是一個非常方便的組件
今天查詢資料知道了android 選項卡的一種簡單實現.
本篇文章來源於好岸園it技術學習網 (http://www.hopean.com)
原文鏈接:http://www.hopean.com/devlop/
下面是簡單的步驟.
1.在布局文件中使用FrameLayout列出Tab組件以及Tab中的內容組件
2.Activity要繼承TabActivity
3.調用TabActivity的getTabHost( )方法來獲得TabHost對象
4.通過TabHost創建Tab選項
創建工程後首先,
修改strings.xml文件
[html]
<?xml version="1.0" encoding="utf-8"?>
<resources>
<string name="app_name">AndroidTabSelector</string>
<string name="hello_world">Hello world!</string>
<string name="menu_settings">Settings</string>
<string name="test1">測試界面1</string>
<string name="test2">測試界面2</string>
<string name="test3">測試界面3</string>
</resources>
之後修改main.xml文件,詳細代碼如下:
[html]
<?xml version="1.0" encoding="utf-8"?>
<FrameLayout xmlns:android="http://schemas.android.com/apk/res/android"
android:id="@+id/FrameLayout01"
android:layout_width="wrap_content"
android:layout_height="wrap_content" >
<TabHost
android:id="@+id/TabHost01"
android:layout_width="wrap_content"
android:layout_height="wrap_content" />
<TextView
android:id="@+id/TextView01"
android:layout_width="wrap_content"
android:layout_height="wrap_content"
android:text="@string/test1" />
<TextView
android:id="@+id/TextView02"
android:layout_width="wrap_content"
android:layout_height="wrap_content"
android:text="@string/test2" />
<TextView
android:id="@+id/TextView03"
android:layout_width="wrap_content"
android:layout_height="wrap_content"
android:text="@string/test3" />
</FrameLayout>
之後修改MainActivity.java文件,java代碼如下:
[java]
package com.example.androidtabselector;
import android.os.Bundle;
import android.app.Activity;
import android.view.Menu;
import android.app.TabActivity;
import android.os.Bundle;
import android.view.LayoutInflater;
import android.widget.TabHost;
public class MainActivity extends TabActivity {
@Override
protected void onCreate(Bundle savedInstanceState) {
super.onCreate(savedInstanceState);
//setContentView(R.layout.activity_main);
TabHost tah = getTabHost();
// from(this)從TabActivity獲取LayoutInflater
// R.layout.main 存放Tab布局
// 通過TabHost獲得存放Tab標簽頁內容的FrameLayout
// 是否將inflate 加到根布局元素上
LayoutInflater.from(this).inflate(R.layout.activity_main,
tah.getTabContentView(), true);
//設置Tab標簽的內容和顯示內容
tah.addTab(tah.newTabSpec("tab1").setIndicator("選項1").setContent(R.id.TextView01));
tah.addTab(tah.newTabSpec("tab2").setIndicator("選項2").setContent(R.id.TextView02));
tah.addTab(tah.newTabSpec("tab3").setIndicator("選項3").setContent(R.id.TextView03));
}
@Override
public boolean onCreateOptionsMenu(Menu menu) {
// Inflate the menu; this adds items to the action bar if it is present.
getMenuInflater().inflate(R.menu.activity_main, menu);
return true;
}
}
至此就可以實現簡單的android 選項卡效果
 Android基礎入門教程——8.4.4 Android動畫合集之屬性動畫-又見
 Android應用中加入微信分享簡單方法
 Android UI設計系列之自定義SwitchButton開關實現類似IOS中UISwitch的動畫效果(2)
 Android插件化的思考——仿QQ一鍵換膚,思考比實現更重要!