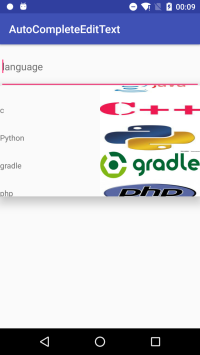
微信聊天窗口的信息效果類似iphone上的短信效果,以氣泡的形式展現,在Android上,實現這種效果主要用到ListView和BaseAdapter,配合布局以及相關素材,就可以自己做出這個效果,素材可以下一個微信的APK,然後把後綴名改成zip,直接解壓,就可以得到微信裡面的所有素材了。首先看一下我實現的效果:
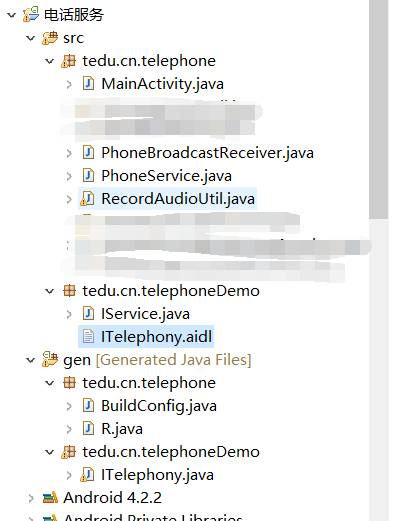
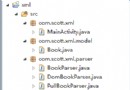
以下是工程目錄結構:
接下來就是如何實現這個效果的代碼:
main.xml,這個是主布局文件,顯示listview和上下兩部分內容。
<?xml version="1.0" encoding="utf-8"?>
<RelativeLayout xmlns:android="http://schemas.android.com/apk/res/android"
android:layout_width="fill_parent"
android:layout_height="fill_parent"
android:background="#f0f0e0" >
<RelativeLayout
android:id="@+id/rl_top"
android:layout_width="fill_parent"
android:layout_alignParentTop="true"
android:layout_height="wrap_content">
<TextView
android:layout_width="fill_parent"
android:layout_height="44dp"
android:gravity="center"
android:textSize="18sp"
android:background="#486a9a"
android:textColor="@android:color/white"
android:text="Chat"/>
</RelativeLayout>
<RelativeLayout
android:id="@+id/rl_bottom"
android:layout_alignParentBottom="true"
android:layout_width="fill_parent"
android:background="#486a9a"
android:paddingTop="5dp"
android:layout_height="wrap_content">
<Button
android:id="@+id/btn_send"
android:layout_width="70dp"
android:layout_height="50dp"
android:layout_alignParentRight="true"
android:layout_centerVertical="true"
android:layout_marginRight="10dp"
android:text="Send" />
<EditText
android:id="@+id/et_content"
android:layout_width="fill_parent"
android:layout_height="50dp"
android:layout_centerVertical="true"
android:layout_marginLeft="10dp"
android:layout_marginRight="10dp"
android:layout_toLeftOf="@id/btn_send"
android:textSize="16sp"/>
</RelativeLayout>
<ListView
android:id="@+id/listview"
android:layout_width="fill_parent"
android:layout_height="fill_parent"
android:layout_above="@id/rl_bottom"
android:layout_below="@id/rl_top"
android:layout_marginLeft="10dp"
android:layout_marginRight="10dp"
android:layout_marginTop="10dp"
android:cacheColorHint="#00000000"
android:divider="@null"
android:listSelector="#00000000"
android:dividerHeight="3dp"
android:scrollbars="none"/>
</RelativeLayout>
然後就是listview中兩種類型item的布局文件,分別是接收信息的item效果和發送信息的item效果
chat_from_item.xml是接收信息的item布局:
<?xml version="1.0" encoding="utf-8"?>
<LinearLayout xmlns:android="http://schemas.android.com/apk/res/android"
android:layout_width="fill_parent"
android:orientation="vertical"
android:paddingBottom="5dp"
android:layout_height="wrap_content" >
<TextView
android:id="@+id/tv_time"
android:layout_width="wrap_content"
android:layout_height="wrap_content"
android:layout_gravity="center_horizontal"
android:background="#bfbfbf"
android:paddingTop="2dp"
android:paddingBottom="2dp"
android:paddingLeft="4dp"
android:paddingRight="4dp"
android:textColor="#ffffff"
android:textSize="12sp" />
<RelativeLayout
android:layout_width="fill_parent"
android:layout_height="wrap_content"
android:layout_marginTop="5dp" >
<ImageView
android:id="@+id/iv_user_image"
android:layout_width="50dp"
android:layout_height="50dp"
android:layout_alignParentLeft="true"
android:layout_alignParentTop="true"
android:background="@drawable/mypic"
android:focusable="false" />
<TextView
android:id="@+id/tv_content"
android:layout_width="wrap_content"
android:layout_height="wrap_content"
android:layout_marginLeft="5dp"
android:layout_toRightOf="@+id/iv_user_image"
android:background="@drawable/chatfrom_bg"
android:gravity="left|center"
android:clickable="true"
android:focusable="true"
android:lineSpacingExtra="2dp"
android:minHeight="50dp"
android:textColor="#ff000000"
android:textSize="14sp" />
</RelativeLayout>
</LinearLayout>
chat_to_item.xml是發送信息item的布局:
<?xml version="1.0" encoding="utf-8"?>
<LinearLayout xmlns:android="http://schemas.android.com/apk/res/android"
android:layout_width="fill_parent"
android:orientation="vertical"
android:paddingBottom="5dp"
android:layout_height="wrap_content" >
<TextView
android:id="@+id/tv_time"
android:layout_width="wrap_content"
android:layout_height="wrap_content"
android:background="#bfbfbf"
android:layout_gravity="center_horizontal"
android:paddingTop="2dp"
android:paddingBottom="2dp"
android:paddingLeft="4dp"
android:paddingRight="4dp"
android:textColor="#ffffff"
android:textSize="12sp" />
<RelativeLayout
android:layout_width="fill_parent"
android:layout_height="wrap_content"
android:layout_marginTop="5dp" >
<ImageView
android:id="@+id/iv_user_image"
android:layout_width="50dp"
android:layout_height="50dp"
android:layout_alignParentRight="true"
android:layout_alignParentTop="true"
android:background="@drawable/mypic"
android:focusable="false" />
<TextView
android:id="@+id/tv_content"
android:layout_width="wrap_content"
android:layout_height="wrap_content"
android:layout_marginRight="5dp"
android:layout_toLeftOf="@+id/iv_user_image"
android:background="@drawable/chatto_bg"
android:gravity="left|center"
android:clickable="true"
android:focusable="true"
android:lineSpacingExtra="2dp"
android:textColor="#ff000000"
android:textSize="14sp" />
</RelativeLayout>
</LinearLayout>
布局完成後新建一個實體類ChatEntity.java:
public class ChatEntity {
private int userImage;
private String content;
private String chatTime;
private boolean isComeMsg;
public int getUserImage() {
return userImage;
}
public void setUserImage(int userImage) {
this.userImage = userImage;
}
public String getContent() {
return content;
}
public void setContent(String content) {
this.content = content;
}
public String getChatTime() {
return chatTime;
}
public void setChatTime(String chatTime) {
this.chatTime = chatTime;
}
public boolean isComeMsg() {
return isComeMsg;
}
public void setComeMsg(boolean isComeMsg) {
this.isComeMsg = isComeMsg;
}
}
最後就是主Activity,這裡面包括了自己寫的BaseAdapter:
public class ChatDemoActivity extends Activity {
private Button sendButton = null;
private EditText contentEditText = null;
private ListView chatListView = null;
private List<ChatEntity> chatList = null;
private ChatAdapter chatAdapter = null;
@Override
public void onCreate(Bundle savedInstanceState) {
super.onCreate(savedInstanceState);
requestWindowFeature(Window.FEATURE_NO_TITLE);
游戲開發論壇:http://jiushun8.com/forum.php?mod=viewthread&tid=4371&extra=page%3D1
setContentView(R.layout.main);
contentEditText = (EditText) this.findViewById(R.id.et_content);
sendButton = (Button) this.findViewById(R.id.btn_send);
chatListView = (ListView) this.findViewById(R.id.listview);
chatList = new ArrayList<ChatEntity>();
ChatEntity chatEntity = null;
for (int i = 0; i < 2; i++) {
chatEntity = new ChatEntity();
if (i % 2 == 0) {
chatEntity.setComeMsg(false);
chatEntity.setContent("Hello");
chatEntity.setChatTime("2012-09-20 15:12:32");
}else {
chatEntity.setComeMsg(true);
chatEntity.setContent("Hello,nice to meet you!");
chatEntity.setChatTime("2012-09-20 15:13:32");
}
chatList.add(chatEntity);
}
chatAdapter = new ChatAdapter(this,chatList);
chatListView.setAdapter(chatAdapter);
sendButton.setOnClickListener(new OnClickListener() {
@Override
public void onClick(View v) {
if (!contentEditText.getText().toString().equals("")) {
//發送消息
send();
}else {
Toast.makeText(ChatDemoActivity.this, "Content is empty", Toast.LENGTH_SHORT).show();
}
}
});
}
private void send(){
ChatEntity chatEntity = new ChatEntity();
chatEntity.setChatTime("2012-09-20 15:16:34");
chatEntity.setContent(contentEditText.getText().toString());
chatEntity.setComeMsg(false);
chatList.add(chatEntity);
chatAdapter.notifyDataSetChanged();
chatListView.setSelection(chatList.size() - 1);
contentEditText.setText("");
}
private class ChatAdapter extends BaseAdapter{
private Context context = null;
private List<ChatEntity> chatList = null;
private LayoutInflater inflater = null;
private int COME_MSG = 0;
private int TO_MSG = 1;
public ChatAdapter(Context context,List<ChatEntity> chatList){
this.context = context;
this.chatList = chatList;
inflater = LayoutInflater.from(this.context);
}
@Override
public int getCount() {
return chatList.size();
}
@Override
public Object getItem(int position) {
return chatList.get(position);
}
@Override
public long getItemId(int position) {
return position;
}
@Override
public int getItemViewType(int position) {
// 區別兩種view的類型,標注兩個不同的變量來分別表示各自的類型
ChatEntity entity = chatList.get(position);
if (entity.isComeMsg())
{
return COME_MSG;
}else{
return TO_MSG;
}
}
@Override
public int getViewTypeCount() {
// 這個方法默認返回1,如果希望listview的item都是一樣的就返回1,我們這裡有兩種風格,返回2
return 2;
}
@Override
public View getView(int position, View convertView, ViewGroup parent) {
ChatHolder chatHolder = null;
if (convertView == null) {
chatHolder = new ChatHolder();
if (chatList.get(position).isComeMsg()) {
convertView = inflater.inflate(R.layout.chat_from_item, null);
}else {
convertView = inflater.inflate(R.layout.chat_to_item, null);
}
chatHolder.timeTextView = (TextView) convertView.findViewById(R.id.tv_time);
chatHolder.contentTextView = (TextView) convertView.findViewById(R.id.tv_content);
chatHolder.userImageView = (ImageView) convertView.findViewById(R.id.iv_user_image);
convertView.setTag(chatHolder);
}else {
chatHolder = (ChatHolder)convertView.getTag();
}
chatHolder.timeTextView.setText(chatList.get(position).getChatTime());
chatHolder.contentTextView.setText(chatList.get(position).getContent());
chatHolder.userImageView.setImageResource(chatList.get(position).getUserImage());
return convertView;
}
private class ChatHolder{
private TextView timeTextView;
private ImageView userImageView;
private TextView contentTextView;
}
}
 Android編程解析XML方法詳解(SAX,DOM與PULL)
 安卓APK瘦身
 viewpager+fragment的懶加載
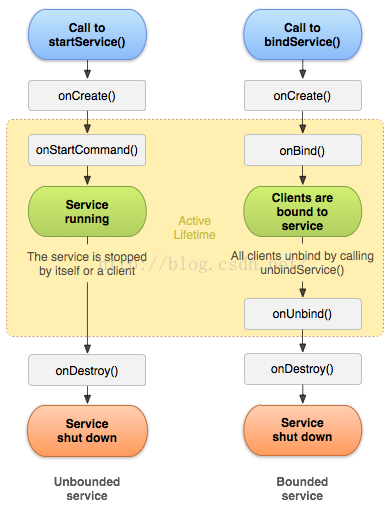 Android_Service(1)基本用法