編輯:關於Android編程
第一部分 Android網絡基礎
Android平台浏覽器采用了WeBKit引擎,這款名為Chorme Lite的Web浏覽器擁有強大擴展特性,
每個開發者都以為編寫自己的插件,使得浏覽器的功能更加完善。
目前Android平台有3種網絡接口。
第一種 java.net.*(標准java接口)
此接口提供與聯網有關的類,包括流和數據包套接字、Internet協議、常見HTTP處理。
如:創建URL以及URLConnection/HttpURLConnection對象、
設置連接參數、連接服務器、向服務器寫數據、從服務器讀取數據等通信。
下例為常見java.net包的Http例子:
try{
URL url = new URL("http://www.google.com%22)//定義地址
HttpURLConnection http = (HttpURLConnection) url.openConnection();//打開連接
int nRC = http.getResponseCode();//得到連接狀態
if(nRC == HttpURLConnection.HTTP_OK){
InputStream is = http.getInputStream();//取得數據
.....//處理數據
}
}catch(Exception e){
//因是連接網絡,不免會出現一些異常,所以必須處理這些異常
}
第二種 Apache接口
Android提供的Apache HttpClient,它是一個開源項目,功能更加完善,
為客戶端的Http編程提供高效、最新、功能豐富的工具包。
Android目前使用的是HttpClient4.0(org.apache.http.*),
可將Apache看為目前流行的開源Web服務器,
主要包括創建HttpClient以及Get/Post、HttpRequest等對象,設置連接參數,執行HTTP操作,
處理服務器返回結果等功能。
下例為使用android.net.http.*包的例子:
try{
HttpClient hc = new DefaultHttpClient();//創建HttpClient,這裡使用DefaultHttpClient表示默認屬性
HttpGet hg = new HttpGet("http://www.google.com%22);//HttpGet實例
HttpResponse rp = hc.execute(hg);//連接
if(rp.getStatusLine().getStatusCode() == HttpStatus.SC_OK){
InputStream is = rp.getEntity().getContent();
.....//處理數據
}
}catch(IOEeception e){
}
第三中 Android網絡接口
android.net.*包實際是通過Apache中HttpClient的封裝來實現的一個HTTP編程接口,
同時還提供了Http請求隊列管理以及Http連接池管理,以提高並發請求情況下(如裝載網頁時)的效率
還包括 網絡狀態監視等接口,網絡訪問的Socket,常用的Uri類以及有關WiFi相關的類等等。
下例為最簡單的Socket連接
try{
InetAddress ia = InetAddress.getByName("192.168.1.110");//IP地址
Socket sk = new Socket(inetAddress,61203,true);//端口
InputStream is =sk.getInputStream();//得到數據
OutputStream os = sk.getOutputStream();
.....//數據處理
os.close();
is.close();
sk.close();
}catch(UnknownHostException e){
}catch(IOException e){
}
第二部分 Http通信
Android提供了HttpURLConnection和HttpClient接口來開發Http程序。
Http(Hyper Text Transfer Protocol,超文本傳輸協議)用於傳輸WWW方式的數據。
HTTP通信中客戶端發送的每次請求都需要服務器回送響應,在請求結束後,會主動釋放連接。
從建立連接到關閉連接的過程為"一次連接"。
要保證客戶端程序在線狀態,需要不斷地向服務器發送連接請求。
通常的做法是即使不需要獲得任何數據,客戶端也保持沒隔一段固定的時間向服務器發送一次“保持連接”的請求,
服務器在收到該請求後對客戶端進行回復,表明知道客戶端在線。
若長時間無法收到客戶端的請求,則認為客戶端下線,若客戶端長時間無法收到服務器的回復,則認為網絡已經斷開。
很多情況下,需要服務器端主動向客戶端發送數據以保持客戶端與服務器數據的實時與同步。
Http通信中,服務器需要等到客戶端發送一次請求後才能將數據傳回給客戶端,
因此,客戶端定時向服務器端發送連接請求,不僅可以保持在線,
同時也是在"詢問"服務器是否有新數據,如果有就將數據傳給客戶端。
Http采用請求/響應的模式。
客戶端向服務器發送一個請求,
請求頭包含了請求方法,URI,協議版本,以及包含請求修飾符,客戶信息和內容,類似於MIME消息結構。
服務器以一個狀態行作為響應,響應的內容包含消息協議的版本,成功或錯誤編碼,
還包含服務器消息,實體元信息以及可能的實體內容。
它是一個屬於應用層的面向對象的協議,適用於分布式超媒體信息系統。
許多HTTP通信是由一個用戶代理初始化的,並且包括一個申請在源服務器上資源的請求。
最簡單的情況可能是在用戶代理和服務器之間通過一個單獨的連接來完成。
在Internet上,Http通信通常發生在TCP/IP連接上,缺省端口是TCP80.其他端口也是可用的。
第一種 HttpURLConnection接口
Http通信中使用最多的是Get和Post.
Get請求可用獲得靜態頁面,也可以把參數放在URL字串的後面,傳遞給服務器。
Post參數不是放在URL字串裡面,而是放在http請求數據中。
URLConnection與HttpURLConnection都是抽象類,無法直接實例化對象。
其對象主要通過URL的openConnection方法獲得,
但openConnection方法只是創建URLConnection或者HttpURLConnection 的實例,並不是進行真正的連接操作。
因此在連接之前我們可用對一些屬性進行設置
對HttpConnection實例的屬性設置:
connection.setDoOutput(true);//設置輸出流
connection.setDoInput(true);//設置輸出流
connection.setRequestMethod("POST");//設置方式為POST
connection.setUseCaches(false);//Post請求不能使用緩存
urlConn.disconnect();//連接完成之後關閉HttpURLConnection連接
首先在服務器上建立一個不需要傳遞參數的網頁http1.jsp文件。代碼如下:
<HTML>
<HEAD>
<TITLE>
Http Test
</TITLE>
</HEAD>
<BODY>
<% out.println("<h1>HTTP TEST<br>http test</h1>"); %>
</BODY>
</HTML>
再創建一個適用Get和Post來傳遞參數的網頁httpget.jsp 代碼如下:
<%@ page language="java" import = "java.util.*" pageEncoding = "gb2312" %>
<HTML>
<HEAD>
<TITLE>
Http Test
</TITLE>
</HEAD>
<BODY>
<%
String type = request.getParameter("par");
String result = new String(type.getBytes("iso-8859-1")),"gb2312");
out.println("<h1>parameters:"+result+"</h1>");
%>
</BODY>
</HTML>
以下例中通過Android程序分別以不同的方式訪問這兩個頁面。
main.xm 文件
<?xml version="1.0" encoding="utf-8"?>
<LinearLayout
xmlns:android="http://schemas.android.com/apk/res/android"
android:orientation="vertical"
android:layout_width="fill_parent"
android:layout_height="fill_parent">
<TextView
android:layout_width="fill_parent"
android:layout_height="wrap_content"
android:text="通過下面的按鈕進行不同方式的連接"/>
<Button
android:id="@+id/Button_HTTP"
android:layout_width="fill_parent"
android:layout_height="wrap_content"
android:text="直接獲取數據"/>
<Button
android:id="@+id/Button_Get"
android:layout_width="fill_parent"
android:layout_height="wrap_content"
android:text="以GET方式傳遞數據"/>
<Button
android:id="@+id/Button_Post"
android:layout_width="fill_parent"
android:layout_height="wrap_content"
android:text="以POST方式傳遞數據"/>
</LinearLayout>
http.xml文件
<?xml version="1.0" encoding="utf-8"?>
<LinearLayout xmlns:android="http://schemas.android.com/apk/res/android"
android:orientation="vertical"
android:layout_width="fill_parent"
android:layout_height="fill_parent"
>
<TextView
android:id="@+id/TextView_HTTP"
android:layout_width="fill_parent"
android:layout_height="wrap_content"
/>
<Button
android:id="@+id/Button_Back"
android:layout_width="fill_parent"
android:layout_height="wrap_content"
android:text="返回"/>
</LinearLayout>
public class Activity01 extends Activity{//進入界面實現3個控件的Activity
public void onCreate(Bundle savedInstanceState){
super.onCreate(savedInstanceState);
setContentView(R.layout.main);
Button button_http = (Button) findViewById(R.id.Button_HTTP);
/* 監聽button的事件信息 */
button_http.setOnClickListener(new Button.OnClickListener() {
public void onClick(View v){
/* 新建一個Intent對象 */
Intent intent = new Intent();
/* 指定intent要啟動的類 */
intent.setClass(Activity01.this, Activity02.class);
/* 啟動一個新的Activity */
startActivity(intent);
/* 關閉當前的Activity */
Activity01.this.finish();
}
});
Button button_Get = (Button) findViewById(R.id.Button_Get);
/* 監聽button的事件信息 */
button_Get.setOnClickListener(new Button.OnClickListener() {
public void onClick(View v){
/* 新建一個Intent對象 */
Intent intent = new Intent();
/* 指定intent要啟動的類 */
intent.setClass(Activity01.this, Activity03.class);
/* 啟動一個新的Activity */
startActivity(intent);
/* 關閉當前的Activity */
Activity01.this.finish();
}
});
Button button_Post = (Button) findViewById(R.id.Button_Post);
/* 監聽button的事件信息 */
button_Post.setOnClickListener(new Button.OnClickListener() {
public void onClick(View v){
/* 新建一個Intent對象 */
Intent intent = new Intent();
/* 指定intent要啟動的類 */
intent.setClass(Activity01.this, Activity04.class);
/* 啟動一個新的Activity */
startActivity(intent);
/* 關閉當前的Activity */
Activity01.this.finish();
}
});
}
}
public class Activity02 extends Activity{//直接獲取數據
private final String DEBUG_TAG = "Activity02";
public void onCreate(Bundle savedInstanceState){
super.onCreate(savedInstanceState);
setContentView(R.layout.http);
TextView mTextView = (TextView)this.findViewById(R.id.TextView_HTTP);
String httpUrl = "http://192.168.1.110:8080/http1.jsp%22;//http地址
String resultData = "";//獲得的數據
URL url = null;
try{
url = new URL(httpUrl); //構造一個URL對象
}catch (MalformedURLException e){
Log.e(DEBUG_TAG, "MalformedURLException");
}
if (url != null){
try{
HttpURLConnection urlConn = (HttpURLConnection) url.openConnection();//使用HttpURLConnection打開連接
InputStreamReader in = new InputStreamReader(urlConn.getInputStream());//得到讀取的內容(流)
BufferedReader buffer = new BufferedReader(in);// 為輸出創建BufferedReader
String inputLine = null;
while (((inputLine = buffer.readLine()) != null)){//使用循環來讀取獲得的數據
resultData += inputLine + "\n";//我們在每一行後面加上一個"\n"來換行
}
in.close();//關閉InputStreamReader
urlConn.disconnect();//關閉http連接
if ( resultData != null ){
mTextView.setText(resultData);//設置顯示取得的內容
}else {
mTextView.setText("讀取的內容為NULL");
}
}catch (IOException e){
Log.e(DEBUG_TAG, "IOException");
}
}else{
Log.e(DEBUG_TAG, "Url NULL");
}
Button button_Back = (Button) findViewById(R.id.Button_Back);//設置按鍵事件監聽
button_Back.setOnClickListener(new Button.OnClickListener(){//監聽button的事件信息
public void onClick(View v){
Intent intent = new Intent();
intent.setClass(Activity02.this, Activity01.class);
startActivity(intent);
Activity02.this.finish();
}
});
}
}
public class Activity03 extends Activity{//以Get方式上傳參數
private final String DEBUG_TAG = "Activity03";
public void onCreate(Bundle savedInstanceState){
super.onCreate(savedInstanceState);
setContentView(R.layout.http);
TextView mTextView = (TextView)this.findViewById(R.id.TextView_HTTP);
String httpUrl = "http://192.168.1.110:8080/httpget.jsp?par=abcdefg";//http地址"?par=abcdefg"是我們上傳的參數
String resultData = "";//獲得的數據
URL url = null;
try{
url = new URL(httpUrl); //構造一個URL對象
}catch (MalformedURLException e){
Log.e(DEBUG_TAG, "MalformedURLException");
}
if (url != null){
try{
HttpURLConnection urlConn = (HttpURLConnection) url.openConnection();// 使用HttpURLConnection打開連接
InputStreamReader in = new InputStreamReader(urlConn.getInputStream());//得到讀取的內容(流)
BufferedReader buffer = new BufferedReader(in); // 為輸出創建BufferedReader
String inputLine = null;
while (((inputLine = buffer.readLine()) != null)){//使用循環來讀取獲得的數據
resultData += inputLine + "\n";//我們在每一行後面加上一個"\n"來換行
}
in.close();//關閉InputStreamReader
urlConn.disconnect();//關閉http連接
if ( resultData != null ){
mTextView.setText(resultData);//設置顯示取得的內容
}else {
mTextView.setText("讀取的內容為NULL");
}
}catch (IOException e){
Log.e(DEBUG_TAG, "IOException");
}
}else{
Log.e(DEBUG_TAG, "Url NULL");
}
Button button_Back = (Button) findViewById(R.id.Button_Back);
button_Back.setOnClickListener(new Button.OnClickListener() {
public void onClick(View v){
Intent intent = new Intent();
intent.setClass(Activity03.this, Activity01.class);
startActivity(intent);
Activity03.this.finish();
}
});
}
}
public class Activity04 extends Activity{//以Post方式上傳參數
private final String DEBUG_TAG = "Activity04";
public void onCreate(Bundle savedInstanceState){
super.onCreate(savedInstanceState);
setContentView(R.layout.http);
TextView mTextView = (TextView)this.findViewById(R.id.TextView_HTTP);
String httpUrl = "http://192.168.1.110:8080/httpget.jsp%22;//http地址"?par=abcdefg"是我們上傳的參數
String resultData = "";//獲得的數據
URL url = null;
try{
url = new URL(httpUrl); //構造一個URL對象
}catch (MalformedURLException e){
Log.e(DEBUG_TAG, "MalformedURLException");
}
if (url != null){
try{
HttpURLConnection urlConn = (HttpURLConnection) url.openConnection();// 使用HttpURLConnection打開連接
urlConn.setDoOutput(true);//因為這個是post請求,設立需要設置為true
urlConn.setDoInput(true);
urlConn.setRequestMethod("POST");// 設置以POST方式
urlConn.setUseCaches(false);// Post 請求不能使用緩存
urlConn.setInstanceFollowRedirects(true);
urlConn.setRequestProperty("Content-Type","application/x-www-form-urlencoded"); // 配置本次連接的Content-type,配置為application/x-www-form-urlencoded的
// 連接,從postUrl.openConnection()至此的配置必須要在connect之前完成,
// 要注意的是connection.getOutputStream會隱含的進行connect。
urlConn.connect();
DataOutputStream out = new DataOutputStream(urlConn.getOutputStream());//DataOutputStream流
String content = "par=" + URLEncoder.encode("ABCDEFG", "gb2312");//要上傳的參數
out.writeBytes(content); //將要上傳的內容寫入流中
out.flush();//刷新、關閉
out.close();
BufferedReader reader = new BufferedReader(new InputStreamReader(urlConn.getInputStream()));//獲取數據
String inputLine = null;
while(((inputLine = reader.readLine()) != null)){//使用循環來讀取獲得的數據
resultData += inputLine + "\n";//我們在每一行後面加上一個"\n"來換行
}
reader.close();
urlConn.disconnect();//關閉http連接
if ( resultData != null ){
mTextView.setText(resultData);//設置顯示取得的內容
}else{
mTextView.setText("讀取的內容為NULL");
}
}catch (IOException e){
Log.e(DEBUG_TAG, "IOException");
}
}else{
Log.e(DEBUG_TAG, "Url NULL");
}
Button button_Back = (Button) findViewById(R.id.Button_Back);
button_Back.setOnClickListener(new Button.OnClickListener(){
public void onClick(View v){
Intent intent = new Intent();
intent.setClass(Activity04.this, Activity01.class);
startActivity(intent);
Activity04.this.finish();
}
});
}
}
上面完成的是網絡通信自是文本形式的,如果要顯示網絡上的一張圖片,連接方式和前面相同,
只需要將連接之後得到數據流轉換成Bitmap就可以了。
下例為顯示網絡圖片的方法
GetNetBitmap方法
//取得網絡上的圖片
//url:圖片地址
public Bitmap GetNetBitmap(String url){
URL imageUrl = null;
Bitmap bitmap = null;
try{
imageUrl = new URL(url);
}catch(MalformedURLException){
Log.e(DEBUG_TAG,e.getMessage());
}
try{
HttpURLConnection conn = (HttpURLConnection)imageUrl.openConnection();
conn.setDoInput(true);
conn.connect();
InputStream is = conn.getInputStream();//將得到的數據轉換成InputStream
bitmap = BitmapFactory.decodeStream(is);//將InputStream轉換成Bitmap
id.close();
}catch(IOException e){
Log.e(DEBUG_TAG,e.getMessage());
}
}
第二種 HttpClient接口
與第一種相比HttpClient對java.net中的類做了封裝和抽象,更適合我們在Android上開發互聯網應用。
需了解如下一些類:
ClinetConnectionManager接口
此接口是客戶端連接管理器接口,有如下抽象方法:
ClientConnectionManager 關閉所有無效、超時的連接
closeIdleConnections 關閉空閒的連接
releaseConnection 釋放一個連接
requestConnection 請求一個新的連接
shutdown 關閉管理器並釋放資源
DefaultHttpClient
是默認的一個HTTP客戶端,可用它創建一個Http連接 代碼如下:
HttpClinet httpclinet = new HttpClient();
HttpResponse
是一個HTTP連接響應,當執行一個HTTP連接後,就會返回一個HttpResponse,可以通過HttpResponse獲得一些響應的信息。
下例為請求一個HTTP連接並獲得該請求是否成功的代碼:
HttpResponse httpResponse = httpclient.execute(httpRequest);
if(httpResponse.getStatusLine(),getStatusCode() == HttpStates.SC_OK){//判斷是否連接成功
}
下例中分別使用Get和Post方式請求一個網頁
main.xml文件
<?xml version="1.0" encoding="utf-8"?>
<LinearLayout xmlns:android="http://schemas.android.com/apk/res/android"
android:orientation="vertical"
android:layout_width="fill_parent"
android:layout_height="fill_parent"
>
<TextView
android:layout_width="fill_parent"
android:layout_height="wrap_content"
android:text="使用HttpClient來進行GET和POST連接"
/>
<Button
android:id="@+id/Button_Get"
android:layout_width="fill_parent"
android:layout_height="wrap_content"
android:text="以GET方式傳遞數據"/>
<Button
android:id="@+id/Button_Post"
android:layout_width="fill_parent"
android:layout_height="wrap_content"
android:text="以POST方式傳遞數據"/>
</LinearLayout>
http.xml文件
<?xml version="1.0" encoding="utf-8"?>
<LinearLayout xmlns:android="http://schemas.android.com/apk/res/android"
android:orientation="vertical"
android:layout_width="fill_parent"
android:layout_height="fill_parent"
>
<TextView
android:id="@+id/TextView_HTTP"
android:layout_width="fill_parent"
android:layout_height="wrap_content"
/>
<Button
android:id="@+id/Button_Back"
android:layout_width="fill_parent"
android:layout_height="wrap_content"
android:text="返回"/>
</LinearLayout>
public class Activity01 extends Activity{
public void onCreate(Bundle savedInstanceState){
super.onCreate(savedInstanceState);
setContentView(R.layout.main);
Button button_Get = (Button) findViewById(R.id.Button_Get);
/* 監聽button的事件信息 */
button_Get.setOnClickListener(new Button.OnClickListener() {
public void onClick(View v){
/* 新建一個Intent對象 */
Intent intent = new Intent();
/* 指定intent要啟動的類 */
intent.setClass(Activity01.this, Activity02.class);
/* 啟動一個新的Activity */
startActivity(intent);
/* 關閉當前的Activity */
Activity01.this.finish();
}
});
Button button_Post = (Button) findViewById(R.id.Button_Post);
/* 監聽button的事件信息 */
button_Post.setOnClickListener(new Button.OnClickListener() {
public void onClick(View v){
/* 新建一個Intent對象 */
Intent intent = new Intent();
/* 指定intent要啟動的類 */
intent.setClass(Activity01.this, Activity03.class);
/* 啟動一個新的Activity */
startActivity(intent);
/* 關閉當前的Activity */
Activity01.this.finish();
}
});
}
}
public class Activity02 extends Activity{//Get方式請求例子
public void onCreate(Bundle savedInstanceState){
super.onCreate(savedInstanceState);
setContentView(R.layout.http);
TextView mTextView = (TextView) this.findViewById(R.id.TextView_HTTP);
String httpUrl = "http://192.168.1.110:8080/httpget.jsp?par=HttpClient_android_Get";// http地址
HttpGet httpRequest = new HttpGet(httpUrl);//HttpGet連接對象
try{
HttpClient httpclient = new DefaultHttpClient();//取得HttpClient對象
HttpResponse httpResponse = httpclient.execute(httpRequest);//請求HttpClient,取得HttpResponse
if (httpResponse.getStatusLine().getStatusCode() == HttpStatus.SC_OK){//請求成功
String strResult = EntityUtils.toString(httpResponse.getEntity());//取得返回的字符串
mTextView.setText(strResult);
}else{
mTextView.setText("請求錯誤!");
}
}catch (ClientProtocolException e){
mTextView.setText(e.getMessage().toString());
}catch (IOException e){
mTextView.setText(e.getMessage().toString());
}catch (Exception e){
mTextView.setText(e.getMessage().toString());
}
Button button_Back = (Button) findViewById(R.id.Button_Back);//設置按鍵事件監聽
button_Back.setOnClickListener(new Button.OnClickListener() {
public void onClick(View v){
Intent intent = new Intent();
intent.setClass(Activity02.this, Activity01.class);
startActivity(intent);
Activity02.this.finish();
}
});
}
}
public class Activity03 extends Activity{//Post方式請求
public void onCreate(Bundle savedInstanceState){
super.onCreate(savedInstanceState);
setContentView(R.layout.http);
TextView mTextView = (TextView) this.findViewById(R.id.TextView_HTTP);
String httpUrl = "http://192.168.1.110:8080/httpget.jsp%22;// http地址
HttpPost httpRequest = new HttpPost(httpUrl);//HttpPost連接對象
List<NameValuePair> params = new ArrayList<NameValuePair>();//使用NameValuePair來保存要傳遞的Post參數
params.add(new BasicNameValuePair("par", "HttpClient_android_Post"));//添加要傳遞的參數
try{
HttpEntity httpentity = new UrlEncodedFormEntity(params, "gb2312");//設置字符集,Post需要設置所使用的字符集
httpRequest.setEntity(httpentity);//請求httpRequest
HttpClient httpclient = new DefaultHttpClient();//取得默認的HttpClient
HttpResponse httpResponse = httpclient.execute(httpRequest);//取得HttpResponse
if (httpResponse.getStatusLine().getStatusCode() == HttpStatus.SC_OK){//HttpStatus.SC_OK表示連接成功
String strResult = EntityUtils.toString(httpResponse.getEntity());//取得返回的字符串
mTextView.setText(strResult);
}else{
mTextView.setText("請求錯誤!");
}
}catch (ClientProtocolException e){
mTextView.setText(e.getMessage().toString());
}catch (IOException e){
mTextView.setText(e.getMessage().toString());
}catch (Exception e){
mTextView.setText(e.getMessage().toString());
}
Button button_Back = (Button) findViewById(R.id.Button_Back);//設置按鍵事件監聽
button_Back.setOnClickListener(new Button.OnClickListener() {
public void onClick(View v){
Intent intent = new Intent();
intent.setClass(Activity03.this, Activity01.class);
startActivity(intent);
Activity03.this.finish();
}
});
}
}
第三部分 實時更新
第二部分只是簡單地一次性獲取網頁數據,
而在實際開發中更多的是需要我們實時獲取最新數據,比如道路流量,實時天氣信息等等。
可通過一個線程來控制視圖的更新,要實時的從網絡獲取數據,其實就是把獲取網絡數據的代碼寫到線程中,不停的進行更新。
注意:Android中更新視圖不能直接在線程中進行,所以需要使用Handler來實現更新。
下例中我們創建一個網頁來顯示系統當前的時間,然後每隔5秒系統自動刷新一次視圖。
首先,創建一個顯示當前系統時間的jsp網頁文件如下:
date.jsp
<% page language="java" import="java.util.*" pageEncoding="gb2312"%>
<HTML>
<HEAD>
<TITLE>
Date Test
</TITLE>
</HEAD>
<BODY>
<%java.text.SimpleDateFormat formatter = new java.text.SimpleDateFormat("yyyy-MM--dd HH:mm:ss");>
</BODY>
</HTML>
main.xml文件
<?xml version="1.0" encoding="utf-8"?>
<LinearLayout
xmlns:android="http://schemas.android.com/apk/res/android"
android:orientation="vertical"
android:layout_width="fill_parent"
android:layout_height="fill_parent"
>
<TextView
android:id="@+id/TextView01"
android:layout_width="fill_parent"
android:layout_height="wrap_content"
android:text="@string/hello"
/>
<Button
android:id="@+id/Button01"
android:layout_width="fill_parent"
android:layout_height="wrap_content"
android:text="刷新" />
</LinearLayout>
public class Activity01 extends Activity{
private final String DEBUG_TAG = "Activity02";
private TextView mTextView;
private Button mButton;
public void onCreate(Bundle savedInstanceState){
super.onCreate(savedInstanceState);
setContentView(R.layout.main);
mTextView = (TextView)this.findViewById(R.id.TextView01);
mButton = (Button)this.findViewById(R.id.Button01);
mButton.setOnClickListener(new Button.OnClickListener(){
public void onClick(View arg0){
refresh();//刷新
}
});
new Thread(mRunnable).start();//開啟線程
}
private void refresh(){//刷新網頁顯示
String httpUrl = "http://192.168.1.110:8080/date.jsp";
String resultData = "";
URL url = null;
try{
url = new URL(httpUrl);// 構造一個URL對象
}catch (MalformedURLException e){
Log.e(DEBUG_TAG, "MalformedURLException");
}
if (url != null){
try{
HttpURLConnection urlConn = (HttpURLConnection) url.openConnection();// 使用HttpURLConnection打開連接
InputStreamReader in = new InputStreamReader(urlConn.getInputStream());// 得到讀取的內容(流)
BufferedReader buffer = new BufferedReader(in);// 為輸出創建BufferedReader
String inputLine = null;
while (((inputLine = buffer.readLine()) != null)){// 使用循環來讀取獲得的數據
resultData += inputLine + "\n";// 我們在每一行後面加上一個"\n"來換行
}
in.close();// 關閉InputStreamReader
urlConn.disconnect();// 關閉http連接
if (resultData != null){
mTextView.setText(resultData);// 設置顯示取得的內容
}else{
mTextView.setText("讀取的內容為NULL");
}
}catch (IOException e){
Log.e(DEBUG_TAG, "IOException");
}
}else{
Log.e(DEBUG_TAG, "Url NULL");
}
}
private Runnable mRunnable = new Runnable(){
public void run(){
while (true){
try{
Thread.sleep(5 * 1000);
mHandler.sendMessage(mHandler.obtainMessage());//發送消息
}catch (InterruptedException e){
Log.e(DEBUG_TAG, e.toString());
}
}
}
};
Handler mHandler = new Handler(){
public void handleMessage(Message msg){
super.handleMessage(msg);//接受消息
refresh();//刷新
}
};
}
第四部分 Socket通信
如果要開發一款多人聯網的游戲,Http已經不能很好的滿足要求了。這時就需要Socket通信了。
Socket通常稱為"套接字",用於描述IP地址和端口,是一個通信鏈的句柄。
應用程序通常通過“套接字”向網絡發出請求或者應答網絡請求。
它是通信的基石,是支持TCP/IP協議的網絡
通信的基本操作單元。它是網絡通信過程中端點的抽象表示,包含進行網絡通信必需的5種信息:
連接使用的協議、本地主機的IP地址、本地進程的協議端口、遠地主機的IP地址、遠地進程的協議端口。
1、Socket傳輸模式
Socket有兩種主要操作方式:面向連接的 和 無連接的
面向連接的Socket操作就像一部電話機,必須要等對方接上之後才能通話。
所有的數據到達的順序與它出發時的順序是一樣的。
面向連接的操作使用TCP協議,即此模式下必須先連接上目的地的Socket,
連接上後Socket就可以使用一個流接口進行打開、讀、寫、關閉等操作。
所有所發信息都會在另一端以同樣的順序被接收。安全性高,但效率低。
無連接的就像是一個郵件投遞,沒有保證,多個郵件到達時的順序可能與出發時的順序不一樣。
無連接的操作使用數據報協議,一個數據報是一個獨立的單元,它包含了這次投遞的所有信息。
可將其想象成一個信封,這個模式下的Socket不需要連接一個目的Socket,它只是簡單的投出數據報。
無連接的操作時快速和高效的,但是數據安全性不高。
到底用哪種由應用程序的需要決定。如:文件服務器需要數據的正確性和有序性,因選面向連接的。
2、Socket編程原理
Socket構造
java.net包中提供兩個類Socket和ServerSocket,分別用來表示雙向連接的客戶端和服務器端.
兩類中其構造方法如下:
Socket(InetAddress address,int port);
Socket(InetAddress address,int port,boolean stream);
Socket(String host,int port);
Socket(String host,int port,boolean stream);
Socket(SocketImpl impl);
Socket(String host,int port,InetAddress localAddr,int localPort);
Socket(InetAddress address,int port,InetAddress localAddr,int localPort);
ServerSocket(int port);
ServerSocket(int port,int backlog);
ServerSocket(int port,int backlog,InetAddress bindAddr);
其中參數意義:
address 雙向連接中另一方的IP地址
host 雙向連接中另一方的主機名
port 雙向連接中另一方的端口號
stream 指明Socket是流Socket還是數據報Socket
localPort 本地主機的端口號
localAddr和bindAddr是本地機器的地址(ServerSocket的主機地址)
impl 是Socket的父類,即可以用來創建ServerSocket,又可以用來創建Socket
例:
//count表示服務端所支持的最大連接數
Socket client = new Socket("192.168.1.110",54321);
ServerSocket server = new ServerSocket(54321);
注意:在選擇端口時每一個端口對應一個服務,只有給出正確的端口,才能獲得相應的服務。0~1023的端口號為系統所保留,例如http服務的端口號為80,telent服務的端口號
為21,ftp服務的端口號為23,所以選擇端口號時最好選擇一個大於1023的數 如上的54321,防止發生沖突。在創建Socket時如果發生錯誤,將產生IOException,所以在創建Socket
和ServerSocket時必須捕獲或拋出異常。
Socket 客戶端
要想使用Socket來與一個服務器通信,就必須先在客戶端創建一個Socket,並指出需要連接的服務器端的IP地址和端口,代碼如下:
try{
Socket socket = new Socket("192.168.1.110",33221);//"192.168.1.110"是IP地址,33221是端口號
}catch(IOException e){
}
ServerSocket 服務器端
創建一個服務器端的代碼:
ServerSocket server = null;
try{
server = new ServerSocket(33221);//服務器端在33221端口號監聽客戶請求,在這裡服務器端只能接收一個請求,接收後服務器端就退出了。實際的應用中總是讓他不
停地循環接收,一旦有客戶請求,服務器端總是會創建一個服務器線程來服務新來的客戶,而自己則繼續監聽。
}catch(IOException e){
}
try{
Socket socket = new server.accpet();//accpet()為一個阻塞函數,即該方法被調用後將等待客戶的請求,直到有一個客戶啟動並請求連接到相同的端口,然後accept
返回一個對應於客戶端的Socket.這時,客戶方和服務方都建立了用於通信的Socket,接下來就由各個Socket分別打開各自的輸入
輸出流。
}catch(IOExcetion e){
}
輸入、輸出流
Socket 提供了getInputStream()和getOutPutStream()來得到對應的輸入(輸出)流以進行讀(寫)操作,這兩個方法分別返回InputStream和OutputStream類對象。
為了便於讀(寫)數據,可以在返回輸入、輸出流對象上建立過濾流。如:DataInputStream、DataOutPutStream、或PrintStream類對象。對於文本方式流對象,可以采用
InputStreamReader和OutputStreamWriter、PrintWirter處理 代碼如下:
PrintStream os = new PrintStream(new BufferedOutputStream(Socket.getOutputStream()));
DataInputStream is = new DataInputStream(socket.getInputStream());
PrintWriter out = new PrintWriter(socket.getOutStream(),true);
BufferedReader in = new ButfferedReader(new InputStreamReader(Socket.getInputStream()));
關閉Socket和流
在Socket使用完畢後需要將其關閉,以釋放資源。
注意:在關閉Socket之前,應將與Socket相關的所有的輸入、輸出流先關閉,以釋放資源。要注意關閉的順序。
os.close();//輸出流先關閉
is.close();//輸入流其次
socket.close();//最後關閉Socket
下例中 實現一個服務器和客戶端通信。客戶端發送數據並接受服務器發回的數據。
public class Server implements Runnable{//服務器實現 注意:該程序需要單獨編譯,並在命令行模式下啟動
public void run(){
try{
ServerSocket serverSocket = new ServerSocket(54321);//創建ServerSocket 設置端口號為54321
while (true){
Socket client = serverSocket.accept();//通過accept監聽接受客戶端請求
System.out.println("accept");
try{
BufferedReader in = new BufferedReader(new InputStreamReader(client.getInputStream()));//通過BufferedReader對象接收客戶端消息
String str = in.readLine();
System.out.println("read:" + str);
PrintWriter out = new PrintWriter( new BufferedWriter( new OutputStreamWriter(client.getOutputStream())),true); //通過PrintWriter向服務器發送消息,但
需要通過Socket對象來取得其輸出流
out.println("server message");
out.close();//關閉流
in.close();
}catch (Exception e){
System.out.println(e.getMessage());
e.printStackTrace();
}finally{
client.close();//關閉
System.out.println("close");
}
}
}catch (Exception e){
System.out.println(e.getMessage());
}
}
public static void main(String a[]){//main函數用來開啟服務器
Thread desktopServerThread = new Thread(new Server());
desktopServerThread.start();//開啟線程
}
}
public class Activity01 extends Activity{//客戶端
private final String DEBUG_TAG = "Activity01";
private TextView mTextView=null;
private EditText mEditText=null;
private Button mButton=null;
public void onCreate(Bundle savedInstanceState){
super.onCreate(savedInstanceState);
setContentView(R.layout.main);
mButton = (Button)findViewById(R.id.Button01);
mTextView=(TextView)findViewById(R.id.TextView01);
mEditText=(EditText)findViewById(R.id.EditText01);
mButton.setOnClickListener(new OnClickListener(){//登陸
public void onClick(View v){
Socket socket = null;
String message = mEditText.getText().toString() + "\r\n";
try {
socket = new Socket("192.168.1.110",54321);//創建Socket 連接服務器
PrintWriter out = new PrintWriter( new BufferedWriter( new OutputStreamWriter(socket.getOutputStream())),true); //向服務器發送消息
out.println(message);
BufferedReader br = new BufferedReader(new InputStreamReader(socket.getInputStream())); //接收來自服務器的消息
String msg = br.readLine(); //讀取
if ( msg != null ){
mTextView.setText(msg);//接受消息後更新顯示到TextView中
}else{
mTextView.setText("數據錯誤!");
}
out.close();//關閉流
br.close();
socket.close(); //關閉Socket
}catch (Exception e) {
Log.e(DEBUG_TAG, e.toString());
}
}
});
}
}
通過上例總結了一下:
使用Socket實現客戶端的步驟;
1、通過IP地址和端口實例化Socket,請求連接服務器
2、獲取Socket上的流以進行讀寫
3、把流包裝進BufferReader/PrintWriter的實例
4、對Socket進行讀寫
5、關閉打開的流
創建服務器的步驟:
1、指定端口實例化一個ServerSocket
2、調用ServerSocket的accept()以在等待連接期間造成阻塞
3、獲取位於該層Socket的流以進行讀寫操作
4、將數據封裝成流
5、對Socket進行讀寫
6、關閉打開的流
第五部分 Socket應用---簡易聊天室
第四部分例子中實現了一個客戶端和一個服務器的單獨通信,並且只能一次通信,
在實際中,往往需要在服務器上運行一個永久的程序,它可以接收來自其他多個客戶端的請求,並提供相應服務。
這就需要多線程來實現多客戶機制。
服務器總是在指定的端口上監聽是否有客戶請求,一旦監聽到客戶請求,
服務器就會啟動一個專門的服務線程來響應該客戶的請求,
而服務器本身在啟動完線程後馬上又進入監聽狀態,等待下一個客戶。
下例中使用Socket通信實現了一個簡單的聊天室程序。
下例我們需要啟動兩個客戶端來同時連接服務器,一個客戶端是Android程序,另一個是Java程序.
首先啟動服務器---啟動Android客戶端---啟動另一個PC客戶端----Android客戶端
發送消息----pc客戶端發送消息---Android客戶端發送消息----pc客戶端發送消息....
(當一個客戶端發送消息(或連接服務器))後,服務器將向所有客戶端發送一個消息,
這就需要服務器和客戶端一直處於監聽狀態。
main.xml文件
<?xml version="1.0" encoding="utf-8"?>
<AbsoluteLayout
xmlns:android="http://schemas.android.com/apk/res/android"
android:orientation="vertical"
android:layout_width="fill_parent"
android:layout_height="fill_parent"
>
<EditText
android:id="@+id/EditText01"
android:text="聊天記錄:\n"
android:layout_width="fill_parent"
android:layout_height="200px">
</EditText>
<EditText
android:id="@+id/EditText02"
android:text="輸入要發送的內容"
android:layout_width="fill_parent"
android:layout_height="wrap_content"
android:layout_y="200px">
</EditText>
<Button
android:id="@+id/Button_In"
android:layout_width="80px"
android:layout_height="wrap_content"
android:text="登陸"
android:layout_x="30px"
android:layout_y="260px"
/>
<Button
android:id="@+id/Button_Send"
android:layout_width="80px"
android:layout_height="wrap_content"
android:text="發送"
android:layout_x="210px"
android:layout_y="260px"
/>
</AbsoluteLayout>
public class Server{//服務器端 需要單獨編譯並在命令行模式下啟動測試
private static final int SERVERPORT = 54321; //服務器端口
private static List<Socket> mClientList = new ArrayList<Socket>(); //客戶端連接 通過List來儲存所有連接進來的客戶端的Socket對象(也可用CopyOnWriteArrayList來儲存)
private ExecutorService mExecutorService; //線程池 需要為每個客戶端都開啟一個線程
private ServerSocket mServerSocket; //ServerSocket對象
public static void main(String[] args){ //main方法 開啟服務器
new Server();
}
public Server(){
try{
mServerSocket = new ServerSocket(SERVERPORT);//設置服務器端口
mExecutorService = Executors.newCachedThreadPool();//創建一個線程池
System.out.println("start...");
Socket client = null;//用來臨時保存客戶端連接的Socket對象
while (true){
client = mServerSocket.accept(); //接收客戶連接並添加到list中
mClientList.add(client);
mExecutorService.execute(new ThreadServer(client));//開啟一個客戶端線程
}
}catch (IOException e){
e.printStackTrace();
}
}
static class ThreadServer implements Runnable{//每個客戶端單獨開啟一個線程
private Socket mSocket;
private BufferedReader mBufferedReader;
private PrintWriter mPrintWriter;
private String mStrMSG;
public ThreadServer(Socket socket) throws IOException{
this.mSocket = socket;
mBufferedReader = new BufferedReader(new InputStreamReader(socket.getInputStream()));
mStrMSG = "user:"+this.mSocket.getInetAddress()+" come total:" + mClientList.size();
sendMessage();
}
public void run(){
try{
while ((mStrMSG = mBufferedReader.readLine()) != null){
if (mStrMSG.trim().equals("exit")){
//當一個客戶端退出時
mClientList.remove(mSocket);
mBufferedReader.close();
mPrintWriter.close();
mStrMSG = "user:"+this.mSocket.getInetAddress()+" exit total:" + mClientList.size();
mSocket.close();
sendMessage();
break;
}else{
mStrMSG = mSocket.getInetAddress() + ":" + mStrMSG;
sendMessage();
}
}
}catch (IOException e){
e.printStackTrace();
}
}
private void sendMessage() throws IOException{//發送消息給所有客戶端
System.out.println(mStrMSG);
for (Socket client : mClientList){
mPrintWriter = new PrintWriter(client.getOutputStream(), true);
mPrintWriter.println(mStrMSG);
}
}
}
}
public class Client2{//需要單獨編譯並在命令行模式下啟動測試
private static final int PORT = 54321;
private static ExecutorService exec = Executors.newCachedThreadPool();
public static void main(String[] args) throws Exception{
new Client2();
}
public Client2(){
try{
Socket socket = new Socket("192.168.1.110", PORT);
exec.execute(new Sender(socket));
BufferedReader br = new BufferedReader(new InputStreamReader(socket.getInputStream()));
String msg;
while ((msg = br.readLine()) != null){
System.out.println(msg);
}
}catch (Exception e){
}
}
static class Sender implements Runnable{//客戶端線程獲取控制台輸入消息
private Socket socket;
public Sender(Socket socket){
this.socket = socket;
}
public void run(){
try{
BufferedReader br = new BufferedReader(new InputStreamReader(System.in));
PrintWriter pw = new PrintWriter(socket.getOutputStream(), true);
String msg;
while (true){
msg = br.readLine();
pw.println(msg);
if (msg.trim().equals("exit")){
pw.close();
br.close();
exec.shutdownNow();
break;
}
}
}catch (Exception e){
e.printStackTrace();
}
}
}
}
public class Activity01 extends Activity{//客戶端, 客戶端需要與服務器始終保持通信狀態
注意:因Android是線程安全的,所以不能直接在線程中更新視圖,需使用Handler來更新視圖
當點擊”登陸“按鈕時,連接服務器,並取得需要操作的流,
點擊"發送"按鈕時取出輸入框中的內容發送向服務器,由服務器發送給每個客戶端
private final String DEBUG_TAG = "Activity01";
private static final String SERVERIP = "192.168.1.110";//服務器IP、端口
private static final int SERVERPORT = 54321;
private Thread mThread = null;
private Socket mSocket = null;
private Button mButton_In = null;
private Button mButton_Send= null;
private EditText mEditText01 = null;
private EditText mEditText02 = null;
private BufferedReader mBufferedReader = null;
private PrintWriter mPrintWriter = null;
private String mStrMSG = "";
public void onCreate(Bundle savedInstanceState){
super.onCreate(savedInstanceState);
setContentView(R.layout.main);
mButton_In = (Button)findViewById(R.id.Button_In);
mButton_Send = (Button)findViewById(R.id.Button_Send);
mEditText01=(EditText)findViewById(R.id.EditText01);
mEditText02=(EditText)findViewById(R.id.EditText02);
mButton_In.setOnClickListener(new OnClickListener(){//登陸按鈕
public void onClick(View v){
try {
mSocket = new Socket(SERVERIP, SERVERPORT); //連接服務器
mBufferedReader = new BufferedReader(new InputStreamReader(mSocket.getInputStream()));//取得輸入、輸出流
mPrintWriter=new PrintWriter(mSocket.getOutputStream(), true);
}catch (Exception e) {
Log.e(DEBUG_TAG, e.toString());
}
}
});
mButton_Send.setOnClickListener(new OnClickListener(){//發送消息按鈕
public void onClick(View v){
try {
String str = mEditText02.getText().toString() + "\n";//取得編輯框中我們輸入的內容
mPrintWriter.print(str);//發送給服務器
mPrintWriter.flush();
}catch (Exception e) {
Log.e(DEBUG_TAG, e.toString());
}
}
});
mThread = new Thread(mRunnable);
mThread.start();
}
private Runnable mRunnable = new Runnable() { //線程:監聽服務器發來的消息
public void run(){
while (true){
try{
if ( (mStrMSG = mBufferedReader.readLine()) != null ){
mStrMSG+="\n";//消息換行
mHandler.sendMessage(mHandler.obtainMessage());// 發送消息
}
}catch (Exception e){
Log.e(DEBUG_TAG, e.toString());
}
}
}
};
Handler mHandler = new Handler() {
public void handleMessage(Message msg){
super.handleMessage(msg);//接受消息 刷新
try{
mEditText01.append(mStrMSG); //將聊天記錄添加進來
}catch (Exception e){
Log.e(DEBUG_TAG, e.toString());
}
}
};
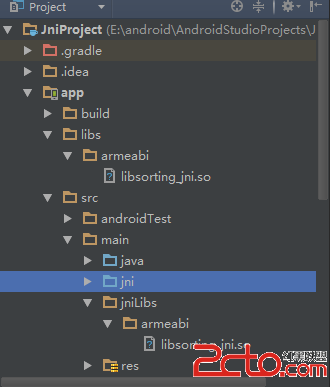 Android使用JNI(從java調用本地函數)
當編寫一個混合有本地C代碼和Java的應用程序時,需要使用Java本地接口(JNI)作為連接橋梁。JNI作為一個軟件層和API,允許使用本地代碼調用Java對象的方法,同
 簡單實用的Android UI微博動態點贊效果
說起空間動態、微博的點贊效果,網上也是很泛濫,各種實現與效果一大堆。而詳細實現的部分,講述的也是參差不齊,另一方面估計也有很多大俠也不屑一顧,覺得完全沒必要單獨開篇來寫和
 android listview級聯三菜單選擇地區,本地數據庫sqlite級聯地區,item選中不變色
前言:因為找了N多網上的資源都沒有好的解決方案,別人都是只給思路沒給具體源碼,真TMD糾結,干嘛求別人,自己動手才是真,最痛恨那些所謂大牛的作風,給了點點代碼就讓別人去想
 微信朋友圈氣泡大字是怎麼做的 氣泡大字生成器
微信朋友圈氣泡大字是怎麼做的?近來,在微信朋友圈裡迅速出現了一種氣泡類型的大文字動態,在朋友圈裡可是新鮮得很啊,那麼這種氣泡大字是怎麼做的?小編特地了解到氣