編輯:關於Android編程
1、養成好習慣,配置字符串資源文件 strings.xml
 xml version="1.0" encoding="utf-8"?>
<resources>
    <string name="app_name">網絡圖片查看器</string>
    <string name="action_settings">Settings</string>
    <string name="hello_world">Hello world!</string>
    <string name="imgpath">輸入圖片地址:</string>
    <string name="getBtn">獲取圖片</string>
    <string name="error">獲取圖片失敗</string>
</resources>

<?xml version="1.0" encoding="utf-8"?>
<resources>
    <string name="app_name">網絡圖片查看器</string>
    <string name="action_settings">Settings</string>
    <string name="hello_world">Hello world!</string>
 <string name="imgpath">輸入圖片地址:</string>
 <string name="getBtn">獲取圖片</string>
 <string name="error">獲取圖片失敗</string>
</resources>
2、布局文件,使用垂直布局
LinearLayout xmlns:android="http://schemas.android.com/apk/res/android"
    xmlns:tools="http://schemas.android.com/tools"
    android:orientation="vertical"
    android:layout_width="match_parent"
    android:layout_height="match_parent"
    android:paddingBottom="@dimen/activity_vertical_margin"
    android:paddingLeft="@dimen/activity_horizontal_margin"
    android:paddingRight="@dimen/activity_horizontal_margin"
    android:paddingTop="@dimen/activity_vertical_margin"
    tools:context=".MainActivity" >

    <TextView
        android:layout_width="fill_parent"
        android:layout_height="wrap_content"
        android:text="@string/imgpath"
        />

    <EditText android:layout_width="fill_parent"
        android:layout_height="wrap_content"
        android:id="@+id/imgpathInput"
        android:text="http://avatar.csdn.net/B/E/7/1_gaotong2055.jpg"
        android:inputType="text" />
    <Button
         android:layout_width="wrap_content"
        android:layout_height="wrap_content"
        android:text="@string/getBtn"
        android:id="@+id/getBtn"
        />
    <ImageView
        android:layout_width="wrap_content"
        android:layout_height="wrap_content"
        android:id="@+id/imgView"
        />
</LinearLayout>

<LinearLayout xmlns:android="http://schemas.android.com/apk/res/android"
    xmlns:tools="http://schemas.android.com/tools"
    android:orientation="vertical"
    android:layout_width="match_parent"
    android:layout_height="match_parent"
    android:paddingBottom="@dimen/activity_vertical_margin"
    android:paddingLeft="@dimen/activity_horizontal_margin"
    android:paddingRight="@dimen/activity_horizontal_margin"
    android:paddingTop="@dimen/activity_vertical_margin"
    tools:context=".MainActivity" >

    <TextView
        android:layout_width="fill_parent"
        android:layout_height="wrap_content"
        android:text="@string/imgpath"
        />

    <EditText android:layout_width="fill_parent"
        android:layout_height="wrap_content"
        android:id="@+id/imgpathInput"
        android:text="http://avatar.csdn.net/B/E/7/1_gaotong2055.jpg"
        android:inputType="text" />
    <Button
         android:layout_width="wrap_content"
        android:layout_height="wrap_content"
        android:text="@string/getBtn"
        android:id="@+id/getBtn"
        />
    <ImageView
        android:layout_width="wrap_content"
        android:layout_height="wrap_content"
        android:id="@+id/imgView"
        />
</LinearLayout>
、編寫代碼
這裡為了方便看代碼,都寫在一個類裡面了。
可以把裡面的靜態方法單獨拆分出來,寫在一個工具類中,結構更好。
public class MainActivity extends Activity implements OnClickListener {
    private EditText pathText;
    private ImageView imageView;

    @Override
    protected void onCreate(Bundle savedInstanceState) {
        super.onCreate(savedInstanceState);
        setContentView(R.layout.activity_main);
        pathText = (EditText) this.findViewById(R.id.imgpathInput);
        imageView = (ImageView) this.findViewById(R.id.imgView);
        Button button = (Button) this.findViewById(R.id.getBtn);
        button.setOnClickListener(this);
    }

    @Override
    public boolean onCreateOptionsMenu(Menu menu) {
        getMenuInflater().inflate(R.menu.main, menu);
        return true;
    }

    @Override
    public void onClick(View v) {
        String path = pathText.getText().toString();
        byte[] data = null;
        try {
            data = getImgData(path);
        } catch (Exception e) {
            e.printStackTrace();
            Toast.makeText(this, R.string.error, 1).show();
        }
        Bitmap bitmap = BitmapFactory.decodeByteArray(data, 0, data.length);
        imageView.setImageBitmap(bitmap);
    }

    public static byte[] getImgData(String path) throws Exception {

        URL url = new URL(path);
        HttpURLConnection conn = (HttpURLConnection) url.openConnection();
        conn.setConnectTimeout(5000);// 超時時間5秒
        conn.setRequestMethod("GET");
        if (conn.getResponseCode() == 200) {
            InputStream in = conn.getInputStream();
            return read(in);
        } else {
            Log.d("tong.getImg", "服務器無響應");
        }

        return null;
    }

    /**
     * 從一個輸入流中讀取數據,並返回
     *
     * @param in
     * @return byte[] 數據
     * @throws IOException
     */
    public static byte[] read(InputStream in) throws IOException {
        // 開辟一個內存的區域,以寫入數據
        ByteArrayOutputStream outStream = new ByteArrayOutputStream();
        byte[] buffer = new byte[10240];
        int len = 0;
        while ((len = in.read(buffer)) != -1) {
            outStream.write(buffer, 0, len);
        }
        outStream.close();

        return outStream.toByteArray(); // 返回內存中的數據
    }

}

public class MainActivity extends Activity implements OnClickListener {
 private EditText pathText;
 private ImageView imageView;

 @Override
 protected void onCreate(Bundle savedInstanceState) {
  super.onCreate(savedInstanceState);
  setContentView(R.layout.activity_main);
  pathText = (EditText) this.findViewById(R.id.imgpathInput);
  imageView = (ImageView) this.findViewById(R.id.imgView);
  Button button = (Button) this.findViewById(R.id.getBtn);
  button.setOnClickListener(this);
 }

 @Override
 public boolean onCreateOptionsMenu(Menu menu) {
  getMenuInflater().inflate(R.menu.main, menu);
  return true;
 }

 @Override
 public void onClick(View v) {
  String path = pathText.getText().toString();
  byte[] data = null;
  try {
   data = getImgData(path);
  } catch (Exception e) {
   e.printStackTrace();
   Toast.makeText(this, R.string.error, 1).show();
  }
  Bitmap bitmap = BitmapFactory.decodeByteArray(data, 0, data.length);
  imageView.setImageBitmap(bitmap);
 }

 public static byte[] getImgData(String path) throws Exception {

  URL url = new URL(path);
  HttpURLConnection conn = (HttpURLConnection) url.openConnection();
  conn.setConnectTimeout(5000);// 超時時間5秒
  conn.setRequestMethod("GET");
  if (conn.getResponseCode() == 200) {
   InputStream in = conn.getInputStream();
   return read(in);
  } else {
   Log.d("tong.getImg", "服務器無響應");
  }

  return null;
 }

 /**
  * 從一個輸入流中讀取數據,並返回
  *
  * @param in
  * @return byte[] 數據
  * @throws IOException
  */
 public static byte[] read(InputStream in) throws IOException {
  // 開辟一個內存的區域,以寫入數據
  ByteArrayOutputStream outStream = new ByteArrayOutputStream();
  byte[] buffer = new byte[10240];
  int len = 0;
  while ((len = in.read(buffer)) != -1) {
   outStream.write(buffer, 0, len);
  }
  outStream.close();

  return outStream.toByteArray(); // 返回內存中的數據
 }

}
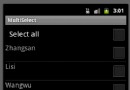 android基於ListView和CheckBox實現多選和全選記錄的功能
應用開發中經常會有從數據庫中讀取數據顯示,然後選中多條、全部記錄並且刪除的需求。在做定制系統聯系人的時候也遇到這樣的需求,下面寫個簡單的通過ListView和CheckB
 Android開發者需要知道的8個項目管理技巧
專業的Android app開發人員會關注一些成熟的項目管理技術,以成功構建Android app,並讓這個app在Google Play Store嶄露頭角。考慮高端客
 android:修改PagerTabStrip中的背景顏色,標題字體的樣式、顏色和圖標以及指示條的顏色
1.修改PagerTabStrip中的背景顏色我們在布局中直接設置background屬性即可: 2.修改指示條的顏色我們可以在java代碼中
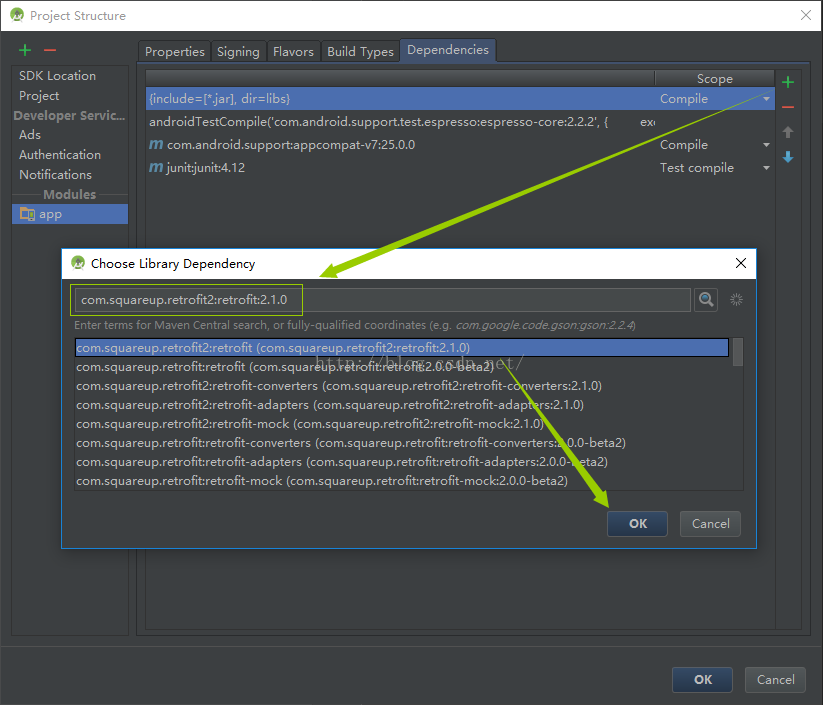 Android開發-Retrofit-AndroidStudio(一)百度首頁解析
有能力的同學可以直接去看 Retrofit官方Demo:https://github.com/square/retrofit我這邊簡單使用一下,以百度首頁解析作為開篇:導