編輯:關於Android編程
public class SetRMPLDialog extends RelativeLayout{

    private Context parentContext;
    private android.view.ViewGroup.LayoutParams lp;

    /**布局*/
    private TextView showtitle;
    private int showtitleid=41310;

    private RelativeLayout allitem;
    private int allitemid=41320;
    private Map<Integer,OneItem> itemmap;

    private Button okBtn;
    private Button exitBtn;

    private PitchListen pitchlisten;//對按鈕的監聽
    private BtnListen btnlisten;//對確定和退出按鈕的監聽

    public SetRMPLDialog(Context context) {
        super(context);
        this.parentContext=context;
        pitchlisten=new PitchListen();
        btnlisten=new BtnListen();
        init();
    }

    private void init() {
        showtitle=new TextView(parentContext);
        showtitle.setText("請選擇屏蔽號碼的位數");
        showtitle.setId(showtitleid);
        LayoutParams lpshowtitle=new LayoutParams(-2,-2);
        lpshowtitle.addRule(RelativeLayout.ALIGN_PARENT_TOP);
        lpshowtitle.addRule(RelativeLayout.CENTER_HORIZONTAL);


        allitem=new RelativeLayout(parentContext);
        allitem.setId(allitemid);
        LayoutParams lpallitem=new LayoutParams(-2,200);
        lpallitem.addRule(RelativeLayout.BELOW,showtitleid);
        itemmap=new HashMap<Integer, SetRMPLDialog.OneItem>();
        //創建顯示列表
        createItem();

        okBtn=new Button(parentContext);
        okBtn.setText("確定");
        LayoutParams lpokBtn=new LayoutParams(-2,-2);
        lpokBtn.setMargins(20, 0, 0, 0);
        lpokBtn.addRule(RelativeLayout.ALIGN_PARENT_BOTTOM);
        lpokBtn.addRule(RelativeLayout.ALIGN_PARENT_LEFT);

        exitBtn=new Button(parentContext);
        exitBtn.setText("退出");
        LayoutParams lpexitBtn=new LayoutParams(-2,-2);
        lpexitBtn.setMargins(0, 0, 20, 0);
        lpexitBtn.addRule(RelativeLayout.ALIGN_PARENT_BOTTOM);
        lpexitBtn.addRule(RelativeLayout.ALIGN_PARENT_RIGHT);

        addView(showtitle,lpshowtitle);
        addView(allitem,lpallitem);
        addView(okBtn,lpokBtn);
        addView(exitBtn,lpexitBtn);
    }

    public void createItem(){
        for(int i=5;i<=13;i++){
            OneItem oneitem=new OneItem(parentContext, i);
            allitem.addView(oneitem,oneitem.getLpitem());
            itemmap.put(oneitem.getI(), oneitem);
        }
    }

    public android.view.ViewGroup.LayoutParams getLp() {
        lp=new android.view.ViewGroup.LayoutParams(-1,300);
        return lp;
    }

    class OneItem extends LinearLayout{
        int i;
        TextView text;
        ImageButton sel;
        android.widget.RelativeLayout.LayoutParams lpitem;
        public OneItem(Context context,int i) {
            super(context);
            this.i=i;
            text=new TextView(parentContext);
            text.setText((i!=13)?i+"位:":"13+"+"位:");
            LayoutParams lptext=new LayoutParams(70,40);
            lptext.setMargins(0, 5, 0, 5);
            sel=new ImageButton(parentContext);
            //添加圖片選擇資源
            sel.setBackgroundResource(R.drawable.nopitch);
            LayoutParams lpsel=new LayoutParams(40,40);
            lpsel.setMargins(5, 5, 5, 5);
            addView(text,lptext);
            addView(sel,lpsel);
            //添加測試的背景顏色
            this.setBackgroundColor(Color.CYAN);

            //對選項按鈕添加監聽
            sel.setOnClickListener(pitchlisten);
        }

        public android.widget.RelativeLayout.LayoutParams getLpitem(){
            lpitem=new android.widget.RelativeLayout.LayoutParams(120,50);
            switch (i%3) {
            case 0:
                //6.9.12
                lpitem.addRule(RelativeLayout.CENTER_HORIZONTAL);
                break;
            case 1:
                //7,10,13
                lpitem.addRule(RelativeLayout.ALIGN_PARENT_RIGHT);
                break;

            default:
                //5,8,11
                lpitem.addRule(RelativeLayout.ALIGN_PARENT_LEFT);
                break;
            }
            switch ((i-5)/3) {
            case 0:
                lpitem.addRule(RelativeLayout.ALIGN_PARENT_TOP);
                break;
            case 1:
                lpitem.addRule(RelativeLayout.CENTER_VERTICAL);
                break;
            default:
                lpitem.addRule(RelativeLayout.ALIGN_PARENT_BOTTOM);
                break;
            }

            return lpitem;
        }

        public int getI() {
            return i;
        }

        public void setI(int i) {
            this.i = i;
        }

        public TextView getText() {
            return text;
        }

        public void setText(TextView text) {
            this.text = text;
        }

        public ImageButton getSel() {
            return sel;
        }

        public void setSel(ImageButton sel) {
            this.sel = sel;
        }


    }

    class PitchListen implements OnClickListener {

        @Override
        public void onClick(View v) {
            Set<Integer> pitchSet = DBHelper.getPitchSet();
            if (v instanceof ImageButton) {
                ImageButton sel = (ImageButton) v;
                OneItem oneitem = (OneItem) sel.getParent();
                int i=oneitem.getI();
                Log.i("tag", "選擇了"+i+"號按鈕");
                if(pitchSet.contains(i)){
                    oneitem.getSel().setBackgroundResource(R.drawable.nopitch);
                    pitchSet.remove(i);
                }else{
                    oneitem.getSel().setBackgroundResource(R.drawable.pitch);
                    pitchSet.add(i);
                }
            }
        }
    }

    class BtnListen implements OnClickListener{

        @Override
        public void onClick(View v) {
            // TODO Auto-generated method stub
            if(v==okBtn){
                Log.i("tag", "okBtn");
            }else if(v==exitBtn){
                Log.i("tag", "exitBtn");
            }else{
                Log.e("error", this.toString()+"監聽按鈕出異常了");
            }
        }

    }
}
DBHelper類:
public class DBHelper {
    static Map<String,User> blackmap;
    static Map<String,User> whitemap;
    static Set<String> selectset;
    static Map<String,String> dustbin;
    static Set<Integer> pitchset;

    public static Set<Integer> getPitchSet(){
        if(pitchset==null){
            pitchset=new HashSet<Integer>();
        }
        return pitchset;
    }
}
然後,大功告成了,應該實現了多選框的功能。 下面我還設定了2個按鈕,分別為提交和取消,提交的話直接上傳一個Set集合就可以了。
 AndroidFM模塊學習之錄音功能
前些天分析了一下FM的流程以及主要類,接下來我們分析一下FM的錄音功能; 首先看下流程圖: Fm錄音時,當點擊了錄音按鈕,會發一個廣播出去,源碼在FMRadioServ
 Android2.3實現Android4.0風格EditText的方法
本文實例講述了Android2.3實現Android4.0風格EditText的方法。分享給大家供大家參考,具體如下:效果如下:思路:在源碼裡找到4.0風格的圖片作為背景
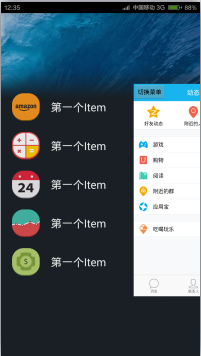
 陌陌向附近的人喊話怎麼用
陌陌新增加的功能-向附近的人喊話是一個非常有趣的功能,隨時可以向附近的陌陌用戶喊話,為大家創造更多話題,這個功能怎麼玩呢?又在哪呢?下面下載吧小編就教大家陌
 Android Studio教程
目標:Android Studio新手–>下載安裝配置–>零基礎入門–>基本使用–>調試技能&nd