編輯:關於Android編程
package cc.testsplitimage;
import java.util.ArrayList;
import android.app.Activity;
import android.graphics.Bitmap;
import android.graphics.BitmapFactory;
import android.os.Bundle;
import android.view.View;
import android.view.View.OnClickListener;
import android.widget.Button;
import android.widget.ImageView;
/**
 * Demo描述:
 * 拆分圖片
 *
 * 參考資料:
 * http://blog.csdn.net/arui319/article/details/7470193
 * Thank you very much
 */
public class MainActivity extends Activity {
    private Button mSplitButton;
    private Bitmap mRawBitmap;
    private ImageView mImageView;
    private int row;
    private int column;
    private ArrayList<Bitmap> mPartImagesArrayLis;

	@Override
	protected void onCreate(Bundle savedInstanceState) {
		super.onCreate(savedInstanceState);
		setContentView(R.layout.main);
		init();
	}

    private void init(){
    	mSplitButton=(Button) findViewById(R.id.splitButton);
    	mSplitButton.setOnClickListener(new ClickListenerImpl());
    	mImageView=(ImageView) findViewById(R.id.imageView);
    	mRawBitmap=BitmapFactory.decodeResource(getResources(), R.drawable.e);
    	row=3;
    	column=3;
    }

    private class ClickListenerImpl implements OnClickListener{
		@Override
		public void onClick(View view) {
			switch (view.getId()) {
			case R.id.splitButton:
				mPartImagesArrayLis=splitImage(mRawBitmap, row, column);
				mImageView.setImageBitmap(null);
				break;
			default:
				break;
			}
		}
    }
    /**
     * @param rawBitmap 原來的Bitmap
     * @param row       切成幾行
     * @param column    切成幾列
     * @return
     */
    private ArrayList<Bitmap> splitImage(Bitmap rawBitmap,int row,int column){
    	ArrayList<Bitmap> partImagesArrayList=new ArrayList<Bitmap>(row*column);
    	int rawBitmapWidth=rawBitmap.getWidth();
    	int rawBitmapHeight=rawBitmap.getHeight();
    	System.out.println("rawBitmapWidth="+rawBitmapWidth+",rawBitmapHeight="+rawBitmapHeight);
    	int perPartWidth=rawBitmapWidth/column;
    	int perPartHeight=rawBitmapHeight/row;
    	System.out.println("perPartWidth="+perPartWidth+",perPartHeight="+perPartHeight);
    	Bitmap perBitmap=null;
    	for (int i = 0; i < row; i++) {
			for (int j = 0; j < column; j++) {
				int x=j*perPartWidth;
				int y=i*perPartHeight;
				System.out.println("i="+i+",j="+j+",x="+x+",y="+y);
				perBitmap=Bitmap.createBitmap(rawBitmap, x, y, perPartWidth, perPartHeight);
				partImagesArrayList.add(perBitmap);
			}
		}
    	System.out.println("size="+partImagesArrayList.size());
		return partImagesArrayList;
    }

}
<RelativeLayout xmlns:android="http://schemas.android.com/apk/res/android"
    xmlns:tools="http://schemas.android.com/tools"
    android:layout_width="match_parent"
    android:layout_height="match_parent" >

    <Button
        android:id="@+id/splitButton"
        android:layout_width="wrap_content"
        android:layout_height="wrap_content"
        android:layout_centerHorizontal="true"
        android:layout_marginTop="10dip"
        android:text="拆分圖片" />


    <ImageView
        android:id="@+id/imageView"
        android:layout_width="wrap_content"
        android:layout_height="wrap_content"
        android:layout_centerInParent="true"
        android:src="@drawable/e" />

</RelativeLayout>
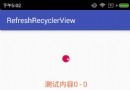 RefreshRecyclerView下拉刷新,加載更多
ListView已經用了很多年了,後來又有了RecyclerView,基本可以代替ListView/GridView了,還有瀑布流的模式,加上各種特效,於是就嘗試用Rec
 Android基礎之使用Fragment適應不同屏幕和分辨率(分享)
最近事情很忙,一個新項目趕著出來,但是很多功能都要重新做,一直在編寫代碼、Debug。今天因為一個新程序要使用Fragment來做,雖然以前也使用過Fragment,不過
 Android動畫之逐幀動畫(Frame Animation)基礎學習
前言在Android中,動畫Animation的實現有兩種方式:Tween Animation(補間動畫)和Frame Animation(幀動畫)。漸變動畫是通過對場景
 自定義View系列教程03--onLayout源碼詳盡分析
在經過measure階段以後,系統確定了View的測量大小,接下來就進入到layout的過程。在該過程中會確定視圖的顯示位置,即子View在其父控件中的位置。嗯哼,我們直