編輯:關於Android編程
羅朝輝 (http://blog.csdn.net/kesalin)CC 許可,轉載請注明出處
在前文《Android多線程分析之二:Thread的實現》中已經詳細分析了Android Thread 是如何創建,運行以及銷毀的,其重點是對相應 native 方法進行分析,今天我將聚焦於 Android Framework 層多線程相關的類:Handler, Looper, MessageQueue, Message 以及它們與Thread 之間的關系。可以用一個不太妥當的比喻來形容它們之間的關聯:如果把 Thread 比作生產車間,那麼 Looper 就是放在這車間裡的生產線,這條生產線源源不斷地從 MessageQueue 中獲取材料 Messsage,並分發處理 Message (由於Message 通常是完備的,所以 Looper 大多數情況下只是調度讓 Message 的 Handler 去處理 Message)。正是因為消息需要在 Looper 中處理,而 Looper 又需運行在 Thread 中,所以不能隨隨便便在非 UI 線程中進行 UI 操作。 UI 操作通常會通過投遞消息來實現,只有往正確的 Looper 投遞消息才能得到處理,對於 UI 來說,這個 Looper 一定是運行在 UI 線程中。
在編寫 app 的過程中,我們常常會這樣來使用 Handler:
Handler mHandler = new Handler();
mHandler.post(new Runnable(){
@Override
public void run() {
// do somework
}
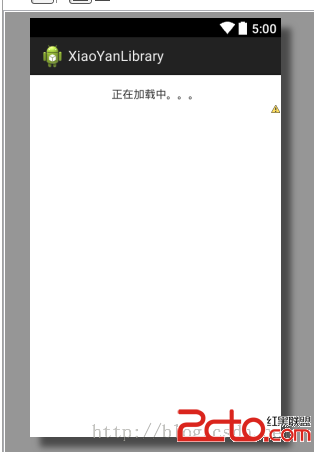
});或者如這系列文章第一篇中的示例那樣: private Handler mHandler= new Handler(){
@Override
public void handleMessage(Message msg) {
Log.i("UI thread", " >> handleMessage()");
switch(msg.what){
case MSG_LOAD_SUCCESS:
Bitmap bitmap = (Bitmap) msg.obj;
mImageView.setImageBitmap(bitmap);
mProgressBar.setProgress(100);
mProgressBar.setMessage("Image downloading success!");
mProgressBar.dismiss();
break;
case MSG_LOAD_FAILURE:
mProgressBar.setMessage("Image downloading failure!");
mProgressBar.dismiss();
break;
}
}
};
Message msg = mHandler.obtainMessage(MSG_LOAD_FAILURE, null);
mHandler.sendMessage(msg); final MessageQueue mQueue;
final Looper mLooper;
final Callback mCallback;
final boolean mAsynchronous;
public Handler(Looper looper, Callback callback, boolean async) {
mLooper = looper;
mQueue = looper.mQueue;
mCallback = callback;
mAsynchronous = async;
}
public Handler(Callback callback, boolean async) {
mLooper = Looper.myLooper();
if (mLooper == null) {
throw new RuntimeException(
"Can't create handler inside thread that has not called Looper.prepare()");
}
mQueue = mLooper.mQueue;
mCallback = callback;
mAsynchronous = async;
}
public Handler() {
this(null, false);
}mLooper:線程的消息處理循環,注意:並非每一個線程都有消息處理循環,因此 Framework 中線程可以分為兩種:有 Looper 的和無 Looper 的。為了方便 app 開發,Framework 提供了一個有 Looper 的 Thread 實現:HandlerThread。在前一篇《Thread的實現》中也提到了兩種不同 Thread 的 run() 方法的區別。
/**
 * Handy class for starting a new thread that has a looper. The looper can then be
 * used to create handler classes. Note that start() must still be called.
 */
public class HandlerThread extends Thread {
    Looper mLooper;
    /**
     * Call back method that can be explicitly overridden if needed to execute some
     * setup before Looper loops.
     */
    protected void onLooperPrepared() {
    }

    public void run() {
        mTid = Process.myTid();
        Looper.prepare();
        synchronized (this) {
            mLooper = Looper.myLooper();
            notifyAll();
        }
        Process.setThreadPriority(mPriority);
        onLooperPrepared();
        Looper.loop();
        mTid = -1;
    }

    /**
     * This method returns the Looper associated with this thread. If this thread not been started
     * or for any reason is isAlive() returns false, this method will return null. If this thread
     * has been started, this method will block until the looper has been initialized.
     * @return The looper.
     */
    public Looper getLooper() {
        if (!isAlive()) {
            return null;
        }

        // If the thread has been started, wait until the looper has been created.
        synchronized (this) {
            while (isAlive() && mLooper == null) {
                try {
                    wait();
                } catch (InterruptedException e) {
                }
            }
        }
        return mLooper;
    }
}/** Initialize the current thread as a looper.
* This gives you a chance to create handlers that then reference
* this looper, before actually starting the loop. Be sure to call
* {@link #loop()} after calling this method, and end it by calling
* {@link #quit()}.
*/
public static void prepare() {
prepare(true);
}
private static void prepare(boolean quitAllowed) {
if (sThreadLocal.get() != null) {
throw new RuntimeException("Only one Looper may be created per thread");
}
sThreadLocal.set(new Looper(quitAllowed));
} /**
* Return the Looper object associated with the current thread. Returns
* null if the calling thread is not associated with a Looper.
*/
public static Looper myLooper() {
return sThreadLocal.get();
}Handler 的成員變量 mQueue 是其成員變量 mLooper 的成員變量,這裡只是為了簡化書寫,單獨拿出來作為 Handler 的成員變量;成員變量 mCallback 提供了另一種使用Handler 的簡便途徑:只需實現回調接口 Callback,而無需子類化Handler,下面會講到的:
    /**
     * Callback interface you can use when instantiating a Handler to avoid
     * having to implement your own subclass of Handler.
     */
    public interface Callback {
        public boolean handleMessage(Message msg);
}同是否有無 Looper 來區分 Thread 一樣,Handler 的構造函數也分為自帶 Looper 和外部 Looper 兩大類:如果提供了 Looper,在消息會在該 Looper 中處理,否則消息就會在當前線程的 Looper 中處理,注意這裡要確保當前線程一定有 Looper。所有的 UI thread 都是有 Looper 的,因為 view/widget 的實現中大量使用了消息,需要 UI thread 提供 Looper 來處理,可以參考view.java:
view.java

    public boolean post(Runnable action) {
        final AttachInfo attachInfo = mAttachInfo;
        if (attachInfo != null) {
            return attachInfo.mHandler.post(action);
        }
        // Assume that post will succeed later
        ViewRootImpl.getRunQueue().post(action);
        return true;
    }

ViewRootImpl.java

    private void performTraversals() {
        ....
        // Execute enqueued actions on every traversal in case a detached view enqueued an action
        getRunQueue().executeActions(attachInfo.mHandler);
      ...
    }

    static RunQueue getRunQueue() {
        RunQueue rq = sRunQueues.get();
        if (rq != null) {
            return rq;
        }
        rq = new RunQueue();
        sRunQueues.set(rq);
        return rq;
    }

    /**
     * The run queue is used to enqueue pending work from Views when no Handler is
     * attached.  The work is executed during the next call to performTraversals on
     * the thread.
     * @hide
     */
    static final class RunQueue {
    ...
        void executeActions(Handler handler) {
            synchronized (mActions) {
                final ArrayList actions = mActions;
                final int count = actions.size();

                for (int i = 0; i < count; i++) {
                    final HandlerAction handlerAction = actions.get(i);
                    handler.postDelayed(handlerAction.action, handlerAction.delay);
                }

                actions.clear();
            }
        }
} public final class ActivityThread {
...
final Looper mLooper = Looper.myLooper();
} void checkThread() {
if (mThread != Thread.currentThread()) {
throw new CalledFromWrongThreadException(
"Only the original thread that created a view hierarchy can touch its views.");
}
}W/dalvikvm(796): threadid=11: thread exiting with uncaught exception (group=0x40a71930) E/AndroidRuntime(796): FATAL EXCEPTION: Thread-75 E/AndroidRuntime(796): android.view.ViewRootImpl$CalledFromWrongThreadException: Only the original thread that created a view hierarchy can touch its views. E/AndroidRuntime(796): at android.view.ViewRootImpl.checkThread(ViewRootImpl.java:4746) E/AndroidRuntime(796): at android.view.ViewRootImpl.requestLayout(ViewRootImpl.java:823) E/AndroidRuntime(796): at android.view.View.requestLayout(View.java:15473) E/AndroidRuntime(796): at android.view.View.requestLayout(View.java:15473) E/AndroidRuntime(796): at android.view.View.requestLayout(View.java:15473) E/AndroidRuntime(796): at android.view.View.requestLayout(View.java:15473) E/AndroidRuntime(796): at android.view.View.requestLayout(View.java:15473) E/AndroidRuntime(796): at android.widget.ImageView.setImageDrawable(ImageView.java:406) E/AndroidRuntime(796): at android.widget.ImageView.setImageBitmap(ImageView.java:421) E/AndroidRuntime(796): at com.example.thread01.MainActivity$2$1.run(MainActivity.java:80)
/**
     * Subclasses must implement this to receive messages.
     */
    public void handleMessage(Message msg) {
    }

    /**
     * Handle system messages here.
     */
    public void dispatchMessage(Message msg) {
        if (msg.callback != null) {
            handleCallback(msg);
        } else {
            if (mCallback != null) {
                if (mCallback.handleMessage(msg)) {
                    return;
                }
            }
            handleMessage(msg);
        }
} private static void handleCallback(Message message) {
message.callback.run();
}在分析 Looper::Loop() 這個關鍵函數之前,先來理一理 Thread,Looper,Handler,MessageQueue 的關系:Thread 需要有 Looper 才能處理消息(也就是說 Looper 是運行在 Thread 中),這是通過在自定義 Thread 的 run() 函數中調用 Looper::prepare() 和 Looper::loop() 來實現,然後在 Looper::loop() 中不斷地從 MessageQueue 獲取由 Handler 投遞到其中的 Message,並調用 Message 的成員變量 Handler 的 dispatchMessage 來處理消息。
下面先來看看 Looper 的構造函數:
    final MessageQueue mQueue;
    final Thread mThread;
    volatile boolean mRun;

    private Looper(boolean quitAllowed) {
        mQueue = new MessageQueue(quitAllowed);
        mRun = true;
        mThread = Thread.currentThread();
}/**
* Initialize the current thread as a looper, marking it as an
* application's main looper. The main looper for your application
* is created by the Android environment, so you should never need
* to call this function yourself. See also: {@link #prepare()}
*/
public static void prepareMainLooper() {
prepare(false);
synchronized (Looper.class) {
if (sMainLooper != null) {
throw new IllegalStateException("The main Looper has already been prepared.");
}
sMainLooper = myLooper();
}
}SystemServer.java 中的 ServerThread,ServerThread 的重要性就不用說了,絕大部分 Android Service 都是這個線程中初始化的。這個線程是在 Android 啟動過程中的 init2() 方法啟動的:
public static final void init2() {
        Slog.i(TAG, "Entered the Android system server!");
        Thread thr = new ServerThread();
        thr.setName("android.server.ServerThread");
        thr.start();
    }
class ServerThread extends Thread {
    @Override
    public void run() {
        ...
        Looper.prepareMainLooper();
        ...
        Looper.loop();
        Slog.d(TAG, "System ServerThread is exiting!");
    }
}public static void main(String[] args) {
....
Looper.prepareMainLooper();
ActivityThread thread = new ActivityThread();
thread.attach(false);
if (sMainThreadHandler == null) {
sMainThreadHandler = thread.getHandler();
}
AsyncTask.init();
Looper.loop();
throw new RuntimeException("Main thread loop unexpectedly exited");
}有了前面的鋪墊,這下我們就可以來分析 Looper::Loop() 這個關鍵函數了:
/**
     * Run the message queue in this thread. Be sure to call
     * {@link #quit()} to end the loop.
     */
    public static void loop() {
        final Looper me = myLooper();
        if (me == null) {
            throw new RuntimeException("No Looper; Looper.prepare() wasn't called on this thread.");
        }
        final MessageQueue queue = me.mQueue;
        ...
        for (;;) {
            Message msg = queue.next(); // might block
            if (msg == null) {
                // No message indicates that the message queue is quitting.
                return;
            }

            msg.target.dispatchMessage(msg);

            msg.recycle();
        }
} 從零開始學android(Toast土司提示組件.二十.)
在系統之中,通過對話框可以對用戶的某些操作進行提示,但是在Android平台之中也提供了另外一套更加友好的提示界面效果,而且這種界面在提示用戶的時候不會打斷用戶的正常操作
 Android——IPC機制(一)IPC概念以及Binder機制
由於IPC機制牽扯的東西比較多,所以這裡將分為一個系列進行總結主要介紹內如如下:IPC簡介 Android中的多進程模式開啟多進程模式 多進程模式的運行機制 IPC基礎概
 Android 緩存淺談(一)
Android開發本質上就是手機和web服務器之間進行通信,從服務端需要獲取數據,但是當訪問的數據比較大,比較多,並且是重復數據時,會極大影響性能,甚至應用崩潰,手機卡死
 android SparseArray替代HashMap的分析
SparseArray是Android框架獨有的類,在標准的JDK中不存在這個類。它要比 HashMap 節省內存,某些情況下比HashMap性能更好,按照官方問答的解