編輯:關於Android編程
今天總結一下Fragment間的參數傳遞及結果返回的方法。
效果圖:
1、點擊“加載第二個Fragment按鈕”,加載出第二個Fragment,同時傳遞過去參數:“從Fragment1傳來的參數”這幾個String;
2、當用戶點擊第二個Fragment中的幾個圖片時,將點中的結果返回給第一個Fragment,將用戶的選擇在第一個Fragment顯示出來
一、基本架構搭建
首先,我們要把整個架構搭起來,然後再進行參數傳遞和回傳
(一)、基本XML構建:
根據上面的效果,大家很容易看到兩個Fragment的布局:
1、Fragment1的布局:(fragment1.xml)
很簡單,垂直布局,上面一個ImageView來盛裝返回過來的圖片結果,下面一個Button來用來點擊加載第二個Fragment;
<LinearLayout xmlns:android="http://schemas.android.com/apk/res/android"
 android:layout_width="match_parent"
 android:layout_height="match_parent"
 android:background="#ffffff"
 android:orientation="vertical">
 <ImageView
 android:id="@+id/img_result"
 android:layout_width="100dp"
 android:layout_height="100dp"
 android:scaleType="center"/>
 <Button
 android:id="@+id/load_fragment2_btn"
 android:layout_width="fill_parent"
 android:layout_height="wrap_content"
 android:text="加載第二個Fragment"/>
</LinearLayout>
2、Fragment2的布局:(fragment2.xml)
這個也是垂直布局,上面的一個TextView用來盛裝從Fragment1傳過來的String參數,下面的幾個ImageView用來顯示幾個供用戶選擇的圖片
<LinearLayout xmlns:android="http://schemas.android.com/apk/res/android"
 android:layout_width="match_parent"
 android:layout_height="match_parent"
 android:background="#ffffff"
 android:orientation="vertical">
 <TextView
 android:id="@+id/textview"
 android:layout_width="wrap_content"
 android:layout_height="wrap_content"
 android:text="This is fragment 2"
 android:textColor="#000000"
 android:textSize="25sp" />
 <ImageView
 android:id="@+id/img1"
 android:layout_width="100dip"
 android:layout_height="100dp"
 android:scaleType="center"
 android:src="@drawable/animal1"/>
 <ImageView
 android:id="@+id/img2"
 android:layout_width="100dip"
 android:layout_height="100dp"
 android:scaleType="center"
 android:src="@drawable/animal2"/>
 <ImageView
 android:id="@+id/img3"
 android:layout_width="100dip"
 android:layout_height="100dp"
 android:scaleType="center"
 android:src="@drawable/animal3"/>
 <ImageView
 android:id="@+id/img4"
 android:layout_width="100dip"
 android:layout_height="100dp"
 android:scaleType="center"
 android:src="@drawable/animal4"/>
</LinearLayout>
(二)對應的Fragment類
1、在MainActivity初始化時,將Fragment1顯示出來:
MainActivity對應的XML文件:(main_activity.xml)
<RelativeLayout xmlns:android="http://schemas.android.com/apk/res/android"
 xmlns:tools="http://schemas.android.com/tools"
 android:id="@+id/main_layout"
 android:layout_width="match_parent"
 android:layout_height="match_parent"
 tools:context=".MainActivity">
 <TextView
 android:text="@string/hello_world"
 android:layout_width="wrap_content"
 android:layout_height="wrap_content" />
</RelativeLayout>
對應的代碼:
public class MainActivity extends Activity {
 @Override
 protected void onCreate(Bundle savedInstanceState) {
 super.onCreate(savedInstanceState);
 setContentView(R.layout.activity_main);
 Fragment1 fragment1 = new Fragment1();
 getFragmentManager().beginTransaction().replace(R.id.main_layout, fragment1).commit();
 }
}
2、Fragment1:在用戶點擊時,將fragment2添加到當前頁面顯示出來;
public class Fragment1 extends Fragment {
 @Override
 public View onCreateView(LayoutInflater inflater, ViewGroup container,
    Bundle savedInstanceState) {
 View view = inflater.inflate(R.layout.fragment1, container, false);
 Button btn = (Button)view.findViewById(R.id.load_fragment2_btn);
 btn.setOnClickListener(new View.OnClickListener(){
  @Override
  public void onClick(final View view) {
  Fragment2 fragment2 = new Fragment2();
  FragmentTransaction transaction = getFragmentManager().beginTransaction();
  transaction.add(R.id.main_layout, fragment2);
  transaction.addToBackStack(null);
  transaction.commit();
  }
 });
 return view;
 }
}
3、Fragment2:至於目前的它還是很簡單的,只要能顯示出來 就好了,所以他的代碼為:
public class Fragment2 extends Fragment implements View.OnClickListener {
 @Override
 public View onCreateView(LayoutInflater inflater, ViewGroup container, Bundle savedInstanceState) {
 View view = inflater.inflate(R.layout.fragment2, container, false);
 return view;
 }
}
二、Fragment間參數傳遞
至於Fragment間參數為什麼要用SetArguments來傳遞,我就不講了,看這篇文章:《Android解惑 - 為什麼要用Fragment.setArguments(Bundle bundle)來傳遞參數》,我這裡只說項目中如何使用:
在Fragment2中,新建一個函數:newInstance(String text)來接收傳過來的參數:
新建一個Fragment2實例,然後將參數通過SetArguments設置到其中;
public static Fragment2 newInstance(String text) {
 Fragment2 fragment = new Fragment2();
 Bundle args = new Bundle();
 args.putString("param", text);
 fragment.setArguments(args);
 return fragment;
}
然後在Fragment2的OnCreateView的時候再從arguments中獲取參數:
public View onCreateView(LayoutInflater inflater, ViewGroup container, Bundle savedInstanceState) {
 View view = inflater.inflate(R.layout.fragment2, container, false);
 if (getArguments() != null) {
 String mParam1 = getArguments().getString("param");
 TextView tv = (TextView)view.findViewById(R.id.textview);
 tv.setText(mParam1);
 }
 return view;
}
在Fragment1中,在調起Fragmen2t時,通過調用newInstance函數來獲取實例並傳遞參數:
public class Fragment1 extends Fragment {
 @Override
 public View onCreateView(LayoutInflater inflater, ViewGroup container,
    Bundle savedInstanceState) {
 View view = inflater.inflate(R.layout.fragment1, container, false);
 Button btn = (Button)view.findViewById(R.id.load_fragment2_btn);
 btn.setOnClickListener(new View.OnClickListener(){
  @Override
  public void onClick(final View view) {
  Fragment2 fragment2 = Fragment2.newInstance("從Fragment1傳來的參數");
  FragmentTransaction transaction = getFragmentManager().beginTransaction();
  transaction.add(R.id.main_layout, fragment2);
  transaction.addToBackStack(null);
  transaction.commit();
  }
 });
 return view;
 }
}
(三)、從Fragment2向Fragment1回傳參數
這裡只有利用回調,有關回調傳遞參數的問題,我在前一篇文章中:《詳解Dialog(三)——自定義對話框視圖及參數傳遞》第三部分:參數傳遞;詳細講過,大家可以先看源碼,如果源碼不懂,可以參考下這篇文章,這裡就不再贅述。
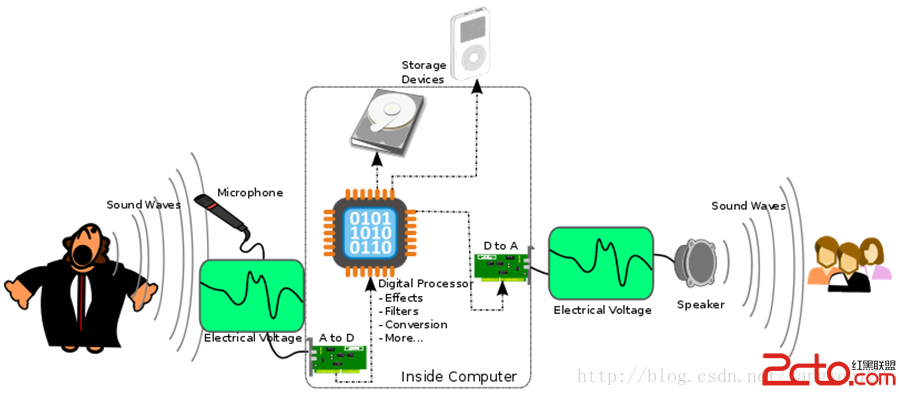 Android系統Audio框架介紹
音頻基礎知識 聲音有哪些重要屬性呢? 響度(Loudness) 響度就是人類可以感知到的各種聲音的大小,也就是音量。響度與聲波的振幅有直接關系。 音調(Pitch)
 Android點擊Button水波紋效果
先上圖,看看接下來我要向大家介紹的是個什麼東西,如下圖: public View findTargetView(float x, float y, View anc
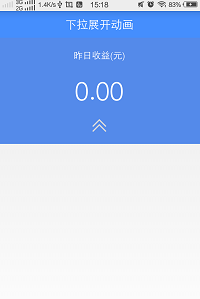 Android屬性動畫實現布局的下拉展開效果
在Android的3.0之後,google又提出了屬性動畫的這樣一個框架,他可以更好的幫助我們實現更豐富的動畫效果。所以為了跟上技術的步伐,今天就聊一聊屬性動畫。這一次的
 【android】仿360手機衛士的簡易設計思路及源碼
筆者最近一直忙於滿廣州的跑,實習好難找好難找,博客也是有點久沒去更新。仿360手機衛士的實現的目的更多的是出於對常用知識點的一個鞏固吧,比較適合像我這種接觸沒多久的學習者