一個完整的Android應用程序都應該提供選項(或者叫偏好設置等等)讓用戶對APP的表現形式能夠進行設置,比如說是否加入用戶體驗計劃,或者是否自動升級、定時提醒、開啟自啟動、後台運行等等。提供一個好的設置項,會大大提升APP的用戶體驗。為了完成這樣的功能,你不必從頭開始寫Activity或者Fragment,因為Android已經提供了實現這個功能的API,並且會自動將用戶設置以鍵值對的形式存入SharedPreference(Android的四大存儲方式之一)中。在3.0以前的系統,使用PreferenceActivity,這個類在api level 11(即Android 3.0)以後的api中丟棄,改用PreferenceFragment。兩者的使用方式及函數調用大同小異,可以根據app的目標系統版本自己去衡量。本文主要說明兩個問題,層次較淺,重在總結和說明基本用法,懂的直接飄過吧。
1. 為APP添加設置選項
Android平台上,為應用添加設置選項是個非常容易的事兒。這裡以PreferenceFragment為例進行演示,畢竟時代向前發展嘛。PreferenceFragment的父類是Fragment類,而Fragment對象必須嵌入到Activity中顯示出來。由此可以確定思路,為設置新建一個activity,然後將PreferenceFragment子類對象嵌入到其中,基本上就實現了選項設置,因為數據的保存與更新自動進行。
思路非常簡單,還是貼下主要代碼,順便整理下思路,幫助理解。
首先為設置選項設置新建一個Preference配置文件,跟layout文件也是XML文件格式,層次化清晰,注意它存儲在res/xml下,而不是res/layout。系統也提供了一些比較常用了設置選項,比如PreferenceScreen,PreferenceCategory,CheckBoxPreference,EditTextPreferece,ListPreference等,如果需要你也可以很方便的實現自定義的Preference,下文將會介紹實現方法。現在新建一個Preference,命名settings.xml(更傳統的命名為preference.xml)。
復制代碼
1 <?xml version="1.0" encoding="utf-8"?>
2 <PreferenceScreen xmlns:android="http://schemas.android.com/apk/res/android"
3 xmlns:preference="http://schemas.android.com/apk/res/com.test.mytest"
4 android:title="設置" >
5
6 <PreferenceScreen
7 android:title="關於" >
8 <Preference android:title="意見反饋" >
9 </Preference>
10
11 <com.test.mytest.PreferenceWithTip
12 preference:tipstring=">"
13 preference:titlestring="自定義測試" >
14 <intent
15 android:action="android.intent.action.VIEW"
16 android:data="http://www.baidu.com" />
17 </com.test.mytest.PreferenceWithTip>
18
19 <Preference android:title="常見問題" >
20 </Preference>
21 <Preference android:title="檢查更新" >
22 </Preference>
23 <Preference android:title="版權聲明" >
24 </Preference>
25
26 <SwitchPreference
27 android:key="setting_test"
28 android:title="測試一下" />
29 </PreferenceScreen>
30
31 </PreferenceScreen>
復制代碼
然後為設置選項新建一個Acitivity,因為此處PreferenceFragment子類寫的非常簡單,順便以內部類實現了。
復制代碼
1 public class SettingsActivity extends Activity {
2
3 @Override
4 public void onCreate(Bundle savedInstanceState) {
5 super.onCreate(savedInstanceState);
6 setContentView(R.layout.settings);
7 setTitle("選項設置");
8 getFragmentManager().beginTransaction().replace(R.id.settings_content,
9 new PrefsFragment()).commit();
10 }
11
12 public static class PrefsFragment extends PreferenceFragment{
13
14 @Override
15 public void onCreate(Bundle savedInstanceState) {
16 super.onCreate(savedInstanceState);
17 addPreferencesFromResource(R.xml.settings);
18 }
19
20 }
21
22 }
復制代碼
最後就差用戶點擊你設計好的設置選項了,到了這裡你應該猜到了,打開設置選項不過只是打開一個Intent而已。基本流程就到這裡,但是一個需要獲得大用戶量應用的設置要比這個復雜得多,你可能還需要根據用戶的設置,立即對應用的表現做出調整,可能要實現onPreferenceTreeClick(PreferenceScreen preferenceScreen,Preference prefence)。正如前文所述,剛接觸Preference,這裡僅僅總結基本用法。
2. 在設置選項中使用自定義的Preference
Preference類直接繼承於Object類。在上文的settings.xml中,定義好幾個Preference,Preference只提供簡單的文本顯示,而它的的子類CheckBoxPreference,SwitchPreference,EditTextPreference等則提供了較為復雜的UI展示,並可以保存用戶的設置數據,一般來說,這些子類Preference對於應用程序更加重要。關於如果使用這些子類對象,其實很簡單,他們可以像UI控件在Layout中的用法類似的應用在Preference定義的xml文件(上文定義的settings.xml)中,基本上使用了eclipse代碼提示功能就可以使用,這些用法基礎但不是本文的說明重點。下面旨在介紹如何定義自己的Preference,先上圖看效果。
圖一 自定義Preference展示
圖一展示了Preference與自定義Preference樣式差別,你或許注意到第二項”自定義測試“與其他的Preference只有一個“>“符號的差別,其實這裡包含了自定義一個Preference的完整步驟。說道這裡,順便說下,其實自定義Preference與自定義控件的方法和套路幾乎一致。還是總結下基本步驟。
1) 定義屬性值 attr.xml
復制代碼
1 <?xml version="1.0" encoding="utf-8"?>
2 <resources>
3 <declare-styleable name="PreferenceWithTip">
4 <attr name="tipstring" format="string"></attr>
5 <attr name="titlestring" format="string"></attr>
6 </declare-styleable>
7 </resources>
復制代碼
2) 設計自定義Preference的布局 preferencewithtip.xml
1 <?xml version="1.0" encoding="utf-8"?>
2 <LinearLayout xmlns:android="http://schemas.android.com/apk/res/android"
3 android:layout_width="match_parent"
4 android:layout_height="match_parent"
5 android:orientation="horizontal"
6 android:paddingLeft="8dp"
7 android:paddingRight="15dp"
8 android:paddingTop="20dp"
9 android:paddingBottom="20dp">
10 <TextView
11 android:id="@+id/prefs_title"
12 android:layout_width="0dp"
13 android:layout_height="wrap_content"
14 android:layout_gravity="left"
15 android:gravity="left|center_vertical"
16 android:textSize="18sp"
17 android:layout_weight="1"/>
18 <TextView
19 android:id="@+id/prefs_tip"
20 android:layout_width="0dp"
21 android:layout_height="wrap_content"
22 android:layout_gravity="right"
23 android:gravity="right|center_vertical"
24 android:textSize="18sp"
25 android:layout_weight="1"/>
26
27 </LinearLayout>
3) 繼承Preference,實現自己的Preference類 PreferenceWithTip
1 public class PreferenceWithTip extends Preference {
2 private static final String TAG = "PreferenceWithTip";
3 String pTitle = null;
4 String tipstring = null;
5
6 @SuppressLint("Recycle")
7 public PreferenceWithTip(Context context, AttributeSet attrs, int defStyle) {
8 super(context, attrs, defStyle);
9 // 獲取自定義參數
10 Log.i(TAG,"PreferenceWithTip invoked");
11 TypedArray ta = context.obtainStyledAttributes(attrs, R.styleable.PreferenceWithTip);
12 tipstring = ta.getString(R.styleable.PreferenceWithTip_tipstring);
13 pTitle = ta.getString(R.styleable.PreferenceWithTip_titlestring);
14 ta.recycle();
15 }
16
17 public PreferenceWithTip(Context context, AttributeSet attrs) {
18 this(context, attrs, 0);
19 }
20
21 @Override
22 protected void onBindView(View view) {
23 super.onBindView(view);
24 TextView pTitleView = (TextView)view.findViewById(R.id.prefs_title);
25 pTitleView.setText(pTitle);
26 TextView pTipView = (TextView)view.findViewById(R.id.prefs_tip);
27 pTipView.setText(tipstring);
28 }
29
30 @Override
31 protected View onCreateView(ViewGroup parent) {
32 return LayoutInflater.from(getContext()).inflate(R.layout.preferencewithtip,
33 parent, false);
34 }
35
36 //如需更新、保存數據則需要繼續編寫
37
38 }
4) 調用。調用代碼在文章的開頭部分已經貼出,主要代碼如下,preference是自定義的包名。
復制代碼
1 <com.ict.customview.PreferenceWithTip
2 preference:tipstring=">"
3 preference:titlestring="自定義測試" >
4 <intent
5 android:action="android.intent.action.VIEW"
6 android:data="http://www.baidu.com" />
7 </com.ict.customview.PreferenceWithTip>
復制代碼
總結一下Preference的使用還是比較簡單的,自定義Preference也比較方便。但是要設計出一個漂亮的、人性化的Preference還是不那麼容易,但這些都是提高用戶體驗的途徑,值得進一步挖掘。
 仿ViewPager相冊(使用HorizontalScrollView)
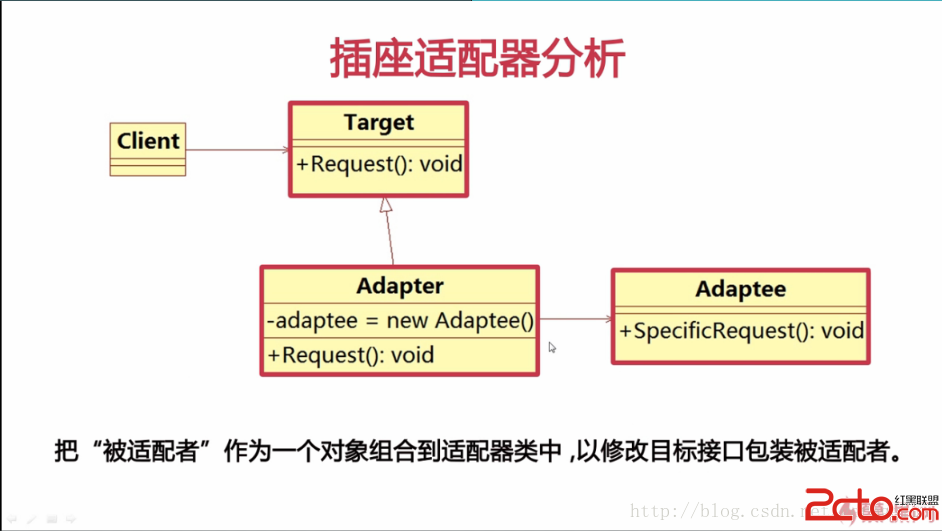 Android開發之適配器模式初探
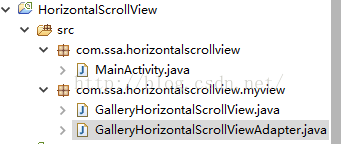
 android學習---Gallery畫廊視圖
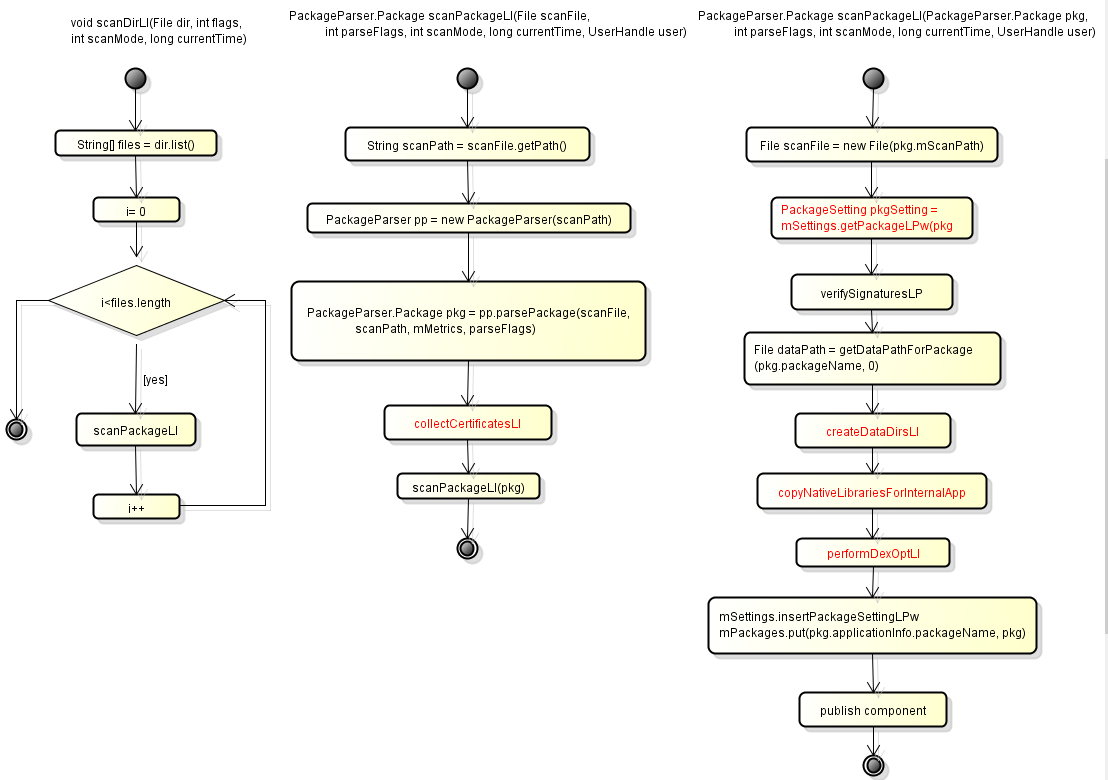 [gitbook] Android框架分析系列之Android PackageManager