編輯:關於Android編程
問題:如果圖片很大,全部載入內存,而顯示屏又不大,那麼再大的圖片也不會提高視覺效果的,而且會消耗無謂的內存。
解決辦法就是根據實際需要多大的圖片,然後動態計算應該載入多大的圖片;但是因為不太可能圖片大小和實際需要的大小一致,故此需要載入圖片大小為一個2的某次方的值,而大於實際需要的大小。
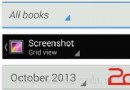
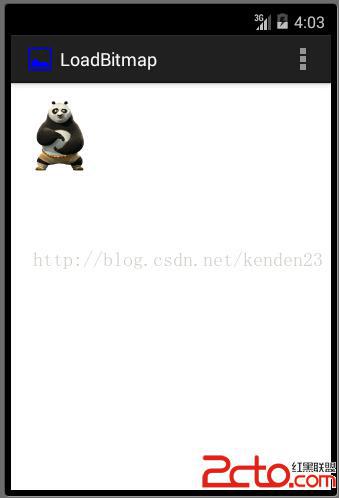
如圖,載入一個微縮圖大小為100*100
新建一個項目,
建立一個類,以便調用其中的函數處理圖片資源,全部代碼如下:
package bill.su.loadbitmap;

import android.content.res.Resources;
import android.graphics.Bitmap;
import android.graphics.BitmapFactory;

public class BitmapUtils {

	public static int calculateInSampleSize(BitmapFactory.Options options,
			int reqWidth, int reqHeight) {
		// Raw height and width of image
		final int height = options.outHeight;
		final int width = options.outWidth;
		int inSampleSize = 1;

		if (height > reqHeight || width > reqWidth) {

			final int halfHeight = height / 2;
			final int halfWidth = width / 2;

			// Calculate the largest inSampleSize value that is a power of 2 and
			// keeps both
			// height and width larger than the requested height and width.
			while ((halfHeight / inSampleSize) > reqHeight
					&& (halfWidth / inSampleSize) > reqWidth) {
				inSampleSize *= 2;
			}
		}

		return inSampleSize;
	}

	public static Bitmap decodeSampledBitmapFromResource(Resources res,
			int resId, int reqWidth, int reqHeight) {

		// First decode with inJustDecodeBounds=true to check dimensions
		final BitmapFactory.Options options = new BitmapFactory.Options();
		options.inJustDecodeBounds = true;
		BitmapFactory.decodeResource(res, resId, options);

		// Calculate inSampleSize
		options.inSampleSize = calculateInSampleSize(options, reqWidth,
				reqHeight);

		// Decode bitmap with inSampleSize set
		options.inJustDecodeBounds = false;
		return BitmapFactory.decodeResource(res, resId, options);
	}
}
主界面的邏輯代碼添加代碼:
	@Override
	protected void onCreate(Bundle savedInstanceState) {
		super.onCreate(savedInstanceState);
		setContentView(R.layout.activity_main);

		ImageView imageView = (ImageView) findViewById(R.id.pandaImageView);
		imageView.setImageBitmap(BitmapUtils.decodeSampledBitmapFromResource(
				getResources(), R.drawable.panda, 100, 100));
	}
注意R.drawable.panda是怎麼來的。只要在項目文件夾中的res文件夾的drawable文件夾添加一個圖片命名為panda,在Eclipse刷新項目就會顯示這個id了。如果沒有drawable這個文件夾也不要緊,直接自己新建一個文件夾就可以了。
如果圖片沒有顯示,很可能是圖片資源不存在,這樣項目是不會提示錯誤的,直接沒有顯示出來。
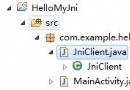
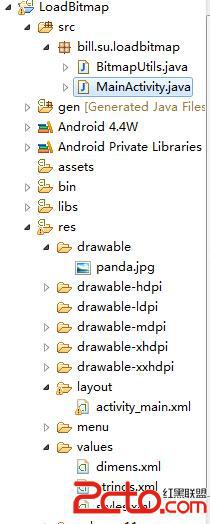
看看項目結構圖,就知道如何建立這個項目了:
這裡主要學習的代碼是BitmapUtils中的代碼,這樣已經封裝好了,以後可以當做自己的一個資源類調用了。
 Android中底部菜單被輸入法頂上去的解決方案
安卓手機輸入法彈出,消失會觸發window.onresize事件,我們一般的解決方法是獲取焦點,底部隱藏,失去焦點,底部菜單出現,但是,有些人會點擊這個按鈕收起鍵牌那麼,
 Android adb logcat 命令查看日志詳細介紹
Android 開發的程序員開發程序的時候,一定為log而苦惱過吧。Eclipse老是Log找不到,是不是很讓人不爽,雖然Android Studio的Logcat功能很
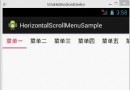
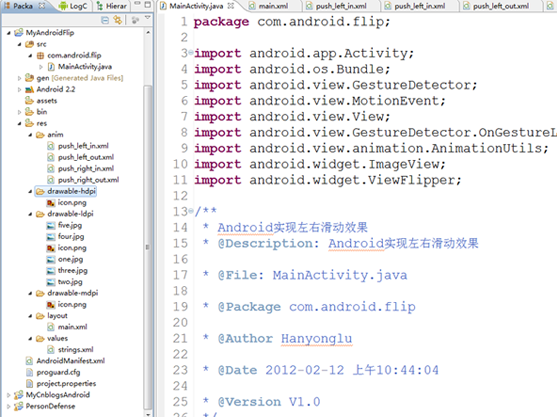 Android實現圖片左右滑動效果
關於滑動效果,在Android中用得比較多,本示例實現的滑動效果是使用ViewFlipper來實現的,當然也可以使用其它的View來實現。接下來就讓我們開始實現這種效果。
 Android Socket通信
Socket是基於Tcp的鏈接,適用於長鏈接Socke通訊需要客戶端和服務器,客戶端我們在android上編寫,而服務器則選擇在eclipse上編寫上效果圖;eclips