修改布局如下:
1 <?xml version="1.0" encoding="utf-8"?>
2
3 <LinearLayout xmlns:android="http://schemas.android.com/apk/res/android"
4 android:orientation="vertical"
5 android:layout_width="match_parent"
6 android:layout_height="match_parent">
7
8 <android.support.v7.widget.Toolbar
9 android:id="@+id/recycler_view_pinned_toolbar"
10 android:layout_height="wrap_content"
11 android:layout_width="match_parent"
12 android:background="?attr/colorPrimary"
13 />
14 <android.support.v4.widget.SwipeRefreshLayout
15 android:id="@+id/recycler_view_pinned_srl"
16 android:layout_width="match_parent"
17 android:layout_height="wrap_content"
18 >
19
20 <com.wangjie.androidbucket.support.recyclerview.pinnedlayout.PinnedRecyclerViewLayout
21 android:id="@+id/recycler_view_pinned_layout"
22 android:layout_width="match_parent" android:layout_height="match_parent">
23 <android.support.v7.widget.RecyclerView
24 android:id="@+id/recycler_view_pinned_rv"
25 android:scrollbars="vertical"
26 android:layout_width="match_parent"
27 android:layout_height="match_parent"
28 android:background="#bbccaa"
29 />
30 <Button
31 android:id="@+id/recycler_view_pinned_add_btn"
32 android:layout_width="wrap_content" android:layout_height="wrap_content"
33 android:layout_centerVertical="true"
34 android:background="#abcabc"
35 android:text="add"
36 />
37
38 </com.wangjie.androidbucket.support.recyclerview.pinnedlayout.PinnedRecyclerViewLayout>
39
40 </android.support.v4.widget.SwipeRefreshLayout>
41
42 </LinearLayout>
可以看到RecyclerView是被一個PinnedRecyclerViewLayout(https://github.com/wangjiegulu/AndroidBucket/blob/master/src/com/wangjie/androidbucket/support/recyclerview/pinnedlayout/PinnedRecyclerViewLayout.java)包含在裡面的。這個在項目AndroidBucket(https://github.com/wangjiegulu/AndroidBucket)中。先看看代碼中怎麼使用吧,具體實現待會說。
1 pinnedLayout.initRecyclerPinned(recyclerView, layoutManager, LayoutInflater.from(context).inflate(R.layout.recycler_view_item_float, null));
2 pinnedLayout.setOnRecyclerViewPinnedViewListener(this);
如上,使用方式很簡單:
Line1:初始化綁定PinnedRecyclerViewLayout和RecyclerView,並設置需要被頂上去的pinnedView
Line2:設置OnRecyclerViewPinnedViewListener,作用是在頂部被頂上去替換掉的時候,會回調重新渲染數據,傳入的OnRecyclerViewPinnedViewListener是this,顯然,此Activity實現了這個接口,實現代碼如下:
1 // 渲染pinnedView數據
2 @Override
3 public void onPinnedViewRender(PinnedRecyclerViewLayout pinnedRecyclerViewLayout, View pinnedView, int position) {
4 switch (pinnedRecyclerViewLayout.getId()) {
5 case R.id.recycler_view_pinned_layout:
6 TextView nameTv = (TextView) pinnedView.findViewById(R.id.recycler_view_item_float_name_tv);
7 nameTv.setText(personList.get(position).getName());
8 TextView ageTv = (TextView) pinnedView.findViewById(R.id.recycler_view_item_float_age_tv);
9 ageTv.setText(personList.get(position).getAge() + "歲");
10 break;
11 }
12 }
然後,我們來看看PinnedRecyclerViewLayout是怎麼實現的。
1 /**
2 * Author: wangjie
3 * Email:
[email protected]
4 * Date: 2/2/15.
5 */
6 public class PinnedRecyclerViewLayout extends RelativeLayout {
7
8 private static final String TAG = PinnedRecyclerViewLayout.class.getSimpleName();
9
10 public static interface OnRecyclerViewPinnedViewListener {
11 void onPinnedViewRender(PinnedRecyclerViewLayout pinnedRecyclerViewLayout, View pinnedView, int position);
12 }
13
14 private OnRecyclerViewPinnedViewListener onRecyclerViewPinnedViewListener;
15
16 public void setOnRecyclerViewPinnedViewListener(OnRecyclerViewPinnedViewListener onRecyclerViewPinnedViewListener) {
17 this.onRecyclerViewPinnedViewListener = onRecyclerViewPinnedViewListener;
18 }
19
20 public PinnedRecyclerViewLayout(Context context) {
21 super(context);
22 init(context);
23 }
24
25 public PinnedRecyclerViewLayout(Context context, AttributeSet attrs) {
26 super(context, attrs);
27 init(context);
28 }
29
30 public PinnedRecyclerViewLayout(Context context, AttributeSet attrs, int defStyleAttr) {
31 super(context, attrs, defStyleAttr);
32 init(context);
33 }
34
35 private void init(Context context) {
36 }
37
38 private View pinnedView;
39 private ABaseLinearLayoutManager layoutManager;
40
41 public void initRecyclerPinned(RecyclerView recyclerView, ABaseLinearLayoutManager layoutManager, View pinnedView) {
42 this.pinnedView = pinnedView;
43 this.layoutManager = layoutManager;
44 this.addView(this.pinnedView);
45 RelativeLayout.LayoutParams lp = new RelativeLayout.LayoutParams(ViewGroup.LayoutParams.MATCH_PARENT, ViewGroup.LayoutParams.WRAP_CONTENT);
46 this.pinnedView.setLayoutParams(lp);
47 layoutManager.getRecyclerViewScrollManager().addScrollListener(recyclerView, new OnRecyclerViewScrollListener() {
48 @Override
49 public void onScrollStateChanged(RecyclerView recyclerView, int newState) {
50 }
51
52 @Override
53 public void onScrolled(RecyclerView recyclerView, int dx, int dy) {
54 refreshPinnedView();
55 }
56 });
57 pinnedView.setVisibility(GONE);
58 }
59
60 // 保存上次的position
61 private int lastPosition = RecyclerView.NO_POSITION;
62
63 public void refreshPinnedView() {
64 if (null == pinnedView || null == layoutManager) {
65 Logger.e(TAG, "Please init pinnedView and layoutManager with initRecyclerPinned method first!");
66 return;
67 }
68 if (VISIBLE != pinnedView.getVisibility()) {
69 pinnedView.setVisibility(VISIBLE);
70 }
71 int curPosition = layoutManager.findFirstVisibleItemPosition();
72 if (RecyclerView.NO_POSITION == curPosition) {
73 return;
74 }
75 View curItemView = layoutManager.findViewByPosition(curPosition);
76 if (null == curItemView) {
77 return;
78 }
79 // 如果當前的curPosition和上次的lastPosition不一樣,則說明需要重新刷新數據,避免curPosition一樣的情況下重復刷新相同數據
80 if (curPosition != lastPosition) {
81 if (null != onRecyclerViewPinnedViewListener) {
82 onRecyclerViewPinnedViewListener.onPinnedViewRender(this, pinnedView, curPosition);
83 }
84 lastPosition = curPosition;
85 }
86
87 int displayTop;
88 int itemHeight = curItemView.getHeight();
89 int curTop = curItemView.getTop();
90 int floatHeight = pinnedView.getHeight();
91 if (curTop < floatHeight - itemHeight) {
92 displayTop = itemHeight + curTop - floatHeight;
93 } else {
94 displayTop = 0;
95 }
96 RelativeLayout.LayoutParams lp = (LayoutParams) pinnedView.getLayoutParams();
97 lp.topMargin = displayTop;
98 pinnedView.setLayoutParams(lp);
99 pinnedView.invalidate();
100 }
101
102
103 }
這個PinnedRecyclerViewLayout 是繼承RelativeLayout的,因為我們需要在裡面添加一個被頂上去的pinnedView,需要覆蓋在RecyclerView上面。
Line44:把傳進來的pinnedView增加到PinnedRecyclerViewLayout 裡面
Line47~56:在ABaseLinearLayoutManager中增加一個滾動的監聽器,因為我們需要在滾動的時候動態的改變pinnedView的位置,這樣才能模擬頂上去的效果。並滾動時調用refreshPinnedView來刷新pinnedView的位置。
Line57:因為在調用initRecyclerPinned方法時,RecyclerView可能還沒有數據源,所以不需要顯示這個pinnedView,等到真正滾動的時候再顯示就可以了。
refreshPinnedView()方法的作用是在滾動的同時用來刷新pinnedView的位置和顯示的數據:
Line71~78:通過layoutManager獲取當前第一個顯示的數據position,然後根據position獲取當前第一個顯示的View。
Line79~85:如果當前的curPosition和上次的lastPosition不一樣,則說明需要重新刷新數據,避免curPosition一樣的情況下重復刷新相同數據。
Line87~95:根據當前第一個顯示的View,根據它的top、它的高度和pinnedView的高度計算出pinnedView需要往上移動的距離(畫個幾何圖一目了然了)。
Line96~99:刷新pinnedView的位置
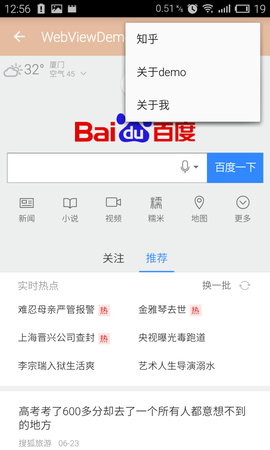 Android中WebView的一些簡單用法
 Android自定義View實現驗證碼
 Android 源碼解析View的touch事件分發機制
 Android進階(二十七)Android原生擾人煩的布局