編輯:關於Android編程
android 常用代碼片段,前1-10條是從網上摘錄,向原作者致謝。後面為自己整理。
1、設置窗口格式為半透明
getWindow().setFormat(PixelFormat.TRANSLUCENT);
2、Android中在非UI線程裡更新View的不同方法:
* Activity.runOnUiThread( Runnable )
* View.post( Runnable )
* View.postDelayed( Runnable, long )
* Hanlder
3、全屏顯示窗口
requestWindowFeature(Window.FEATURE_NO_TITLE);
getWindow().setFlags(WindowManager.LayoutParams.FLAG_FULLSCREEN, WindowManager.LayoutParams.FLAG_FULLSCREEN);
4、取得屏幕大小
方法A:
WindowManager windowManager = getWindowManager();
Display display = windowManager.getDefaultDisplay();
hAndW[0] = display.getWidth();
hAndW[1] = display.getHeight();
方法B:
DisplayMetrics dm = new DisplayMetrics();
getWindowManager().getDefaultDisplay().getMetrics(dm);
hAndW[0] = dm.widthPixels;
hAndW[1] = dm.heightPixels;
5、調浏覽器 載入網址
Uri uri = Uri.parse("http://www.google.com");
Intent it = new Intent(Intent.ACTION_VIEW, uri);
startActivity(it);
6、取得內存大小
ActivityManager.MemoryInfo outInfo = new ActivityManager.MemoryInfo();
activityManager.getMemoryInfo(outInfo);
//可用內存
outInfo.availMem
//是否在低內存狀態
outInfo.lowMemory
取得ScrollView的實際高度
scrollview.getHeight()
scrollview.getMeasuredHeight()
scrollview.compute()
scrollview.getLayoutParams().height
7、監聽App安裝/卸載事件
A.Define a class derived from class BroadcastReceiver;
B.Register broadcast receiver;
MyBroadcastReceiver myReceiver = new MyBroadcastReceiver();
IntentFilter filter = new IntentFilter(Intent.ACTION_PACKAGE_INSTALL);
filter.addAction(Intent.ACTION_PACKAGE_REMOVED);
filter.addAction(Intent.ACTION_PACKAGE_ADDED);
filter.addAction(Intent.ACTION_PACKAGE_CHANGED);
filter.addAction(Intent.ACTION_PACKAGE_RESTARTED);
...
filter.addDataScheme("package"); //This line is very important. Otherwise, broadcast can't be received.
registerReceiver(myReceiver, filter);
Notes: The package name is Intent.mData. Intent.mData is not available in SDK 1.0, but it can be retrieved by calling Intent.getDataString();
8、取得IP地址
A.
//Connect via WIFI 通過wifi
WifiManager wifiManager = (WifiManager) getSystemService(WIFI_SERVICE);
WifiInfo wifiInfo = wifiManager.getConnectionInfo();
int ipAddress = wifiInfo.getIpAddress();
B.
//Connect via GPRS通過gprs
public String getLocalIpAddress(){
try{
for(Enumeration en = NetworkInterface.getNetworkInterfaces(); en.hasMoreElements();){
NetworkInterface intf = en.nextElement();
for (Enumeration enumIpAddr = intf.getInetAddresses(); enumIpAddr.hasMoreElements();){
InetAddress inetAddress = enumIpAddr.nextElement();
if (!inetAddress.isLoopbackAddress()){
return inetAddress.getHostAddress().toString();
}
}
}
}catch (SocketException ex){
Log.e(S.TAG, ex.toString());
}
return null;
}
9、ListView 後面adapter數據已更改,但是ListView沒有收到Notification
首先,必須將 更新adapter數據的代碼放在:Handler.post(Runnable)方法中執行;
然後,如果Adapter數據的來源如果是cursor(CursorAdapter)的話 可以cursor.requery一下,如果是別的可以強制調用一下notifyChange, notifyChange 會調用 invalidate 進行重繪;
10、模擬HOME鍵
Intent i=new Intent(Intent.ACTION_MAIN);
i.addCategory(Intent.CATEGORY_HOME);
i.addFlags(Intent.FLAG_ACTIVITY_NEW_TASK);
context.startActivity(i);
11、設置焦點
editText.setFocusable(true);
editText.requestFocus();
editText.setFocusableInTouchMode(true);
12:在一個應用中去調用另一個app
例如:
if (Utils.isAvilible(context, "com.netschool.main.ui"))
{
Intent i = new Intent();
ComponentName cn = new ComponentName("com.netschool.main.ui",
"com.netschool.main.ui.SplashScreenActivity");
i.setComponent(cn);
startActivity(i);
}
else
{
Uri uri = Uri.parse(context.getString(R.string.url_zhuanti_download));
Intent it = new Intent(Intent.ACTION_VIEW, uri);
it.setData(uri);
startActivity(it);
}
13:andoroid TextView 顯示特殊字符
String course_jianjie ="xxxxxxxxxx";
//字符串中有 \r\n 需要替換為
String temp =course_jianjie.replaceAll("\\r\\n", "
");
//用html 來顯示
CharSequence styledText = Html.fromHtml(temp);
//設置要顯示的控件
mCourseDescTv.setText(styledText);
14:使用NotificationManager觸發多個Notification,只顯示最後一個的問題
只要每個不同的Intent對應傳遞一個獨立的ID就可以了,以上函數修改如下(增加ID參數):
private Notification genreNotification(Context context, int icon, String tickerText, String title, String content, Intent intent, int id){
Notification notification = new Notification(icon, tickerText, System.currentTimeMillis());
// 問題就在這裡的id了
PendingIntent pendIntent = PendingIntent.getActivity(context, id, intent, PendingIntent.FLAG_UPDATE_CURRENT);
notification.setLatestEventInfo(context, title, content, pendIntent);
notification.flags |= Notification.FLAG_AUTO_CANCEL;
return notification;
}
...
mNotificationManager.notify(ID_1,
genreNotification(mContext, ICON_RES,
notifyText1, notifyTitle1, notifyText1, intent_1, ID_1));
...
mNotificationManager.notify(ID_2,
genreNotification(mContext, ICON_RES,
notifyText2, notifyTitle2, notifyText2, intent_2, ID_2));
...
mNotificationManager.notify(ID_3,
genreNotification(mContext, ICON_RES,
notifyText3, notifyTitle3, notifyText3, intent_3, ID_3));
15: adb 命令截圖
adb shell /system/bin/screencap -p /sdcard/screenshot.png(保存到SDCard)
adb pull /sdcard/screenshot.png d:/screenshot.png(保存到電腦)
16:跳出for循環
OK:
for(int i=0;i<100;i++){
if(i==10){
break OK;
}
}
17:使用viewPager加載超過3頁
有時會報出 The specified child already has a parent. You must call removeView() on the child's parent first 的錯誤
此時:可以簡單的用
mViewPager.setOffscreenPageLimit(3);解決
備注:單這不是萬能之策,也不是優選之策
18:
/**
* @Description:調節音量大小
* @author: jrh
* @date: 2014-11-13 下午3:06:46
* @return: void
* @param percent
*/
private void onVolumeSlide(float percent)
{
if (mVolume == -1)
{
mVolume = mAudioManager.getStreamVolume(AudioManager.STREAM_MUSIC);
if (mVolume < 0)
{
mVolume = 0;
}
mOperationBg.setImageResource(R.drawable.video_volumn_bg);
mVolumeBrightnessLayout.setVisibility(View.VISIBLE);
}
int index = (int) ((percent * mMaxVolume) + mVolume);
if (index > mMaxVolume)
{
index = mMaxVolume;// 最大音量
}
else if (index < 0)
{
index = 0;// 靜音
}
// 變更聲音
mAudioManager.setStreamVolume(AudioManager.STREAM_MUSIC, index, 0);
// 變更進度條
ViewGroup.LayoutParams lp = mOperationPercent.getLayoutParams();
lp.width = findViewById(R.id.operation_full).getLayoutParams().width * index /
mMaxVolume;
mOperationPercent.setLayoutParams(lp);
}
19 /**
* @Description:調節屏幕亮度
* @author: jrh
* @date: 2014-11-13 下午3:17:40
* @return: void
* @param percent
*/
private void onBrightnessSlide(float percent)
{
if (mBrightness < 0)
{
mBrightness = getWindow().getAttributes().screenBrightness;
if (mBrightness <= 0.00f)
{
mBrightness = 0.50f;
}
else if (mBrightness < 0.01f)
{
mBrightness = 0.01f;
}
// 顯示
mOperationBg.setImageResource(R.drawable.video_brightness_bg);
mVolumeBrightnessLayout.setVisibility(View.VISIBLE);
}
WindowManager.LayoutParams lpa = getWindow().getAttributes();
lpa.screenBrightness = mBrightness + percent;
if (lpa.screenBrightness > 1.0f)
{
lpa.screenBrightness = 1.0f;// 最亮
}
else if (lpa.screenBrightness < 0.01f)
{
lpa.screenBrightness = 0.01f;
}
getWindow().setAttributes(lpa);
ViewGroup.LayoutParams lp = mOperationPercent.getLayoutParams();
lp.width = (int) (findViewById(R.id.operation_full).getLayoutParams().width * lpa.screenBrightness);
mOperationPercent.setLayoutParams(lp);
}
20:viewpager + fragment 布局時有時會報下面的錯誤
11-14 13:52:45.266: E/AndroidRuntime(4561): FATAL EXCEPTION: main
11-14 13:52:45.266: E/AndroidRuntime(4561): java.lang.NullPointerException
11-14 13:52:45.266: E/AndroidRuntime(4561): at android.support.v4.app.FragmentManagerImpl.saveFragmentBasicState(FragmentManager.java:1576)
解決方法:
在繼承fragment的裡面重寫
@Override
public void onSaveInstanceState(Bundle outState)
{
// TODO Auto-generated method stub
super.onSaveInstanceState(outState);
setUserVisibleHint(true);
}
21:service 服務並不是另開一個線程 ,處理service 時最好單獨開線程進行處理
22:不要在receiver 裡面處理耗時工作
23:如果布局時: 想要在字中間加空格 可以使用 " ;" html 的空格實體編號添加。注意:一個漢字相當於 兩個空格字符。
24:volatile java 關鍵字 保證了線程可以讀取其他線程的寫入值、
Thread.join() 方法保證了該線程優先執行 其他線程等待
Thread.yied() 方法 讓出時間讓其它線程可以執行
如何停止線程?
不要隨意調用 Thread.stop()方法 ,該方法不是正確的停止線程方法 會導致一些其他的問題
使用推出的旗桿標志 :如設置 boolean 值等
結束時及時清理資源
使用代碼邏輯來使得線程執行結束 (使thread 線程內部的代碼 任務執行完畢)
25:如何在TextVeiw下加入一條線
TextView tv = new TextView();
tv.getPaint().setFlags(Paint.UNDERLINE_TEXT_FLAG);
26:android 4.4 以上無法在外置SD卡創建文件夾
解決方法:
@A File dirFile = new File(temp.trim());
if (!dirFile.exists())
{// 對於4.4以上版本特別重要
getApplicationContext().getExternalFilesDir(null);
dirFile.mkdirs();
}
@B 文件路徑:/android/data/包名/
27:在:
android:targetSdkVersion="18"
隨著版本號的改變 界面元素,顯示方式是不一樣的
28:android 獲取所有存儲卡的地址
private String[] getSdCard() {
StorageManager sm = (StorageManager) getSystemService(Context.STORAGE_SERVICE);
String[] paths = null;
try {
paths = (String[]) sm.getClass().getMethod("getVolumePaths", null)
.invoke(sm, null);
} catch (IllegalAccessException e) {
// TODO Auto-generated catch block
e.printStackTrace();
} catch (IllegalArgumentException e) {
// TODO Auto-generated catch block
e.printStackTrace();
} catch (InvocationTargetException e) {
// TODO Auto-generated catch block
e.printStackTrace();
} catch (NoSuchMethodException e) {
// TODO Auto-generated catch block
e.printStackTrace();
}
return paths;
}
29:百度地圖 出現問題
A:報錯
java.lang.UnsatisfiedLinkError: Couldn't load BaiduMapSDK_v3_2_0_15 from loader dalvik.system.PathClassLoader[dexPath=/data/app/com.znxh.haohao-1.apk,libraryPath=/data/app-lib/com.znxh.haohao-1]: findLibrary returned null
解決方法:
1:現在libs下建armeabi文件夾,然後加入.so庫文件;
2:如果上述方法不行:再在libs下建armeabi-v7a文件夾,再導入相應.so庫文件
3:定位時一定要在mainfest 文件中注冊服務:
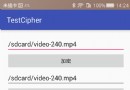
30:處理圖片上傳的工具類
/*
* 上傳頭像
*
* @param urlStr url地址
*
* @param userid 用戶id
*
* @param urlStr 要上傳的圖片
*/
public static Runnable upLoadFile(final Handler handler, final String urlString,
final String userid, final File file)
{
Runnable runnable = new Runnable()
{
@Override
public void run()
{
int res = 0;
String result = null;
String BOUNDARY = UUID.randomUUID().toString(); // 邊界標識 隨機生成
String PREFIX = "--", LINE_END = "\r\n";
String CONTENT_TYPE = "multipart/form-data"; // 內容類型
try
{
URL url = new URL(urlString);
HttpURLConnection conn = (HttpURLConnection) url.openConnection();
conn.setReadTimeout(2000);
conn.setConnectTimeout(2000);
conn.setDoInput(true); // 允許輸入流
conn.setDoOutput(true); // 允許輸出流
conn.setUseCaches(false); // 不允許使用緩存
conn.setRequestMethod("POST"); // 請求方式
conn.setRequestProperty("Charset", "UTF-8"); // 設置編碼
conn.setRequestProperty("connection", "keep-alive");
conn.setRequestProperty("Content-Type", CONTENT_TYPE + ";boundary=" + BOUNDARY);
if (file != null)
{
/**
* 當文件不為空時執行上傳
*/
DataOutputStream dos = new DataOutputStream(conn.getOutputStream());
StringBuffer sb = new StringBuffer();
sb.append("--" + BOUNDARY + "\r\n");
sb.append("Content-Disposition: form-data; name=\"userid\"" + "\r\n");
sb.append("\r\n");
sb.append(userid + "\r\n");
sb.append(PREFIX);
sb.append(BOUNDARY);
sb.append(LINE_END);
/**
* 這裡重點注意: name裡面的值為服務器端需要key 只有這個key 才可以得到對應的文件 filename是文件的名字,包含後綴名
*/
sb.append("Content-Disposition: form-data; name=\"photo\"; filename=\"" +
file.getName() + "\"" + LINE_END);
sb.append("Content-Type: image/pjpeg; charset=" + "UTF-8" + LINE_END);
sb.append(LINE_END);
dos.write(sb.toString().getBytes());
InputStream is = new FileInputStream(file);
byte[] bytes = new byte[1024];
int len = 0;
while ((len = is.read(bytes)) != -1)
{
dos.write(bytes, 0, len);
}
is.close();
dos.write(LINE_END.getBytes());
byte[] end_data = (PREFIX + BOUNDARY + PREFIX + LINE_END).getBytes();
dos.write(end_data);
dos.flush();
/**
* 獲取響應碼 200=成功 當響應成功,獲取響應的流
*/
res = conn.getResponseCode();
Log.i("return code", "response code:" + res);
Log.i("userid", "" + userid);
if (res == 200)
{
InputStream input = conn.getInputStream();
StringBuffer sb1 = new StringBuffer();
int ss;
while ((ss = input.read()) != -1)
{
sb1.append((char) ss);
}
result = sb1.toString();
Log.i("return", "result : " + result);
Message message = Message.obtain();
message.what = 666;
handler.sendMessage(message);
}
else
{
Log.i("return", "request error");
}
}
}
catch (MalformedURLException e)
{
e.printStackTrace();
}
catch (IOException e)
{
e.printStackTrace();
}
}
};
return runnable;
}
 酷派cool1生態手機和樂視2哪個好 cool1和樂2區別對比
ool1手機的亮點在於雙攝2.0技術的1300萬雙後置鏡頭,系統也進化到樂視EUI。這樣的一款手機很多人很好奇它和年初發布的樂視2超級手機哪個好?那麼到底c
 Android 熱補丁動態修復框架小結
一、概述最新github上開源了很多熱補丁動態修復框架,大致有:上述三個框架呢,根據其描述,原理都來自:安卓App熱補丁動態修復技術介紹,以及Android
 Android中圖案解鎖的設計原理和實現過程
Android中圖案解鎖首先要理解圖案的實現原理,上一張圖: 由上圖,可以看出,圖案中手勢的記錄是1-9或0-8的,保存的順序就是密碼,當然有些是可以重復的,為了安全,
 Android選項卡動態滑動效果
本文會實現一個類似網易新聞(不說網易新聞大家可能不知道大概是什麼樣子)點擊超多選項卡,選項卡動態滑動的效果。首先來看看布局,就是用HorizontalScrollView