編輯:關於Android編程
今天了解到PopupWindows這個布局,PopupWindow這個類用來實現一個彈出框,可以使用任意布局的View作為其內容,這個彈出框是懸浮在當前activity之上的。
下面是一個實例
xml文件
android:layout_width="match_parent"
android:layout_height="wrap_content"
android:layout_alignParentBottom="true"
android:background="#ffffff"
android:orientation="vertical" >
android:layout_height="1dp"
android:background="#ff495a" />
android:layout_height="55dp"
android:orientation="horizontal" >
android:layout_width="match_parent"
android:layout_height="55dp"
android:background="@drawable/bt_nobgd"
android:textColor="#585858"
android:textSize="18sp"
android:text="拍照" />
android:layout_width="match_parent"
android:layout_height="1px"
android:background="#f2f2f2" />
android:layout_height="55dp"
android:orientation="horizontal" >
android:layout_width="match_parent"
android:layout_height="55dp"
android:background="@drawable/bt_nobgd"
android:textColor="#585858"
android:textSize="18sp"
android:text="從相冊中選取" />
android:layout_height="2dp"
android:background="#f3f3f3" />
android:layout_width="match_parent"
android:layout_height="55dp"
android:background="@drawable/bt_nobgd"
android:textColor="#585858"
android:textSize="18sp"
android:text="取消" />
MainActivity文件 用來實現拍照獲取本地圖庫的功能。
package cn.pb.activity;
import java.io.File;
import com.example.pb_android.R;
import android.app.Activity;
import android.content.Context;
import android.content.Intent;
import android.graphics.drawable.BitmapDrawable;
import android.net.Uri;
import android.os.Bundle;
import android.os.Environment;
import android.provider.MediaStore;
import android.view.Gravity;
import android.view.View;
import android.view.View.OnClickListener;
import android.view.ViewGroup.LayoutParams;
import android.view.animation.AnimationUtils;
import android.view.Window;
import android.widget.Button;
import android.widget.LinearLayout;
import android.widget.PopupWindow;
import android.widget.TextView;
public class MainActivity extends Activity implements OnClickListener{
private TextView t_send,t_ragion;
private Button btn_images;
@Override
protected void onCreate(Bundle savedInstanceState) {
super.onCreate(savedInstanceState);
this.requestWindowFeature(Window.FEATURE_NO_TITLE);
setContentView(R.layout.activity_main);
Init();
}
public void Init(){
t_send = (TextView) findViewById(R.id.t_send);
btn_images = (Button) findViewById(R.id.btn_images);
t_ragion = (TextView) findViewById(R.id.t_ragion);
t_send.setOnClickListener(this);
btn_images.setOnClickListener(this);
t_ragion.setOnClickListener(this);
}
@Override
public void onClick(View v) {
switch (v.getId()) {
case R.id.t_send:
break;
case R.id.btn_images:
new PopupWindows(MainActivity.this, v);
break;
case R.id.t_ragion:
break;
default:
break;
}
}
public class PopupWindows extends PopupWindow {
public PopupWindows(Context mContext, View parent) {
View view = View
.inflate(mContext, R.layout.item_popupwindows, null);
view.startAnimation(AnimationUtils.loadAnimation(mContext,
R.anim.fade_ins));
LinearLayout ll_popup = (LinearLayout) view
.findViewById(R.id.ll_popup);
ll_popup.startAnimation(AnimationUtils.loadAnimation(mContext,
R.anim.push_bottom_in_2));
setWidth(LayoutParams.FILL_PARENT);
setHeight(LayoutParams.FILL_PARENT);
setBackgroundDrawable(new BitmapDrawable());
setFocusable(true);
setOutsideTouchable(true);
setContentView(view);
showAtLocation(parent, Gravity.BOTTOM, 0, 0);
update();
Button bt1 = (Button) view
.findViewById(R.id.item_popupwindows_camera);
Button bt2 = (Button) view
.findViewById(R.id.item_popupwindows_Photo);
Button bt3 = (Button) view
.findViewById(R.id.item_popupwindows_cancel);
bt1.setOnClickListener(new OnClickListener() {
public void onClick(View v) {
Intent intent = new Intent(
MediaStore.ACTION_IMAGE_CAPTURE);
// 下面這句指定調用相機拍照後的照片存儲的路徑
intent.putExtra(MediaStore.EXTRA_OUTPUT, Uri
.fromFile(new File(Environment
.getExternalStorageDirectory(),
"imageTemp.jpg")));
startActivityForResult(intent, 2);
dismiss(); //關閉Pop窗口
}
});
bt2.setOnClickListener(new OnClickListener() {
public void onClick(View v) {
Intent intent = new Intent(Intent.ACTION_PICK, null);
intent.setDataAndType(
MediaStore.Images.Media.EXTERNAL_CONTENT_URI,
"image/*");// 調用android的圖庫
startActivityForResult(intent, 1);
dismiss();
}
});
bt3.setOnClickListener(new OnClickListener() {
public void onClick(View v) {
dismiss();
}
});
}
}
}
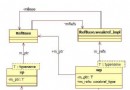 android refbase類
在Android的源代碼中,經常會看到形如:sp<xxx>、wp<xxx>這樣的類型定義,這其實是Android中的智能 指針。智能
 簡單6步 把安卓機變得和蘋果系統一樣快
眾所周知,Android系統對硬件擁有較高的要求,使用一段時間以後就會出現速度變慢、多任務處理卡頓的現象,其實通過一些小技巧,便能提升設備的運行速度,大家不
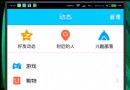 android:QQ多種側滑菜單的實現
然而這個菜單效果只是普通的側拉效果 我們還可以實現抽屜式側滑菜單 就像這樣第一種效果第二種效果第三種效果第四種效果其它代碼都和上篇文章相同,只是在MyHorizontal
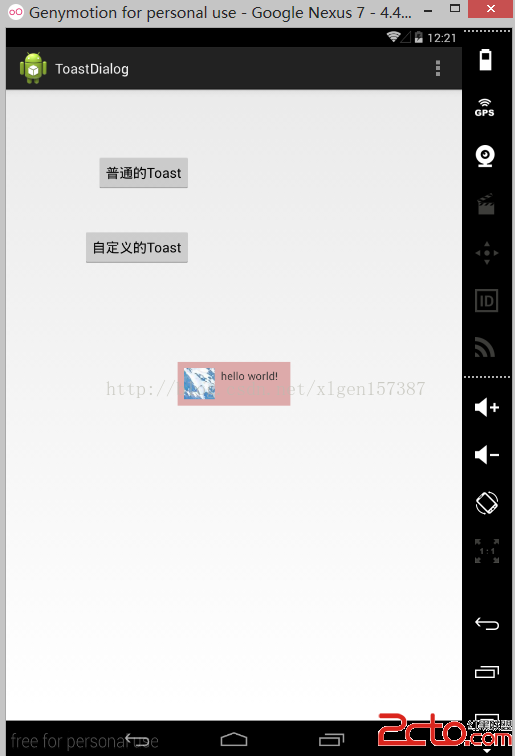 Android學習筆記之自定義Toast
(1)布局文件layout (2)需要彈出的Toast布局文件 (3)類的文件 package com