編輯:關於Android編程
 1 <LinearLayout xmlns:android="http://schemas.android.com/apk/res/android"
 2     xmlns:tools="http://schemas.android.com/tools"
 3     android:layout_width="match_parent"
 4     android:layout_height="match_parent"
 5     android:orientation="vertical"
 6     tools:context=".MainActivity">
 7
 8     <EditText
 9         android:id="@+id/editText"
10         android:layout_width="match_parent"
11         android:layout_height="wrap_content"
12         android:hint="請輸入要發送的內容"/>
13
14     <Button
15         android:id="@+id/button01"
16         android:layout_width="match_parent"
17         android:layout_height="wrap_content"
18         android:text="連接"/>
19
20     <Button
21         android:id="@+id/button02"
22         android:layout_width="match_parent"
23         android:layout_height="wrap_content"
24         android:text="發送"/>
25
26     <ScrollView
27         android:layout_width="match_parent"
28         android:layout_height="wrap_content"
29         android:scrollbars="vertical"
30         android:fadingEdge="vertical">
31         <TextView
32             android:id="@+id/textView"
33             android:layout_width="match_parent"
34             android:layout_height="wrap_content"
35             android:text="輸出信息:"/>
36     </ScrollView>
37
38 </LinearLayout>
界面很是簡單。 下面我們需要一個服務器,和一個客戶端。服務器,我用的是Eclipse寫的Java的服務器;客戶端,我用的是Android Studio寫的。
package com.ryan.socketdemo01;

import android.os.Handler;
import android.os.Message;
import android.support.v7.app.AppCompatActivity;
import android.os.Bundle;
import android.util.Log;
import android.view.Menu;
import android.view.MenuItem;
import android.view.View;
import android.widget.Button;
import android.widget.EditText;
import android.widget.TextView;
import android.widget.Toast;

import java.io.IOException;
import java.io.OutputStream;
import java.io.UnsupportedEncodingException;
import java.net.Socket;

/**
 * 本實例功能: 客戶端發送數據至客戶端(動態輸出數據)
 *
 */
public class MainActivity extends AppCompatActivity implements View.OnClickListener{

    private Button button01 = null;
    private Button button02 = null;
    private EditText editText = null;
    private TextView textView = null;

    private static Socket ClientSocket = null;
    private byte[] msgBuffer = null;
    Handler handler = new Handler();


    private void initView() {
        button01 = (Button) findViewById(R.id.button01);
        button02 = (Button) findViewById(R.id.button02);
        editText = (EditText) findViewById(R.id.editText);
        textView = (TextView) findViewById(R.id.textView);

        button01.setOnClickListener(this);
        button02.setOnClickListener(this);

        button01.setEnabled(true);
        button02.setEnabled(false);
    }


    @Override
    protected void onCreate(Bundle savedInstanceState) {
        super.onCreate(savedInstanceState);
        setContentView(R.layout.activity_main);
        initView();

    }


    @Override
    public void onClick(View v) {
        switch (v.getId()){
            case R.id.button01:
                // TODO: 15-9-4 socket連接線程
                connectThread();
                break;
            case R.id.button02:
                // TODO: 15-9-4 發送數據線程
                sendMsgThread();
                break;
        }
    }

    private void sendMsgThread() {

        final String text = editText.getText().toString();
        try {
            msgBuffer = text.getBytes("UTF-8");
        } catch (UnsupportedEncodingException e) {
            e.printStackTrace();
        }

        new Thread(new Runnable() {
            @Override
            public void run() {
                try {
                    OutputStream outputStream;
                    //Socket輸出流
                    outputStream = ClientSocket.getOutputStream();

                    outputStream.write(msgBuffer);
                    outputStream.flush();
                    outputStream.close();
                } catch (IOException e) {
                    e.printStackTrace();
                }
                handler.post(new Runnable() {
                    @Override
                    public void run() {
                        textView.append("發送成功:"+text+"\n");
                    }
                });
            }
        }).start();
    }

    private void connectThread() {
        new Thread(new Runnable() {
            @Override
            public void run() {
                try {
                    ClientSocket = new Socket("10.0.2.2",9001);
                    if (ClientSocket.isConnected()){
                        handler.post(new Runnable() {
                            @Override
                            public void run() {
                                textView.append("連接成功!"+"\n");
                                button01.setEnabled(false);
                                button02.setEnabled(true);
                            }
                        });
                    }else {
                        handler.post(new Runnable() {
                            @Override
                            public void run() {
                                textView.append("連接失敗!"+"\n");
                            }
                        });
                    }
                } catch (IOException e) {
                    e.printStackTrace();
                }
            }
        }).start();
    }


    @Override
    public boolean onCreateOptionsMenu(Menu menu) {
        // Inflate the menu; this adds items to the action bar if it is present.
        getMenuInflater().inflate(R.menu.menu_main, menu);
        return true;
    }

    @Override
    public boolean onOptionsItemSelected(MenuItem item) {
        // Handle action bar item clicks here. The action bar will
        // automatically handle clicks on the Home/Up button, so long
        // as you specify a parent activity in AndroidManifest.xml.
        int id = item.getItemId();

        //noinspection SimplifiableIfStatement
        if (id == R.id.action_settings) {
            return true;
        }

        return super.onOptionsItemSelected(item);
    }
}
這裡我的線程使用方式是:
new Thread (new Runnable) {
      @Override
      public void run() {
      }
}
網上有人說這個方式很LOW,而且不好,但現在我只會這個,就連asynctask也還在學習中。 還有一點,子線程更新主UI的方法: 我使用的是 Handler.post(); 同樣十分簡單的使用方法。
Handler handler = new Handler();

handler.post(new Runnable() {
                    @Override
                    public void run() {
                        textView.append("發送成功:"+text+"\n");
                    }
                });
關於幾種子線程更新主UI的方法,我以後會再寫一篇博客。我現在已經知道了不下4中方法,還沒實地操作。
 android dialog邊框去除白色邊框實現思路及代碼
使用樣式文件,在values 目錄下新建styles.xml文件,編寫如下代碼: 復制代碼 代碼如下: Code highlighting produced by Act
 《Android Studio實用指南》4.27 使用演示模式
目前本書已上傳到百度閱讀, 在百度中搜索[Anroid Studio實用指南]便可以找到本書.什麼是演示模式?顧名思義,當你想給別人演示你的代碼時就會用到這個演示模式.演
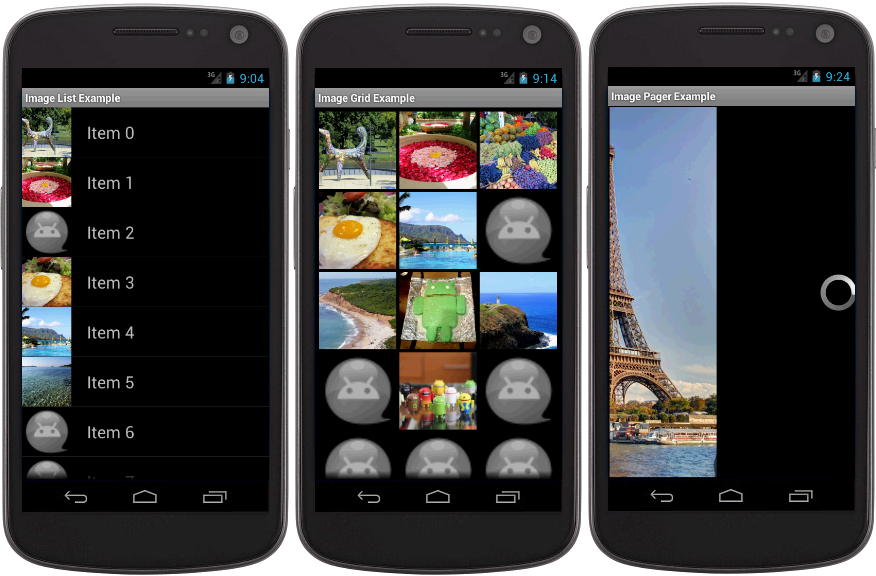 安卓universal-image-loader圖片異步加載的解析
這個圖片異步加載並緩存的類已經被很多開發者所使用,是最常用的幾個開源庫之一,主流的應用,隨便反編譯幾個火的項目,都可以見到它的身影。可是有的人並不知道如何去使用這庫如何進
 [Android] 快速實現一個通用EmptyView
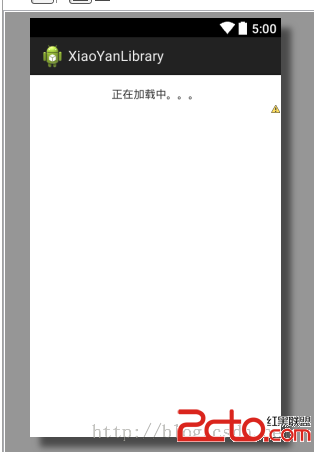
好的APP應當具備良好的交互, 最好能貼心的滿足用戶的需求. 而人性化的提醒就是其中之一. 某些APP中經常會看到這樣的場景, 當加載內容失敗, 或者獲取內容失敗時, 界
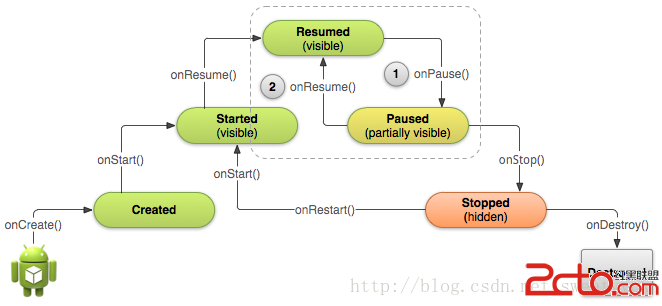 Android學習路線(十三)Activity生命周期——停止和恢復(Pausing and Resuming )一個Activity
先占個位置,下次翻譯~ :p During normal app u