編輯:關於Android編程
簡單的說就是狀態欄顏色出現了變化,能夠跟APP界面顏色相匹配。接下來對這種效果的實現進行詳細的分析。
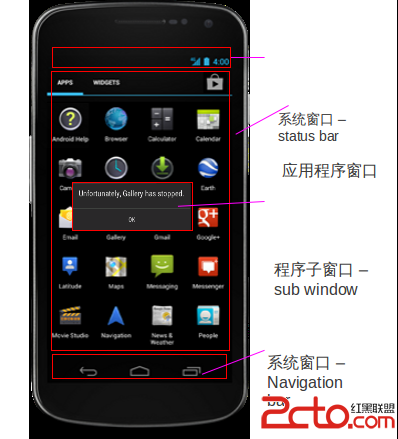
先來了解一下Android的窗口系統。從用戶角度來看,Android是一個多窗口的操作系統,窗口根據尺寸,位置,Z-Order,透明度等參數疊加起來一起呈現給用戶。這些窗口既可以來自同一個應用也可以來自不同的應用。既可以顯示在同一個平面,也可以在不同的平面。總而言之,窗口是有層次的顯示區域,每個窗口在底層最終體現為一個個的矩形buffer,這些buffer通過計算合成一個新的buffer,最終交給Display系統進行顯示。為了輔助最後的窗口管理,Android定義了一些不同的窗口類型:
應用程序窗口(Application Window):包括應用程序自己創建的窗口,以及應用啟動之前系統負責顯示的窗口。 子窗口(Sub Window):應用自定義的對話框,輸入法窗口,子窗口必須依附於某個應用窗口(設置相同的token)。 系統窗口(System Window):系統設計的,不依附於任何應用的窗口,列如狀態欄(Status Bar),導航欄(Navigation Bar),壁紙(Wallpaper),來電顯示窗口(Phone),鎖屏窗口(KeyGuard),信息提示窗口(Toast),音量調試窗口等。PhoneWindow是Activity Window的擴展,是為手機或者平板專門設計的一個布局方案,一個PhoneWindow的布局大致如下:
Android4.4以下對於系統窗口中的狀態欄和導航欄等是不支持更改的。但是Android4.4API裡google添加了一個這translucent statusbar navigationbar概念。官方文檔如下:
Translucent system bars
You can now make the system bars partially translucent with new themes, Theme.Holo.NoActionBar.TranslucentDecor and Theme.Holo.Light.NoActionBar.TranslucentDecor. By enabling translucent system bars, your layout will fill the area behind the system bars, so you must also enable fitsSystemWindows for the portion of your layout that should not be covered by the system bars.
If you’re creating a custom theme, set one of these themes as the parent theme or include the windowTranslucentNavigation and windowTranslucentStatus style properties in your theme.
android 4.4雖然沒有直接提供修改系統欄(狀態欄,導航欄)顏色,但是卻給了我們實現系統欄設計的方向。
方法一:設置Activity所在window的屬性。
if (Build.VERSION.SDK_INT >= Build.VERSION_CODES.KITKAT){
         getWindow().addFlags(WindowManager.LayoutParams.FLAG_TRANSLUCENT_STATUS);
         getWindow().addFlags(WindowManager.LayoutParams.FLAG_TRANSLUCENT_NAVIGATION);
  }
方法二:設置theme屬性。
android:theme="@android:style/Theme.DeviceDefault.Light.NoActionBar.TranslucentDecor"
android:theme="@android:style/Theme.Holo.Light.NoActionBar.TranslucentDecor"
android:theme="@android:style/Theme.Holo.NoActionBar.TranslucentDecor"
如果使用自定主題,只需在在 values-19 文件夾下添加以下屬性
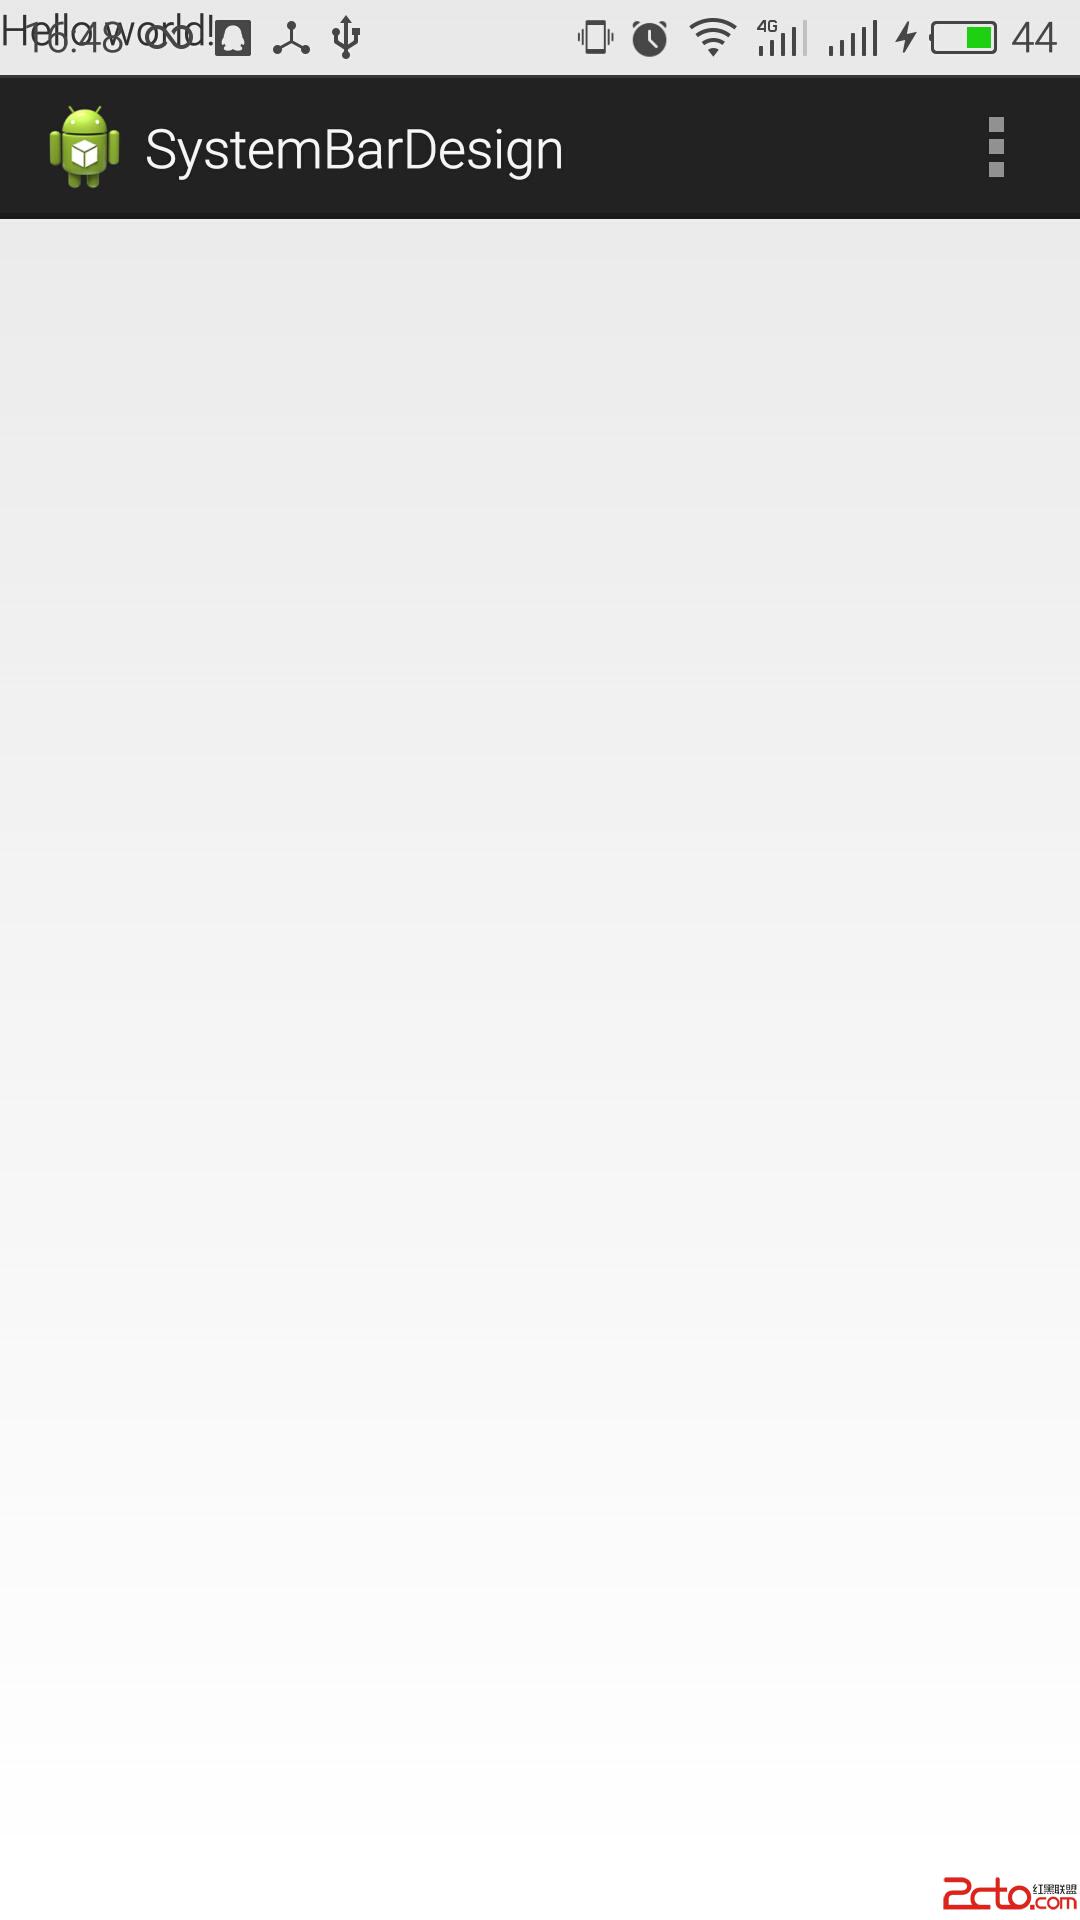
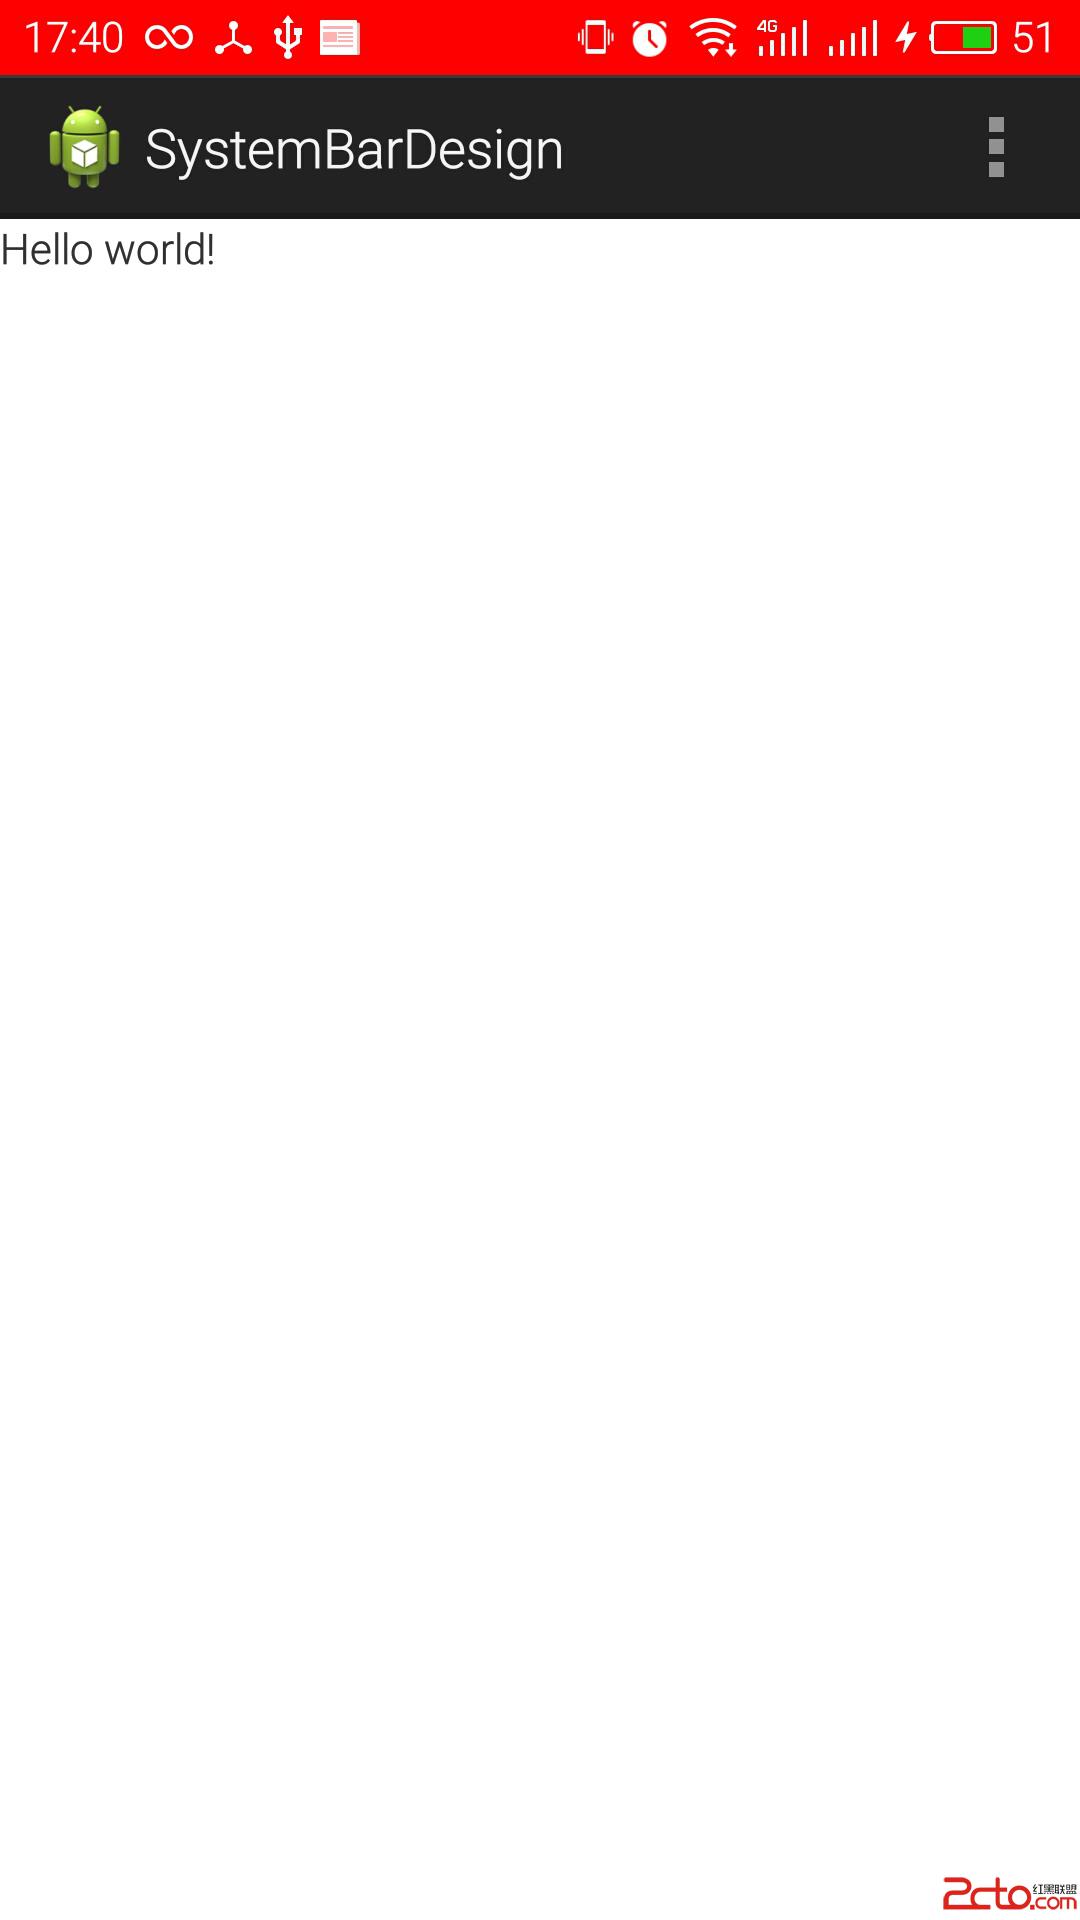
但是,設置透明之後效果如下所示,app會頂掉原來狀態欄所占位置,解決方法如下。
關於fitsystemwindow屬性,官方文檔如下:
Boolean internal attribute to adjust view layout based on system windows such as the status bar. If true, adjusts the padding of this view to leave space for the system windows. Will only take effect if this view is in a non-embedded activity.
Must be a boolean value, either “true” or “false”.
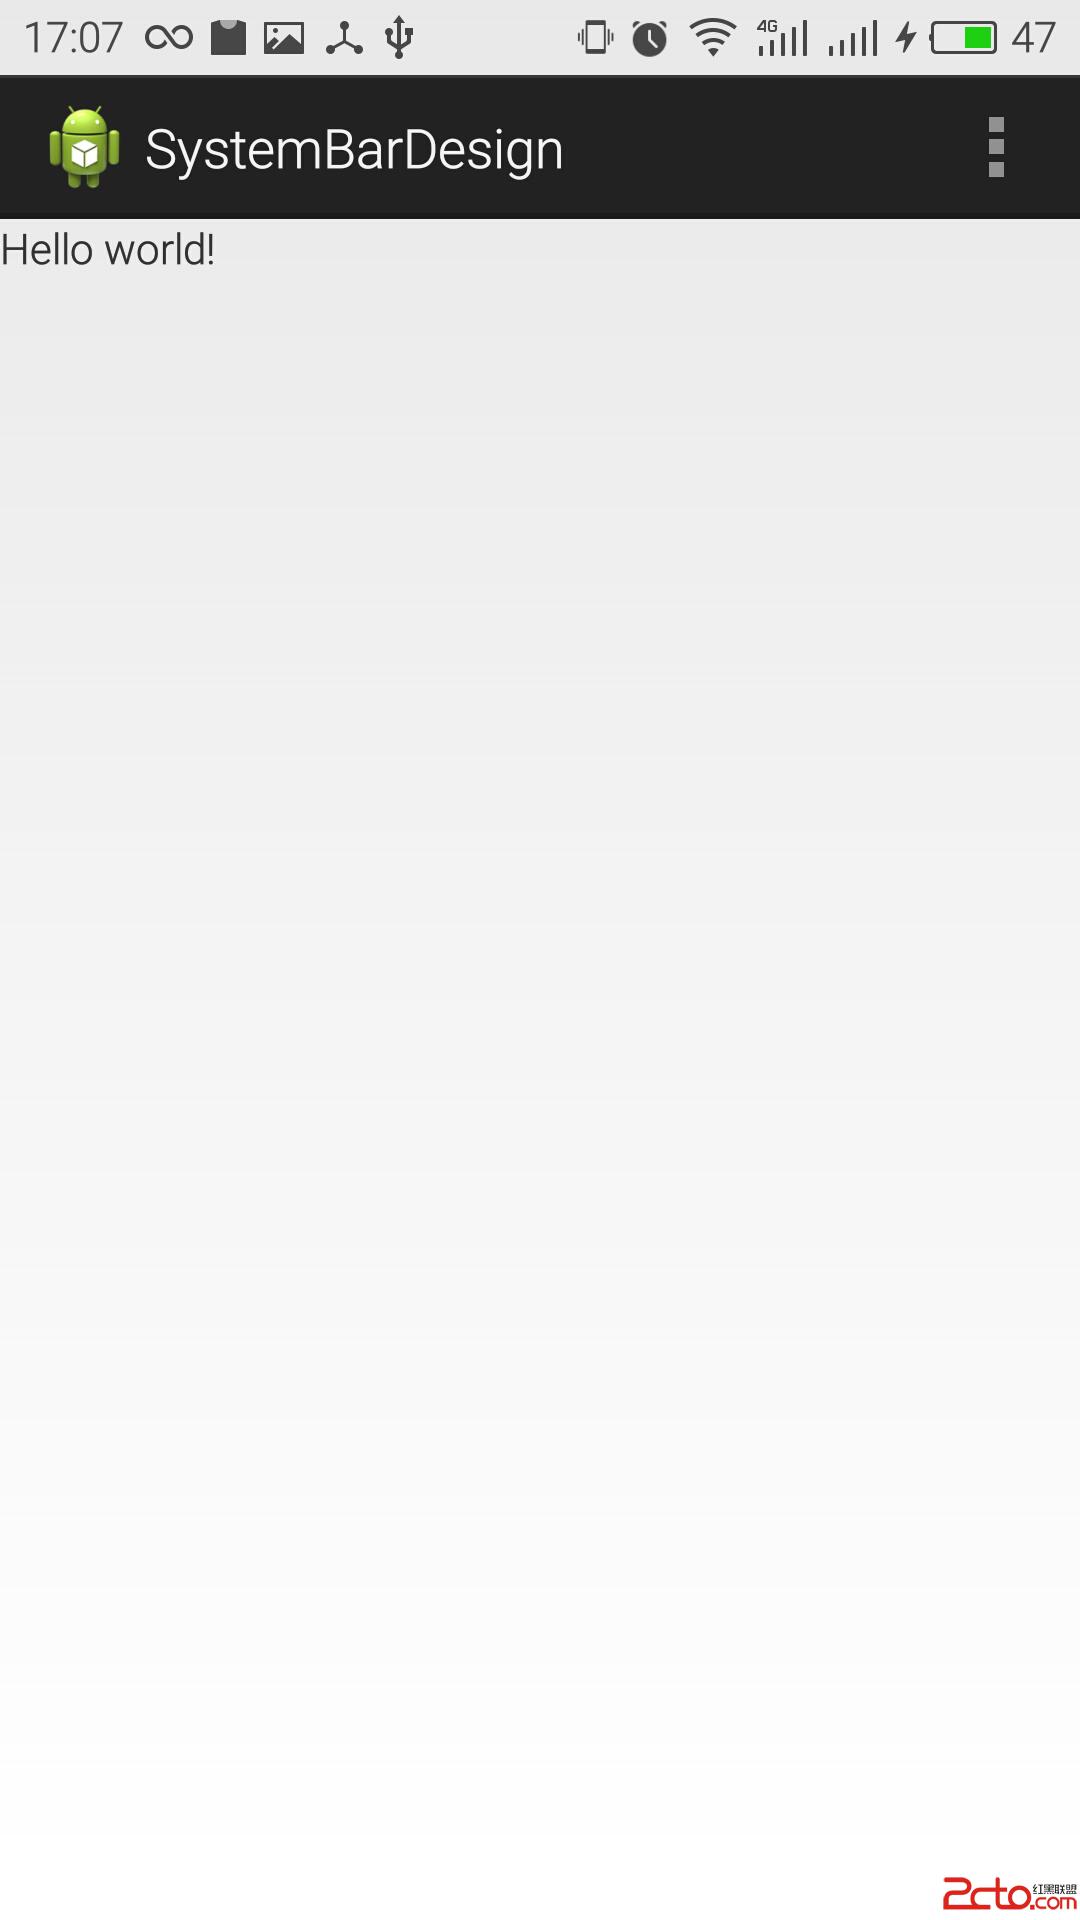
也就是說,設置fitsSystemWindow=true後,view會根據系統欄自動設置Padding值來適配。設置之後效果如下:
跟進去之後可以看到,裡面最終調用這麼view的這個函數:protected boolean fitSystemWindows (Rect insets)
如果你查看 View 的 protected boolean fitSystemWindows (Rect insets) 函數,其參數值為 Rect insets, 關於該參數的說明如下:
Rect: Current content insets of the window. Prior to JELLY_BEAN you must not modify the insets or else you and Android will be unhappy.
返回值的說明如下:
true if this view applied the insets and it should not continue propagating further down the hierarchy, false otherwise.
content insets 是系統狀態欄、導航欄、輸入法等其他系統窗口所占用的空間,系統通過該回調接口告訴你的應用, 系統的窗口占用了多少空間,然後你可以根據該信息來調整你的 View 顯示屬性。
自定義 fitsSystemWindows在 android4.4+ 版本中,你可以重寫這個 protected boolean fitSystemWindows (Rect insets) 函數,如果一個 View 想吃掉這個 insets ,則返回 true,如果不想處理,讓其他 View 來處理,則返回 false。
為了更方便的處理這種情況,在 android5.0 版本,fitSystemWindows() 函數給廢棄了,使用兩個新的函數來簡化該處理流程。使用新的 onApplyWindowInsets() 函數,該函數中你可以選擇吃掉一部分insets,然後你還可以調用 dispatchApplyWindowInsets() 函數讓該 View 的子View 來繼續處理 insets。
如果你只想在 5.0 以上版本使用該功能,則無需繼承一個 View, 只需要使用 ViewCompat.setOnApplyWindowInsetsListener() 函數即可。使用 ViewCompat 提供的函數可以方便你編寫版本兼容的代碼,不需要頻繁的判斷版本號。
系統實例系統的基本控件((FrameLayout, LinearLayout, 等)都使用默認的行為,Support 包中有些控件使用了自定義行為。
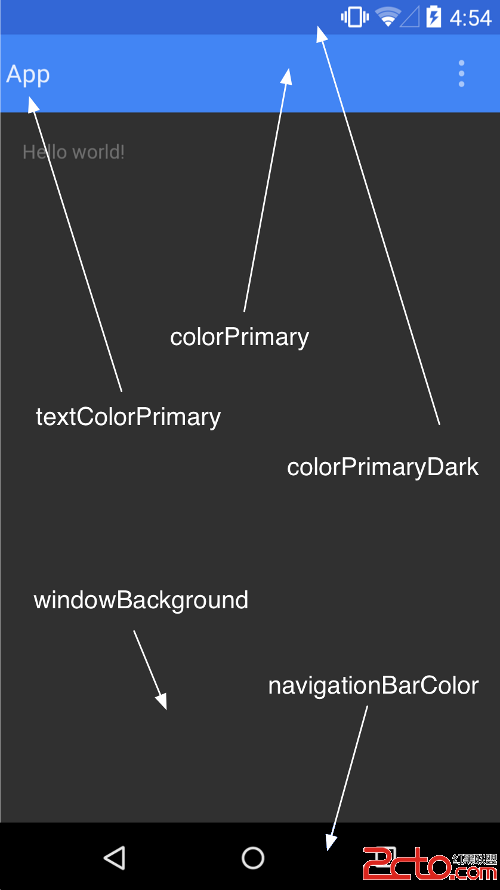
DrawerLayout 使用 fitsSystemWindows 來表明需要處理 insets,但是仍然使用狀態欄的顏色來繪制狀態欄背景(狀態欄顏色為 主題的 colorPrimaryDark 所設置的顏色)。
然後 DrawerLayout 在每個子 View 上調用 dispatchApplyWindowInsets() 函數,這樣 子 View 也有 機會處理 insets,這和系統默認行為是不一樣的(系統默認行為只是吃掉這個 insets,然後子 View 無法繼續處理)。
CoordinatorLayout 對此也做了特殊處理,讓每個子 View 的 Behavior 可以根據系統窗口的大小來做不同的處理。 還使用 fitsSystemWindows 屬性來判斷是否需要繪制狀態欄背景。
通用 CollapsingToolbarLayout 也根據 fitsSystemWindows 屬性來確定何時何地繪制 內容上方的半透明背景。
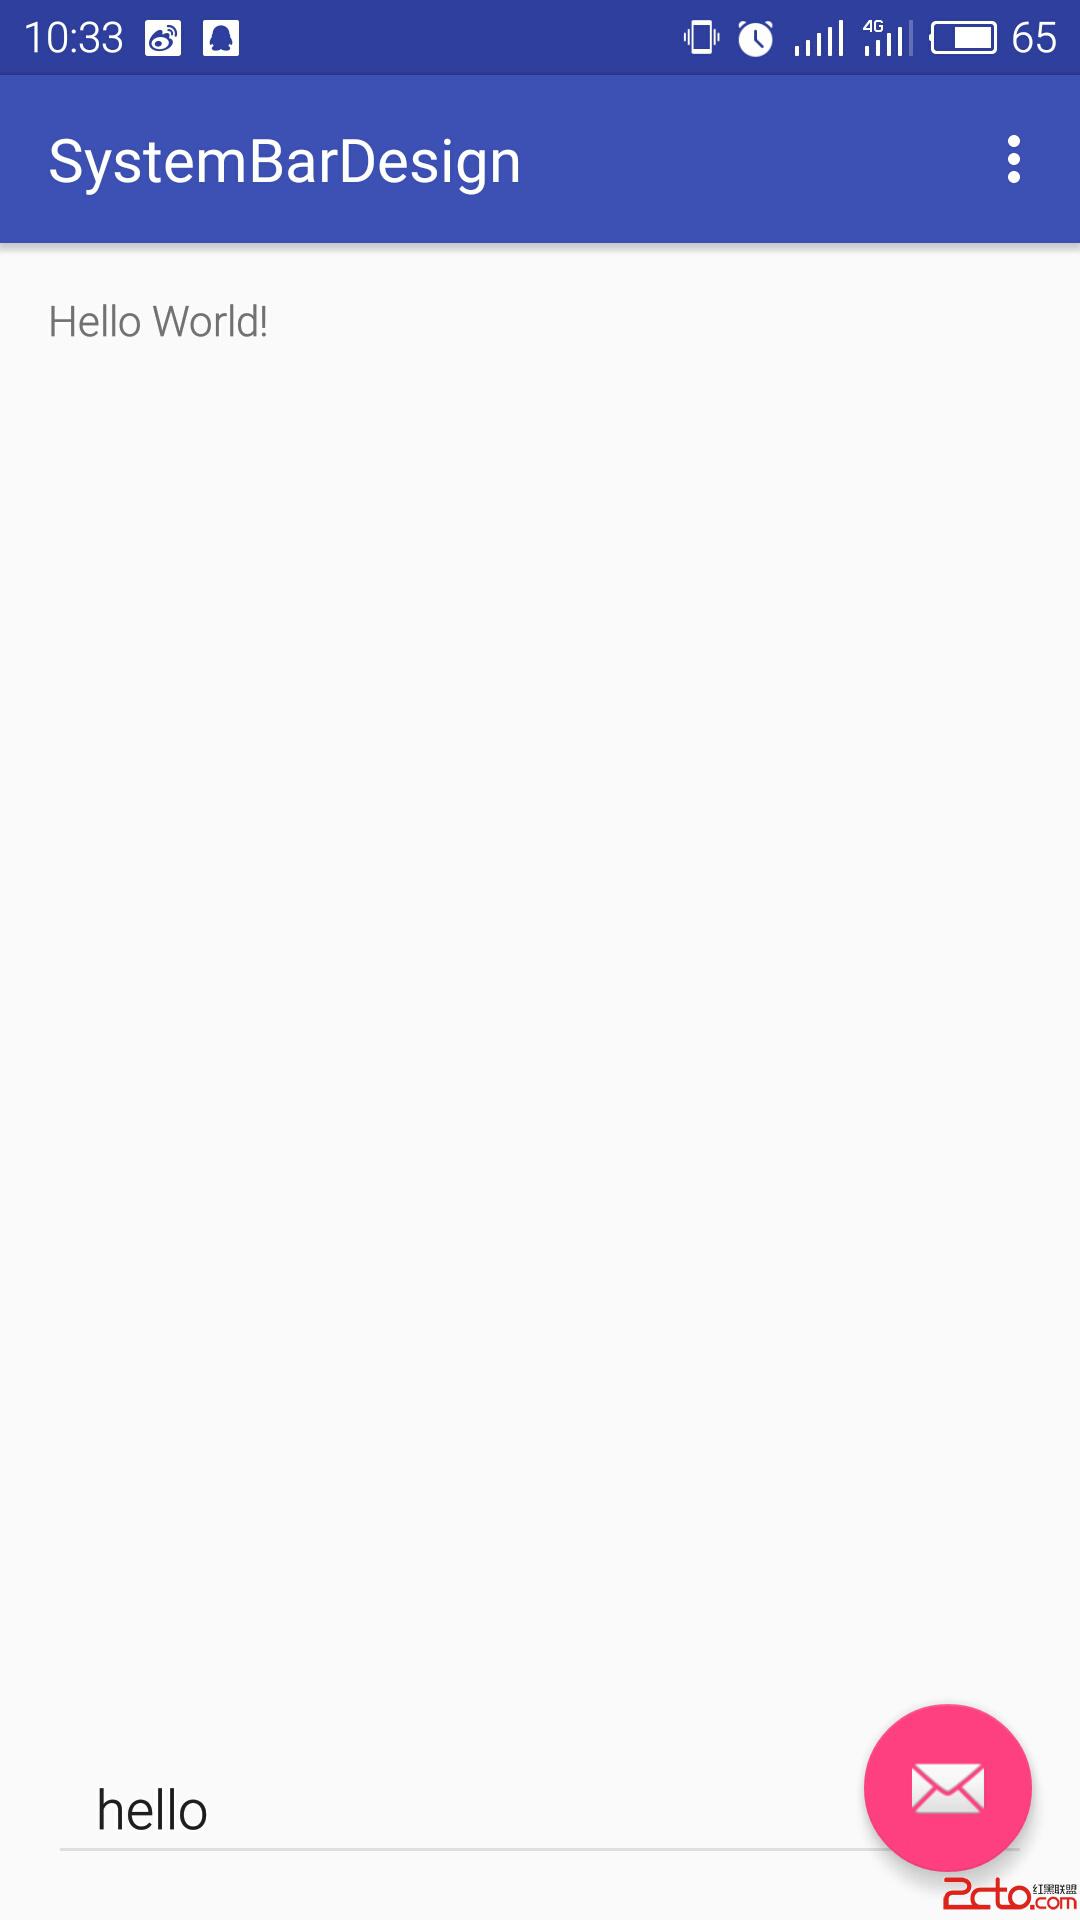
通過上面的步驟,狀態欄透明且不會與內容沖突,但是現在問題是狀態欄的顏色。
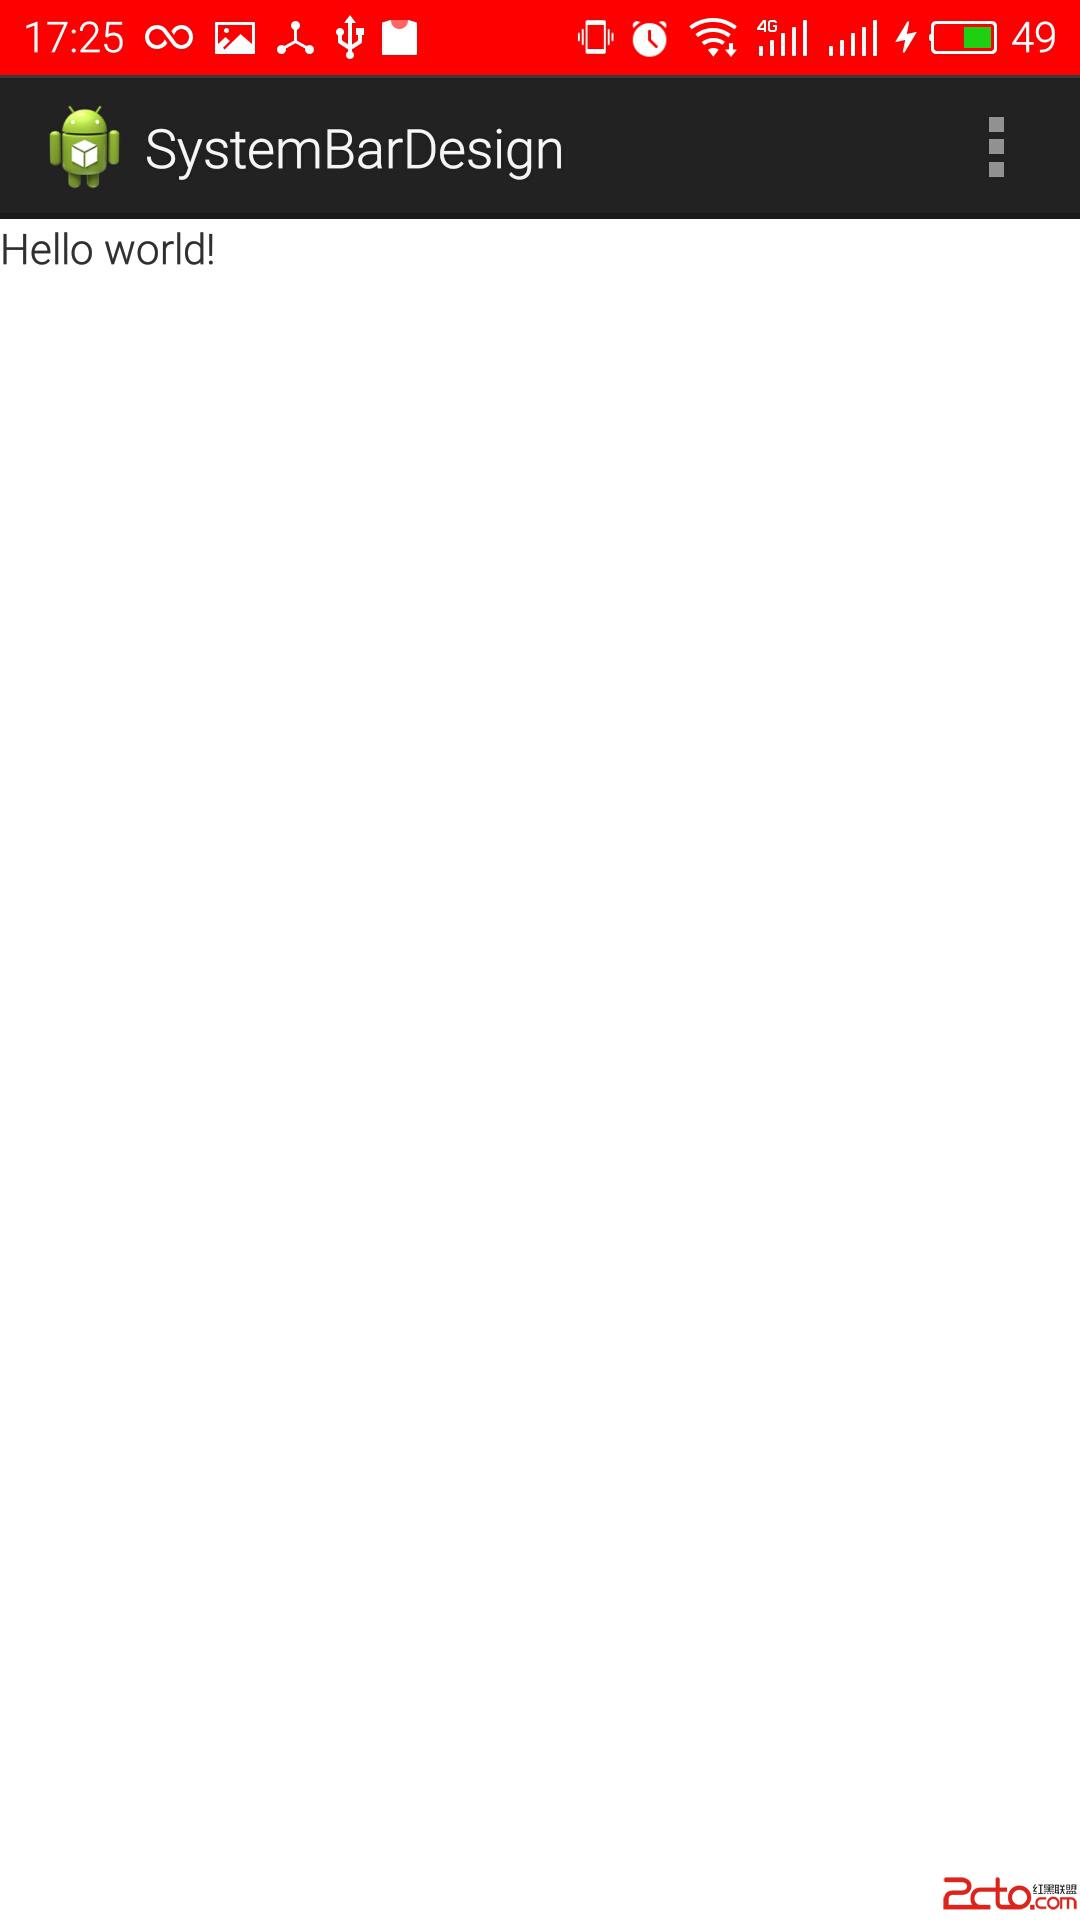
方法一首先我們清楚Android 整個界面是一個Window(phonewindow),而window的內部類DecorView是界面的根布局(FrameLayout),根據這種ui布局方式的話,可以設置activity的根布局的背景顏色即可更換導航欄顏色,只是需要添加一個子布局遮擋內容區域的背景顏色,效果圖如下:
 方法二
方法二
上面的方法雖然簡單但並不是合理的方法,還有一種方法就是,自己繪制一個與狀態欄等高的view設置上顏色,填充進去,由於底層是透明的framelayout,故效果與其他各方面都最好,算是比較好的解決這個問題的一種方法。效果如下:
完整代碼如下:
package com.swallow.systembardesign;

import android.os.Build;
import android.os.Bundle;
import android.app.Activity;
import android.graphics.Color;
import android.view.Gravity;
import android.view.Menu;
import android.view.View;
import android.view.ViewGroup;
import android.view.WindowManager;
import android.widget.FrameLayout.LayoutParams;

public class MainActivity extends Activity {

    @Override
    protected void onCreate(Bundle savedInstanceState) {
    super.onCreate(savedInstanceState);

    setContentView(R.layout.activity_main);
    if (Build.VERSION.SDK_INT >= Build.VERSION_CODES.KITKAT) {
        getWindow().addFlags(
            WindowManager.LayoutParams.FLAG_TRANSLUCENT_STATUS);
        getWindow().addFlags(
            WindowManager.LayoutParams.FLAG_TRANSLUCENT_NAVIGATION);

        addStatusView();
    }

    }

    @Override
    public boolean onCreateOptionsMenu(Menu menu) {
    // Inflate the menu; this adds items to the action bar if it is present.
    getMenuInflater().inflate(R.menu.main, menu);
    return true;
    }

    /**
     * 獲取狀態欄的高度
     *
     * @return
     */
    private int getStatusHeight() {
    int height = -1;
    try {
        Class clazz = Class.forName("com.android.internal.R$dimen");
        Object object = clazz.newInstance();
        height = Integer.parseInt(clazz.getField("status_bar_height")
            .get(object).toString());
    } catch (Exception e) {
        e.printStackTrace();
    }
    int statusHeight = this.getResources().getDimensionPixelSize(height);
    return statusHeight;
    }

    /**
     * 添加導航欄顏色布局
     */
    private void addStatusView() {
    View mStatusView = new View(this);
    LayoutParams params = new LayoutParams(LayoutParams.MATCH_PARENT,
        getStatusHeight());
    params.gravity = Gravity.TOP;
    mStatusView.setLayoutParams(params);
    mStatusView.setBackgroundColor(Color.RED);
    ((ViewGroup) (getWindow().getDecorView())).addView(mStatusView);
    }

}
基於這種原理實現狀態欄著色的Github上面有一個開源庫–SystemBarTint,寫的挺全面的,可以直接拿下來用。
Android5.0之後,Google提供了Material Design系列的API直接設置系統欄顏色。
材料主題可讓您輕松定制狀態欄,因此您可以指定一個符合自己品牌特色且對比度足夠高、能夠顯示白色狀態圖標的顏色。 如果要為狀態欄設置定制顏色,您可在擴展材料主題時使用 android:statusBarColor 屬性。 默認情況下,android:statusBarColor 將繼承 android:colorPrimaryDark 的值。
您也可自行將狀態欄移到後側。例如,您想在一個照片上以透明的方式顯示狀態欄,同時利用細微的深色漸變以確保白色狀態圖標仍保持可見。 如果要執行此操作,請將 android:statusBarColor 屬性設置為 @android:color/transparent 並根據需要調整窗口標志。您也可以使用 Window.setStatusBarColor() 方法進行動畫或淡出設置。
需要注意的是Android5.0之後的support包裡的組件大都重寫了與fitssystemwindow相關的onApplyWindowInsets(),dispatchApplyWindowInsets()兩個方法,或將padding填充方式改變或者由子布局來完成填充任務,甚至將fitssystemwindow的值作為是否繪制狀態欄的標志。
 Android從零單排之獲取ImageView的寬高為0?
問題描述 說起來我也夠菜的!⊙﹏⊙b汗。 今天搞了一個關於圖片的demo,想動態的改變一張圖片的大小和margin值。但是在activity
 Android服務類Service詳細解析
Service有什麼作用?許多人不明白service是用來干嘛的,其實Service作為Android四大組件之一,可以理解為一個運行在後台的Activity,它適用於處
 Android實現通過浏覽器點擊鏈接打開本地應用(APP)並拿到浏覽器傳遞的數據
點擊浏覽器中的URL鏈接,啟動特定的App。 首先做成HTML的頁面,頁面內容格式如下: 啟動應用程序 這一句就可以了。 各個項目含義如下
 Android實現登錄功能demo示例
本文實例講述了Android實現登錄功能的方法。分享給大家供大家參考,具體如下:安卓,在小編實習之前的那段歲月裡面,小編都沒有玩兒過,如果說玩兒過,那就是安卓手機了,咳咳