編輯:關於Android編程
今天講講應用進程Context的創建流程,相信大家平時在開發過程中經常會遇到對Context對象的使用,Application是Context,Activity是Context,Service也是Context,所以有一個經典的問題是一個App中一共有多少個Context?
這個問題的答案是Application + N個Activity + N個Service。
還有就是我們平時在使用Context過程中許多時候由於使用不當,可能會造成內存洩露的情況等等,這個也是需要我們注意的。
好吧,什麼叫應用進程Context呢?這是指的是Application所代表的Context的創建流程,還記得我們前幾篇寫的應用進程創建流程麼?
最後我們得出結論,應用進程的起始方法是ActivityThread.main方法,好吧,
由於還未講解Service相關知識,這裡暫時講解一下Activity與Application中Context對象的創建過程。
首先我們就從ActivityThread.main方法開始看一下Application的創建流程。。。
public static void main(String[] args) {
        ...
        ActivityThread thread = new ActivityThread();
        thread.attach(false);
        ...
    }
這裡我們發現在方法體中我們創建了一個ActivityThread對象並執行了attach方法:
private void attach(boolean system) {
        sCurrentActivityThread = this;
        mSystemThread = system;
        if (!system) {
            ViewRootImpl.addFirstDrawHandler(new Runnable() {
                @Override
                public void run() {
                    ensureJitEnabled();
                }
            });
            android.ddm.DdmHandleAppName.setAppName("",
                                                    UserHandle.myUserId());
            RuntimeInit.setApplicationObject(mAppThread.asBinder());
            final IActivityManager mgr = ActivityManagerNative.getDefault();
            try {
                mgr.attachApplication(mAppThread);
            } catch (RemoteException ex) {
                // Ignore
            }
            // Watch for getting close to heap limit.
            BinderInternal.addGcWatcher(new Runnable() {
                @Override public void run() {
                    if (!mSomeActivitiesChanged) {
                        return;
                    }
                    Runtime runtime = Runtime.getRuntime();
                    long dalvikMax = runtime.maxMemory();
                    long dalvikUsed = runtime.totalMemory() - runtime.freeMemory();
                    if (dalvikUsed > ((3*dalvikMax)/4)) {
                        if (DEBUG_MEMORY_TRIM) Slog.d(TAG, "Dalvik max=" + (dalvikMax/1024)
                                + " total=" + (runtime.totalMemory()/1024)
                                + " used=" + (dalvikUsed/1024));
                        mSomeActivitiesChanged = false;
                        try {
                            mgr.releaseSomeActivities(mAppThread);
                        } catch (RemoteException e) {
                        }
                    }
                }
            });
        } else {
          ...
        }
    }
這裡看一下重點實現,我們可以發現在方法體中調用了ActivityManagerNative.getDefault().attachApplication(mAppThread)
看過我的前幾篇文章的童鞋應該知道這裡就是一個Binder進程間通訊,其實上執行的是ActivityManagerService.attachApplication方法,具體的可以參考前幾篇文章的介紹,好吧,既然這樣我們看一下ActivityManagerService.attachApplication方法的具體實現。
@Override
    public final void attachApplication(IApplicationThread thread) {
        synchronized (this) {
            int callingPid = Binder.getCallingPid();
            final long origId = Binder.clearCallingIdentity();
            attachApplicationLocked(thread, callingPid);
            Binder.restoreCallingIdentity(origId);
        }
    }
然後這裡面又調用了attachApplicationLocked方法:
private final boolean attachApplicationLocked(IApplicationThread      thread, int pid) {

        ...
        thread.bindApplication(processName, appInfo, providers, app.instrumentationClass, profilerInfo, app.instrumentationArguments, app.instrumentationWatcher,
app.instrumentationUiAutomationConnection, testMode, enableOpenGlTrace, isRestrictedBackupMode || !normalMode, app.persistent, new Configuration(mConfiguration), app.compat,
getCommonServicesLocked(app.isolated),
mCoreSettingsObserver.getCoreSettingsLocked());
        ...
可以看到這裡面又調用了IApplication.bindApplication,從方法名稱中我們可以看出這裡應該是綁定Application的方法,跟上面的ActivityManangerNative類似的,前面幾篇文章中我們已經做過介紹,IApplicationThread是ActivityThread中ApplicationThread binder對象的客戶端,所以這裡最終調用的是ApplicationThread的bindApplication方法,既然這樣,我們來看一下ApplicationThread的bindApplication的實現:
 providers, ComponentName instrumentationName,
                ProfilerInfo profilerInfo, Bundle instrumentationArgs,
                IInstrumentationWatcher instrumentationWatcher,
                IUiAutomationConnection instrumentationUiConnection, int debugMode,
                boolean enableOpenGlTrace, boolean isRestrictedBackupMode, boolean persistent,
                Configuration config, CompatibilityInfo compatInfo, Map services,
                Bundle coreSettings) {

            if (services != null) {
                // Setup the service cache in the ServiceManager
                ServiceManager.initServiceCache(services);
            }

            setCoreSettings(coreSettings);

            /*
             * Two possible indications that this package could be
             * sharing its runtime with other packages:
             *
             * 1.) the sharedUserId attribute is set in the manifest,
             *     indicating a request to share a VM with other
             *     packages with the same sharedUserId.
             *
             * 2.) the application element of the manifest has an
             *     attribute specifying a non-default process name,
             *     indicating the desire to run in another packages VM.
             *
             * If sharing is enabled we do not have a unique application
             * in a process and therefore cannot rely on the package
             * name inside the runtime.
             */
            IPackageManager pm = getPackageManager();
            android.content.pm.PackageInfo pi = null;
            try {
                pi = pm.getPackageInfo(appInfo.packageName, 0, UserHandle.myUserId());
            } catch (RemoteException e) {
            }
            if (pi != null) {
                boolean sharedUserIdSet = (pi.sharedUserId != null);
                boolean processNameNotDefault =
                (pi.applicationInfo != null &&
                 !appInfo.packageName.equals(pi.applicationInfo.processName));
                boolean sharable = (sharedUserIdSet || processNameNotDefault);

                // Tell the VMRuntime about the application, unless it is shared
                // inside a process.
                if (!sharable) {
                    VMRuntime.registerAppInfo(appInfo.packageName, appInfo.dataDir,
                                            appInfo.processName);
                }
            }

            AppBindData data = new AppBindData();
            data.processName = processName;
            data.appInfo = appInfo;
            data.providers = providers;
            data.instrumentationName = instrumentationName;
            data.instrumentationArgs = instrumentationArgs;
            data.instrumentationWatcher = instrumentationWatcher;
            data.instrumentationUiAutomationConnection = instrumentationUiConnection;
            data.debugMode = debugMode;
            data.enableOpenGlTrace = enableOpenGlTrace;
            data.restrictedBackupMode = isRestrictedBackupMode;
            data.persistent = persistent;
            data.config = config;
            data.compatInfo = compatInfo;
            data.initProfilerInfo = profilerInfo;
            sendMessage(H.BIND_APPLICATION, data);
        }" data-snippet-id="ext.4a79920722c21abfcac946fa948397a8" data-snippet-saved="false" data-codota-status="done">public final void bindApplication(String processName, ApplicationInfo appInfo,
                List providers, ComponentName instrumentationName,
                ProfilerInfo profilerInfo, Bundle instrumentationArgs,
                IInstrumentationWatcher instrumentationWatcher,
                IUiAutomationConnection instrumentationUiConnection, int debugMode,
                boolean enableOpenGlTrace, boolean isRestrictedBackupMode, boolean persistent,
                Configuration config, CompatibilityInfo compatInfo, Map services,
                Bundle coreSettings) {

            if (services != null) {
                // Setup the service cache in the ServiceManager
                ServiceManager.initServiceCache(services);
            }

            setCoreSettings(coreSettings);

            /*
             * Two possible indications that this package could be
             * sharing its runtime with other packages:
             *
             * 1.) the sharedUserId attribute is set in the manifest,
             *     indicating a request to share a VM with other
             *     packages with the same sharedUserId.
             *
             * 2.) the application element of the manifest has an
             *     attribute specifying a non-default process name,
             *     indicating the desire to run in another packages VM.
             *
             * If sharing is enabled we do not have a unique application
             * in a process and therefore cannot rely on the package
             * name inside the runtime.
             */
            IPackageManager pm = getPackageManager();
            android.content.pm.PackageInfo pi = null;
            try {
                pi = pm.getPackageInfo(appInfo.packageName, 0, UserHandle.myUserId());
            } catch (RemoteException e) {
            }
            if (pi != null) {
                boolean sharedUserIdSet = (pi.sharedUserId != null);
                boolean processNameNotDefault =
                (pi.applicationInfo != null &&
                 !appInfo.packageName.equals(pi.applicationInfo.processName));
                boolean sharable = (sharedUserIdSet || processNameNotDefault);

                // Tell the VMRuntime about the application, unless it is shared
                // inside a process.
                if (!sharable) {
                    VMRuntime.registerAppInfo(appInfo.packageName, appInfo.dataDir,
                                            appInfo.processName);
                }
            }

            AppBindData data = new AppBindData();
            data.processName = processName;
            data.appInfo = appInfo;
            data.providers = providers;
            data.instrumentationName = instrumentationName;
            data.instrumentationArgs = instrumentationArgs;
            data.instrumentationWatcher = instrumentationWatcher;
            data.instrumentationUiAutomationConnection = instrumentationUiConnection;
            data.debugMode = debugMode;
            data.enableOpenGlTrace = enableOpenGlTrace;
            data.restrictedBackupMode = isRestrictedBackupMode;
            data.persistent = persistent;
            data.config = config;
            data.compatInfo = compatInfo;
            data.initProfilerInfo = profilerInfo;
            sendMessage(H.BIND_APPLICATION, data);
        }
好吧,最後調用了ActivityThread.sendMessage()…
private void sendMessage(int what, Object obj) {
        sendMessage(what, obj, 0, 0, false);
    }
然後我們看一下其sendMessage的重載方法:
private void sendMessage(int what, Object obj, int arg1, int arg2, boolean async) {
        if (DEBUG_MESSAGES) Slog.v(
            TAG, "SCHEDULE " + what + " " + mH.codeToString(what)
            + ": " + arg1 + " / " + obj);
        Message msg = Message.obtain();
        msg.what = what;
        msg.obj = obj;
        msg.arg1 = arg1;
        msg.arg2 = arg2;
        if (async) {
            msg.setAsynchronous(true);
        }
        mH.sendMessage(msg);
    }
可以發現這裡調用了mH的sendMessage方法,最後通過Handler的異步消息機制被mH的handleMessage方法處理,然後根據Message.what選擇處理分支,最終調用了ActivityThread的handleBindApplication方法。
private void handleBindApplication(AppBindData data) {
        ...
        // 創建Instrumentation
        if (data.instrumentationName != null) {
            InstrumentationInfo ii = null;
            try {
                ii = appContext.getPackageManager().
                    getInstrumentationInfo(data.instrumentationName, 0);
            } catch (PackageManager.NameNotFoundException e) {
            }
            if (ii == null) {
                throw new RuntimeException(
                    "Unable to find instrumentation info for: "
                    + data.instrumentationName);
            }

            mInstrumentationPackageName = ii.packageName;
            mInstrumentationAppDir = ii.sourceDir;
            mInstrumentationSplitAppDirs = ii.splitSourceDirs;
            mInstrumentationLibDir = ii.nativeLibraryDir;
            mInstrumentedAppDir = data.info.getAppDir();
            mInstrumentedSplitAppDirs = data.info.getSplitAppDirs();
            mInstrumentedLibDir = data.info.getLibDir();

            ApplicationInfo instrApp = new ApplicationInfo();
            instrApp.packageName = ii.packageName;
            instrApp.sourceDir = ii.sourceDir;
            instrApp.publicSourceDir = ii.publicSourceDir;
            instrApp.splitSourceDirs = ii.splitSourceDirs;
            instrApp.splitPublicSourceDirs = ii.splitPublicSourceDirs;
            instrApp.dataDir = ii.dataDir;
            instrApp.nativeLibraryDir = ii.nativeLibraryDir;
            LoadedApk pi = getPackageInfo(instrApp, data.compatInfo,
                    appContext.getClassLoader(), false, true, false);
            ContextImpl instrContext = ContextImpl.createAppContext(this, pi);

            try {
                java.lang.ClassLoader cl = instrContext.getClassLoader();
                mInstrumentation = (Instrumentation)
                    cl.loadClass(data.instrumentationName.getClassName()).newInstance();
            } catch (Exception e) {
                throw new RuntimeException(
                    "Unable to instantiate instrumentation "
                    + data.instrumentationName + ": " + e.toString(), e);
            }

            mInstrumentation.init(this, instrContext, appContext,
                   new ComponentName(ii.packageName, ii.name), data.instrumentationWatcher,
                   data.instrumentationUiAutomationConnection);

            if (mProfiler.profileFile != null && !ii.handleProfiling
                    && mProfiler.profileFd == null) {
                mProfiler.handlingProfiling = true;
                File file = new File(mProfiler.profileFile);
                file.getParentFile().mkdirs();
                Debug.startMethodTracing(file.toString(), 8 * 1024 * 1024);
            }

        } else {
            mInstrumentation = new Instrumentation();
        }

        ...
        / If the app is being launched for full backup or restore, bring it up in
            // a restricted environment with the base application class.
            Application app = data.info.makeApplication(data.restrictedBackupMode, null);
            mInitialApplication = app;
        ...
        try {
           mInstrumentation.onCreate(data.instrumentationArgs);
         }
         catch (Exception e) {
                throw new RuntimeException(
                    "Exception thrown in onCreate() of "
                    + data.instrumentationName + ": " + e.toString(), e);
            }

            try {
                mInstrumentation.callApplicationOnCreate(app);
            } catch (Exception e) {
                if (!mInstrumentation.onException(app, e)) {
                    throw new RuntimeException(
                        "Unable to create application " + app.getClass().getName()
                        + ": " + e.toString(), e);
                }
            }
        } finally {
            StrictMode.setThreadPolicy(savedPolicy);
        }
    }
這個方法的方法體比較長,我們挑重點的看,可以看到方法體中系統通過反射機制創建了Instrumentation對象,並執行了init方法,執行了Insrtumentation對象的初始化。然後我們調用了LockedApk.makeApplication方法創建了Application對象,我們來看一下其具體的實現邏輯:
 packageIdentifiers = getAssets(mActivityThread)
                .getAssignedPackageIdentifiers();
        final int N = packageIdentifiers.size();
        for (int i = 0; i < N; i++) {
            final int id = packageIdentifiers.keyAt(i);
            if (id == 0x01 || id == 0x7f) {
                continue;
            }

            rewriteRValues(getClassLoader(), packageIdentifiers.valueAt(i), id);
        }

        return app;
    }" data-snippet-id="ext.fc07f931f1d50ea2167e4881aa15e6ac" data-snippet-saved="false" data-codota-status="done">public Application makeApplication(boolean forceDefaultAppClass,
            Instrumentation instrumentation) {
        if (mApplication != null) {
            return mApplication;
        }

        Application app = null;

        String appClass = mApplicationInfo.className;
        if (forceDefaultAppClass || (appClass == null)) {
            appClass = "android.app.Application";
        }

        try {
            java.lang.ClassLoader cl = getClassLoader();
            if (!mPackageName.equals("android")) {
                initializeJavaContextClassLoader();
            }
            ContextImpl appContext = ContextImpl.createAppContext(mActivityThread, this);
            app = mActivityThread.mInstrumentation.newApplication(
                    cl, appClass, appContext);
            appContext.setOuterContext(app);
        } catch (Exception e) {
            if (!mActivityThread.mInstrumentation.onException(app, e)) {
                throw new RuntimeException(
                    "Unable to instantiate application " + appClass
                    + ": " + e.toString(), e);
            }
        }
        mActivityThread.mAllApplications.add(app);
        mApplication = app;

        if (instrumentation != null) {
            try {
                instrumentation.callApplicationOnCreate(app);
            } catch (Exception e) {
                if (!instrumentation.onException(app, e)) {
                    throw new RuntimeException(
                        "Unable to create application " + app.getClass().getName()
                        + ": " + e.toString(), e);
                }
            }
        }

        // Rewrite the R 'constants' for all library apks.
        SparseArray packageIdentifiers = getAssets(mActivityThread)
                .getAssignedPackageIdentifiers();
        final int N = packageIdentifiers.size();
        for (int i = 0; i < N; i++) {
            final int id = packageIdentifiers.keyAt(i);
            if (id == 0x01 || id == 0x7f) {
                continue;
            }

            rewriteRValues(getClassLoader(), packageIdentifiers.valueAt(i), id);
        }

        return app;
    }
可以發現這裡也是以反射的機制創建了Application對象,並創建了一個ContextImpl對象,並將Application與ContextImpl建立關聯。。。
繼續回到我們的ActivityThread的handleBindApplication方法,在創建了Application對象之後我們調用了Instrumentation的onCreate方法,然後調用了Instrumentation的callApplicationOnCreate方法,我們來看一下其具體實現:
public void callApplicationOnCreate(Application app) {
        app.onCreate();
    }
咋樣?原來Application的onCreate生命周期方法是在這裡回調滴啊。
這樣我們整個Application的創建執行流程就講解完了。
總結:
應用進程啟動 –> 創建Instrumentation –> 創建Application對象 –> 創建Application相關的ContextImpl對象;
ActivityThread.main方法–> ActivityManagerService.bindApplication方法 –> ActivityThread.handleBindApplication –> 創建Instrumentation,創建Application;
每個應用進程對應一個Instrumentation,對應一個Application;
Instrumentation與Application都是通過java反射機制創建;
Application創建過程中會同時創建一個ContextImpl對象,並建立關聯;
接下來我們來看一下Acitivty中的Context創建流程,大家都知道我們Activity的具體創建過程是在ActivityThread的performLaunchActivity,可參見:http://blog.csdn.net/qq_23547831/article/details/51224992,這裡我們看一下其具體的實現:
private Activity performLaunchActivity(ActivityClientRecord r, Intent customIntent) {
        ...
        Activity activity = null;
        try {
            java.lang.ClassLoader cl = r.packageInfo.getClassLoader();
            activity = mInstrumentation.newActivity(
                    cl, component.getClassName(), r.intent);
            StrictMode.incrementExpectedActivityCount(activity.getClass());
            r.intent.setExtrasClassLoader(cl);
            r.intent.prepareToEnterProcess();
            if (r.state != null) {
                r.state.setClassLoader(cl);
            }
        } catch (Exception e) {
            if (!mInstrumentation.onException(activity, e)) {
                throw new RuntimeException(
                    "Unable to instantiate activity " + component
                    + ": " + e.toString(), e);
            }
        }

        try {
            Application app = r.packageInfo.makeApplication(false, mInstrumentation);
            ...
            if (activity != null) {
                Context appContext = createBaseContextForActivity(r, activity);
                CharSequence title = r.activityInfo.loadLabel(appContext.getPackageManager());
                Configuration config = new Configuration(mCompatConfiguration);
                if (DEBUG_CONFIGURATION) Slog.v(TAG, "Launching activity "
                        + r.activityInfo.name + " with config " + config);
                activity.attach(appContext, this, getInstrumentation(), r.token,
                        r.ident, app, r.intent, r.activityInfo, title, r.parent,
                        r.embeddedID, r.lastNonConfigurationInstances, config,
                        r.referrer, r.voiceInteractor);

                if (customIntent != null) {
                    activity.mIntent = customIntent;
                }
                r.lastNonConfigurationInstances = null;
                activity.mStartedActivity = false;
                int theme = r.activityInfo.getThemeResource();
                if (theme != 0) {
                    activity.setTheme(theme);
                }

                activity.mCalled = false;
                if (r.isPersistable()) {
                    mInstrumentation.callActivityOnCreate(activity, r.state, r.persistentState);
                } else {
                    mInstrumentation.callActivityOnCreate(activity, r.state);
                }
                if (!activity.mCalled) {
                    throw new SuperNotCalledException(
                        "Activity " + r.intent.getComponent().toShortString() +
                        " did not call through to super.onCreate()");
                }
                r.activity = activity;
                r.stopped = true;
                if (!r.activity.mFinished) {
                    activity.performStart();
                    r.stopped = false;
                }
                if (!r.activity.mFinished) {
                    if (r.isPersistable()) {
                        if (r.state != null || r.persistentState != null) {
                            mInstrumentation.callActivityOnRestoreInstanceState(activity, r.state,
                                    r.persistentState);
                        }
                    } else if (r.state != null) {
                        mInstrumentation.callActivityOnRestoreInstanceState(activity, r.state);
                    }
                }
                ...
        return activity;
    }
這裡簡要說明一下,Activity也是系統通過反射機制創建的,然後我們通過LockedApk.makeApplication創建一個Application,通過查看源碼我們知道若這時候LockedApk中的mApplication不為空則直接返回當前的mApplication又因為當我們創建應用進程的時候Application已經被創建,所以當創建Activity的時候這時候Application肯定不為空,所以這時候返回的就是應用進程創建的時候創建的Application,這也從側面說明了一個應用進程對應著一個Application。然後我們通過createBaseContextForActivity創建了一個ContextImpl對象。
private Context createBaseContextForActivity(ActivityClientRecord r, final Activity activity) {
        int displayId = Display.DEFAULT_DISPLAY;
        try {
            displayId = ActivityManagerNative.getDefault().getActivityDisplayId(r.token);
        } catch (RemoteException e) {
        }

        ContextImpl appContext = ContextImpl.createActivityContext(
                this, r.packageInfo, displayId, r.overrideConfig);
        appContext.setOuterContext(activity);
        Context baseContext = appContext;

        final DisplayManagerGlobal dm = DisplayManagerGlobal.getInstance();
        // For debugging purposes, if the activity's package name contains the value of
        // the "debug.use-second-display" system property as a substring, then show
        // its content on a secondary display if there is one.
        String pkgName = SystemProperties.get("debug.second-display.pkg");
        if (pkgName != null && !pkgName.isEmpty()
                && r.packageInfo.mPackageName.contains(pkgName)) {
            for (int id : dm.getDisplayIds()) {
                if (id != Display.DEFAULT_DISPLAY) {
                    Display display =
                            dm.getCompatibleDisplay(id, appContext.getDisplayAdjustments(id));
                    baseContext = appContext.createDisplayContext(display);
                    break;
                }
            }
        }
        return baseContext;
    }
可以發現這裡創建了一個ContextImpl對象,並通過ContextImpl的setOuterContext方法,讓該ContextImpl持有了Activity的引用,繼續往下看,我們調用了activity.attach方法,查看一下該方法的實現邏輯:
final void attach(Context context, ActivityThread aThread,
            Instrumentation instr, IBinder token, int ident,
            Application application, Intent intent, ActivityInfo info,
            CharSequence title, Activity parent, String id,
            NonConfigurationInstances lastNonConfigurationInstances,
            Configuration config, String referrer, IVoiceInteractor voiceInteractor) {
        attachBaseContext(context);

        mFragments.attachHost(null /*parent*/);

        mWindow = new PhoneWindow(this);
        mWindow.setCallback(this);
        mWindow.setOnWindowDismissedCallback(this);
        mWindow.getLayoutInflater().setPrivateFactory(this);
        if (info.softInputMode != WindowManager.LayoutParams.SOFT_INPUT_STATE_UNSPECIFIED) {
            mWindow.setSoftInputMode(info.softInputMode);
        }
        if (info.uiOptions != 0) {
            mWindow.setUiOptions(info.uiOptions);
        }
        mUiThread = Thread.currentThread();

        mMainThread = aThread;
        mInstrumentation = instr;
        mToken = token;
        mIdent = ident;
        mApplication = application;
        mIntent = intent;
        mReferrer = referrer;
        mComponent = intent.getComponent();
        mActivityInfo = info;
        mTitle = title;
        mParent = parent;
        mEmbeddedID = id;
        mLastNonConfigurationInstances = lastNonConfigurationInstances;
        if (voiceInteractor != null) {
            if (lastNonConfigurationInstances != null) {
                mVoiceInteractor = lastNonConfigurationInstances.voiceInteractor;
            } else {
                mVoiceInteractor = new VoiceInteractor(voiceInteractor, this, this,
                        Looper.myLooper());
            }
        }

        mWindow.setWindowManager(
                (WindowManager)context.getSystemService(Context.WINDOW_SERVICE),
                mToken, mComponent.flattenToString(),
                (info.flags & ActivityInfo.FLAG_HARDWARE_ACCELERATED) != 0);
        if (mParent != null) {
            mWindow.setContainer(mParent.getWindow());
        }
        mWindowManager = mWindow.getWindowManager();
        mCurrentConfig = config;
    }
除了一下初始化操作之外,還調用了attachBaseContext方法,讓Activity持有了ContextImpl的引用,這樣就相當於Activity與ContextImpl對象相互持有了對方的引用,並且Activity是繼承與Context。
總結:
Activity中創建ContextImpl對象的具體實現在ActivityThread的performLauncherAcitivty方法中;
Activity的創建伴隨著ContextImpl的創建,二者相互持有對方的引用;
創建Activity –> 創建Activity相關ContextImpl對象;
創建應用進程 –> 創建Application –> 創建Application相關ContextImpl對象;
 android用PopWindow做下拉框實例代碼
最近在做下拉框,本來想用spinner,可是spinner達不到項目要求,跟同學同事問了一圈,都在用popwindow,網上看了一下,popwindow挺簡單的,可定制性
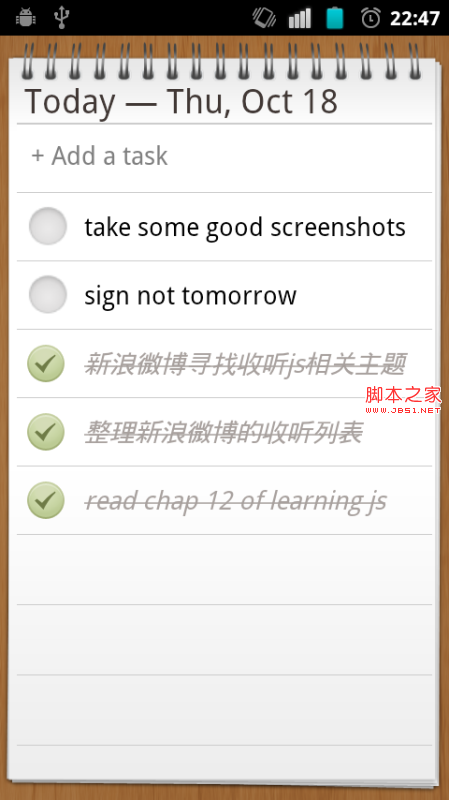 基於Android今日事今日畢的使用介紹
今日事今日畢,這是高效工作的最重原則。沒有什麼能比從待辦事項列表裡劃掉一些條目更讓人覺得舒服的事了。做為一個高效的人,您需要一個優秀的待辦事項管理工具,一個優秀的待辦事項
 android代碼審查工具---lint工具的使用
轉載請著名出處:http://blog.csdn.net/lijunhuayc 搞了這麼久android我居然不知道lint工具是干啥的,雖然每次在eclip
 小米手環怎麼連接微信
先請手機上打開小米手環,點擊右上角的“更多”選項圖標,如圖所示 接著請在選項列表中點擊“服務”選項,如圖