編輯:關於Android編程
設計通知時要考慮到用戶所預想的導航體驗。通常有以下兩種情況:
常規的Activity(Regular activity)
這裡所啟動的Activity是作為應用程序的正常流程部分出現的。指定的Activity(Special activity)
用戶只會看到這個Activity,如果這個Activity是從通知啟動的話。在直覺上,這個Activity是用來展示通知上的詳細信息的。設置啟動常規的Activity需要執行以下步驟:
1.在清單文件中定義Activity的層級,最終的清單文件應該是這樣的:
2.創建一個基於回退棧的Intent,它用來啟動父Activity(下面的代碼可能有誤,請自行驗證。):
int id = 1;
...
Intent resultIntent = new Intent(this, ResultActivity.class);
TaskStackBuilder stackBuilder = TaskStackBuilder.create(this);
// Adds the back stack
stackBuilder.addParentStack(ResultActivity.class);
// Adds the Intent to the top of the stack
stackBuilder.addNextIntent(resultIntent);
// Gets a PendingIntent containing the entire back stack
PendingIntent resultPendingIntent =
        stackBuilder.getPendingIntent(0, PendingIntent.FLAG_UPDATE_CURRENT);
...
NotificationCompat.Builder builder = new NotificationCompat.Builder(this);
builder.setContentIntent(resultPendingIntent);
NotificationManager mNotificationManager =
    (NotificationManager) getSystemService(Context.NOTIFICATION_SERVICE);
mNotificationManager.notify(id, builder.build());
啟動指定的Activity不需要回退棧,所以不需要在清單文件中定義Activity的層級,也不需要在代碼中使用addParentStack()構建回退棧。相反的,使用清單文件來設置Activity的任務模式,並通過getActivity()創建PendingIntent就可以完成創建。
1.在清單文件中,為Activity添加如下屬性:
android:name=”activityclass” 指定該Activity的全限定名稱. android:taskAffinity=”” 與在代碼中設置的FLAG_ACTIVITY_NEW_TASK標志一同使用。這可以確保這個Activity不會進入應用程序的默認任務棧中。任何已有的任務棧皆不會受到這個屬性的影響。 android:excludeFromRecents=”true” 將該Activity從Recents中排除,所以用戶不會意外的再通過返回鍵啟動這個Activity.下面的代碼段展示了這個屬性的設置:
...
2.構建及發射通知下面的代碼段演示了這個實現過程:
// Instantiate a Builder object.
NotificationCompat.Builder builder = new NotificationCompat.Builder(this);
// Creates an Intent for the Activity
Intent notifyIntent =
        new Intent(new ComponentName(this, ResultActivity.class));
// Sets the Activity to start in a new, empty task
notifyIntent.setFlags(Intent.FLAG_ACTIVITY_NEW_TASK |
        Intent.FLAG_ACTIVITY_CLEAR_TASK);
// Creates the PendingIntent
PendingIntent notifyIntent =
        PendingIntent.getActivity(
        this,
        0,
        notifyIntent,
        PendingIntent.FLAG_UPDATE_CURRENT
);
// Puts the PendingIntent into the notification builder
builder.setContentIntent(notifyIntent);
// Notifications are issued by sending them to the
// NotificationManager system service.
NotificationManager mNotificationManager =
    (NotificationManager) getSystemService(Context.NOTIFICATION_SERVICE);
// Builds an anonymous Notification object from the builder, and
// passes it to the NotificationManager
mNotificationManager.notify(id, builder.build());
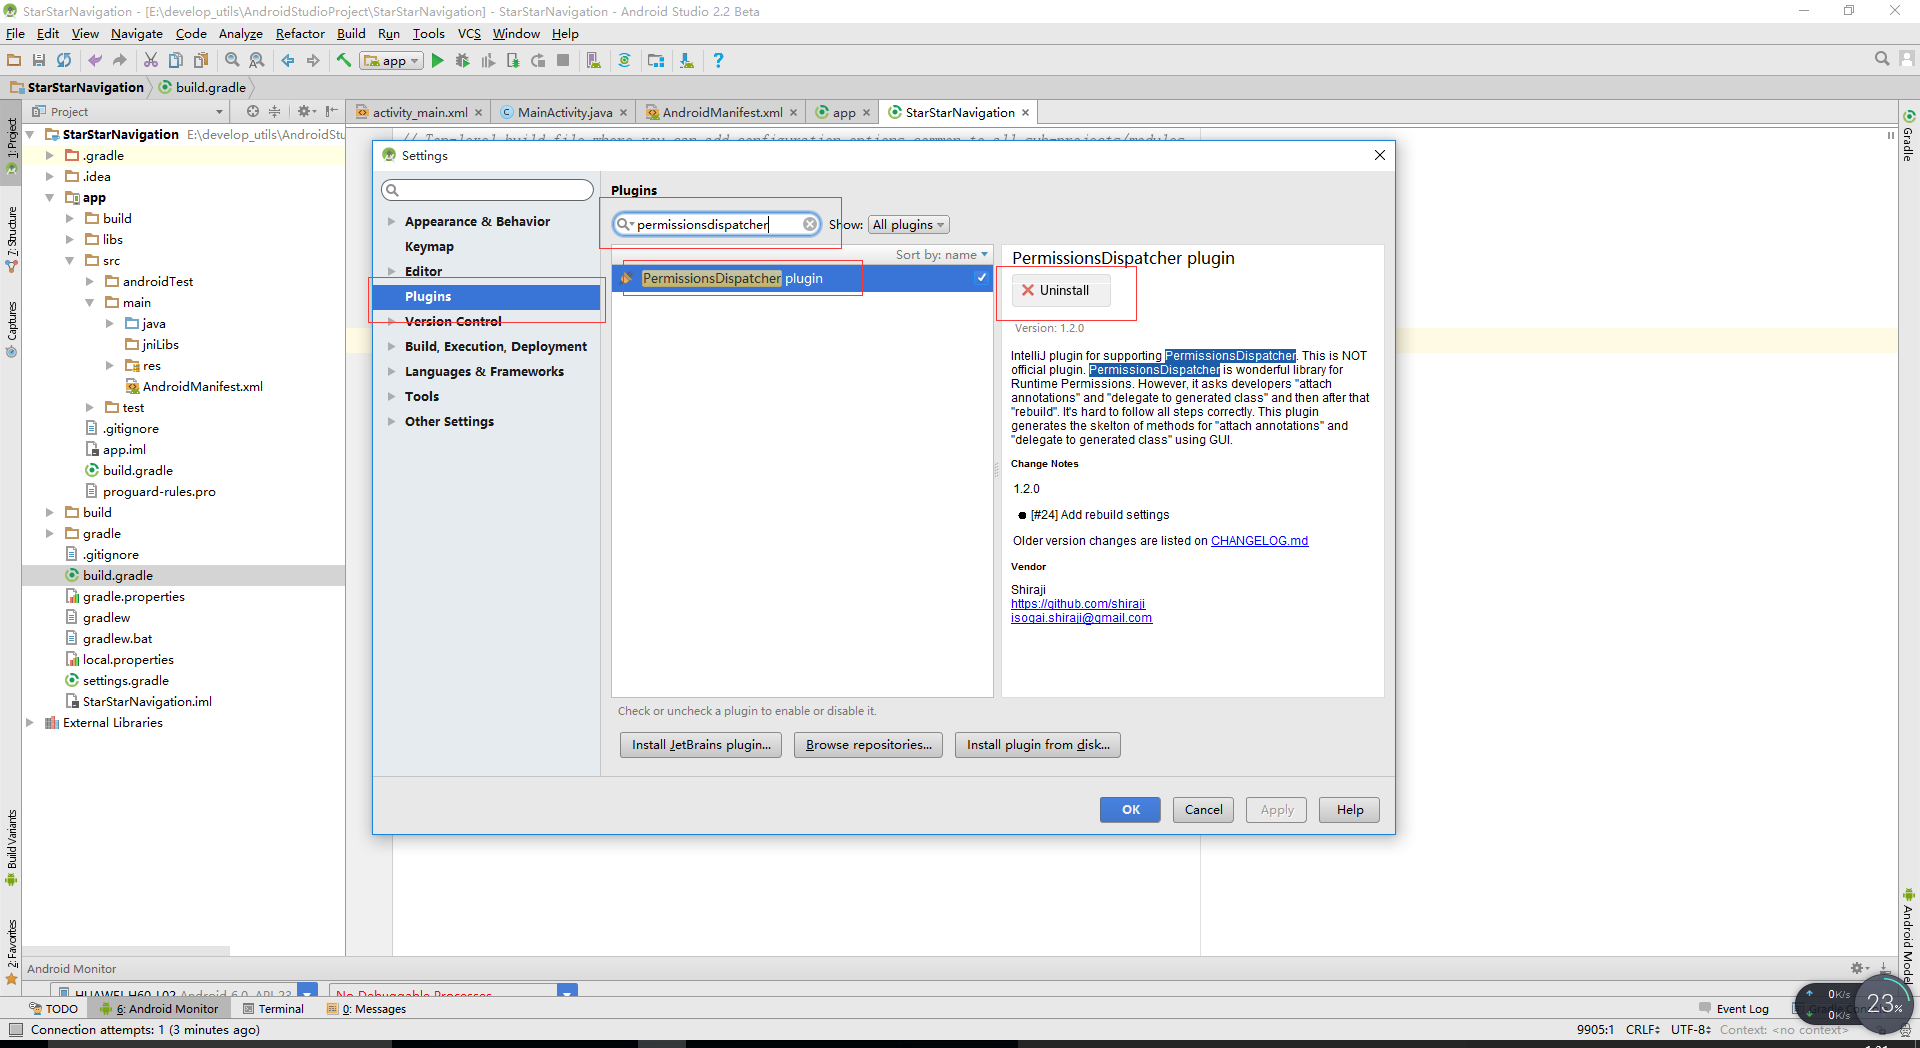 android開發 權限適配6.0 permissionsdispatcher的安裝使用
折騰了一陣,終於是安裝上了,臥槽,先在AndroidStudio裡面安裝permissiondispatcher插件,看圖:重啟完成之後就是配置build.gradle,
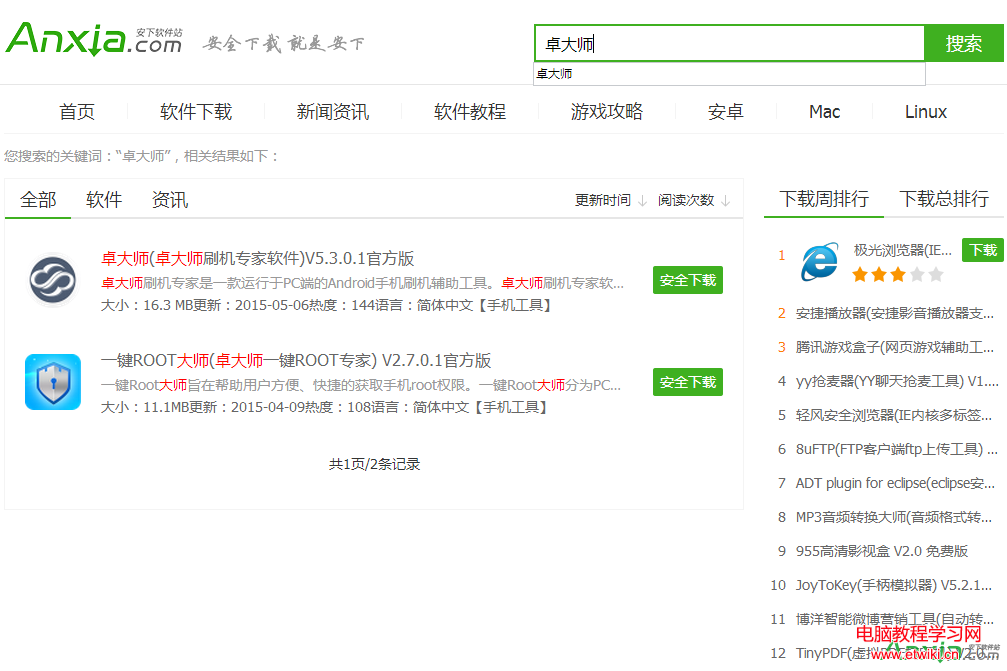 手機最簡單的兩種刷機方式 手機怎麼重裝系統圖文教程
我們常常聽說電腦重裝系統,那麼現在的智能手機可以重裝系統嗎?手機是可以重裝系統的,但是我們通常叫刷機,今天小編就為大家分享一下如何使用刷價軟件卓大師來進行刷
 Android應用的Material設計中圖片的相關處理指南
可伸縮的矢量圖片不會丟失清晰度,並且單一顏色的app-icon是完美的可定義一個bitmap作為透明度(alpha)和運行時的顏色可對一個bitmap image取色,會
 Android actionBar與Fragment結合使用Demo2
上一篇文章介紹了ActionBar的使用,這裡介紹ActionBar的另一種使用方法,達到的效果和以前的GroupActivity或TabHost是一樣的,可作為導航來使