編輯:關於Android編程
學習怎樣使用常見的技術處理並加載一個 Bitmap 對象,保持用戶界面(UI)組件的響應,並且避免超過應用程序的內存限制。如果你不小心的話,Bitmap 可以快速的消耗內存預算,主要會導致應用程序崩潰由於一個可怕的異常:
java.lang.OutofMemoryError: bitmap size exceeds VM budget.
下面有很多原因,為什麼在你的應用程序加載 Bitmap 的時候會很復雜:
1.移動設備通常具有有限的系統資源。Android 設備的單個應用程序最少有16M的內存可用。在 Android的兼容性定義文件(CDD)的第3.7節,虛擬機的兼容性給出了不同的屏幕大小和密度所需的申請最低內存。應用程序應該優化這個最小的內存限制來執行。但是,很多設備的配置限制是很高的(也就是可能會超過16M)。
2.Bitmap 會占用大量的內存。特別是豐富的圖像,像照片。例如,在Galaxy Nexus的相機拍照采用的照片高達2592x1936像素(5百萬像素)。如果這個 Bitmap 的配置使用 ARGB_8888(從Android 2.3以後默認),加載這張圖片的內存將需要19M(2592*1936*4 bytes),馬上會耗盡在某些設備上的每個應用程序的內存限制。
3.Android 應用程序的 UI 界面會頻繁的一次加載幾張 Bitmap。組件像ListView、GridView、ViewPager通常包括多個 Bitmap 在屏幕上同時出現,更多的潛在關屏幕時,手指輕彈顯現圖像。
————————————————————————————
圖像有各種形狀和大小。在許多情況下,它們比用於典型的應用程序的用戶界面(UI)需要更大。例如,系統相冊應用程序顯示照片使用 Android 設備的相機,通常比設備的屏幕密度更高的分辨率。
應用程序工作的時候是有內存限制的,在理想情況下,你只想在內存裡加載一個低分辨率的版本。低分辨率的版本應該適配UI組件顯示的大小。一張高分辨率的圖片並沒有提供可見的好處,但是還要占用珍貴的內存和由於額外的動態縮放所帶來的額外的性能開銷。
本課程將引導你解碼大的位圖,不超過每個應用程序的內存限制,通過在內存裡加載一個小的子采樣版本。
1.閱讀位圖尺寸和類型
BitmapFactory 類提供了幾個解碼方法(decodeByteArray(), decodeFile(), decodeResource())用來從各種資源中創建一個 Bitmap。根據圖片數據資源選擇最合適的解碼方法。這些方法試圖為構建Bitmap對象分配內存,因此很容易造成 OutOfMemory 異常。每種類型的解碼方法都有額外的簽名,讓你指定通過解碼選項 BitmapFactory.Options 類。設置 inJustDecodeBounds 為 true 當解碼的時候避免內存分配,返回了 null 的 Bitmap 對象,但是設置了 outWidth,outHeight 和 outMimeType。這個技術允許你在閱讀圖像數據的尺寸和類型前去構建一個 Bitma 對象(避免內存分配)。
BitmapFactory.Options options = new BitmapFactory.Options();
options.inJustDecodeBounds = true;
BitmapFactory.decodeResource(getResources(), R.id.myimage, options);
int imageHeight = options.outHeight;
int imageWidth = options.outWidth;
String imageType = options.outMimeType;
避免了 java.lang.OutOfMemory 異常,在解碼前檢查圖像尺寸,除非你絕對信任其來源為你提供了在可用內存裡正適合的圖像數據。
2.加載一個縮小的版本到內存
現在知道了圖像尺寸,他們可以被決定使用是否全圖加載到內存,或者用加載采樣版本來代替。下面有一些考慮因素:
1.估計加載整個圖像到內存中,內存的使用情況
2.內存量。你願意承擔加載這張圖像在應用程序中的任何內存要求。
3.圖像被加載到 ImageView 或者UI組件的目標尺寸。
4.當前設備的屏幕大小和密度。
例如,加載1024x768 像素的圖片到內存中,如果它最終在 ImageView上顯示128x96的縮略圖,這是不值得的。
告訴解碼器樣本圖像,加載一個小版本到內存中,如果你使用 BitmapFactory.Options 對象的話,設置 inSampleSize 為 true。例如,對於2048×1536分辨率的圖像,它解碼產生4個大約512x384的位圖。加載到內存中使用0.75MB,而不是12MB的完整圖像(假設的Bitmap 配置為ARGB_8888)。下面方法計算一個樣本大小值的比率是基於目標寬度和高度的二值化:
public static int calculateInSampleSize(
            BitmapFactory.Options options, int reqWidth, int reqHeight) {
    // Raw height and width of image
    final int height = options.outHeight;
    final int width = options.outWidth;
    int inSampleSize = 1;

    if (height > reqHeight || width > reqWidth) {

        final int halfHeight = height / 2;
        final int halfWidth = width / 2;

        // Calculate the largest inSampleSize value that is a power of 2 and keeps both
        // height and width larger than the requested height and width.
        while ((halfHeight / inSampleSize) > reqHeight
                && (halfWidth / inSampleSize) > reqWidth) {
            inSampleSize *= 2;
        }
    }

    return inSampleSize;
}
使用這個方法,首先 inJustDecodeBounds 設置為 true,通過解碼選項使用新的 inSampleSize 值,再設置 inJustDecodeBounds 為false。
public static Bitmap decodeSampledBitmapFromResource(Resources res, int resId,
        int reqWidth, int reqHeight) {

    // First decode with inJustDecodeBounds=true to check dimensions
    final BitmapFactory.Options options = new BitmapFactory.Options();
    options.inJustDecodeBounds = true;
    BitmapFactory.decodeResource(res, resId, options);

    // Calculate inSampleSize
    options.inSampleSize = calculateInSampleSize(options, reqWidth, reqHeight);

    // Decode bitmap with inSampleSize set
    options.inJustDecodeBounds = false;
    return BitmapFactory.decodeResource(res, resId, options);
}
這個方法可以很容易的加載任意大小的位圖到 ImageView,在ImageView 顯示 100x100 的縮略圖。
mImageView.setImageBitmap(
    decodeSampledBitmapFromResource(getResources(), R.id.myimage, 100, 100));
————————————————————————————
BitmapFactory.decode* 方法,在 Load Large Bitmaps Efficiently 這節課已經討論過了,不應該在主UI線程中執行,如果從磁盤中或者網絡上讀取圖像數據(或者內存以外的任何來源)。這個數據加載時間是不可預測的,並取決於多種因素(從磁盤或網絡,圖像的大小,CPU的功率等讀取速度)。如果這些任務中的一個阻塞了UI線程,應用程序會出現一個無響應的系統標志,用戶有一個選項能關閉它(更多信息請看 Designing for Responsiveness)。
本課程指導你處理位圖在後台線程中,使用AsyncTask,並告訴你如何處理並發問題。
1.使用AsyncTask
AsyncTask 類提供了一個簡單的方法,在後台線程中執行一些工作,並將結果發布回UI線程上。要使用它,創建一個子類,並重寫所提供的方法。這裡有一個例子,使用的AsyncTask和decodeSampledBitmapFromResource() 加載一張大圖到 ImageView:
class BitmapWorkerTask extends AsyncTask {
    private final WeakReference imageViewReference;
    private int data = 0;

    public BitmapWorkerTask(ImageView imageView) {
        // Use a WeakReference to ensure the ImageView can be garbage collected
        imageViewReference = new WeakReference(imageView);
    }

    // Decode image in background.
    @Override
    protected Bitmap doInBackground(Integer... params) {
        data = params[0];
        return decodeSampledBitmapFromResource(getResources(), data, 100, 100));
    }

    // Once complete, see if ImageView is still around and set bitmap.
    @Override
    protected void onPostExecute(Bitmap bitmap) {
        if (imageViewReference != null && bitmap != null) {
            final ImageView imageView = imageViewReference.get();
            if (imageView != null) {
                imageView.setImageBitmap(bitmap);
            }
        }
    }
}
ImageView 的 WeakReference 確保 AsyncTask不妨礙 ImageView的任何關於它的引用被垃圾回收。不需要保證 ImageView 一直存在當任務完成的時候,所以你必須要在 onPostExecute() 檢查引用。這個 ImageView 可能不再存在,如果用戶從 Activity 回到導航,或者配置發生改變在任務完成之前。
要啟動異步加載位圖,只需創建一個新的任務,並執行它:
public void loadBitmap(int resId, ImageView imageView) {
    BitmapWorkerTask task = new BitmapWorkerTask(imageView);
    task.execute(resId);
}
2.處理並發
常見的View組件,像ListView、GridView和AsyncTask一起使用時會引入另一個問題,如前一節中所示。為了高效內存,用戶在滾動時,這些組件要重復利用子View。如果每個子View引發一個AsyncTask,也不能保證它完成時,相關聯的View尚未再循環用於另一子View的使用。此外,這裡並不能保證異步任務啟動的順序是它們完成的順序。
博客 Multithreading for Performance 進一步討論處理並發性,並提供了解決方案,當任務完成之後檢查最近的AsyncTask中大量ImageView的引用的地方。使用一個類似的方法,所述的AsyncTask從上一節可以擴展到遵循類似的模式。
創建一個專用Drawable子類來存儲引用,用來回到工作任務中。在這種情況下,一個BitmapDrawable作為一個占位符圖像顯示在ImageView中當任務完成時:
static class AsyncDrawable extends BitmapDrawable {
    private final WeakReference bitmapWorkerTaskReference;

    public AsyncDrawable(Resources res, Bitmap bitmap,
            BitmapWorkerTask bitmapWorkerTask) {
        super(res, bitmap);
        bitmapWorkerTaskReference =
            new WeakReference(bitmapWorkerTask);
    }

    public BitmapWorkerTask getBitmapWorkerTask() {
        return bitmapWorkerTaskReference.get();
    }
}
在執行BitmapWorkerTask之前,創建一個AsyncDrawable並將其綁定到目標ImageView上:
public void loadBitmap(int resId, ImageView imageView) {
    if (cancelPotentialWork(resId, imageView)) {
        final BitmapWorkerTask task = new BitmapWorkerTask(imageView);
        final AsyncDrawable asyncDrawable =
                new AsyncDrawable(getResources(), mPlaceHolderBitmap, task);
        imageView.setImageDrawable(asyncDrawable);
        task.execute(resId);
    }
}
cancelPotentialWork 方法的代碼引用,檢查另一個ImageView相關的任務是不是正在運行。如果是,它將通過調用 cancel() 方法取消前一個任務。在少數情況下,新的任務數據與現有的任務相匹配,並沒有什麼進一步的需要發生。
public static boolean cancelPotentialWork(int data, ImageView imageView) {
    final BitmapWorkerTask bitmapWorkerTask = getBitmapWorkerTask(imageView);

    if (bitmapWorkerTask != null) {
        final int bitmapData = bitmapWorkerTask.data;
        // If bitmapData is not yet set or it differs from the new data
        if (bitmapData == 0 || bitmapData != data) {
            // Cancel previous task
            bitmapWorkerTask.cancel(true);
        } else {
            // The same work is already in progress
            return false;
        }
    }
    // No task associated with the ImageView, or an existing task was cancelled
    return true;
}
getBitmapWorkerTask() 是一個輔助方法,是用於檢索與特定任務相關的圖片。
private static BitmapWorkerTask getBitmapWorkerTask(ImageView imageView) {
   if (imageView != null) {
       final Drawable drawable = imageView.getDrawable();
       if (drawable instanceof AsyncDrawable) {
           final AsyncDrawable asyncDrawable = (AsyncDrawable) drawable;
           return asyncDrawable.getBitmapWorkerTask();
       }
    }
    return null;
}
最後一步是在onPostExecute() 方法中更新,如果當前任務匹配關聯ImageView,檢查 BitmapWorkerTask 任務是不是被取消。
class BitmapWorkerTask extends AsyncTask {
    ...

    @Override
    protected void onPostExecute(Bitmap bitmap) {
        if (isCancelled()) {
            bitmap = null;
        }

        if (imageViewReference != null && bitmap != null) {
            final ImageView imageView = imageViewReference.get();
            final BitmapWorkerTask bitmapWorkerTask =
                    getBitmapWorkerTask(imageView);
            if (this == bitmapWorkerTask && imageView != null) {
                imageView.setImageBitmap(bitmap);
            }
        }
    }
}
實現這個現在適合使用ListView和GridView組件以及任何其他組件,回收子視圖。只需調用 loadBitmap() ,當你通常在ImageView上設置一張圖片。例如,在一個GridView實現它,只需要getview()方法中返回支持的適配器。
————————————————————————————
加載單張 Bitmap 到用戶界面是很直接的,然而,事情變得更復雜,如果你需要加載一個更大的一組圖像。在許多情況下,(像ListView、GridView、ViewPager),這些圖片的總數基本上是無限的,結合這些圖像可以快速的從屏幕上滾動。
內存使用時保持不變的,這些組件通過回收滾出屏幕的子View來保存內存。垃圾回收器也釋放你加載的圖片,假如你沒有保持著一個長時間活著的引用。這一切都很好,但是為了保持流暢的和快速加載的UI,你要避免不停地處理加載到屏幕中的圖片。內存和磁盤緩存能有所幫助,讓組件能夠快速加載處理的圖像。
本課程將教你使用的是內存和硬盤位圖緩存加載多個圖片時,改善用戶界面的響應性和流動性。
1.使用內存緩存
內存緩存提供了可以快速的訪問圖片,代價是占用應用程序寶貴的內存。
LruCache 類特別適合用來緩存圖片,保持最近引用的對象在 LinkedHashMap 中有個強引用,在緩存超過指定大小之前,趕出最近最少使用的成員。
注意:在過去,一個流行的內存緩存是通過 SoftReference 或者WeakReference 圖片緩存來實施的,然而,它不是被推薦的。自從 Android 2.3 開始,垃圾收集器更具侵略性,收集軟/弱引用,這使他們相當無效。此外,在 Android 3.0 之前,圖片支持的數據被存儲在本地內存,並沒有用可預測的方式來釋放,潛在的造成應用程序短暫的超過內存限制而引起的崩潰。
為了選擇一個合適的尺寸LruCache,應考慮到許多因素,例如:
1.內存密集型是Activity或者應用程序的其余部分?
2.有多少圖片同時出現在屏幕上?有多少准備好在屏幕上顯示?
3.設備的屏幕尺寸和密度是多少?一個額外的高密度屏幕的設備(像Galaxy Nexus xhdpi)需要大的緩存來維持內存中相同數量的圖片,相比較於 Nexus S hdpi。
4.什麼尺寸和配置的圖片,因此會占用多少內存?
5.頻繁的訪問圖片?有比其他人更頻繁的訪問嗎?如果是這樣的話,也許你可能想在內存中保持某些條目,甚至出現了多個LruCache對象在不同的圖片組中。
6.你能平衡質量和數量嗎?有時它可以更有用的去存儲大量低質量的圖片,可能加載一個高質量的版本在另一個後台的任務中。
沒有指定的大小和公式來適合所有的應用程序,這取決於對你的使用進行分析,並提出一個合適的解決方案。緩存很小引起額外的開銷,也是不好的,緩存太大可能再次引起 java.lang.OutOfMemory 異常,留下應用程序剩余的很少的一點內存來工作。
下面是一個的例子給圖片建立一個LruCache:
private LruCache mMemoryCache;

@Override
protected void onCreate(Bundle savedInstanceState) {
    ...
    // Get max available VM memory, exceeding this amount will throw an
    // OutOfMemory exception. Stored in kilobytes as LruCache takes an
    // int in its constructor.
    final int maxMemory = (int) (Runtime.getRuntime().maxMemory() / 1024);

    // Use 1/8th of the available memory for this memory cache.
    final int cacheSize = maxMemory / 8;

    mMemoryCache = new LruCache(cacheSize) {
        @Override
        protected int sizeOf(String key, Bitmap bitmap) {
            // The cache size will be measured in kilobytes rather than
            // number of items.
            return bitmap.getByteCount() / 1024;
        }
    };
    ...
}

public void addBitmapToMemoryCache(String key, Bitmap bitmap) {
    if (getBitmapFromMemCache(key) == null) {
        mMemoryCache.put(key, bitmap);
    }
}

public Bitmap getBitmapFromMemCache(String key) {
    return mMemoryCache.get(key);
}
注意:在這個例子中,應用程序的內存八分之一被分配給我們的緩存。在一個正常的hdpi的設備,最低是4MB左右(32/8)。全屏幕GridView充滿圖像的設備上,使用800x480分辨率將使用1.5MB左右內存(800 x480x4),因此在內存中最少緩存2.5頁圖像。
當在ImageView上加載一張圖片的時候,首先檢查LruCache。如果找到條目,立馬使用並且更新ImageView。否則,將在後台線程中產生並處理這張圖像。
public void loadBitmap(int resId, ImageView imageView) {
    final String imageKey = String.valueOf(resId);

    final Bitmap bitmap = getBitmapFromMemCache(imageKey);
    if (bitmap != null) {
        mImageView.setImageBitmap(bitmap);
    } else {
        mImageView.setImageResource(R.drawable.image_placeholder);
        BitmapWorkerTask task = new BitmapWorkerTask(mImageView);
        task.execute(resId);
    }
}
該BitmapWorkerTask也需要進行更新,然後添加條目到內存緩存:
class BitmapWorkerTask extends AsyncTask {
    ...
    // Decode image in background.
    @Override
    protected Bitmap doInBackground(Integer... params) {
        final Bitmap bitmap = decodeSampledBitmapFromResource(
                getResources(), params[0], 100, 100));
        addBitmapToMemoryCache(String.valueOf(params[0]), bitmap);
        return bitmap;
    }
    ...
}
2.使用磁盤緩存
內存緩存加速訪問最近查看過的位圖是有用的,然而,你不能依賴於緩存中可用的圖像。像GridView 組件有大量的數據,很容易填滿內存緩存。你的應用程序不能夠中斷,當另一個任務在跑的時候(像電話來了),應用程序就退到後台,可能會被殺死,內存緩存被破壞。一旦用戶重啟,你的應用程序就會再次處理每個圖片。
磁盤緩存可以用於這些情況,持續處理位圖和有助於減少加載時間,圖像不再可用在內存緩存。當然,從磁盤中讀取圖像比從內存中加載慢,並且應該在後台線程中完成,因為磁盤讀取時間是不可預測的。
注意:ContentProvider可能是一個更加合適的來存儲緩存圖像的地方,如果他們訪問更頻繁,例如圖像應用程序。
private DiskLruCache mDiskLruCache;
private final Object mDiskCacheLock = new Object();
private boolean mDiskCacheStarting = true;
private static final int DISK_CACHE_SIZE = 1024 * 1024 * 10; // 10MB
private static final String DISK_CACHE_SUBDIR = "thumbnails";

@Override
protected void onCreate(Bundle savedInstanceState) {
    ...
    // Initialize memory cache
    ...
    // Initialize disk cache on background thread
    File cacheDir = getDiskCacheDir(this, DISK_CACHE_SUBDIR);
    new InitDiskCacheTask().execute(cacheDir);
    ...
}

class InitDiskCacheTask extends AsyncTask {
    @Override
    protected Void doInBackground(File... params) {
        synchronized (mDiskCacheLock) {
            File cacheDir = params[0];
            mDiskLruCache = DiskLruCache.open(cacheDir, DISK_CACHE_SIZE);
            mDiskCacheStarting = false; // Finished initialization
            mDiskCacheLock.notifyAll(); // Wake any waiting threads
        }
        return null;
    }
}

class BitmapWorkerTask extends AsyncTask {
    ...
    // Decode image in background.
    @Override
    protected Bitmap doInBackground(Integer... params) {
        final String imageKey = String.valueOf(params[0]);

        // Check disk cache in background thread
        Bitmap bitmap = getBitmapFromDiskCache(imageKey);

        if (bitmap == null) { // Not found in disk cache
            // Process as normal
            final Bitmap bitmap = decodeSampledBitmapFromResource(
                    getResources(), params[0], 100, 100));
        }

        // Add final bitmap to caches
        addBitmapToCache(imageKey, bitmap);

        return bitmap;
    }
    ...
}

public void addBitmapToCache(String key, Bitmap bitmap) {
    // Add to memory cache as before
    if (getBitmapFromMemCache(key) == null) {
        mMemoryCache.put(key, bitmap);
    }

    // Also add to disk cache
    synchronized (mDiskCacheLock) {
        if (mDiskLruCache != null && mDiskLruCache.get(key) == null) {
            mDiskLruCache.put(key, bitmap);
        }
    }
}

public Bitmap getBitmapFromDiskCache(String key) {
    synchronized (mDiskCacheLock) {
        // Wait while disk cache is started from background thread
        while (mDiskCacheStarting) {
            try {
                mDiskCacheLock.wait();
            } catch (InterruptedException e) {}
        }
        if (mDiskLruCache != null) {
            return mDiskLruCache.get(key);
        }
    }
    return null;
}

// Creates a unique subdirectory of the designated app cache directory. Tries to use external
// but if not mounted, falls back on internal storage.
public static File getDiskCacheDir(Context context, String uniqueName) {
    // Check if media is mounted or storage is built-in, if so, try and use external cache dir
    // otherwise use internal cache dir
    final String cachePath =
            Environment.MEDIA_MOUNTED.equals(Environment.getExternalStorageState()) ||
                    !isExternalStorageRemovable() ? getExternalCacheDir(context).getPath() :
                            context.getCacheDir().getPath();

    return new File(cachePath + File.separator + uniqueName);
}
注意:初始化磁盤緩存需要磁盤操作,因此不應該發生在主線程中。但是,這並不意味著在初始化之前能有訪問緩存的機會。為了解決這個問題,在上面的實現中,一個鎖對象確保應用程序不會從磁盤緩存中讀取,直到緩存已被初始化。
內存緩存檢查在UI線程中,但是磁盤緩存檢查在後台線程中。磁盤操作從不應該在UI線程中。當一張圖片處理完成,最後的位圖被添加到內存和磁盤高速緩存中,以供將來使用。
3.處理配置改變
運行配置改變,比如屏幕方向,造成運行Activity的銷毀和重啟配置新的Activity(有關此問題的詳細信息,請參閱處Handling Runtime Changes)。你要避免再次處理圖片,使用戶在配置改變時有一個極致的體驗。
幸運地是,你的位圖有好的內存緩存,因為你建立了 Use a Memory Cache 部分。緩存通過 setRetainInstance(true) 方法來保存Activity實例使用的一個Fragment。在Activity再次被創建的時候,保留的Fragment能夠被連接上,你能訪問存在的緩存對象,允許圖片能夠快速的獲取和填充在ImageView對象上。
這裡的例子保留了LruCache對象,在配置更改使用的Fragment:
private LruCache mMemoryCache;

@Override
protected void onCreate(Bundle savedInstanceState) {
    ...
    RetainFragment retainFragment =
            RetainFragment.findOrCreateRetainFragment(getFragmentManager());
    mMemoryCache = retainFragment.mRetainedCache;
    if (mMemoryCache == null) {
        mMemoryCache = new LruCache(cacheSize) {
            ... // Initialize cache here as usual
        }
        retainFragment.mRetainedCache = mMemoryCache;
    }
    ...
}

class RetainFragment extends Fragment {
    private static final String TAG = "RetainFragment";
    public LruCache mRetainedCache;

    public RetainFragment() {}

    public static RetainFragment findOrCreateRetainFragment(FragmentManager fm) {
        RetainFragment fragment = (RetainFragment) fm.findFragmentByTag(TAG);
        if (fragment == null) {
            fragment = new RetainFragment();
            fm.beginTransaction().add(fragment, TAG).commit();
        }
        return fragment;
    }

    @Override
    public void onCreate(Bundle savedInstanceState) {
        super.onCreate(savedInstanceState);
        setRetainInstance(true);
    }
}
為了測試這個,嘗試旋轉一個設備,並沒有保留Fragment。當你保留緩存時,你應該注意到幾乎沒有任何延遲,因為Activity幾乎立即從內存中取出來填充圖片。沒有找到在內存緩存中的任何圖像,就希望在磁盤緩存中能找到,如果沒有,他們像往常一樣處理。
————————————————————————————
上一節處理描述緩存位圖,你做一些幫助垃圾回收器和圖片重用的事情。推薦的策略取決你的目標的於Android系統版本。BitmapFun 這個App展示了如何設計你的應用在不同Android版本的提高工作效率。
設置這個課的階段,Android對位圖內存的管理是怎樣發展的:
1.在Android2.2(API 8)和更低,當垃圾回收器觸發時,你應用的線程會被停止。這會導致一個延遲,會降低性能。Android 2.3增加了一個並行垃圾回收器,這意味著內存被回收後不久,位圖就不再被引用。
2.在Android 2.3.3(API 10)和更低,位圖支持像素數據存儲在本地內存中。它獨立於bitmap本身,這是存儲在Dalvik堆。本地內存中的像素數據不能以可預測的方式釋放,可能會導致應用程序短暫的超過它的內存限制並崩潰。作為Android 3(API 11),像素數據存儲在Dalvik堆以及相關的位圖。
下面的章節描述了如何優化內存的位圖管理在不同的Andr??oid版本上。
1.在Android 2.3.3和更低上的內存管理
在Android 2.3.3和更低上的內存管理,使用recycle()方法是比較推薦的。如果你在你的應用程序上顯示大量的圖片數據,你可能或出現 OutOfMemoryError 錯誤。recycle()方法允許應用程序盡可能的回收內存。
當你確定圖片不再被使用的時候,才調用recycle()方法,如果你使用了recycle()方法,之後再去繪制位圖,你將會得到一個錯誤“Canvas: trying to use a recycled bitmap”
下面的代碼片段是一個調用recycle()的例子,它使用引用計數(在變量mdisplayrefcount和mcacherefcount)來跟蹤當前位圖是否顯示或緩存。代碼回收位圖時,這些條件都滿足:
1.引用計數mDisplayRefCount 和 mCacheRefCount 都為0。
2.位圖不空,而且尚未回收。
private int mCacheRefCount = 0;
private int mDisplayRefCount = 0;
...
// Notify the drawable that the displayed state has changed.
// Keep a count to determine when the drawable is no longer displayed.
public void setIsDisplayed(boolean isDisplayed) {
    synchronized (this) {
        if (isDisplayed) {
            mDisplayRefCount++;
            mHasBeenDisplayed = true;
        } else {
            mDisplayRefCount--;
        }
    }
    // Check to see if recycle() can be called.
    checkState();
}

// Notify the drawable that the cache state has changed.
// Keep a count to determine when the drawable is no longer being cached.
public void setIsCached(boolean isCached) {
    synchronized (this) {
        if (isCached) {
            mCacheRefCount++;
        } else {
            mCacheRefCount--;
        }
    }
    // Check to see if recycle() can be called.
    checkState();
}

private synchronized void checkState() {
    // If the drawable cache and display ref counts = 0, and this drawable
    // has been displayed, then recycle.
    if (mCacheRefCount <= 0 && mDisplayRefCount <= 0 && mHasBeenDisplayed
            && hasValidBitmap()) {
        getBitmap().recycle();
    }
}

private synchronized boolean hasValidBitmap() {
    Bitmap bitmap = getBitmap();
    return bitmap != null && !bitmap.isRecycled();
}
2.在Android 3.0和更高上管理內存
Android 3.0(API 11)推出 BitmapFactory.Options.inBitmap 屬性。如果這個選項被設置,當加載內容的時候,解碼方法將根據 Options對象嘗試重用現有的位圖。這就意味著位圖內存被重用,提高性能,刪除內存分配和解除分配。然而,有一定的限制,就是inBitmap怎樣被使用。特別是在Android 4.4(API 19)之前,只支持同等大小的位圖。有關詳細信息,請參閱 inBitmap文檔。
保存位圖給以後使用
下面的代碼演示了存儲已經存在的位圖在示例的應用程序中,供以後使用。當應用程序在Android 3或更高版本上運行,位圖是從LruCache取出,位圖的軟引用被放置在一個HashSet中,與後來的inbitmap可能重用。
Set> mReusableBitmaps;
private LruCache mMemoryCache;

// If you're running on Honeycomb or newer, create a
// synchronized HashSet of references to reusable bitmaps.
if (Utils.hasHoneycomb()) {
    mReusableBitmaps =
            Collections.synchronizedSet(new HashSet>());
}

mMemoryCache = new LruCache(mCacheParams.memCacheSize) {

    // Notify the removed entry that is no longer being cached.
    @Override
    protected void entryRemoved(boolean evicted, String key,
            BitmapDrawable oldValue, BitmapDrawable newValue) {
        if (RecyclingBitmapDrawable.class.isInstance(oldValue)) {
            // The removed entry is a recycling drawable, so notify it
            // that it has been removed from the memory cache.
            ((RecyclingBitmapDrawable) oldValue).setIsCached(false);
        } else {
            // The removed entry is a standard BitmapDrawable.
            if (Utils.hasHoneycomb()) {
                // We're running on Honeycomb or later, so add the bitmap
                // to a SoftReference set for possible use with inBitmap later.
                mReusableBitmaps.add
                        (new SoftReference(oldValue.getBitmap()));
            }
        }
    }
....
}
使用一個存在的位圖
在運行的應用程序中,解碼方??法進行檢查,看是否有存在的位圖,有就可以使用。例子:
public static Bitmap decodeSampledBitmapFromFile(String filename,
        int reqWidth, int reqHeight, ImageCache cache) {

    final BitmapFactory.Options options = new BitmapFactory.Options();
    ...
    BitmapFactory.decodeFile(filename, options);
    ...

    // If we're running on Honeycomb or newer, try to use inBitmap.
    if (Utils.hasHoneycomb()) {
        addInBitmapOptions(options, cache);
    }
    ...
    return BitmapFactory.decodeFile(filename, options);
}
下面代碼是顯示addInBitmapOptions()方法的。為存在的位圖設置inBitmap 的值。注意,此方法只設置一個值 inBitmap ,如果找到一個合適的匹配(假設的代碼不會走的):
private static void addInBitmapOptions(BitmapFactory.Options options,
        ImageCache cache) {
    // inBitmap only works with mutable bitmaps, so force the decoder to
    // return mutable bitmaps.
    options.inMutable = true;

    if (cache != null) {
        // Try to find a bitmap to use for inBitmap.
        Bitmap inBitmap = cache.getBitmapFromReusableSet(options);

        if (inBitmap != null) {
            // If a suitable bitmap has been found, set it as the value of
            // inBitmap.
            options.inBitmap = inBitmap;
        }
    }
}

// This method iterates through the reusable bitmaps, looking for one
// to use for inBitmap:
protected Bitmap getBitmapFromReusableSet(BitmapFactory.Options options) {
        Bitmap bitmap = null;

    if (mReusableBitmaps != null && !mReusableBitmaps.isEmpty()) {
        synchronized (mReusableBitmaps) {
            final Iterator> iterator
                    = mReusableBitmaps.iterator();
            Bitmap item;

            while (iterator.hasNext()) {
                item = iterator.next().get();

                if (null != item && item.isMutable()) {
                    // Check to see it the item can be used for inBitmap.
                    if (canUseForInBitmap(item, options)) {
                        bitmap = item;

                        // Remove from reusable set so it can't be used again.
                        iterator.remove();
                        break;
                    }
                } else {
                    // Remove from the set if the reference has been cleared.
                    iterator.remove();
                }
            }
        }
    }
    return bitmap;
}
最後,該方法確定候選位圖滿足尺寸標准用於inbitmap。
static boolean canUseForInBitmap(
        Bitmap candidate, BitmapFactory.Options targetOptions) {

    if (Build.VERSION.SDK_INT >= Build.VERSION_CODES.KITKAT) {
        // From Android 4.4 (KitKat) onward we can re-use if the byte size of
        // the new bitmap is smaller than the reusable bitmap candidate
        // allocation byte count.
        int width = targetOptions.outWidth / targetOptions.inSampleSize;
        int height = targetOptions.outHeight / targetOptions.inSampleSize;
        int byteCount = width * height * getBytesPerPixel(candidate.getConfig());
        return byteCount <= candidate.getAllocationByteCount();
    }

    // On earlier versions, the dimensions must match exactly and the inSampleSize must be 1
    return candidate.getWidth() == targetOptions.outWidth
            && candidate.getHeight() == targetOptions.outHeight
            && targetOptions.inSampleSize == 1;
}

/**
 * A helper function to return the byte usage per pixel of a bitmap based on its configuration.
 */
static int getBytesPerPixel(Config config) {
    if (config == Config.ARGB_8888) {
        return 4;
    } else if (config == Config.RGB_565) {
        return 2;
    } else if (config == Config.ARGB_4444) {
        return 2;
    } else if (config == Config.ALPHA_8) {
        return 1;
    }
    return 1;
}
————————————————————————————
這節課把前面的課程內容集中在一起,在GridView或者ViewPager上加載多個位圖,使用後台線程和位圖緩存,處理並發和配置改變。
1.加載位圖到ViewPager的實現
swipe view pattern 是一個浏覽圖片庫的詳細視圖的很好的方式。你能夠實現這個模式使用ViewPager組件支持,通過PagerAdapter。然而,一個更合適的支持適配器是 FragmentStatePagerAdapter 類,自動保存和銷毀ViewPager中Fragment的狀態,當他們消失在屏幕的時候,保持內存使用。
注意:如果你有圖像的數量較少,並有信心他們都在應用的內存限制之內,則使用常規的PagerAdapter或FragmentPagerAdapter可能更合適。
下面實現ViewPager中ImageView,主Activity持有ViewPager和適配器:
public class ImageDetailActivity extends FragmentActivity {
    public static final String EXTRA_IMAGE = "extra_image";

    private ImagePagerAdapter mAdapter;
    private ViewPager mPager;

    // A static dataset to back the ViewPager adapter
    public final static Integer[] imageResIds = new Integer[] {
            R.drawable.sample_image_1, R.drawable.sample_image_2, R.drawable.sample_image_3,
            R.drawable.sample_image_4, R.drawable.sample_image_5, R.drawable.sample_image_6,
            R.drawable.sample_image_7, R.drawable.sample_image_8, R.drawable.sample_image_9};

    @Override
    public void onCreate(Bundle savedInstanceState) {
        super.onCreate(savedInstanceState);
        setContentView(R.layout.image_detail_pager); // Contains just a ViewPager

        mAdapter = new ImagePagerAdapter(getSupportFragmentManager(), imageResIds.length);
        mPager = (ViewPager) findViewById(R.id.pager);
        mPager.setAdapter(mAdapter);
    }

    public static class ImagePagerAdapter extends FragmentStatePagerAdapter {
        private final int mSize;

        public ImagePagerAdapter(FragmentManager fm, int size) {
            super(fm);
            mSize = size;
        }

        @Override
        public int getCount() {
            return mSize;
        }

        @Override
        public Fragment getItem(int position) {
            return ImageDetailFragment.newInstance(position);
        }
    }
}
下面是詳細的Fragment的實現,這可能看起來是一個完全合理的方法,但你能看到這個實現的缺點嗎?如何改進?
public class ImageDetailFragment extends Fragment {
    private static final String IMAGE_DATA_EXTRA = "resId";
    private int mImageNum;
    private ImageView mImageView;

    static ImageDetailFragment newInstance(int imageNum) {
        final ImageDetailFragment f = new ImageDetailFragment();
        final Bundle args = new Bundle();
        args.putInt(IMAGE_DATA_EXTRA, imageNum);
        f.setArguments(args);
        return f;
    }

    // Empty constructor, required as per Fragment docs
    public ImageDetailFragment() {}

    @Override
    public void onCreate(Bundle savedInstanceState) {
        super.onCreate(savedInstanceState);
        mImageNum = getArguments() != null ? getArguments().getInt(IMAGE_DATA_EXTRA) : -1;
    }

    @Override
    public View onCreateView(LayoutInflater inflater, ViewGroup container,
            Bundle savedInstanceState) {
        // image_detail_fragment.xml contains just an ImageView
        final View v = inflater.inflate(R.layout.image_detail_fragment, container, false);
        mImageView = (ImageView) v.findViewById(R.id.imageView);
        return v;
    }

    @Override
    public void onActivityCreated(Bundle savedInstanceState) {
        super.onActivityCreated(savedInstanceState);
        final int resId = ImageDetailActivity.imageResIds[mImageNum];
        mImageView.setImageResource(resId); // Load image into ImageView
    }
}
希望你注意到這些問題,從UI線程獲取圖片資源,可能導致應用程序掛起和焦點關閉。使用 的AsyncTask類,直接在後台線程中加載和處理圖像。
public class ImageDetailActivity extends FragmentActivity {
    ...

    public void loadBitmap(int resId, ImageView imageView) {
        mImageView.setImageResource(R.drawable.image_placeholder);
        BitmapWorkerTask task = new BitmapWorkerTask(mImageView);
        task.execute(resId);
    }

    ... // include BitmapWorkerTask class
}

public class ImageDetailFragment extends Fragment {
    ...

    @Override
    public void onActivityCreated(Bundle savedInstanceState) {
        super.onActivityCreated(savedInstanceState);
        if (ImageDetailActivity.class.isInstance(getActivity())) {
            final int resId = ImageDetailActivity.imageResIds[mImageNum];
            // Call out to ImageDetailActivity to load the bitmap in a background thread
            ((ImageDetailActivity) getActivity()).loadBitmap(resId, mImageView);
        }
    }
}
任何額外的處理(如調整或獲取來自網絡圖片),只要發生在 BitmapWorkerTask 中都不影響主界面的響應。如果後台線程正在做的不僅僅是直接從磁盤上加載一個圖像,它有利於增加內存或磁盤高速緩存。下面是一個內存緩存的補充修改:
public class ImageDetailActivity extends FragmentActivity {
    ...
    private LruCache mMemoryCache;

    @Override
    public void onCreate(Bundle savedInstanceState) {
        ...
        // initialize LruCache as per Use a Memory Cache section
    }

    public void loadBitmap(int resId, ImageView imageView) {
        final String imageKey = String.valueOf(resId);

        final Bitmap bitmap = mMemoryCache.get(imageKey);
        if (bitmap != null) {
            mImageView.setImageBitmap(bitmap);
        } else {
            mImageView.setImageResource(R.drawable.image_placeholder);
            BitmapWorkerTask task = new BitmapWorkerTask(mImageView);
            task.execute(resId);
        }
    }

    ... // include updated BitmapWorkerTask from Use a Memory Cache section
}
把所有這些碎片拼湊起來給你一個回應,ViewPager 是以最小的圖像加載等待時間,並根據你的圖像需求盡可能多的在後台處理能力實現是很好的。
2.加載位圖到GridView的實現
網格列表構造塊 顯示圖片數據集市很有用的,通過GridView組件實現,其中許多圖像可以在屏幕上在任何一個時間隨時出現,如果用戶向上或向下滾動。實現這種控制的時候,你必須確保UI依然流暢,要控制內存的使用和正確的並發處理(由於GridView回收子View)。
開始,這裡是一個標准的GridView實現與ImageView放在Fragment。然後,這似乎是一個完全合理的方法,但你會做的更好?
public class ImageGridFragment extends Fragment implements AdapterView.OnItemClickListener {
    private ImageAdapter mAdapter;

    // A static dataset to back the GridView adapter
    public final static Integer[] imageResIds = new Integer[] {
            R.drawable.sample_image_1, R.drawable.sample_image_2, R.drawable.sample_image_3,
            R.drawable.sample_image_4, R.drawable.sample_image_5, R.drawable.sample_image_6,
            R.drawable.sample_image_7, R.drawable.sample_image_8, R.drawable.sample_image_9};

    // Empty constructor as per Fragment docs
    public ImageGridFragment() {}

    @Override
    public void onCreate(Bundle savedInstanceState) {
        super.onCreate(savedInstanceState);
        mAdapter = new ImageAdapter(getActivity());
    }

    @Override
    public View onCreateView(
            LayoutInflater inflater, ViewGroup container, Bundle savedInstanceState) {
        final View v = inflater.inflate(R.layout.image_grid_fragment, container, false);
        final GridView mGridView = (GridView) v.findViewById(R.id.gridView);
        mGridView.setAdapter(mAdapter);
        mGridView.setOnItemClickListener(this);
        return v;
    }

    @Override
    public void onItemClick(AdapterView parent, View v, int position, long id) {
        final Intent i = new Intent(getActivity(), ImageDetailActivity.class);
        i.putExtra(ImageDetailActivity.EXTRA_IMAGE, position);
        startActivity(i);
    }

    private class ImageAdapter extends BaseAdapter {
        private final Context mContext;

        public ImageAdapter(Context context) {
            super();
            mContext = context;
        }

        @Override
        public int getCount() {
            return imageResIds.length;
        }

        @Override
        public Object getItem(int position) {
            return imageResIds[position];
        }

        @Override
        public long getItemId(int position) {
            return position;
        }

        @Override
        public View getView(int position, View convertView, ViewGroup container) {
            ImageView imageView;
            if (convertView == null) { // if it's not recycled, initialize some attributes
                imageView = new ImageView(mContext);
                imageView.setScaleType(ImageView.ScaleType.CENTER_CROP);
                imageView.setLayoutParams(new GridView.LayoutParams(
                        LayoutParams.MATCH_PARENT, LayoutParams.MATCH_PARENT));
            } else {
                imageView = (ImageView) convertView;
            }
            imageView.setImageResource(imageResIds[position]); // Load image into ImageView
            return imageView;
        }
    }
}
再一次又出現這個問題,圖片在UI線程中設置。雖然這個工作量可能很小,圖像簡單(由於系統資源加載和緩存),如果圖像需要做額外的處理,你的UI卡住。
相同的異步處理和緩存方法在前面已經實現過了。然後,你也需要警惕並發問題,當GridView回收子View的時候。這裡是最新的解決方案:
public class ImageGridFragment extends Fragment implements AdapterView.OnItemClickListener {
    ...

    private class ImageAdapter extends BaseAdapter {
        ...

        @Override
        public View getView(int position, View convertView, ViewGroup container) {
            ...
            loadBitmap(imageResIds[position], imageView)
            return imageView;
        }
    }

    public void loadBitmap(int resId, ImageView imageView) {
        if (cancelPotentialWork(resId, imageView)) {
            final BitmapWorkerTask task = new BitmapWorkerTask(imageView);
            final AsyncDrawable asyncDrawable =
                    new AsyncDrawable(getResources(), mPlaceHolderBitmap, task);
            imageView.setImageDrawable(asyncDrawable);
            task.execute(resId);
        }
    }

    static class AsyncDrawable extends BitmapDrawable {
        private final WeakReference bitmapWorkerTaskReference;

        public AsyncDrawable(Resources res, Bitmap bitmap,
                BitmapWorkerTask bitmapWorkerTask) {
            super(res, bitmap);
            bitmapWorkerTaskReference =
                new WeakReference(bitmapWorkerTask);
        }

        public BitmapWorkerTask getBitmapWorkerTask() {
            return bitmapWorkerTaskReference.get();
        }
    }

    public static boolean cancelPotentialWork(int data, ImageView imageView) {
        final BitmapWorkerTask bitmapWorkerTask = getBitmapWorkerTask(imageView);

        if (bitmapWorkerTask != null) {
            final int bitmapData = bitmapWorkerTask.data;
            if (bitmapData != data) {
                // Cancel previous task
                bitmapWorkerTask.cancel(true);
            } else {
                // The same work is already in progress
                return false;
            }
        }
        // No task associated with the ImageView, or an existing task was cancelled
        return true;
    }

    private static BitmapWorkerTask getBitmapWorkerTask(ImageView imageView) {
       if (imageView != null) {
           final Drawable drawable = imageView.getDrawable();
           if (drawable instanceof AsyncDrawable) {
               final AsyncDrawable asyncDrawable = (AsyncDrawable) drawable;
               return asyncDrawable.getBitmapWorkerTask();
           }
        }
        return null;
    }

    ... // include updated BitmapWorkerTask class
這個實現允許圖像處理和加載是很靈活性,而不會阻礙用戶界面的流暢性。在後台任務中,可以從網絡加載圖像或調整相機的照片,任務處理完成時顯示圖片。
本課中有一個完整的例子,請參閱包含的示例應用程序。
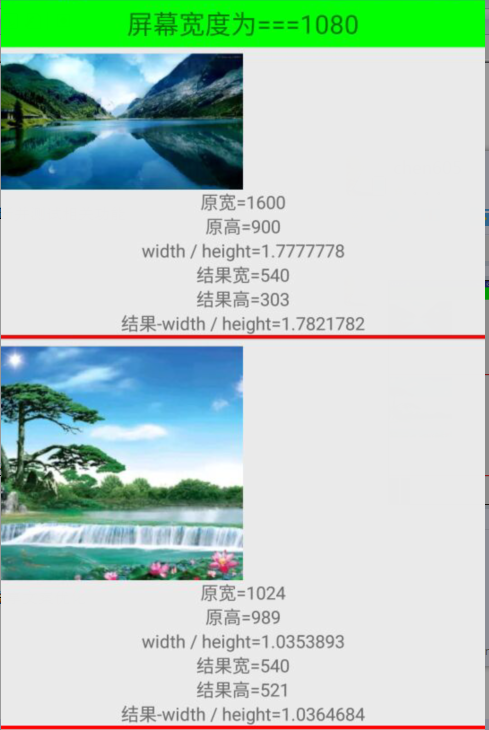 在一定范圍裡,按比例縮放圖片,優化展示效果
在listview中,每個條目有一張圖片,圖片的大小是隨機的,怎麼展示才能美觀。很多人用的方法是,在ImageView中,加屬性 android:adjustVi
 Android Launcher淺析(二)
1,如何修改主菜單圖標的位置?[DESCRIPTION]默認主菜單圖標在中間,如何修改它的位置? Launcher3:DynamicGrid.java文件hotseatA
 Weex之Android端的淺析(一)
基本介紹:體驗了一下weex,發現weex語法還挺簡單,上手容易,發現自己沒什麼前端知識,也能極易上手,出於強烈好奇和業務預研的需要,分析了其Android端的Weex
 Android 馬賽克(Mosaics)效果
前幾天看見開源項目效果好贊,看了下代碼,實現大致就是在原界面之上覆蓋一成自定義的View,獲取到點擊的那個View的內容(Bitmap),然後在覆蓋的那個自定義View的