編輯:關於Android編程
android四大組件之一:BroadcastReceiver 翻譯成中文:廣播接收者。在Android中,Broadcast是一種廣泛運用在應用程序之間傳輸信息的機制。而BroadcastReceiver是對發送出來的Broadcast(廣播)進行過濾、接收、響應的一類組件。
呵呵,作為一個android研發學習者,我們想要學習使用BroadcastReceiver這個組件,當然實踐是最好的方式。下面介紹BroadcastReceiver的幾種使用方式。
靜態注冊分為兩步。
第一步:創建一個繼承BroadcastReceiver的子類,重寫onReceive(Context context,Intent intent)方法。
第二步:在AndroidManifest.xml中用標簽聲明注冊,並在標簽內設置過濾器,指定接收哪些action。
源碼1:MyBroadcastDemo.java
public class MyBroadcastDemo extends BroadcastReceiver{
    @Override
    public void onReceive(Context context, Intent intent) {
        System.out.println([MyBroadcastDemo]onReceive());
    }
}
源碼2:AndroidManifest.xml
// 繼承BroadcastReceiver的類

        //使用過濾器,接收指定Action的廣播
通過上面兩個步驟,我們已經完成了BroadcastReceiver的靜態注冊方式。
接著,我們需要對上述方式進行驗證。發送廣播的實現代碼如下:
源碼3:
public void sendBroadcast(){
    Intent intent = new Intent();
    intent.setAction(cn.com.relaxmeet.GAME_BEGIN); // 設置廣播的Action
    sendBroadcast(intent); // 發送廣播
}
發送廣播,指定廣播的Action,只有在過濾器中添加了,指定Action的廣播接收器,才能通過過濾,接收並響應廣播。上述測試代碼指定的Action是:cn.com.relaxmeet.GAME_BEGIN。文章看再多,不如親手試一試,可以寫一個Demo測試BroadcastReceiver的靜態注冊方式。
動態注冊方式與靜態注冊方式在代碼結構上的區別比較少,我們先展示代碼:
源碼4:
public void registerReceiver(){
    IntentFilter intentFilter = new IntentFilter();// 過濾器
    intentFilter.addAction(cn.com.relaxmeet.GAME_BEGIN); // 指定Action
    mBroadcastReceiver = new MyBroadcastDemo2();
    registerReceiver(mBroadcastReceiver, intentFilter);// 注冊廣播接收器
}

public void unRegisterReceiver(){
    unregisterReceiver(mBroadcastReceiver);// 注銷廣播接收器
}
上述兩個方法,可以分別在onCreate()和onDestroy(),或者onResume()和onPause()中調用。動態注冊廣播後,必須適時的unRegister,否則會有內存洩漏。
展示在onCreate()和onDestroy()中調用注冊接收者和注銷廣播接收者。完整的Activity的代碼如下
源碼5:
public class TranManagerActivity extends Activity{
    private MyBroadcastDemo2 mBroadcastReceiver;

    @Override
    public void onCreate(Bundle savedInstanceState) {
        super.onCreate(savedInstanceState);
        setContentView(R.layout.activity_main);
        registerReceiver();
    }
    public void registerReceiver(){
        IntentFilter intentFilter = new IntentFilter();
        intentFilter.addAction(cn.com.relaxmeet.GAME_BEGIN);
        mBroadcastReceiver = new MyBroadcastDemo2();
        registerReceiver(mBroadcastReceiver, intentFilter);
    }

    // 注銷廣播接收器
    public void unRegisterReceiver(){
        unregisterReceiver(mBroadcastReceiver);
    }

    @Override
    protected void onDestroy() {
        super.onDestroy();
        unRegisterReceiver();
    }
}
2.3.1 兩種注冊方式在代碼結構上就有差異(源碼2和源碼4)所以在接收響應上存在差異。
2.3.2 靜態注冊的廣播,在應用沒有起動的狀態下也能過濾-接收-響應到廣播。而動態注冊的廣播則調用了registerReceiver()方法之後才能接收到廣播。根據這點,所以在有需要注冊接收系統的廣播時,使用靜態注冊方式。
2.3.3 動態注冊方式相比較靜態注冊方式來說比較靈活。使用動態注冊方式使用廣播時,registerReceiver()與unRegisterReceiver()成對存在。如果調用了unRegisterReceiver()後,廣播接收器就接收不到廣播了。
A BroadcastReceiver object is only valid for the duration of the call to onReceive(Context, Intent). Once your code returns from this function, the system considers the object to be finished and no longer active.
一個BroadcastReceiver對象的可用時間是在onReceive()方法中,一旦從這個方法return,系統就認為這個對象已經執行完成,不再處於活躍狀態,也就是說這個對象的生命周期就此結束了。

BroadcastReceiver最主要的方法是onReceive(),讓我看看該方法源碼介紹
源碼6:
 /**
     * This method is called when the BroadcastReceiver is receiving an Intent
     * broadcast.  During this time you can use the other methods on
     * BroadcastReceiver to view/modify the current result values.  This method
     * is always called within the main thread of its process, unless you
     * explicitly asked for it to be scheduled on a different thread using
     * {@link android.content.Context#registerReceiver(BroadcastReceiver,
     * IntentFilter, String, android.os.Handler)}. When it runs on the main
     * thread you should
     * never perform long-running operations in it (there is a timeout of
     * 10 seconds that the system allows before considering the receiver to
     * be blocked and a candidate to be killed). You cannot launch a popup dialog
     * in your implementation of onReceive().
     *
     *
If this BroadcastReceiver was launched through a
The Intent filters used in {@link android.content.Context#registerReceiver} * and in application manifests are not guaranteed to be exclusive. They * are hints to the operating system about how to find suitable recipients. It is * possible for senders to force delivery to specific recipients, bypassing filter * resolution. For this reason, {@link #onReceive(Context, Intent) onReceive()} * implementations should respond only to known actions, ignoring any unexpected * Intents that they may receive. * * @param context The Context in which the receiver is running. * @param intent The Intent being received. */ public abstract void onReceive(Context context, Intent intent);
翻譯與個人理解:
[1,什麼時候該方法被調用] 當BroadcastReceiver接收到一個Intent的廣播時,該方法會被調用。[2,可以在該方法中做什麼] 我們可以在這個方法中可以使用其他方法顯示或者修改數據。[3,不能在該方法中做什麼]通常BroadcastReceiver的onReceive()方法是在主線程(UI主線程)中被調用,因為UI主線程的特性,在這個方法中,我們不能進行長時間操作,否則會產生ANR異常(如:網絡請求)。官方介紹說,該方法有10s的生命周期時間,所以類似啟動一個popup dialog這樣的操作,在onReceive()方法中是不允許使用的。[4,其他條件] BroadcastReceiver只接收已知的action。
步驟1:添加權限
步驟2:指定BroadcastReceiver添加action
步驟3:onReceive()方法篩選action,解析intent中攜帶的數據
public class MyBroadcastDemo2 extends BroadcastReceiver {
    static final String SMS_ACTION = android.provider.Telephony.SMS_RECEIVED;

    @Override
    public void onReceive(Context context, Intent intent) {
        if (SMS_ACTION.equals(intent.getAction())) {
            Object [] pdus= (Object[]) intent.getExtras().get(pdus);
            for(Object pdu:pdus){
                SmsMessage smsMessage = SmsMessage.createFromPdu((byte [])pdu);
                String sender = smsMessage.getDisplayOriginatingAddress();
                String content = smsMessage.getMessageBody();
                long date = smsMessage.getTimestampMillis();
                // 攔截短信
                if (123456.equals(sender)) {
                    abortBroadcast();
                }
                //TODO 進行其他操作
            }
        }
    }
}
步驟1:在AndroidManifest.xml文件中添加權限
步驟2:添加廣播接收Action
步驟3:實現onReceive方法
    public void onReceive(Context context, Intent intent) {
        final String action = intent.getAction();
        // public static final java.lang.String CONNECTIVITY_ACTION = android.net.conn.CONNECTIVITY_CHANGE;
        if (!ConnectivityManager.CONNECTIVITY_ACTION.equals(action){
            return;
        }
        boolean noConnection = intent.getBooleanExtra(
                ConnectivityManager.EXTRA_NO_CONNECTIVITY, false);
        // TODO
    }
附帶:網絡判斷幫助類
1)判斷是否網絡連接
public boolean isNetworkConnected(Context context) {
     if (context != null) {
         ConnectivityManager mConnectivityManager = (ConnectivityManager) context
                 .getSystemService(Context.CONNECTIVITY_SERVICE);
         NetworkInfo mNetworkInfo = mConnectivityManager.getActiveNetworkInfo();
         if (mNetworkInfo != null) {
             return mNetworkInfo.isAvailable();
         }
     }
     return false;
 }
2)判斷是否為WI-FI
   public boolean isWifiConnected(Context context) {
     if (context != null) {
         ConnectivityManager mConnectivityManager = (ConnectivityManager) context
                 .getSystemService(Context.CONNECTIVITY_SERVICE);
         NetworkInfo mWiFiNetworkInfo = mConnectivityManager
                 .getNetworkInfo(ConnectivityManager.TYPE_WIFI);
         if (mWiFiNetworkInfo != null) {
             return mWiFiNetworkInfo.isAvailable();
         }
     }
     return false;
 }
3)判斷是否為手機流量
public boolean isMobileConnected(Context context) {
     if (context != null) {
         ConnectivityManager mConnectivityManager = (ConnectivityManager) context
                 .getSystemService(Context.CONNECTIVITY_SERVICE);
         NetworkInfo mMobileNetworkInfo = mConnectivityManager
                 .getNetworkInfo(ConnectivityManager.TYPE_MOBILE);
         if (mMobileNetworkInfo != null) {
             return mMobileNetworkInfo.isAvailable();
         }
     }
     return false;
 }
4)獲取當前網絡連接類型
 public static int getConnectedType(Context context) {
     if (context != null) {
         ConnectivityManager mConnectivityManager = (ConnectivityManager) context
                 .getSystemService(Context.CONNECTIVITY_SERVICE);
         NetworkInfo mNetworkInfo = mConnectivityManager.getActiveNetworkInfo();
         if (mNetworkInfo != null && mNetworkInfo.isAvailable()) {
             return mNetworkInfo.getType();
         }
     }
     return -1;
 }
步驟1: 在AndroidManifest.xml文件中添加權限
步驟2:添加廣播可接收action
上手上面我添加了接收系統發送電量過低,彈出對話框的廣播信號。
步驟3:實現onReceive()方法
public class MyBroadcastDemo extends BroadcastReceiver{
    @Override
    public void onReceive(Context context, Intent intent) {
        if (Intent.ACTION_BATTERY_CHANGED.equals(intent.getAction())){
            // 得到系統當前電量
            int level = intent.getIntExtra(level, 0);
            // 取得系統總電量
            int total = intent.getIntExtra(scale, 100);
            //TODO 其他處理
        }
    }
}
步驟1:在AndroidManifest.xml中添加權限
步驟2:添加BroadcastReceiver指定ACTION
步驟3:重寫onReceive()方法
public class MyBroadcastDemo extends BroadcastReceiver{
    @Override
    public void onReceive(Context context, Intent intent) {
    // public static final String ACTION_BOOT_COMPLETED = android.intent.action.BOOT_COMPLETED;
        if (Intent.ACTION_BOOT_COMPLETED.equals(intent.getAction())) {
            // 開機啟動的Activity
            Intent activityIntent = new Intent(context, StartOnBootActivity.class);
            activityIntent.addFlags(Intent.FLAG_ACTIVITY_NEW_TASK);
            // 啟動Activity
            context.startActivity(activityIntent);

            // 開機啟動的Service
            Intent serviceIntent = new Intent(context, StartOnBootService.class);
            // 啟動Service
            context.startService(serviceIntent);
        }
    }
}
上面幾個例子僅用於學習,不要做壞事。
在BroadcastReceiver實際的使用中,我們可能不希望其他應用能夠接收到我們應用發出的廣播。同樣,我們的廣播接收器也不希望接收不明廣播信息。下面幾種場景需要我們考慮。
場景1:當你在應用的manifest中注冊一個Receiver時,你會在intent-filters中添加一個action,其他應用可以通過發送一個pass這個filters,發送一下信息給你的廣播接收器。這樣就會導致不安全。
解決方案可以是:在receiver中添加android:exported=false
場景2:當你sendBroadcast(Intent),一般情況其他應用能夠接收到這些廣播信息,為了防止其他應用能夠接收到廣播信息,你可能會添加一些權限描述,比方說設置指定的包名Intent.setPackage
    public void sendBroadcast(){
        Intent intent = new Intent();
        intent.setAction(cn.com.relaxmeet.GAME_BEGIN); // 設置廣播的Action
        intent.setPackage(cn.com.relaxmeet);
        sendBroadcast(intent); // 發送廣播
    }
如果使用LocalBroadcastManager,上述5.1的幾種場景的問題將不存在。Intent的廣播將只在當前進程中傳遞。
使用該方案的優勢:1,數據不會離開當前應用,不要擔心數據被其他應用接收。2,這個廣播接收器也接收不到其他應用發送的廣播信息。3,這比全局廣播的效率高
5.2.1 使用方式
public class TranManagerActivity extends Activity{
    private MyBroadcastDemo2 mBroadcastReceiver;
    private LocalBroadcastManager lbm;

    @Override
    public void onCreate(Bundle savedInstanceState) {
        super.onCreate(savedInstanceState);
        setContentView(R.layout.activity_main);
        registerReceiver();
    }
    public void registerReceiver(){
        IntentFilter intentFilter = new IntentFilter();
        intentFilter.addAction(cn.com.relaxmeet.GAME_BEGIN);
        mBroadcastReceiver = new MyBroadcastDemo2();
        lbm = LocalBroadcastManager.getInstance(getApplicationContext());
        lbm.registerReceiver(mBroadcastReceiver, intentFilter);
    }

    public void unRegisterReceiver(){
        lbm.unregisterReceiver(mBroadcastReceiver);
    }

    @Override
    protected void onDestroy() {
        super.onDestroy();
        unRegisterReceiver();
    }
}
發送廣播:
    public void sendBroadcast(){
        LocalBroadcastManager lbm = LocalBroadcastManager.getInstance(getApplicationContext());
        Intent intent = new Intent();
        intent.setAction(cn.com.relaxmeet.GAME_BEGIN);
        lbm.sendBroadcast(intent);
    }
優點:1,按優先級的不同,優先Receiver可對數據進行處理,廣播可傳遞到下一個Receiver
2,通過abortBroadcast可終止廣播的傳播
缺點:效率低
系統的短信接收廣播是一個有序廣播,我們可以監聽短信接收廣播,可以做垃圾短信攔截。
發送廣播的方法:sendOrderedBroadcast()
優先接收到Broadcast的Receiver可通過setResultExtra()將數據存入Broadcast中,下一個Receiver可以通過Bundle bundle = getResultExtras(true)方法獲取上一個Receiver傳來的數據。
測試結果預測:點擊按鈕,兩個Receiver都能接收到同一條廣播,在logcat中打印出數據。Receiver的優先順序,Receiver2先、Receiver1後。Receiver1接收到Receiver傳遞來的字符串信息,“來自Receiver2的問候:你好。
測試代碼:
代碼7:AndroidManifest.xml
代碼8:MainActivity.java
public class MainActivity extends Activity implements View.OnClickListener {
    private Button mBtnRead;

    @Override
    protected void onCreate(Bundle savedInstanceState) {
        super.onCreate(savedInstanceState);
        setContentView(R.layout.activity_main);

        mBtnRead = (Button) findViewById(R.id.btn_read);
        mBtnRead.setOnClickListener(this);
    }

    @Override
    public void onClick(View v) {
        sendBroadcast();
    }

    public void sendBroadcast(){
        Intent intent = new Intent();
        intent.setAction(cn.com.relaxmeet.GAME_BEGIN);
        Bundle bundle = new Bundle();
        bundle.putString(a,aaaaaaa);
        intent.putExtras(bundle);
        sendOrderedBroadcast(intent,null);
    }
}
代碼9:MyBroadcastDemo.java
public class MyBroadcastDemo extends BroadcastReceiver{
    @Override
    public void onReceive(Context context, Intent intent) {
        System.out.println([MyBroadcastDemo]);

        Bundle bundle = getResultExtras(true);

        System.out.println(a= + bundle.getString(a)+,b= + bundle.getString(b));
    }
}
代碼10:MyBroadcastDemo2.java
public class MyBroadcastDemo2 extends BroadcastReceiver {

    @Override
    public void onReceive(Context context, Intent intent) {
        System.out.println([MyBroadcastDemo2]);

        Bundle bundle = intent.getExtras();
        bundle.putString(b,bbbbbbb);

        System.out.println(a= + bundle.getString(a));
        setResultExtras(bundle);
        // 切斷廣播
//        abortBroadcast();
    }
}
測試結果:

 Android自動化測試--Espresso框架使用
且說正文之前,還是先說說Android單元測試的意義或者說為什麼我們要進行Android的單元測試?為什麼要進行單元測試?單元測試可以幫助我們程序員將bug消滅在萌芽期,
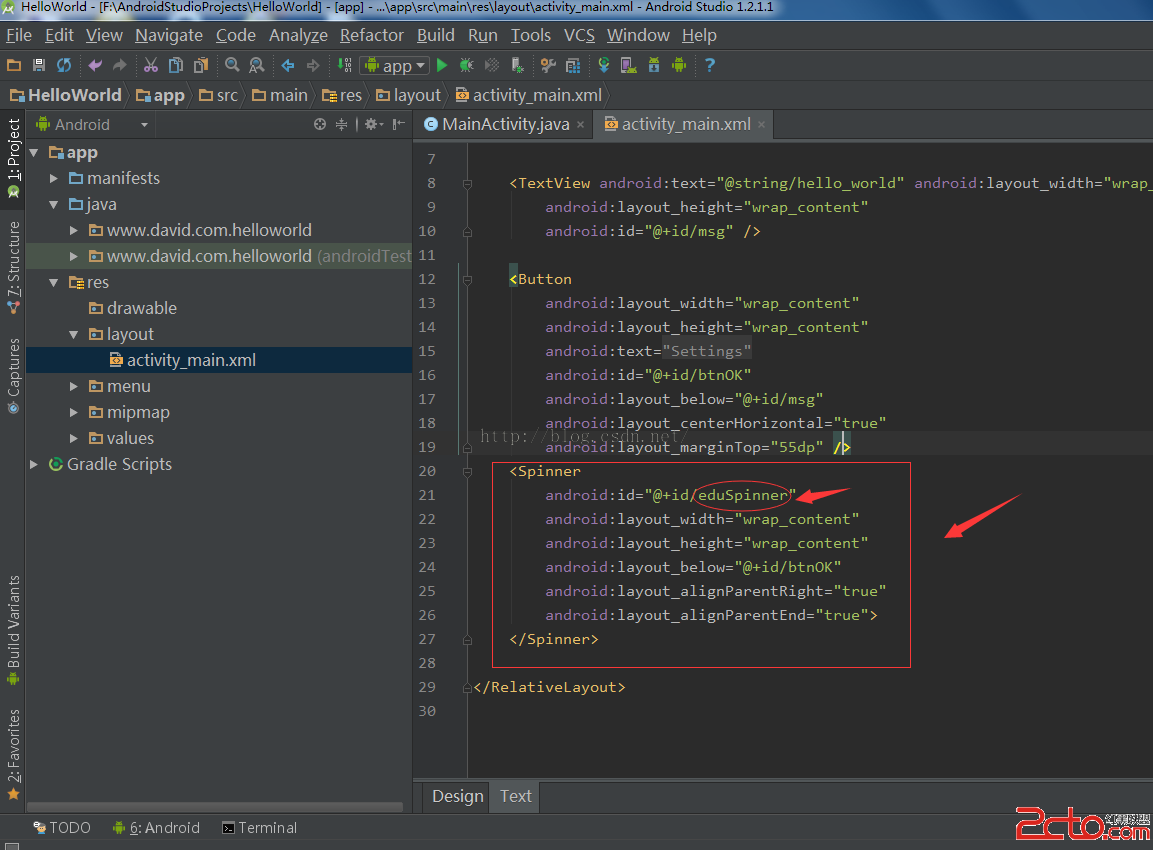 Android Studio中Spinner控件的數據綁定實現
這裡介紹使用集合在程序中為Spinner控件設定數據源,步驟如下:1、在Android Studio界面中,選擇“Project”,然後展開&qu
 Android Demo---如何敲出圓角的Button+圓角頭像
經常玩兒App的小伙伴都知道,APP上面有很多按鈕都是圓角的,圓形給人感覺飽滿,富有張力,不知道設計圓角按鈕的小伙伴是不是和小編有著相同的想法`(*∩_∩
 Android開發之利用Activity實現Dialog對話框
前言在Android中經常要使用Dialog來實現一些提示以及一些特殊的效果,而且樣式也不一樣,每次都得查一大堆資料,還不一定能解決。對話框是個好東西,創建簡單有實用。當