編輯:關於Android編程
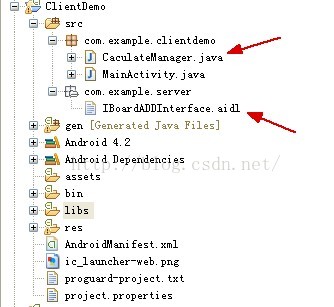
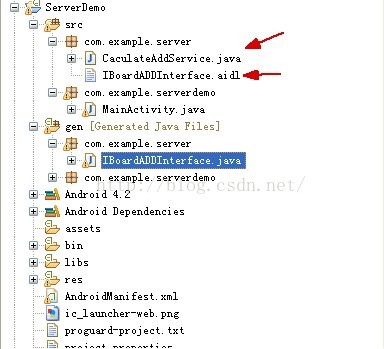
前段時間研究了不少android二次開發,其中有一種方法就是通過aidl通信,留接口提供給外面二次開發。從這裡也可以看出:aidl通信是兩個應用程序之間的進程通信了。在這篇博客中,主要寫了兩個應用程序,一個是serverdemo,可以稱為服務端,也是提供接口的應用程序,在這裡面我寫了一個加法計算。二是客戶端:clientdemo,在這個程序中調用了加法計算接口,把值傳到serverdemo進行加法計算,返回結果,進行顯示。
aidl是AndroidInterface definition language的縮寫,它是一種android內部進程通信接口的描述語言,通過它我們可以定義進程間的通信接口;icp:interprocess communication :內部進程通信。
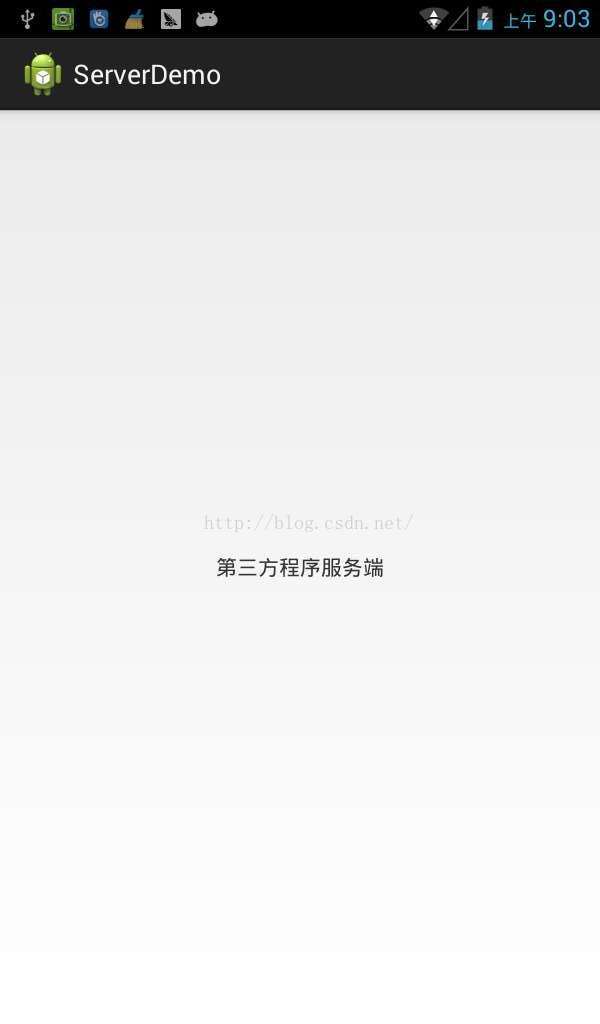
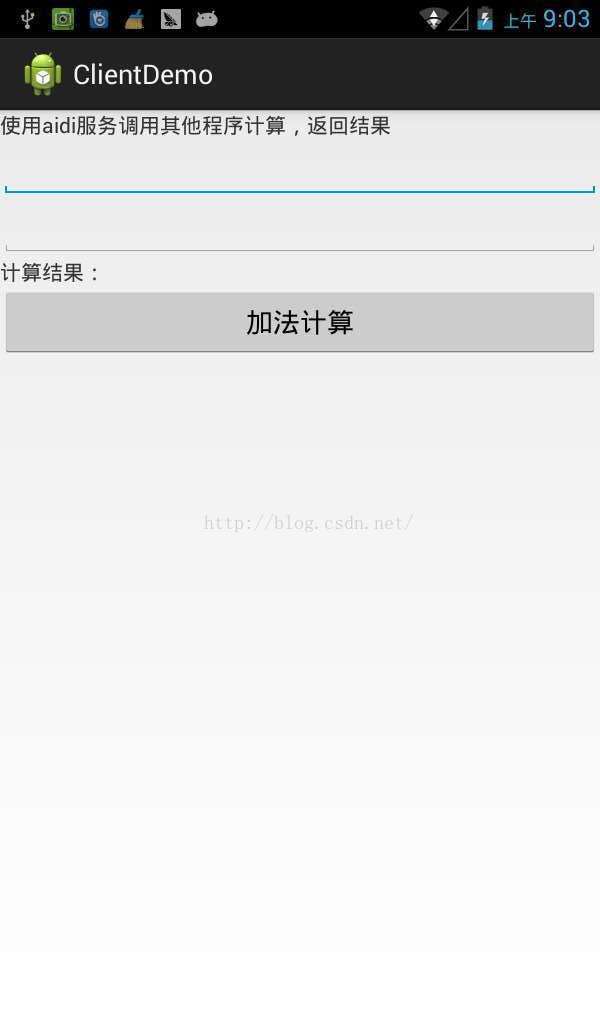
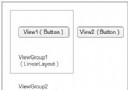
從上面圖中看以大概看出,服務端布局什麼都沒有,不過這裡面有加法計算的服務。而客戶端有兩個輸入框輸入兩個值,點擊計算。
保存你的aidl文件,這個只要是在eclipse中開發,你的adt插件會像資源文件一樣把aidl文件編譯成java代碼生成在gen文件夾下,不用手動去編譯:編譯生成AIDLService.java如我例子中代碼。
IBoardADDInterface.aidl
package com.example.server;
import android.os.Bundle;

/***
 * System private API for talking with the caculate service.
 *
 * {@hide}
 */
interface IBoardADDInterface
{
    int add(int nValue1,int nValue2);
}
自動把aidl文件編譯成java代碼生成在gen文件夾下IBoardADDInterface的接口代碼
/*
 * This file is auto-generated.  DO NOT MODIFY.
 * Original file: C:\\Users\\southgnssliyc\\Desktop\\android aidl\\ServerDemo\\src\\com\\example\\server\\IBoardADDInterface.aidl
 */
package com.example.server;
/***
 * System private API for talking with the caculate service.
 *
 * {@hide}
 */
public interface IBoardADDInterface extends android.os.IInterface
{
/** Local-side IPC implementation stub class. */
public static abstract class Stub extends android.os.Binder implements com.example.server.IBoardADDInterface
{
private static final java.lang.String DESCRIPTOR = "com.example.server.IBoardADDInterface";
/** Construct the stub at attach it to the interface. */
public Stub()
{
this.attachInterface(this, DESCRIPTOR);
}
/**
 * Cast an IBinder object into an com.example.server.IBoardADDInterface interface,
 * generating a proxy if needed.
 */
public static com.example.server.IBoardADDInterface asInterface(android.os.IBinder obj)
{
if ((obj==null)) {
return null;
}
android.os.IInterface iin = obj.queryLocalInterface(DESCRIPTOR);
if (((iin!=null)&&(iin instanceof com.example.server.IBoardADDInterface))) {
return ((com.example.server.IBoardADDInterface)iin);
}
return new com.example.server.IBoardADDInterface.Stub.Proxy(obj);
}
@Override public android.os.IBinder asBinder()
{
return this;
}
@Override public boolean onTransact(int code, android.os.Parcel data, android.os.Parcel reply, int flags) throws android.os.RemoteException
{
switch (code)
{
case INTERFACE_TRANSACTION:
{
reply.writeString(DESCRIPTOR);
return true;
}
case TRANSACTION_add:
{
data.enforceInterface(DESCRIPTOR);
int _arg0;
_arg0 = data.readInt();
int _arg1;
_arg1 = data.readInt();
int _result = this.add(_arg0, _arg1);
reply.writeNoException();
reply.writeInt(_result);
return true;
}
}
return super.onTransact(code, data, reply, flags);
}
private static class Proxy implements com.example.server.IBoardADDInterface
{
private android.os.IBinder mRemote;
Proxy(android.os.IBinder remote)
{
mRemote = remote;
}
@Override public android.os.IBinder asBinder()
{
return mRemote;
}
public java.lang.String getInterfaceDescriptor()
{
return DESCRIPTOR;
}
@Override public int add(int nValue1, int nValue2) throws android.os.RemoteException
{
android.os.Parcel _data = android.os.Parcel.obtain();
android.os.Parcel _reply = android.os.Parcel.obtain();
int _result;
try {
_data.writeInterfaceToken(DESCRIPTOR);
_data.writeInt(nValue1);
_data.writeInt(nValue2);
mRemote.transact(Stub.TRANSACTION_add, _data, _reply, 0);
_reply.readException();
_result = _reply.readInt();
}
finally {
_reply.recycle();
_data.recycle();
}
return _result;
}
}
static final int TRANSACTION_add = (android.os.IBinder.FIRST_CALL_TRANSACTION + 0);
}
public int add(int nValue1, int nValue2) throws android.os.RemoteException;
}
這代碼一看就是自動生成的。
package com.example.server;

import android.app.Service;
import android.content.Intent;
import android.os.IBinder;
import android.os.RemoteException;
import android.util.Log;

/**
 * 服務端的計算加法實現類
 * @author mmsx
 *
 */
public class CaculateAddService extends Service {
	//加法計算的服務
	final String CACULATE_ADD = "COM.CACULATE.ADD";

	//找到自定義服務
	@Override
	public IBinder onBind(Intent intent) {
		if(intent.getAction().equals(CACULATE_ADD))
		{
			return mIBinder_CACULATE_ADD;
		}
		return null;
	}

	@Override
	public boolean onUnbind(Intent intent) {
		return super.onUnbind(intent);
	}

	@Override
	public void onDestroy() {
		super.onDestroy();
	}

	@Override
	public void onCreate() {
		super.onCreate();
	}

	//aidl的接口實現
	private final IBinder mIBinder_CACULATE_ADD = new IBoardADDInterface.Stub()
	{

		@Override
		public int add(int nValue1, int nValue2) throws RemoteException {
			Log.i("Show", String.valueOf(nValue1) + ",,," +String.valueOf(nValue2));
			return nValue1 + nValue2;
		}

	};
}
既然你寫了一個service,那麼就要在AndroidManifest.xml中添加注冊
這個名稱是自定義的:COM.CACULATE.ADD。service的路徑com.example.server.CaculateAddService。
到這裡就寫完了這個服務端的應用程序,是不是很簡單。activity都沒寫什麼,因為只是用到裡面的一個service和aidl。
package com.example.server;
import android.os.Bundle;

/***
 * System private API for talking with the caculate service.
 *
 * {@hide}
 */
interface IBoardADDInterface
{
    int add(int nValue1,int nValue2);
}
自動編譯生成的代碼就不貼了。
package com.example.clientdemo;

import com.example.server.IBoardADDInterface;

import android.content.ComponentName;
import android.content.Context;
import android.content.Intent;
import android.content.ServiceConnection;
import android.os.IBinder;

/**
 * 客戶端的服務計算管理類
 * @author mmsx
 *
 */
public class CaculateManager {
	//加法計算的服務
	final String CACULATE_ADD = "COM.CACULATE.ADD";

	//aidi接口服務
	IBoardADDInterface mService = null;

    /***
     * 服務綁定
     */
    public void bindService(Context context) {
    	mContext = context;
    	context.bindService(new Intent(CACULATE_ADD),
				serviceConnection, Context.BIND_AUTO_CREATE);
    }

    Context mContext = null;

    /***
    * 解除服務綁定
    */
    public void unbindService()
    {
    	if (mContext != null) {
    		mContext.unbindService(serviceConnection);
		}
    }

    /**
     * 加法計算
     * @param nValue1
     * @param nValue2
     * @return 結果
     */
    public int caculateAdd(int nValue1,int nValue2)
    {
		if (mService == null)
			return 0;

		try {
			return mService.add(nValue1, nValue2);
		} catch (Exception e) {
			return 0;
		}
    }


    //服務和aidl接口綁定
    private ServiceConnection serviceConnection = new ServiceConnection() {

		@Override
		public void onServiceDisconnected(ComponentName name) {
			mService = null;
		}

		@Override
		public void onServiceConnected(ComponentName name, IBinder service) {
			mService = IBoardADDInterface.Stub.asInterface(service);
		}
	};
}
這裡面有找到服務,解除服務。方法實現的接口。
package com.example.clientdemo;

import android.os.Bundle;
import android.app.Activity;
import android.view.View;
import android.view.View.OnClickListener;
import android.widget.EditText;
import android.widget.TextView;

public class MainActivity extends Activity {
	CaculateManager caculateManager = new CaculateManager();
	@Override
	protected void onCreate(Bundle savedInstanceState) {
		super.onCreate(savedInstanceState);
		setContentView(R.layout.activity_main);

		caculateManager.bindService(this);
		findViewById(R.id.button1).setOnClickListener(new OnClickListener() {

			@Override
			public void onClick(View v) {
				EditText editText1 = (EditText)findViewById(R.id.editText1);
				EditText editText2 = (EditText)findViewById(R.id.editText2);
				int nValue1 = Integer.parseInt(editText1.getText().toString().trim());
				int nValue2 = Integer.parseInt(editText2.getText().toString().trim());
				int nResult = caculateManager.caculateAdd(nValue1, nValue2);

				TextView textView = (TextView)findViewById(R.id.textView1);
				textView.setText("計算結果:" + String.valueOf(nResult));
			}
		});
	}

}
xml代碼很簡單
<linearlayout xmlns:android="http://schemas.android.com/apk/res/android" xmlns:tools="http://schemas.android.com/tools" android:id="@+id/LinearLayout1" android:layout_width="match_parent" android:layout_height="match_parent" android:orientation="vertical" tools:context=".MainActivity">

    <textview android:layout_width="wrap_content" android:layout_height="wrap_content" android:text="使用aidi服務調用其他程序計算,返回結果">

    <edittext android:id="@+id/editText1" android:layout_width="match_parent" android:layout_height="wrap_content" android:ems="10" android:inputtype="numberDecimal">

        <requestfocus>
    </requestfocus></edittext>

    <edittext android:id="@+id/editText2" android:layout_width="match_parent" android:layout_height="wrap_content" android:ems="10" android:inputtype="numberDecimal">

    <textview android:id="@+id/textView1" android:layout_width="wrap_content" android:layout_height="wrap_content" android:text="計算結果:"><button android:id="@+id/button1" android:layout_width="match_parent" android:layout_height="wrap_content" android:text="加法計算"></button></textview></edittext></textview></linearlayout>
 Android 事件分發機制探析
一基礎知識 android的事件處理分為3步。 1)public booleandispatchTouchEvent(MotionEvent ev) 這個方法用來分發
 [Android] 通過GridView仿微信動態添加本地圖片示例代碼
前面文章講述的都是隨手拍中圖像處理的操作,此篇文章主要講述GridView控件實現添加本地圖片並顯示.主要是關於GridView控件的基本操作,通常可以通過自定義繼承Ba
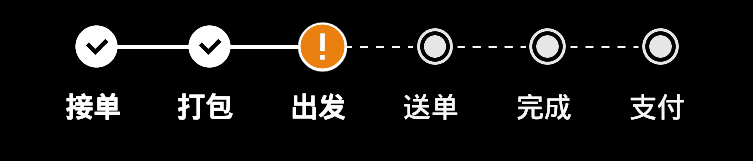 StepView(步驟流程的view)
StepView(步驟流程的view)效果圖如下:該控件可以支持這種步驟的操作view展示,像快遞app的流程。1.首先有在xml布局: 2 .一個自定義的Hori
 Android Path繪制貝塞爾曲線實現QQ拖拽泡泡
這兩天學習了使用Path繪制貝塞爾曲線相關,然後自己動手做了一個類似QQ未讀消息可拖拽的小氣泡,效果圖如下:最終效果圖接下來一步一步的實現整個過程。基本原理其實就是使用P