編輯:關於Android編程
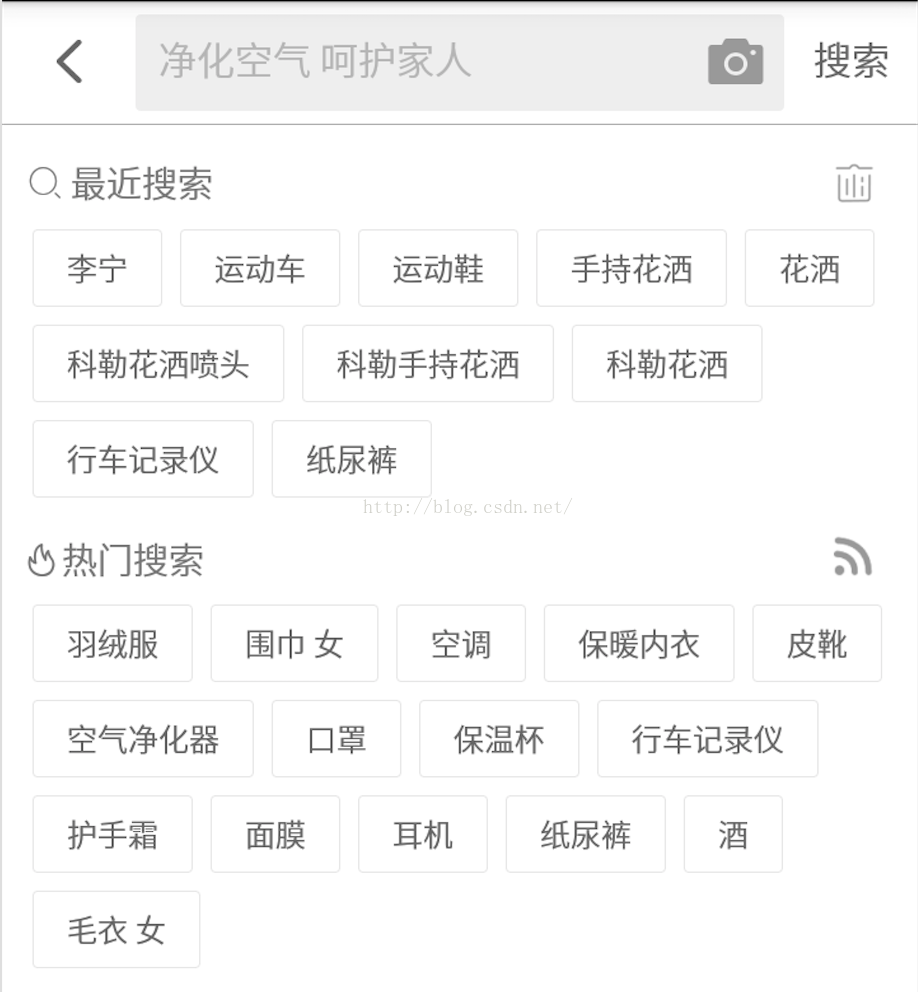
最近在學習AIOSO(Alibaba Internal Open Source Organization,即阿裡巴巴內部開源組織) 的一個子項目MMCherryUI,這是一個流式布局,可以在運行時做動態改變子元素的個數(增刪查改), 並內建動畫效果,先貼一張效果圖出來
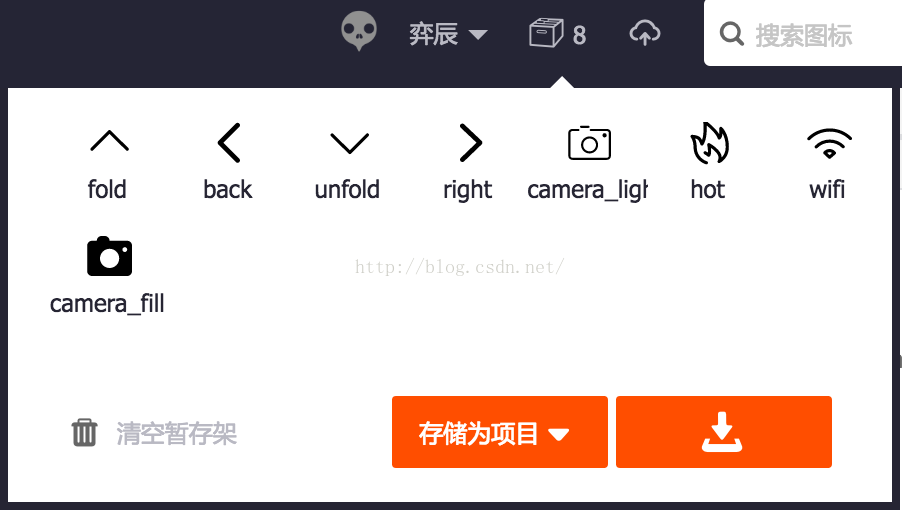
我們學習代碼,最重要的就是動手實踐。於是,我想自己去實現一個類似上面效果的頁面。首先,我需要頁面上的幾張 icon 圖標,去哪裡找?上 iconfont.cn 找,裡面的 icon 最全了。這時候我腦子裡浮現了一個問題,我是使用 png 格式的 icon 圖片還是使用 iconfont 呢?如果使用 png 我還得考慮圖片的分辨率(當然,我完全可以不必考慮這個問題,畢竟我只是為了學習而去寫的這個頁面),但強迫症迫使我最終選擇了 iconfont,因為 iconfont 可以不用考慮分辨率等適配問題。說到這裡,終於進入正題了 -_- 。
iconfont 其實說白了就是一種特殊的字體,那麼問題就轉變為怎麼在 Android 上使用自定義字體的問題了。以 iconfont 為例,一般你需要下面幾個步驟:
准備字體文件
在 iconfont.cn 上選好圖片,然後打包下載,解壓文件,得到字體文件 iconfont.ttf。
導入字體文件
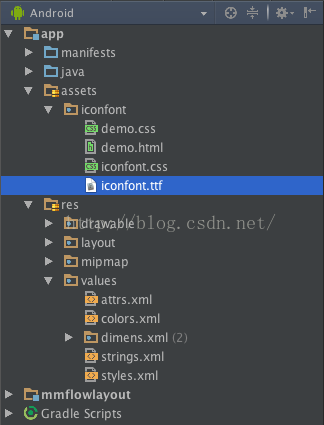
在工程 assets 目錄下創建一個文件夾,名字隨便取,然後把字體文件放進去。
使用字體
打開工程目錄下 res/values/strings.xml 文件,添加 string
然後打開 Activity 對應的布局文件,比如activity_main.xml,添加 string 值到 TextView 中,
TextView
android:id="@+id/like"
android:layout_width="wrap_content"
android:layout_height="wrap_content"
android:text="@string/icons" />
import android.graphics.Typeface;
...
protected void onCreate(Bundle savedInstanceState) {
super.onCreate(savedInstanceState);
// 加載布局文件
setContentView(R.layout.activity_main);
// 加載字體文件
Typeface iconfont = Typeface.createFromAsset(getAssets(), "iconfont/iconfont.ttf");
// 獲取 textview 實例
TextView textview = (TextView)findViewById(R.id.like);
// 設置 typeface, 就是字體文件
textview.setTypeface(iconfont);
}
...
在單個 View 的情況下,上面的步驟看起來也沒有那麼可怕,但是在很多 TextView、Button 等文本組件的情況下,這就是一種體力活了。
舉例:
我有這麼一個需求,首頁底部欄需要用到四個 iconfont 的圖標,

Typeface iconfont = Typeface.createFromAsset(getAssets(), "iconfont/iconfont.ttf");
TextView textview1 = (TextView)findViewById(R.id.icon_1);
textview1.setTypeface(iconfont);
TextView textview2 = (TextView)findViewById(R.id.icon_2);
textview2.setTypeface(iconfont);
TextView textview3 = (TextView)findViewById(R.id.icon_3);
textview3.setTypeface(iconfont);
TextView textview4 = (TextView)findViewById(R.id.icon_4);
textview4.setTypeface(iconfont);
這只是同一個頁面上有四個 iconfont 的情況,如果是多頁面多處地方使用到 iconfont,那就可怕了,難以接受。身為程序員,除了會寫代碼,還要講究效率和質量。我開始在想,是否有更好的方案來使用 iconfont。
由於 iconfont 屬於一種字體,所以我開始從自定義字體的方向上去探索。首先想到的就是自定義 TextView 組件,這也是我最終選擇的方案。但在此之前,我想跟大家分享一個國外的方案,他不考慮界面的布局層級,通過遍歷當前頁面上所有基於 TextView 的文本組件來設置字體。
/**
* Apply specified font for all text views (including nested ones) in the specified
* root view.
*
* @param context
*            Context to fetch font asset.
* @param root
*            Root view that should have specified font for all it's nested text
*            views.
* @param fontPath
*            Font path related to the assets folder (e.g. "fonts/YourFontName.ttf").
*/
public static void applyFont(final Context context, final View root, final String fontName) {
    try {
        if (root instanceof ViewGroup) {
            ViewGroup viewGroup = (ViewGroup) root;
            for (int i = 0; i < viewGroup.getChildCount(); i++)
                applyFont(context, viewGroup.getChildAt(i), fontName);
        } else if (root instanceof TextView)
            ((TextView) root).setTypeface(Typeface.createFromAsset(context.getAssets(), fontName));
    } catch (Exception e) {
        Log.e(TAG, String.format("Error occured when trying to apply %s font for %s view", fontName, root));
        e.printStackTrace();
    }
}
使用方法:
FontHelper.applyFont(context, findViewById(R.id.activity_root), "fonts/YourCustomFont.ttf");
一行代碼就行了,傳入上下文,根布局和字體文件路徑三個參數,非常簡單粗暴。剛看到這個方法時,我有些驚訝,之所以在這裡拿出來跟大家分享,並不是想說這種方法有多好,而是因為我被作者的這種活躍的思維所震撼,這很值得我們去學習,不局限於傳統,大膽勇於創新。
好了,不再廢話了,說說我的方案——自定義 TextView。
我創建了一個 View,繼承系統的 TextView,將其命名為 IconFontTextView。
然後在 res/values 目錄下,新建一個 attrs.xml 的資源文件,如果已經存在,就不需要重復創建了。這是我的 attrs.xml 的內容:
我定義了兩個屬性,value 填寫 iconfont 圖標對應的值,fontFile 是字體文件路徑。
然後在 IconFontTextView 裡添加兩個構造方法
public IconFontTextView(Context context) {
      super(context);
  }

  public IconFontTextView(Context context, AttributeSet attrs) {
      super(context, attrs);
  }
public IconFontTextView(Context context, AttributeSet attrs) {
          super(context, attrs);
          if (attrs == null) {
              return;
          }
          TypedArray a = context.obtainStyledAttributes(attrs, R.styleable.IconFontTextView);
          final int N = a.getIndexCount();
          for (int i = 0; i < N; i++) {
              int attr = a.getIndex(i);
              switch (attr) {
                  case R.styleable.IconFontTextView_value:
                      value = a.getString(attr);
                      setText(value);
                      Log.d(TAG, "value : " + value);
                      break;
                  case R.styleable.IconFontTextView_fontFile:
                      fontFile = a.getString(attr);
                      Log.d(TAG, "fontFile : " + fontFile);
                      try {
                          Typeface typeface = Typeface.createFromAsset(context.getAssets(), fontFile);
                          setTypeface(typeface);
                      } catch (Throwable e) {

                      }
                      break;
              }
          }
          a.recycle();
      }
其實很簡單,這樣我們就完成了自定義 IconFontTextView 了,接下來講下怎麼使用。在布局文件中,跟普通的 TextView 一樣,添加 IconFontTextVIew,記得在根布局添加這一行 xmlns:app="http://schemas.android.com/apk/res-auto" ,這樣才可以使用自定義屬性。緊接著,指定字體文件 fontFile="iconfont/iconfont.ttf",告訴 IconFontTextView 字體文件路徑位於 assets 目錄下的 iconfont/iconfont.ttf,並給它一個 iconfont 的值,
app:value="" app:value="@string/arrow";這個值對應的圖標是一個箭頭,

這樣直接跑程序就可以看到效果了,是不是方便了很多?因為一般我們不使用 TextView 來監聽事件,更多的是讓它去負責 View 層的一些展示,而且這裡我們也不再需要在 java 代碼中去指定加載字體文件,所以根本不需要再去 findViewById 獲取實例了,所以可以省去下面的一段代碼,
Typeface iconfont = Typeface.createFromAsset(getAssets(), "iconfont/iconfont.ttf");
TextView textview1 = (TextView)findViewById(R.id.icon_1);
textview1.setTypeface(iconfont);
TextView textview2 = (TextView)findViewById(R.id.icon_2);
textview2.setTypeface(iconfont);
...
IconFontTextView 我們可以抽出來當做一個組件使用,這樣以後使用 iconfont 時,將它當做普通的 TextView 來使用,並指定字體文件和圖標值,就可以了。
也許你有這樣的需求,我想要在運行時去動態的設置 IconFont 的值。就拿我上面那底部欄四個 tab 來說吧,當我選中其中一個 tab 時,我想要它顯示選中狀態,如果只是改變顏色那就方便多了,如果在改變顏色的同時,還需要改變圖標呢?你可能會說,這個問題很容易解決啊,因為 IconFontTextView 是 TextView 的子類,我重新給它一個 value 不就好了嗎?是的,可是當你通過 setText("") 後你會發現,圖標成這樣了

這是為什麼呢?我就遇到了這個問題,我還發現,當我在 res/values/strings.xml 文件上添加 string 再來使用時卻不會出現這個問題,像下面這樣就什麼問題都沒有:
setText(getString(R.string.wifi));
難道 getString 裡面做了什麼處理嗎?看了源碼,沒發現什麼特別的地方。那好吧,我直接通過 log 打印出來,看看 getString 返回了什麼。
我在 string.xml 上添加了
然後在 Activity 上添加下面兩行測試代碼,
Log.d("tag", getString(R.string.iconfont));
Log.d("tag", "");

setText("\ue6f2");// "&#x" 替換成 "\u",用 unicode 字符來表示
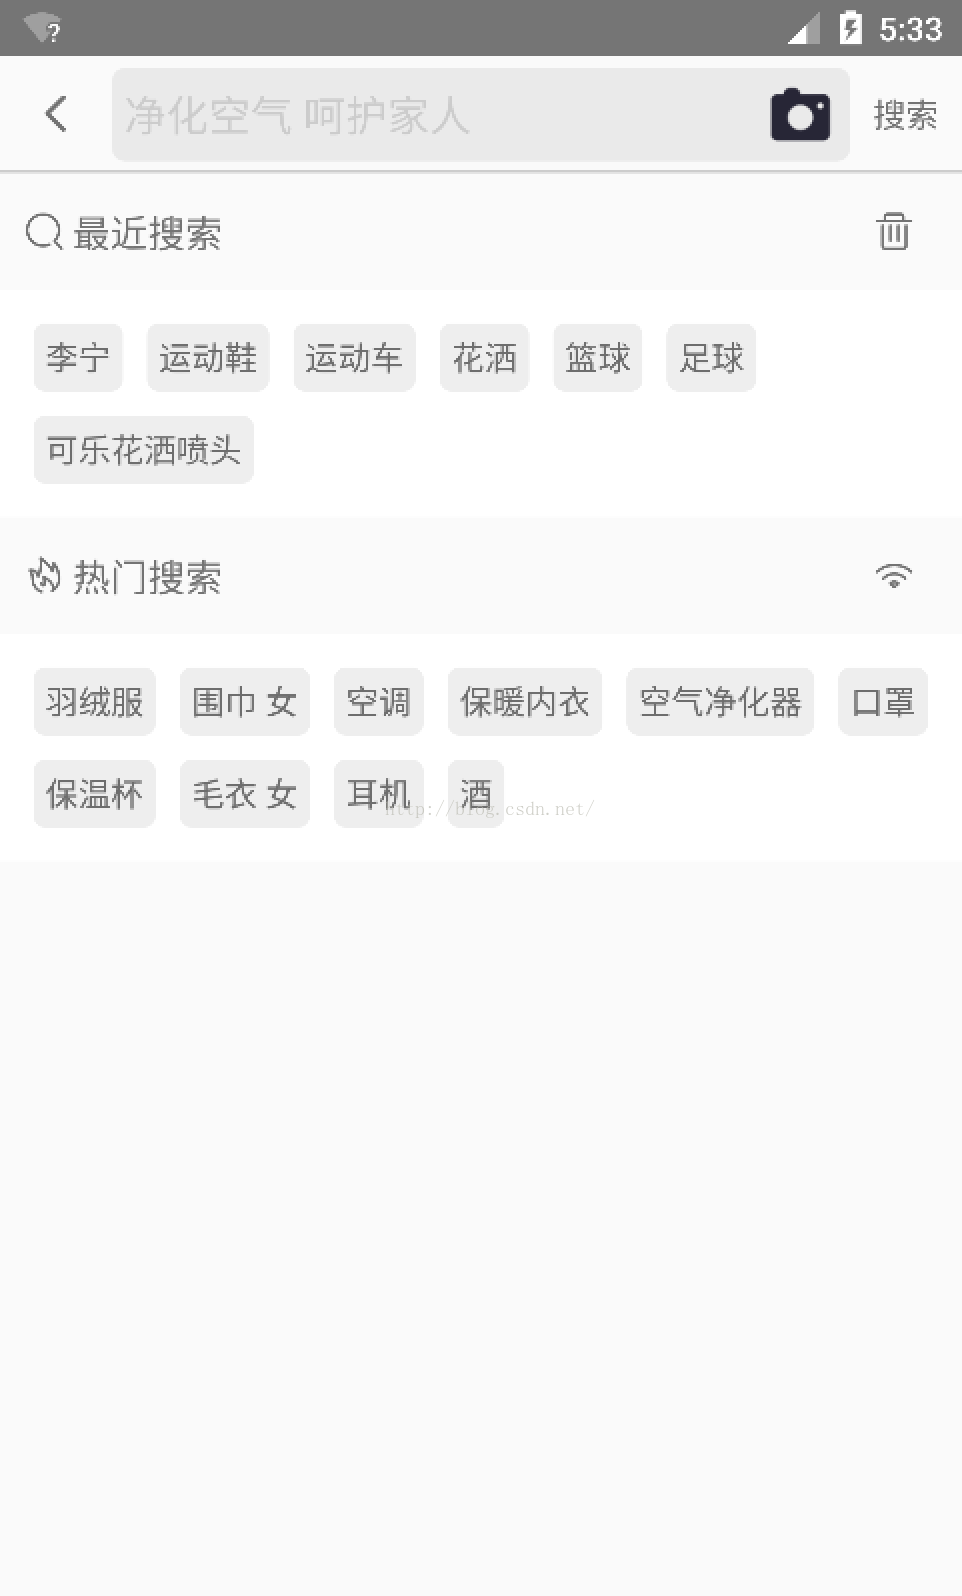
這樣問題就解決了。
OK,最後附上我實現的效果圖,
 Android權限控制之自定義權限
天哪,這篇文章終於說道如何自定義權限了,左盼右盼,其實這個自定義權限相當easy。為了方便敘述,我這邊會用到兩個app作為例子示范。Permission App: use
 初涉Rx套餐 之RxBinding
最近下班回家都在WOW,周末就爆肝,感覺人都要GO DIE了,昨天下午看了看RxBinding相關的功能感覺還是蠻強大的,所提供的API也是相當豐富(基本Rx套餐都是互通
 安卓系統自定義刪除空間功能怎麼用 安卓自定義刪除空間是什麼
安卓系統近日正在測試一項新功能,在設備儲存空間不足的情況下會自動尋找並給出刪除建議,安卓系統自定義刪除空間功能怎麼用?下載吧小編就一起來參考一下。 安卓系
 Android中handler運行原理
在android中提供了一種異步回調機制Handler,使用它,我們可以在完成一個很長時間的任務後做出相應的通知 handler基本使用: 在主線