編輯:關於Android編程
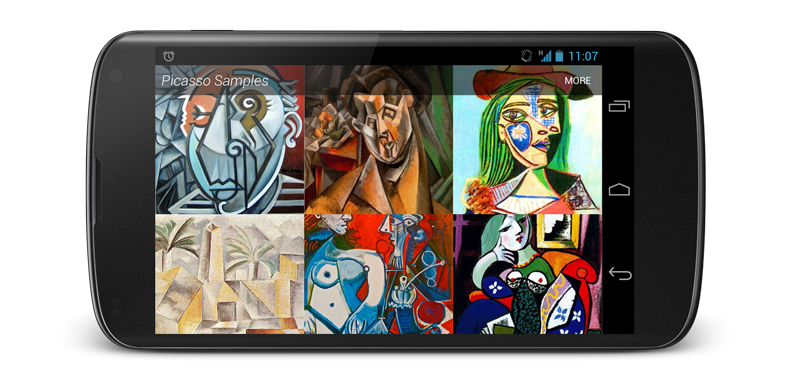
picasso是Square公司開源的一個Android圖形緩存庫,地址http://square.github.io/picasso/,可以實現圖片下載和緩存功能。僅僅只需要一行代碼就能完全實現圖片的異步加載:
Picasso.with(context).load("/uploadfile/2016/0721/20160721114606773.png").into(imageView);
Api看起來非常獨特,是吧。
Picasso不僅實現了圖片異步加載的功能,還解決了android中加載圖片時需要解決的一些常見問題:
1.在adapter中需要取消已經不在視野范圍的ImageView圖片資源的加載,否則會導致圖片錯位,Picasso已經解決了這個問題。
2.使用復雜的圖片壓縮轉換來盡可能的減少內存消耗
3.自帶內存和硬盤二級緩存功能
特性以及示例代碼:
ADAPTER中的下載:Adapter的重用會被自動檢測到,Picasso會取消上次的加載
@Override public void getView(int position, View convertView, ViewGroup parent) { SquaredImageView view = (SquaredImageView) convertView; if (view == null) { view = new SquaredImageView(context); } String url = getItem(position); Picasso.with(context).load(url).into(view); }
圖片轉換:轉換圖片以適應布局大小並減少內存占用
Picasso.with(context) .load(url) .resize(50, 50) .centerCrop() .into(imageView);
你還可以自定義轉換:
public class CropSquareTransformation implements Transformation { @Override public Bitmap transform(Bitmap source) { int size = Math.min(source.getWidth(), source.getHeight()); int x = (source.getWidth() - size) / 2; int y = (source.getHeight() - size) / 2; Bitmap result = Bitmap.createBitmap(source, x, y, size, size); if (result != source) { source.recycle(); } return result; } @Override public String key() { return "square()"; } }
將CropSquareTransformation的對象傳遞給transform方法即可。
Place holders-空白或者錯誤占位圖片:picasso提供了兩種占位圖片,未加載完成或者加載發生錯誤的時需要一張圖片作為提示。
Picasso.with(context) .load(url) .placeholder(R.drawable.user_placeholder) .error(R.drawable.user_placeholder_error) .into(imageView);
如果加載發生錯誤會重復三次請求,三次都失敗才會顯示erroPlace holder
資源文件的加載:除了加載網絡圖片picasso還支持加載Resources, assets, files, content providers中的資源文件。
Picasso.with(context).load(R.drawable.landing_screen).into(imageView1); Picasso.with(context).load(newFile(...)).into(imageView2);
下面是picasso源碼的解析(不看不影響使用)
Cache,緩存類
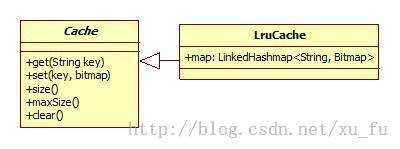
Lrucacha,主要是get和set方法,存儲的結構采用了LinkedHashMap,這種map內部實現了lru算法(Least Recently Used 近期最少使用算法)。
this.map = new LinkedHashMap(0, 0.75f, true);
最後一個參數的解釋:
true if the ordering should be done based on the last access (from least-recently accessed to most-recently accessed), and false if the ordering should be the order in which the entries were inserted.
因為可能會涉及多線程,所以在存取的時候都會加鎖。而且每次set操作後都會判斷當前緩存區是否已滿,如果滿了就清掉最少使用的圖形。代碼如下
private void trimToSize(int maxSize) { while (true) { String key; Bitmap value; synchronized (this) { if (size < 0 || (map.isEmpty() && size != 0)) { throw new IllegalStateException(getClass().getName() + ".sizeOf() is reporting inconsistent results!"); } if (size <= maxSize || map.isEmpty()) { break; } Map.Entry toEvict = map.entrySet().iterator() .next(); key = toEvict.getKey(); value = toEvict.getValue(); map.remove(key); size -= Utils.getBitmapBytes(value); evictionCount++; } } }
Request,操作封裝類
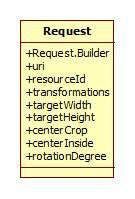
所有對圖形的操作都會記錄在這裡,供之後圖形的創建使用,如重新計算大小,旋轉角度,也可以自定義變換,只需要實現Transformation,一個bitmap轉換的接口。
public interface Transformation { /** * Transform the source bitmap into a new bitmap. If you create a new bitmap instance, you must * call {@link android.graphics.Bitmap#recycle()} on {@code source}. You may return the original * if no transformation is required. */ Bitmap transform(Bitmap source); /** * Returns a unique key for the transformation, used for caching purposes. If the transformation * has parameters (e.g. size, scale factor, etc) then these should be part of the key. */ String key(); }
當操作封裝好以後,會將Request傳到另一個結構中Action。
Action
Action代表了一個具體的加載任務,主要用於圖片加載後的結果回調,有兩個抽象方法,complete和error,也就是當圖片解析為bitmap後用戶希望做什麼。最簡單的就是將bitmap設置給imageview,失敗了就將錯誤通過回調通知到上層。

ImageViewAction實現了Action,在complete中將bitmap和imageview組成了一個PicassoDrawable,裡面會實現淡出的動畫效果。
@Override public void complete(Bitmap result, Picasso.LoadedFrom from) { if (result == null) { thrownew AssertionError(String.format( "Attempted to complete action with no result!\n%s", this)); } ImageView target = this.target.get(); if (target == null) { return; } Context context = picasso.context; boolean debugging = picasso.debugging; PicassoDrawable.setBitmap(target, context, result, from, noFade, debugging); if (callback != null) { callback.onSuccess(); } }
有了加載任務,具體的圖片下載與解析是在哪裡呢?這些都是耗時的操作,應該放在異步線程中進行,就是下面的BitmapHunter。
BitmapHunter
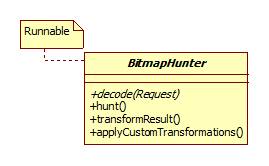
BitmapHunter是一個Runnable,其中有一個decode的抽象方法,用於子類實現不同類型資源的解析。
@Override public void run() { try { Thread.currentThread() .setName(Utils.THREAD_PREFIX + data.getName()); result = hunt(); if (result == null) { dispatcher.dispatchFailed(this); } else { dispatcher.dispatchComplete(this); } } catch (IOException e) { exception = e; dispatcher.dispatchRetry(this); } catch (Exception e) { exception = e; dispatcher.dispatchFailed(this); } finally { Thread.currentThread().setName(Utils.THREAD_IDLE_NAME); } } abstract Bitmap decode(Request data) throws IOException; Bitmap hunt() throws IOException { Bitmap bitmap; if (!skipMemoryCache) { bitmap = cache.get(key); if (bitmap != null) { stats.dispatchCacheHit(); loadedFrom = MEMORY; returnbitmap; } } bitmap = decode(data); if (bitmap != null) { stats.dispatchBitmapDecoded(bitmap); if(data.needsTransformation() || exifRotation != 0) { synchronized (DECODE_LOCK) { if(data.needsMatrixTransform() || exifRotation != 0) { bitmap = transformResult(data, bitmap, exifRotation); } if (data.hasCustomTransformations()) { bitmap = applyCustomTransformations( data.transformations, bitmap); } } stats.dispatchBitmapTransformed(bitmap); } } return bitmap; }
可以看到,在decode生成原始bitmap,之後會做需要的轉換transformResult和applyCustomTransformations。最後在將最終的結果傳遞到上層dispatcher.dispatchComplete(this)。
基本的組成元素有了,那這一切是怎麼連接起來運行呢,答案是Dispatcher。
Dispatcher任務調度器
在bitmaphunter成功得到bitmap後,就是通過dispatcher將結果傳遞出去的,當然讓bitmaphunter執行也要通過Dispatcher。
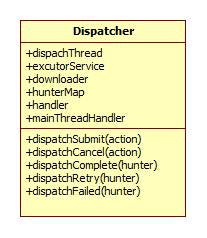
Dispatcher內有一個HandlerThread,所有的請求都會通過這個thread轉換,也就是請求也是異步的,這樣應該是為了Ui線程更加流暢,同時保證請求的順序,因為handler的消息隊列。
外部調用的是dispatchXXX方法,然後通過handler將請求轉換到對應的performXXX方法。
例如生成Action以後就會調用dispather的dispatchSubmit()來請求執行,
1 2 3void dispatchSubmit(Action action) { handler.sendMessage(handler.obtainMessage(REQUEST_SUBMIT, action)); }
handler接到消息後轉換到performSubmit方法
void performSubmit(Action action) { BitmapHunter hunter = hunterMap.get(action.getKey()); if (hunter != null) { hunter.attach(action); return; } if (service.isShutdown()) { return; } hunter = forRequest(context, action.getPicasso(), this, cache, stats, action, downloader); hunter.future = service.submit(hunter); hunterMap.put(action.getKey(), hunter); }
這裡將通過action得到具體的BitmapHunder,然後交給ExecutorService執行。
下面是Picasso.with(context).load("/uploadfile/2016/0721/20160721114606773.png").into(imageView)的過程,
public static Picasso with(Context context) { if (singleton == null) { singleton = newBuilder(context).build(); } return singleton; } public Picasso build() { Context context = this.context; if(downloader == null) { downloader = Utils.createDefaultDownloader(context); } if (cache == null) { cache = new LruCache(context); } if (service == null) { service = new PicassoExecutorService(); } if (transformer == null) { transformer = RequestTransformer.IDENTITY; } Stats stats = new Stats(cache); Dispatcher dispatcher = new Dispatcher(context, service, HANDLER, downloader, cache, stats); return newPicasso(context, dispatcher, cache, listener, transformer, stats, debugging); }
在Picasso.with()的時候會將執行所需的所有必備元素創建出來,如緩存cache、執行executorService、調度dispatch等,在load()時創建Request,在into()中創建action、bitmapHunter,並最終交給dispatcher執行。
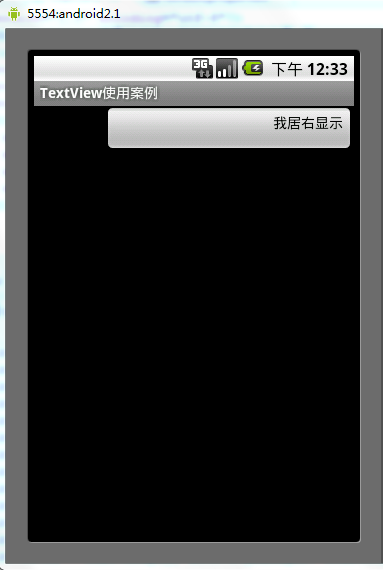 Android中gravity與layout_gravity的使用區別分析
android:gravity:設置的是控件自身上面的內容位置android:layout_gravity:設置控件本身相對於父控件的顯示位置。看下如下代碼段復制代碼 代
 Binder IPC的權限控制詳細教程
基於Android 6.0的源碼剖析, 分析Binder IPC通信的權限控制方法clearCallingIdentity和restoreCallingId
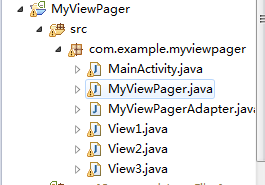 Android ViewPager 的使用總結
在一個窗口裡面添加tab便簽,完成便簽切換來實現頁面的切換,這樣的好處是可以在同一個窗口裡面有多個頁面,這些頁面共享同一個窗口的資源,同使用多個窗口來實現這個功能來得更加
 AsyncTask 流程解析
為什麼要使用異步任務?Android 單線程模型,多線程的操作系統耗時操作放在非主線程中運行AsyncTask 為何而生?子線程中更新UI封裝簡化異步操作構建AsyncT