編輯:關於Android編程
不管是出於什麼樣地考慮,android系統終究是提供了hardware層來封裝了對Linux的驅動的訪問,同時為上層提供了一個統一的硬件接口和硬件形態。
在Hardware層中的一個模塊中,主要設計一下三個結構:
struct hw_module_t struct hw_module_methods_t struct hw_device_t
在hardware/libhardware/modules新建hellotest目錄,添加兩個文件:hellotest.c 和 Android.mk
這個文件把對linux驅動的訪問封裝成了Android要求的格式。
#include#include #include #include #include #include #define DEVICE_NAME "/dev/hello" #define MODULE_NAME "HelloTest" #define MODULE_AUTHOR "jinwei" #define LOG_TAG "HelloTest" /* 定義LOG */ #define LOGV(...) __android_log_print(ANDROID_LOG_VERBOSE, LOG_TAG, __VA_ARGS__) #define LOGD(...) __android_log_print(ANDROID_LOG_DEBUG , LOG_TAG, __VA_ARGS__) #define LOGI(...) __android_log_print(ANDROID_LOG_INFO , LOG_TAG, __VA_ARGS__) #define LOGW(...) __android_log_print(ANDROID_LOG_WARN , LOG_TAG, __VA_ARGS__) #define LOGE(...) __android_log_print(ANDROID_LOG_ERROR , LOG_TAG, __VA_ARGS__) /*打開和關閉設備的方法*/ static int hellotest_device_open(const struct hw_module_t* module, const char* name, struct hw_device_t** device); static int hellotest_device_close(struct hw_device_t* device); /*讀寫linux驅動的接口*/ static int hellotest_write_string(struct hellotest_device_t* dev, char * str); static int hellotest_read_string(struct hellotest_device_t* dev, char **str); /*模塊方法結構體*/ static struct hw_module_methods_t hellotest_module_methods = { open: hellotest_device_open }; /*模塊實例變量*/ struct hellotest_module_t HAL_MODULE_INFO_SYM = { common: { tag: HARDWARE_MODULE_TAG, version_major: 1, version_minor: 0, id: HELLOTEST_HARDWARE_MODULE_ID, name: MODULE_NAME, author: MODULE_AUTHOR, methods: &hellotest_module_methods, } }; static int hellotest_device_open(const struct hw_module_t* module, const char* name, struct hw_device_t** device) { struct hellotest_device_t* dev; dev = (struct hellotest_device_t*)malloc(sizeof(struct hellotest_device_t)); if(!dev) { LOGE("HelloTest: failed to alloc space"); return -EFAULT; } memset(dev, 0, sizeof(struct hellotest_device_t)); dev->common.tag = HARDWARE_DEVICE_TAG; dev->common.version = 0; dev->common.module = (hw_module_t*)module; dev->common.close = hellotest_device_close; dev->write_string = hellotest_write_string; dev->read_string = hellotest_read_string; if((dev->fd = open(DEVICE_NAME, O_RDWR)) == -1) { LOGE("HelloTest: open /dev/hello fail-- %s.", strerror(errno));free(dev); return -EFAULT; } *device = &(dev->common); LOGI("HelloTest: open /dev/hello successfully."); return 0; } static int hellotest_device_close(struct hw_device_t* device) { struct hellotest_device_t* hello_device = (struct hellotest_device_t*)device; if(hello_device) { close(hello_device->fd); free(hello_device); } return 0; } static int hellotest_write_string(struct hellotest_device_t* dev,char * str) { LOGI("HelloTest:write string: %s", str); write(dev->fd, str, sizeof(str)); return 0; } static int hellotest_read_string(struct hellotest_device_t* dev, char ** str) { LOGI("HelloTest:read string: %s", *str); read(dev->fd, *str, sizeof(*str)); return 0; }
這個程序就是把我們讀寫/dev/hello的代碼做了一次封裝而已,經過封裝以後,我們有了hw_module_t,hw_module_methods_t,hw_device_t這三個結構體。正因為它如此規范,所以上層才可以按照這種規范的格式獲取的hw_module_t結構體,進而使用hw_module_methods_t中的open函數獲取hw_device_t結構體,然後使用hw_device_t結構體中的方法操作Linux驅動。
      LOCAL_PATH := $(call my-dir)
      include $(CLEAR_VARS)

      LOCAL_MODULE_TAGS := optional
      LOCAL_PRELINK_MODULE := false
      LOCAL_MODULE_PATH := $(TARGET_OUT_SHARED_LIBRARIES)/hw

        LOCAL_SHARED_LIBRARIES += \
    libcutils libutils liblog
    LOCAL_LDLIBS:=  -L$(SYSROOT)/usr/lib -llog

      LOCAL_SRC_FILES := hellotest.c
      LOCAL_MODULE := hellotest.default
      include $(BUILD_SHARED_LIBRARY)
LOCAL_MODULE 的值為hellotest.default,注意,一定要加上default,不然使用hw_get_module函數找不到我們的HAL模塊。
然後在hardware/libhardware/include/hardware新建對應的頭文件hellotest.h
#ifndef ANDROID_HELLO_TEST_H #define ANDROID_HELLO_TEST_H #include__BEGIN_DECLS /*定義模塊ID,必須的,用與上層程序獲取該模塊*/ #define HELLOTEST_HARDWARE_MODULE_ID "hellotest" /*硬件模塊結構體*/ struct hellotest_module_t { struct hw_module_t common; }; /*硬件接口結構體*/ struct hellotest_device_t { struct hw_device_t common; int fd; int (*write_string)(struct hellotest_device_t* dev, int val); int (*read_string)(struct hellotest_device_t* dev, int* val); }; __END_DECLS #endif
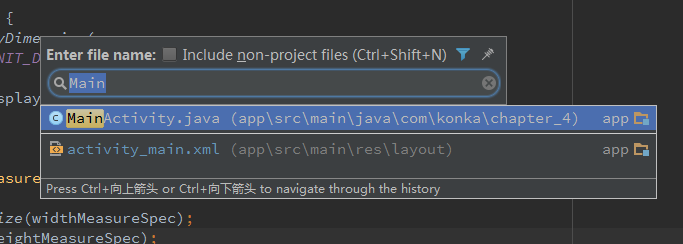
做好這三個文件以後,我們就可以編譯該模塊了。進入到hardware/libhardware/modules目錄,執行mm命令進行編譯,編譯後的文件如圖所示:

封裝好了我們的HAL層module以後,我希望立刻測試它是否正確運行,下面我們將寫一個簡單的C程序,用來測試module是否正確工作。
首先在hardware/libhardware/tests/目錄下新建一個testhellotest目錄,新增test.c和Android.mk文件:
#include#include #include #include struct hw_module_t * module; struct hw_device_t * device; int main(){ char *read_str; char *write_str="nihao"; read_str = malloc(100); printf("----begin main------\n"); if(hw_get_module(HELLOTEST_HARDWARE_MODULE_ID,(struct hw_module_t const **)&module)==0){ printf("get module sucess\n"); }else{ printf("get module fail\n"); return -1; } if(module->methods->open(module,HELLOTEST_HARDWARE_MODULE_ID,(struct hw_device_t const**)&device)==0){ printf("open module sucess\n"); }else{ printf("open module error\n"); return -2; } struct hellotest_device_t* dev = (struct hellotest_device_t *)device; dev->read_string(dev,&read_str); if(read_str == NULL){ printf("read error"); }else{ printf("read data: %s\n",read_str); } dev->write_string(dev,write_str); printf("write data: %s\n",write_str); dev->read_string(dev,&read_str); if(read_str == NULL){ printf("read error"); }else{ printf("read data: %s\n",read_str); } printf("----end main------\n"); return 0; }
測試的流程正如文章開頭描述的那樣,首先使用hw_get_module函數獲得hw_module_t結構體,然後調用hw_module_methods_t結構體中的open方法過得hw_device_t結構體,然後使用hw_device_t結構體中的read_string和write_string方法與linux驅動交互。注意,驅動的打開是在hw_module_methods_t結構體中的open方法中做的。
      LOCAL_PATH := $(call my-dir)

      include $(CLEAR_VARS)

      LOCAL_MODULE_TAGS := optional

      LOCAL_MODULE := my_test

    LOCAL_LDLIBS:=  -lhardware

      LOCAL_SRC_FILES := $(call all-subdir-c-files)

      include $(BUILD_EXECUTABLE)
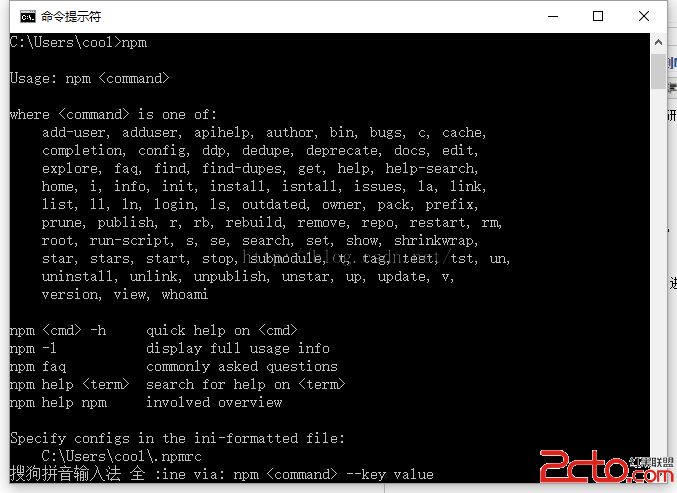
然後進入到該目錄執行mm命令進行編譯,編譯後生成文件如圖所示:

1.把生成的hellotest.default.so文件拷貝到android設備的/system/lib/hw目錄下,這需要root權限,沒有root權限請自行解決。
2.獲得root權限後會提示/system是一個只讀文件系統,所以需要重新掛載為可讀可寫的文件系統,執行mount -o remount,rw /system 即可。
3.修改hellotest.default.so文件的的權限為644,執行chmod 644 /system/lib/dw/hellotest.default.so
4.裝載上一節實現的hello.ko驅動:insmod hello.ko
5.把生成的my_test可執行文件拷貝的android設備上,建議push my_test /data
6.給my_test文件添加可執行權限. chmod +x my_test
7.執行my_test。 ./my_test
打印如下:
—-begin main——
get module sucess
open module sucess
read data: hell
write data: nihao
read data: niha
—-end main——
可見,測試成功。
如果有問題,可以使用logcat看下HAL層的打印,看看問題出在什麼地方。
 Android 仿UC浏覽器三點加載效果
1.import android.app.Activity;import android.content.Context;import android.content.r
 cordova開發自定義插件
由於最近工作需要,需要一個自定義插件,本人研究了很久終於做出一個最簡單的插件,是基於android平台來開發的,雖然寫博客很花時間,但是為了以後再次查看復習能很好的提供參
 Android通訊錄開發之實現全選、反選功能
Android通訊錄開發之實現全選、反選功能 2014年1月15日 實現全選、反選不是什麼難的事情,就只是用另外一個數據結構來存儲被選中的狀態,通過刷新列表
 Android 表情面板的展示和表情的顯示
前言在Android項目中由於是社交類的項目,所以裡面用到了表情,表情是emoji表情,所以實現了之後,弄個demo分享一下,主要實現了表情的選擇和顯示,只是一個demo