編輯:關於Android編程
3.1 Android控件架構 3.2 View的測量 3.3 View的繪制 3.4 ViewGroup的測量 3.5 ViewGroup的繪制 3.6 自定義View
3.6.1 對現有的空間進行拓展 3.6.2 創建復合控件 3.6.3 重寫View來實現全新的空間 3.7 自定義ViewGroup 3.8 事件攔截機制分析
控件大致非為兩類:
view控件:視圖控件 viewGroup控件:包含多個View控件,並管理其包含的View控件 兩者之間的關系:上層控件負責下層子控件的測量與繪制,並傳遞交互事件UI界面架構:
Activity都包含一個Window對象,通常由PhoneWindow來實現 PhoneWindow將一個DecorView設置為整個應用窗口的根View
DecorView為整個Window界面的最頂層View DecorView只有一個子元素為LinearLayout,代表整個Window界面,包含通知欄,標題欄,內容顯示欄三塊區域 LinearLayout裡有兩個FrameLayout子元素:
標題欄顯示界面。只有一個TextView顯示應用的名稱 內容欄顯示界面。就是setContentView()方法載入的布局界面
MeasureSpec類:32位的int值,高2位為測量模式,低30位為測量大小
MeasureSpec模式:
EXACTLY:精確模式 ,當控件的layout_width屬性或layout_height屬性指定為具體值,控件大小也是該具體值 AT_MOST:最大值模式,當控件layout_width屬性或layout_height屬性指定為warp_content時,控件的尺寸不要超過父控件允許的最大尺寸 UNSPECIFIED:未指定模式,控件要多大就多大,通常情況下再繪制自定義View中才會使用View類默認的onMeasure()方法只支持EXACTLY模式,View需要支持warp_content屬性,那麼就必須重寫onMeasure()方法,來制定warp_content的大小
下面我們通過一個簡單的實例,演示如何進行View的測量,首先,需要重寫onMeasure()方法:
@Override
protected void onMeasure(int widthMeasureSpec, int heightMeasureSpec) {
    super.onMeasure(widthMeasureSpec, heightMeasureSpec);
}
可以發現,onMeasure方法調用了父類的onMeasure方法,代碼跟蹤父類onMeasure方法
protected void onMeasure(int widthMeasureSpec, int heightMeasureSpec) {
    setMeasuredDimension(getDefaultSize(getSuggestedMinimumWidth(), widthMeasureSpec),
            getDefaultSize(getSuggestedMinimumHeight(), heightMeasureSpec));
}
可以發現,系統最終會調用setMeasuredDimension(int measuredWidth,int measuredHeight)方法將測量後的寬高值設置進去,我們調用自定義的measureWidth()方法和measureHeight()方法,分別對寬高進行重新定義
protected void onMeasure(int widthMeasureSpec, int heightMeasureSpec) {
    setMeasuredDimension(measureWidth(widthMeasureSpec),measureHeight(heightMeasureSpec));
}
下面以measureWidth()方法為例:
第一步:從MeasureSpec對象中提取出具體的測量模式和大小
int specMode = MeasureSpec.getMode(measureSpec);
int specSize = MeasureSpec.getSize(measureSpec);
第二步:通過不同的測量模式給出不同的測量值:
EXACTLY:使用指定的specSize即可 AT_MOST:取出我們指定的大小和SpecSize的最小值 UNSPECIFIED:200px下面這段代碼基本上可以作為模板代碼:
private int measureWidth(int measureSpec) {
   int result = 0;
   int specMode = MeasureSpec.getMode(measureSpec);
   int specSize = MeasureSpec.getSize(measureSpec);

   if (specMode == MeasureSpec.EXACTLY) {
       result = specSize;

   } else {
       result = 200;
       if (specMode == MeasureSpec.AT_MOST) {
           result = Math.min(result, specSize);
       }
   }
   return result;
}
可以發現,當指定warp_content屬性時,View就獲得一個默認值200px
當測量好了一個View之後,我們通過重寫View類中的onDraw()方法來繪圖,要想繪制相應的圖像,就必須在Canvas上進行繪制
Canvas canvas = new Canvas(Bitmap);
Canvas就像是一個畫板,我們傳進去一個bitmap,通過這個bitmap創建的Canvas畫布緊緊聯系在一起,這個過程我們稱之為裝載畫布,這個bitmap用來存儲所有繪制在Canvas上的像素信息,所以當你在後面調用所有的Canvas.drawxxx方法都會發生在這個bitmap上
ViewGroup在測量時通過遍歷所有子View,從而調用子View的Measure方法來獲得每一個子View的結果
@Override
protected void onMeasure(int widthMeasureSpec, int heightMeasureSpec) {
    super.onMeasure(widthMeasureSpec, heightMeasureSpec);
    int childCount = getChildCount();
    for (int i = 0; i < childCount; i++) {
        getChildAt(i).measure(widthMeasureSpec, heightMeasureSpec);
    }
 }
ViewGroup測量完畢後,通常會去重寫onLayout()方法來控制其子View顯示位置的邏輯
@Override
protected void onLayout(boolean changed, int l, int t, int r, int b) {
    for (int i = 0; i < getChildCount(); i++) {
        this.getChildAt(i).layout(l, t, r, b);
    }
}
ViewGroup通常不需要繪制,如果不是指定ViewGroup的背景顏色,那麼ViewGroup的onDraw()方法都不會被調用,但是,ViewGroup會使用dispatchDraw()方法來繪制子View
@Override
protected void dispatchDraw(Canvas canvas) {
    super.dispatchDraw(canvas);
}
在View中通常有以下一些重要的回調方法:
onFinishInflate():從XML加載組件後回調 onSizeChanged():組件大小改變時回調 onMeasure():回調該方法來進行測量 onLayout():回調該方法來確定顯示的位置 onTouchEvent():監聽到觸摸事件時回調通常情況下,有以下三種方法來實現自定義的控件:
對現有的控件進行拓展 通過組合來實現新的控件 重寫View來實現全新的控件
3.6.1 對現有的控件進行拓展
自定義修改TextView……見經典代碼回顧,案例一 閃動的文字效果……見經典代碼回顧,案例二
3.6.2 創建復合控件
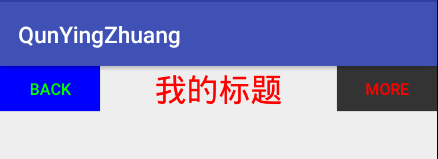
自定義ToolBar的實現……見經典代碼回顧,案例三
3.6.3 重寫View來實現全新的控件
弧線展示圖……見經典代碼回顧,案例四 音頻條形圖……見經典代碼回顧,案例五
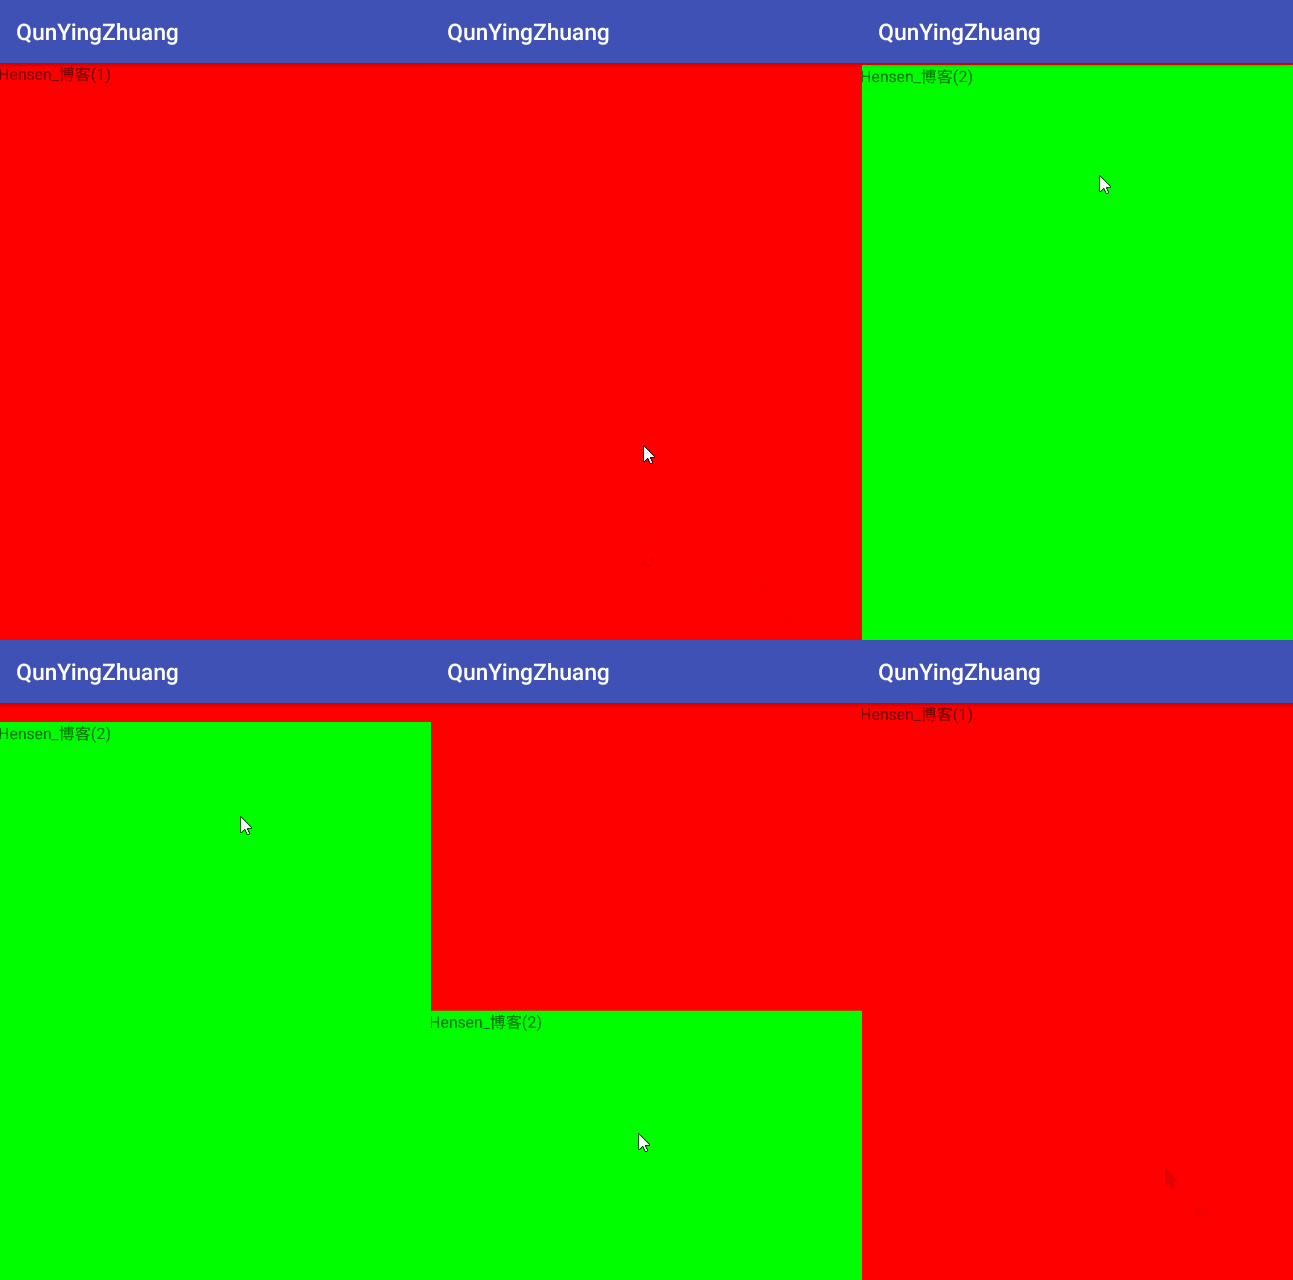
自定義ViewGroup,仿ScrollView……見經典代碼回顧,案例六
事件攔截機制三個重要方法
dispatchTouchEvent():分發事件 onInterceptTouchEvent():攔截事件 onTouchEvent():處理事件舉一個例子說明事件分發機制:
ViewGroupA:處於視圖最下層 ViewGroupB:處於視圖中間層 View:處於視圖最上層正常的事件分發機制流程:
ViewGroupA dispatchTouchEvent ViewGroupA onInterceptTouchEvent ViewGroupB dispatchTouchEvent ViewGroupB onInterceptTouchEvent View dispatchTouchEvent View onTouchEvent ViewGroupB onTouchEvent ViewGroupA onTouchEvent若ViewGroupB的onInterceptTouchEvent()方法返回true的分發機制流程:
ViewGroupA dispatchTouchEvent ViewGroupA onInterceptTouchEvent ViewGroupB dispatchTouchEvent ViewGroupB onInterceptTouchEvent ViewGroupB onTouchEvent ViewGroupA onTouchEvent若View的onTouchEvent()方法返回true的分發機制流程:
ViewGroupA dispatchTouchEvent ViewGroupA onInterceptTouchEvent ViewGroupB dispatchTouchEvent ViewGroupB onInterceptTouchEvent View dispatchTouchEvent View onTouchEvent若ViewGroupB的onTouchEvent()方法返回true的分發機制流程:
ViewGroupA dispatchTouchEvent ViewGroupA onInterceptTouchEvent ViewGroupB dispatchTouchEvent ViewGroupB onInterceptTouchEvent View dispatchTouchEvent View onTouchEvent ViewGroupB onTouchEvent簡單的說dispatchTouchEvent()和onInterceptTouchEvent()是從下往上一層一層分發下去的,而onTouchEvent()是從上往下一層一層分發下去的
public class CustomTextView extends TextView {

    private Paint paint1, paint2;

    public CustomTextView(Context context, AttributeSet attrs) {
        super(context, attrs);
        initPaint();
    }

    /**
     * 初始化畫筆
     */
    private void initPaint() {
        paint1 = new Paint();
        paint1.setColor(getResources().getColor(android.R.color.holo_blue_light));
        paint1.setStyle(Paint.Style.FILL);
        paint2 = new Paint();
        paint2.setColor(Color.YELLOW);
        paint2.setStyle(Paint.Style.FILL);
    }

    @Override
    protected void onDraw(Canvas canvas) {
        //繪制外層矩形
        canvas.drawRect(0, 0, getMeasuredWidth(), getMeasuredHeight(), paint1);
        //繪制內層矩形
        canvas.drawRect(10, 10, getMeasuredWidth() - 10, getMeasuredHeight() - 10, paint2);
        canvas.save();
        //繪制文字前平移10像素
        canvas.translate(10, 0);
        //父類完成的方法,即繪制文本
        super.onDraw(canvas);
        canvas.restore();
    }
}
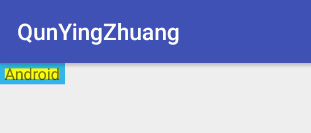
public class FlashTextView extends TextView {

    int mViewWidth = 0;
    private Paint mPaint;
    private LinearGradient mLinearGradient;
    private Matrix matrix;
    private int mTranslate;

    public FlashTextView(Context context, AttributeSet attrs) {
        super(context, attrs);
    }

    @Override
    protected void onSizeChanged(int w, int h, int oldw, int oldh) {
        super.onSizeChanged(w, h, oldw, oldh);
        if (mViewWidth == 0) {
            mViewWidth = getMeasuredWidth();
            if (mViewWidth > 0) {
                mPaint = getPaint();
                mLinearGradient = new LinearGradient(0, 0, mViewWidth, 0, new int[]{Color.BLUE, 0xffffffff, Color.BLUE},
                        null, Shader.TileMode.CLAMP);
                mPaint.setShader(mLinearGradient);
                matrix = new Matrix();
            }
        }
    }

    @Override
    protected void onDraw(Canvas canvas) {
        super.onDraw(canvas);
        if (matrix != null) {
            mTranslate += mViewWidth + 5;
            if (mTranslate > 2 * mViewWidth / 5) {
                mTranslate = -mViewWidth;
            }
            matrix.setTranslate(mTranslate, 0);
            mLinearGradient.setLocalMatrix(matrix);
            postInvalidateDelayed(100);
        }
    }
}
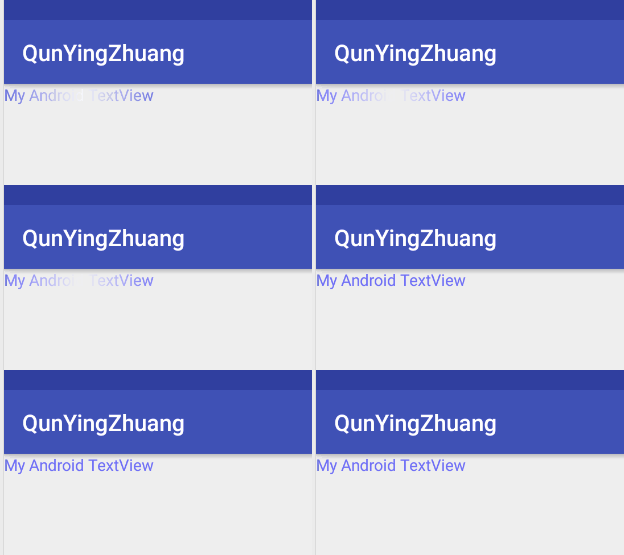
在values文件夾中創建一個attrs.xml文件來自定義屬性
開始創建我們的ToolBar
public class ToolBar extends RelativeLayout {

    private int mLeftTextColor;
    private Drawable mLeftBackground;
    private String mLeftText;

    private int mRightTextColor;
    private Drawable mRightBackgroup;
    private String mRightText;

    private float mTitleTextSize;
    private int mTitleTextColor;
    private String mTitle;

    private Button mLeftButton;
    private Button mRightButton;
    private TextView mTitleView;

    private RelativeLayout.LayoutParams mLeftParams;
    private RelativeLayout.LayoutParams mRightParams;
    private RelativeLayout.LayoutParams mTitleParams;

    //帶參構造方法
    public ToolBar(Context context, AttributeSet attrs) {
        super(context, attrs);

        //通過這個方法,將你在attrs.xml文件中定義的declare-styleable
        //的所有屬性的值存儲到TypedArray中
        TypedArray ta = context.obtainStyledAttributes(attrs, R.styleable.TopBar);
        //從TypedArray中取出對應的值來設置的屬性賦值
        mLeftTextColor = ta.getColor(R.styleable.TopBar_leftTextColor, 0);
        mLeftBackground = ta.getDrawable(R.styleable.TopBar_leftBackground);
        mLeftText = ta.getString(R.styleable.TopBar_leftText);

        mRightTextColor = ta.getColor(R.styleable.TopBar_rightTextColor, 0);
        mRightBackgroup = ta.getDrawable(R.styleable.TopBar_rightBackground);
        mRightText = ta.getString(R.styleable.TopBar_rightText);

        mTitleTextSize = ta.getDimension(R.styleable.TopBar_titleTextSize, 10);
        mTitleTextColor = ta.getColor(R.styleable.TopBar_titleTextColor, 0);
        mTitle = ta.getString(R.styleable.TopBar_title);

        //獲取完TypedArray的值之後,一般要調用recycle方法來避免重復創建時候的錯誤
        ta.recycle();

        mLeftButton = new Button(context);
        mRightButton = new Button(context);
        mTitleView = new TextView(context);

        //為創建的元素賦值
        mLeftButton.setTextColor(mLeftTextColor);
        mLeftButton.setBackground(mLeftBackground);
        mLeftButton.setText(mLeftText);

        mRightButton.setTextColor(mRightTextColor);
        mRightButton.setBackground(mRightBackgroup);
        mRightButton.setText(mRightText);

        mTitleView.setText(mTitle);
        mTitleView.setTextColor(mTitleTextColor);
        mTitleView.setTextSize(mTitleTextSize);
        mTitleView.setGravity(Gravity.CENTER);

        //為組件元素設置相應的布局元素
        mLeftParams = new RelativeLayout.LayoutParams(LayoutParams.WRAP_CONTENT, LayoutParams.MATCH_PARENT);
        mLeftParams.addRule(RelativeLayout.ALIGN_PARENT_LEFT);
        addView(mLeftButton, mLeftParams);
        mRightParams = new RelativeLayout.LayoutParams(LayoutParams.WRAP_CONTENT, LayoutParams.MATCH_PARENT);
        mRightParams.addRule(RelativeLayout.ALIGN_PARENT_RIGHT);
        addView(mRightButton, mRightParams);
        mTitleParams = new RelativeLayout.LayoutParams(LayoutParams.WRAP_CONTENT, LayoutParams.MATCH_PARENT);
        mTitleParams.addRule(RelativeLayout.CENTER_IN_PARENT);
        addView(mTitleView, mTitleParams);
    }

}
在布局文件中使用
public class CircleProgressView extends View {

    private int mCircleXY;
    private int length;
    private float mRadius;

    private Paint mCirclePaint;
    private Paint mArcPaint;
    private Paint mTextPaint;
    private String mShowText = "Hensen_";

    private int mTextSize = 25;
    private float mSweepValue = 270;

    public CircleProgressView(Context context, AttributeSet attrs) {
        super(context, attrs);
        //獲取屏幕高寬
        WindowManager wm = (WindowManager) getContext()
                .getSystemService(Context.WINDOW_SERVICE);
        length = wm.getDefaultDisplay().getWidth();
        init();
    }

    private void init() {
        mCircleXY = length / 2;
        mRadius = (float) (length * 0.5 / 2);

        mCirclePaint = new Paint();
        mCirclePaint.setColor(Color.BLUE);

        mArcPaint = new Paint();
        mArcPaint.setStrokeWidth(50);
        mArcPaint.setStyle(Paint.Style.STROKE);
        mArcPaint.setColor(Color.BLUE);

        mTextPaint = new Paint();
        mTextPaint.setColor(Color.WHITE);
        mTextPaint.setTextSize(mTextSize);
    }

    @Override
    protected void onDraw(Canvas canvas) {
        super.onDraw(canvas);
        //矩形
        RectF mArcRectF = new RectF((float) (length * 0.1), (float) (length * 0.1), (float) (length * 0.9), (float) (length * 0.9));
        //繪制圓
        canvas.drawCircle(mCircleXY, mCircleXY, mRadius, mCirclePaint);
        //繪制弧線
        canvas.drawArc(mArcRectF, 270, mSweepValue, false, mArcPaint);
        //繪制文字
        canvas.drawText(mShowText, 0, mShowText.length(), mCircleXY, mCircleXY + (mTextSize / 4), mTextPaint);
    }

    public void setSweepValue(float sweepValue) {
        if (sweepValue != 0) {
            mSweepValue = sweepValue;
        } else {
            mSweepValue = 25;
        }
        invalidate();
    }
}
當用戶不指定具體的比例值時,可以調用以下代碼來設置相應的比例值
CircleProgressView circleProgressView = (CircleProgressView) findViewById(R.id.circle);
circleProgressView.setSweepValue(270);
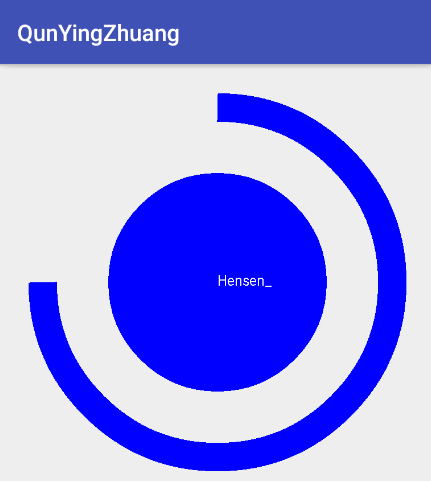
public class MusicView extends View {

    private int mWidth;
    private int mRectHeight;
    private int mRectWidth;
    private int mRectCount = 20;
    private LinearGradient mLinearGradient;
    private Paint mPaint=new Paint();

    private float currentHeight;
    private int offset = 5;
    private double mRandom;

    public MusicView(Context context, AttributeSet attrs) {
        super(context, attrs);
    }

    @Override
    protected void onSizeChanged(int w, int h, int oldw, int oldh) {
        super.onSizeChanged(w, h, oldw, oldh);
        mWidth = getWidth();
        mRectHeight = getHeight();
        mRectWidth = (int) (mWidth * 0.6 / mRectCount);
        mLinearGradient = new LinearGradient(0, 0, mRectWidth, mRectHeight, Color.YELLOW, Color.BLUE, Shader.TileMode.CLAMP);
        mPaint.setShader(mLinearGradient);
    }

    @Override
    protected void onDraw(Canvas canvas) {
        super.onDraw(canvas);
        //遍歷繪制矩形,留中間間隔
        for (int i = 0; i < mRectCount; i++) {
            //開始繪制
            canvas.drawRect((float) (mWidth * 0.4 / 2 + mRectWidth * i + offset),
                    currentHeight, (float) (mWidth * 0.4 / 2 + mRectWidth * (i + 1)), mRectHeight, mPaint);
        }
        //獲取隨機數
        mRandom = Math.random();
        currentHeight = ((float) (mRectHeight * mRandom));
        //延遲300去刷新
        postInvalidateDelayed(300);
    }

}
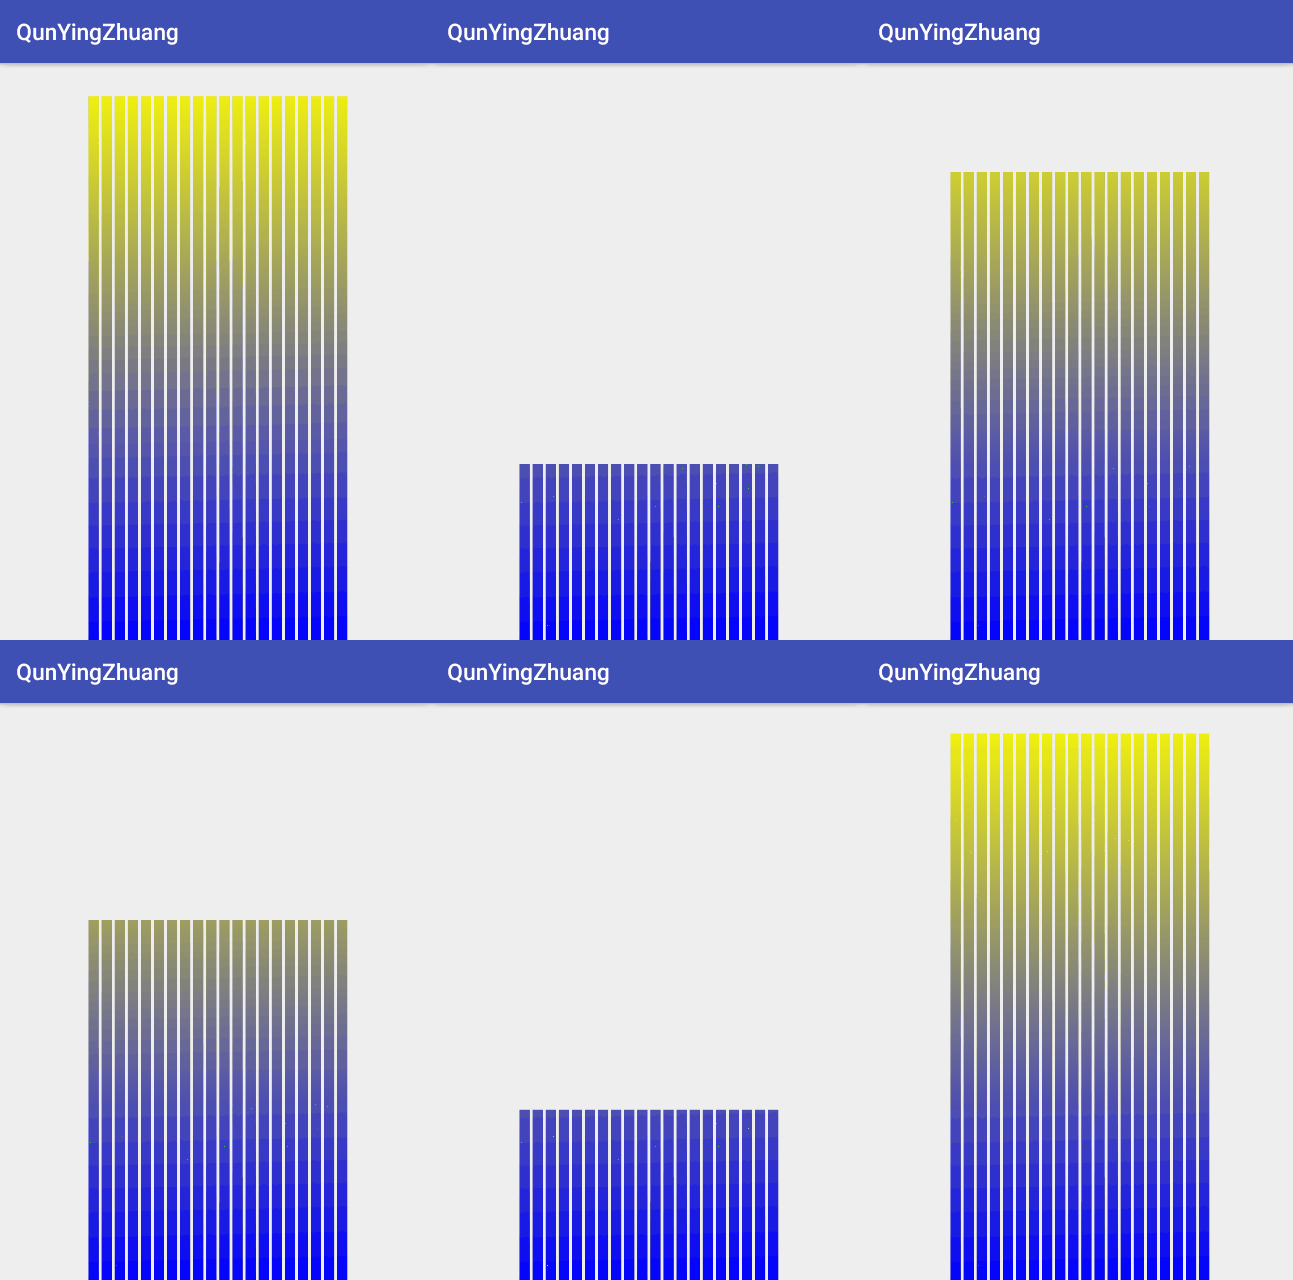
自定義的ScrollView沒有系統自帶的性能好,畢竟很多因素都沒考慮到,這裡只是適用於練手使用
public class CustomScrollView extends ViewGroup {

    private int mScreenHeight;
    private Scroller mScroller;
    private int mLastY;
    private int mStart;
    private int mEnd;

    public CustomScrollView(Context context, AttributeSet attrs) {
        super(context, attrs);
        //獲取屏幕高寬
        WindowManager wm = (WindowManager) getContext()
                .getSystemService(Context.WINDOW_SERVICE);
        mScreenHeight = wm.getDefaultDisplay().getHeight();
        mScroller = new Scroller(getContext());
    }

    @Override
    protected void onLayout(boolean b, int i, int i1, int i2, int i3) {
        int childCount = getChildCount();
        MarginLayoutParams mlp = (MarginLayoutParams) getLayoutParams();
        mlp.height = mScreenHeight * childCount;
        setLayoutParams(mlp);

        for (int j = 0; j < childCount; j++) {
            View child = getChildAt(j);
            if (child.getVisibility() != View.GONE) {
                child.layout(i, j * mScreenHeight, i2, (j + 1) * mScreenHeight);
            }
        }
    }

    @Override
    protected void onMeasure(int widthMeasureSpec, int heightMeasureSpec) {
        super.onMeasure(widthMeasureSpec, heightMeasureSpec);
        int count = getChildCount();
        for (int i = 0; i < count; ++i) {
            View childView = getChildAt(i);
            measureChild(childView, widthMeasureSpec, heightMeasureSpec);
        }
    }

    @Override
    public boolean onTouchEvent(MotionEvent event) {
        int y = (int) event.getY();
        switch (event.getAction()) {
            case MotionEvent.ACTION_DOWN:
                mLastY = y;
                mStart = getScrollY();
                break;
            case MotionEvent.ACTION_MOVE:
                if (!mScroller.isFinished()) {
                    mScroller.abortAnimation();
                }
                int dy = mLastY - y;
                if (getScrollY() < 0) {
                    dy = 0;
                }
                if (getScrollY() > getHeight() - mScreenHeight) {
                    dy = 0;
                }
                scrollBy(0, dy);
                mLastY = y;
                break;
            case MotionEvent.ACTION_UP:
                mEnd = getScrollY();
                int dScrollY = mEnd - mStart;
                if (dScrollY > 0) {
                    if (dScrollY < mScreenHeight / 3) {
                        mScroller.startScroll(0, getScrollY(), 0, -dScrollY);
                    } else {
                        mScroller.startScroll(0, getScrollY(), 0, mScreenHeight - dScrollY);
                    }
                } else {
                    if (-dScrollY < mScreenHeight / 3) {
                        mScroller.startScroll(0, getScrollY(), 0, -dScrollY);
                    } else {
                        mScroller.startScroll(0, getScrollY(), 0, -mScreenHeight - dScrollY);
                    }
                }
                break;
        }
        postInvalidate();
        return true;
    }

    @Override
    public void computeScroll() {
        super.computeScroll();
        if (mScroller.computeScrollOffset()) {
            scrollTo(0, mScroller.getCurrY());
        }
    }
}
在布局中使用
經典回顧源碼下載
github:https://github.com/CSDNHensen/QunYingZhuang
 Android應用開發中使用Fragment的入門學習教程
Fragment是Android honeycomb 3.0開始新增的概念,Fragment名為碎片不過卻和Activity十分相似,下面介紹下Androi
 WindowsAndroid 安裝教程詳解
WindowsAndroid我們可以這樣來稱呼我們此次Win8中運行安卓系統的方法。這款軟件是北京某公司剛剛研發出來的
 ndk開發中利用java與c之間互相傳遞數據
1、DataProvider package com.njupt.ndk_passdata; public class DataProvider { public
 Android之——代碼混淆
Android自身可以實現代碼的混淆功能,Android集成了代碼混淆的功能,這些功能在Android SDK的tools有個proguard目錄,這個目錄下就是提供了A