編輯:關於Android編程
build.gradle的android節點下添加:
buildTypes {
        release {
            minifyEnabled true
            proguardFiles 'proguard-rules.pro'
        }
        debug {
            minifyEnabled true
            proguardFiles 'proguard-rules.pro'
        }
    }
或者
buildTypes {
        release {
            minifyEnabled true
            proguardFiles getDefaultProguardFile('proguard-android.txt'), 'proguard-rules.pro'
        }
        debug {
            minifyEnabled true
            proguardFiles getDefaultProguardFile('proguard-android.txt'), 'proguard-rules.pro'
        }
    }
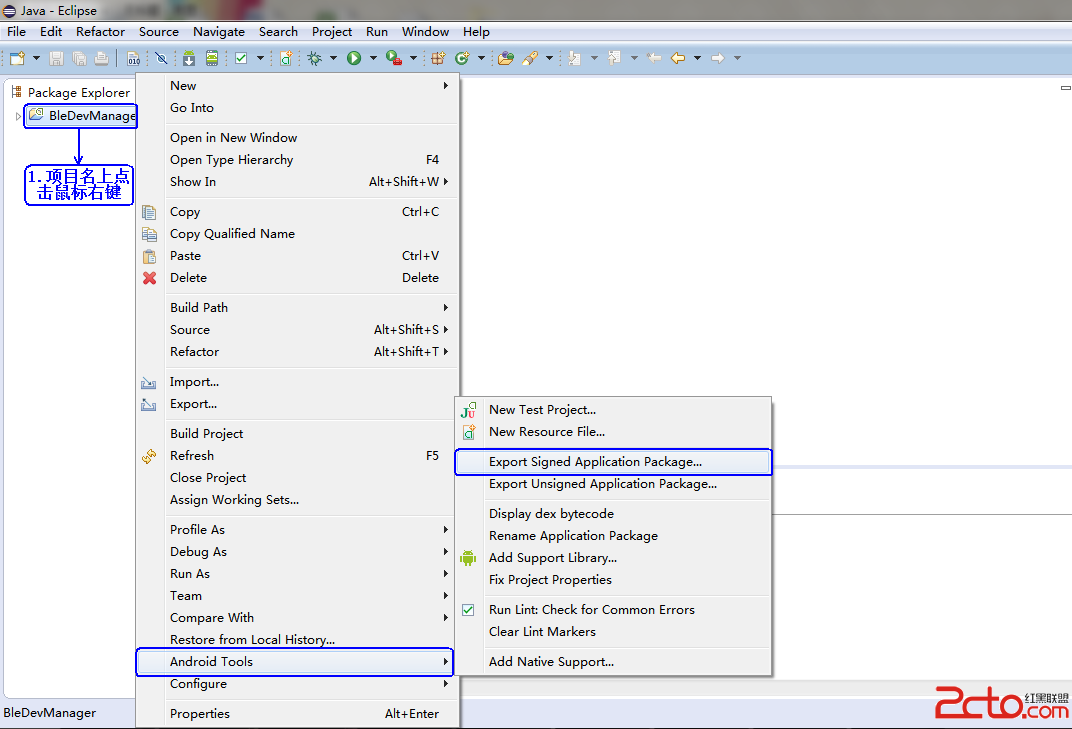
這樣配置需要通過Build-Generate Signed Apk…進行對應的release或debug打包。proguard-rules.pro文件的配置稍候會給出。
和簡單配置的區別是即使在debug版本下生成的包也是帶簽名的。
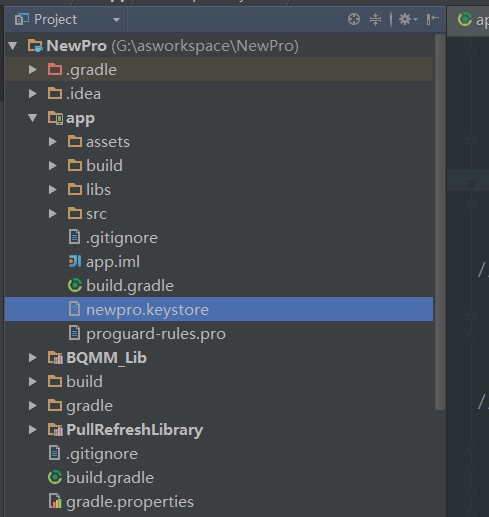
首先需要在app目錄下添加簽名文件,注意一定是要在app目錄下,如圖:
build.gradle配置:
buildTypes {
        debug {
            minifyEnabled false
            signingConfig signingConfigs.debug
//            proguardFiles getDefaultProguardFile('proguard-android.txt'), 'proguard-rules.pro'
            proguardFiles 'proguard-rules.pro'
        }
        release {
            minifyEnabled true
            signingConfig signingConfigs.debug
//            proguardFiles getDefaultProguardFile('proguard-android.txt'), 'proguard-rules.pro'
            proguardFiles 'proguard-rules.pro'
        }
    }
    signingConfigs {
        debug {
            storeFile file('newpro.keystore')//你的簽名文件
            storePassword "123456" //簽名密碼
            keyAlias "newpro" //Alias名稱
            keyPassword "123456" //Alias密碼
        }
    }
這樣生成的包就是帶有簽名文件的包。
現在來配置proguard-rules.pro文件:
-optimizationpasses 5
-dontusemixedcaseclassnames
-dontskipnonpubliclibraryclasses
-verbose
-ignorewarnings
-optimizations !code/simplification/arithmetic,!field/*,!class/merging/*

-keep class android.** {*; }
-keep public class * extends android.app.Activity
-keep public class * extends android.view.View
-keep public class * extends android.app.Application
-keep public class * extends android.app.Service
-keep public class * extends android.content.BroadcastReceiver
-keep public class * extends android.content.ContentProvider
-keep public class * extends android.app.backup.BackupAgentHelper
-keep public class * extends android.preference.Preference
-keep public class com.android.vending.licensing.ILicensingService

-keepclasseswithmembernames class * {
    native ;
}

-keepclasseswithmembers class * {
    public (android.content.Context, android.util.AttributeSet);
}

-keepclasseswithmembers class * {
    public (android.content.Context, android.util.AttributeSet, int);
}

-keepclassmembers class * extends android.app.Activity {
   public void *(android.view.View);
}

-keepclassmembers enum * {
    public static **[] values();
    public static ** valueOf(java.lang.String);
}

-keep class * implements android.os.Parcelable {
  public static final android.os.Parcelable$Creator *;
}

-keepclassmembers class * {
   public  (org.json.JSONObject);
}

-keepclassmembers class fqcn.of.javascript.interface.for.webview {
   public *;
}

#########################################################################################

#不混淆注解類型
# For using Eventbus @Subscribe annotation
-keepattributes *Annotation*


##---------------Begin: proguard configuration for glide  ----------
-keep public class * implements com.bumptech.glide.module.GlideModule
-keep public enum com.bumptech.glide.load.resource.bitmap.ImageHeaderParser$** {
     **[] $VALUES;
     public *;
}
##---------------End: proguard configuration for glide  ----------


##---------------Begin: proguard configuration for xutils  ----------
-keepattributes Signature,*Annotation*
-keep public class org.xutils.** {
    public protected *;
}
-keep public interface org.xutils.** {
    public protected *;
}
-keepclassmembers class * extends org.xutils.** {
    public protected *;
}
-keepclassmembers @org.xutils.db.annotation.* class * {*;}
-keepclassmembers @org.xutils.http.annotation.* class * {*;}
-keepclassmembers class * {
    @org.xutils.view.annotation.Event ;
}
##---------------End: proguard configuration for xutils  ----------

##---------------Begin: proguard configuration for BQMM  ----------
-dontwarn com.melink.**
-dontwarn com.thirdparty.**
-keep class com.melink.** {*;}
-keep class com.thirdparty.** {*;}
##---------------End: proguard configuration for BQMM  ----------

##---------------Begin: proguard configuration for Umeng  ----------
-keep public class com.umeng.** { *;}
-dontwarn com.tencent.mm.**
-keep class com.tencent.mm.**{*;}
-dontwarn com.tencent.android.**
-keep class com.tencent.android.**{*;}
-keepclassmembers class * {
   public (org.json.JSONObject);
}
##---------------End: proguard configuration for Umeng  ----------

-dontwarn org.apache.http.**
-keep class org.apache.http.** { *; }
-keep class de.greenrobot.event.** {*;}
“#########################################################################################”上面的是基本配置,必須有的。之下的要根據你項目集成的jar或者第三方庫相應添加。
這裡有個技巧,混淆打包的時候難免出現錯誤,像下面截圖這種錯誤是很常見的。
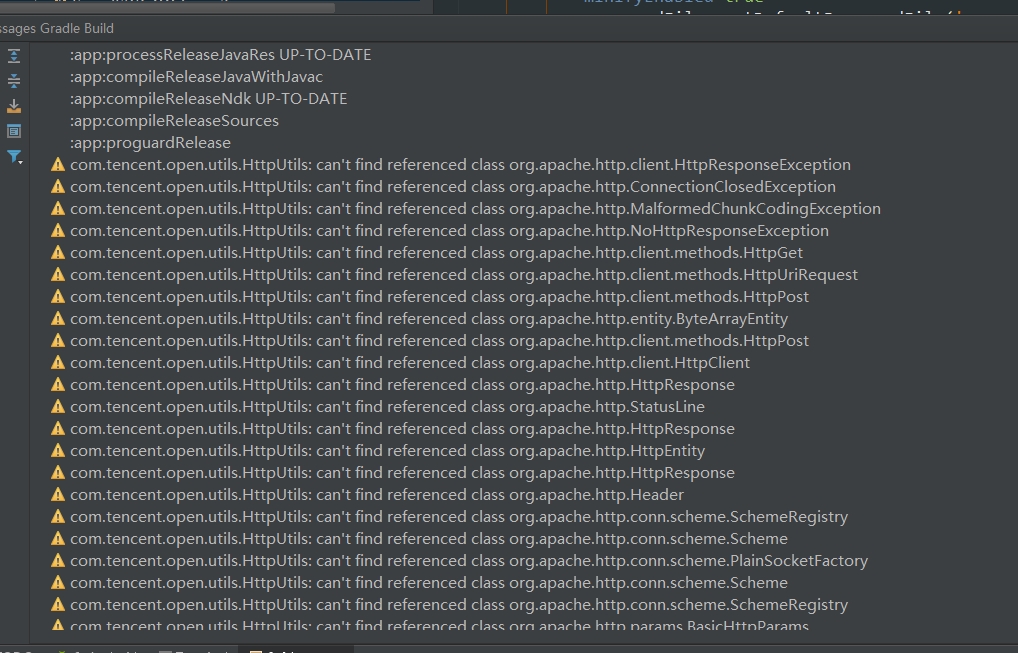
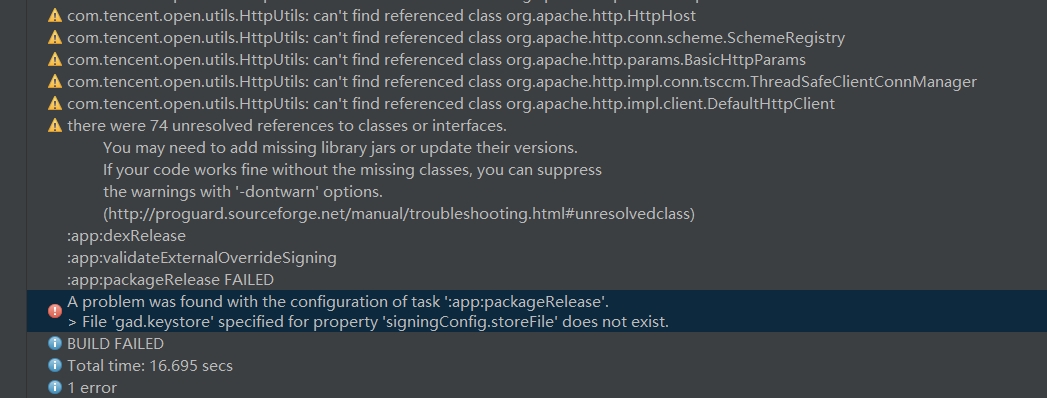
看起來有好多的警告,其實就只涉及到org.apache.http這個類,我們只要不混淆這個類就可以了。
此時我們可以根據報錯提示來決定不混淆哪個類,逐個排除。比如針對截圖的情況,可以這樣配置,就ok了。
#按壓警告
-dontwarn org.apache.http.**
#保持類不被混淆
-keep class org.apache.http.** { *; }
如果你沒有混淆(minifyEnabled false),那就不需要考慮了。
需要說明一下,混淆完以後整個項目需要全面測試一下,尤其是第三方的東西,因為有的第三方的在混淆的是很不會報錯,有的類也只有在運行起來的時候才會發現沒有相關類。
在清單文件application節點下配置:
build.gradle的android節點下添加:
productFlavors {

        baidu {}//百度
        anzhi {}//安智
        yingyongbao {}//騰訊應用寶
        qihu360 {}//360
        wandoujia {}//豌豆莢
        mumayi {}//木螞蟻
        appchina {}//應用匯
        leshi {}//樂視
        huawei {}//華為
        xiaomi {}//小米
        meizu {}//魅族
        oppo {}//oppo
        vivo {}//vivo
        pp {}//pp助手
        gfan {}//機鋒市場
        nduo {}//n多市場
        lenovo {}//樂商店
        eoe {}//優億市場
        gionee {}//金立
        coolpad {}//酷派
        myzte {}//中興

        productFlavors.all { flavor ->
            flavor.manifestPlaceholders = [UMENG_CHANNEL_VALUE: name]
        }

    }
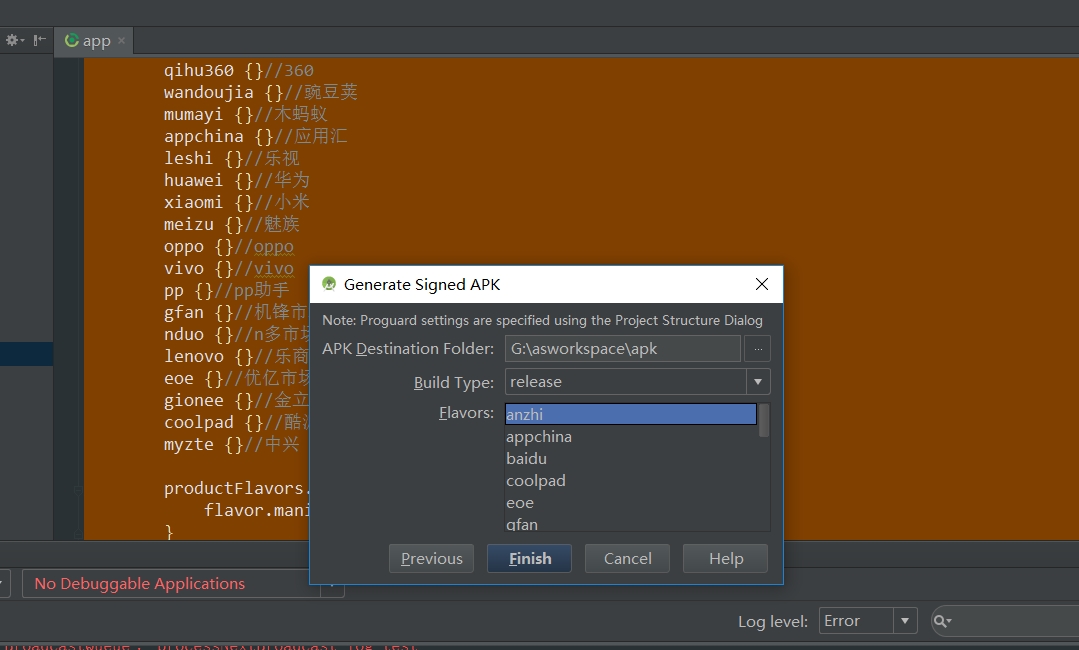
顯然,兩者之間是通過UMENG_CHANNEL_VALUE建立聯系的,此時我們Build-Generate Signed Apk…,在打包的時候會發現多了一欄Flavors,列表項就是我們添加的打包渠道,選擇你需要的渠道包,點擊Finish,studio便會開始自動打包模式。
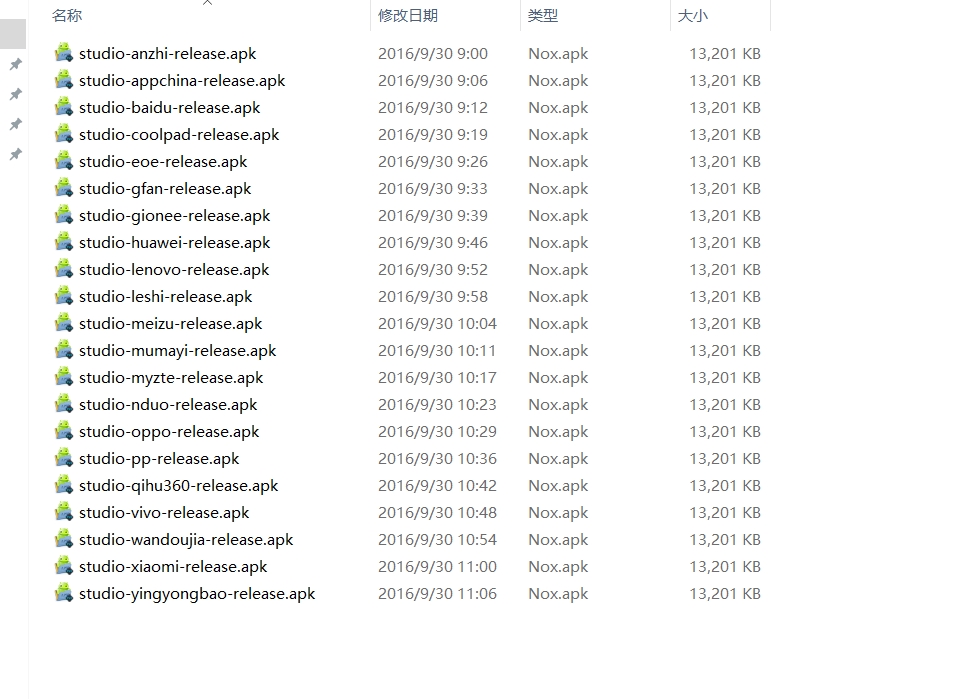
打包完成後apk文件會自動命名:
有混淆就有反編譯,我們畢竟要查看一下混淆成果。我給大家提供了反編譯的工具下載:
點擊:反編譯工具下載
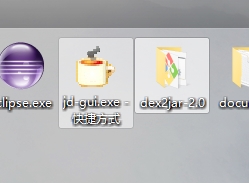
安裝產生這麼兩個東西,一個是產生jar文件的,一個是打開看混淆文件的。
使用說明:
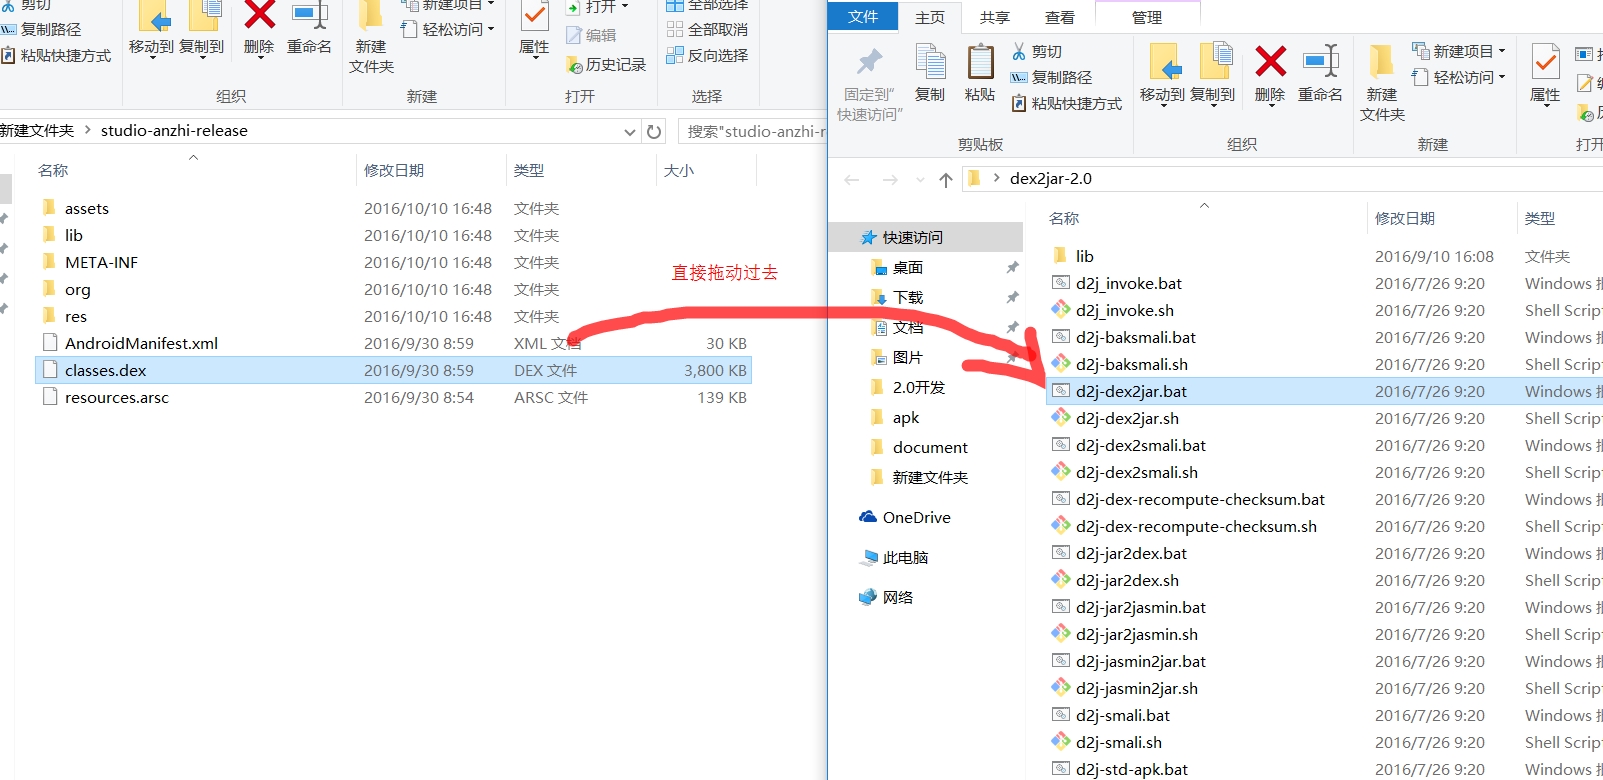
*首先將apk文件,將後綴改為zip,解壓,得到其中的classes.dex,它就是java文件編譯再通過dx工具打包而成的;
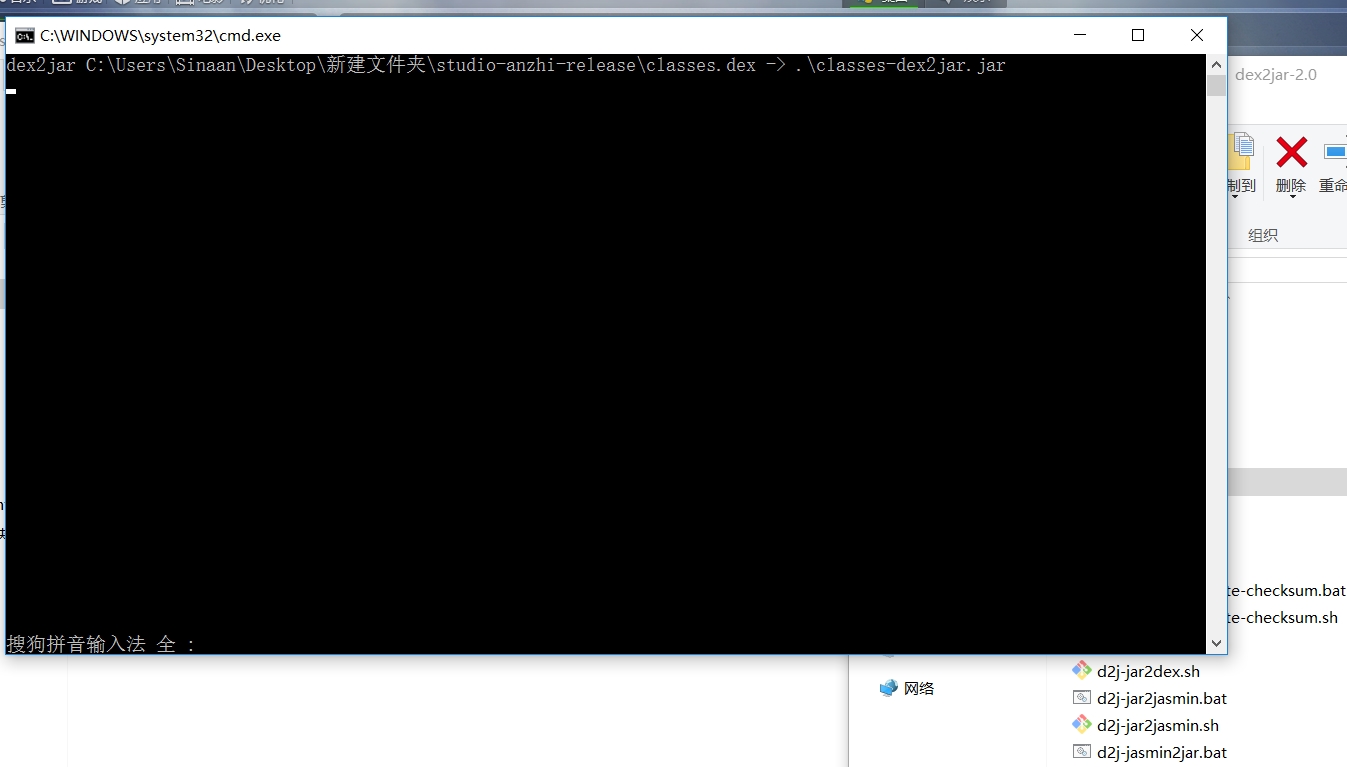
將classes.dex拖動到dex2jar.bat上,會彈出一個命令框,無需理會,等待命令框消失。
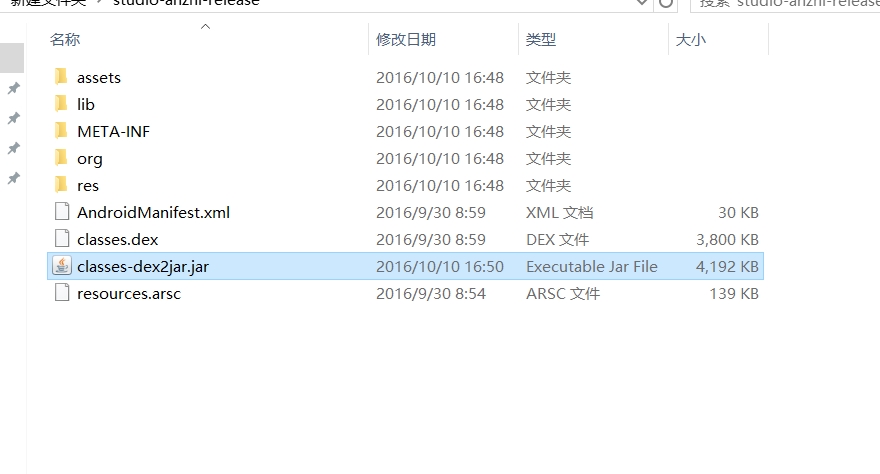
消失以後在classes.dex所在的目錄下會生成一個jar文件classes-dex2jar.jar
然後用jd_gui.exe直接File-Open File…打開即可。*
拖動classes.dex:
正在生成jar文件,等待3~4秒:
在和classes.dex同級目錄下生成jar文件:
下面這兩個截圖分別是未混淆和混淆後的,效果很顯然:
謝謝閱覽!!
 Android Studio下使用Android Fragment的簡單Demo(1)
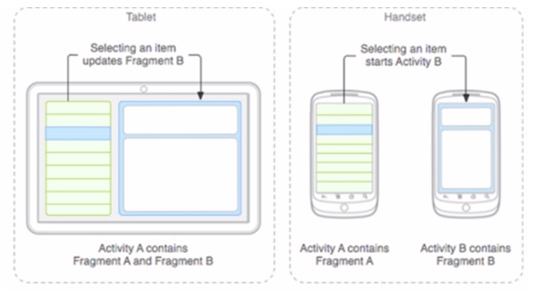
一、Fragment簡介Fragment介紹針對屏幕尺寸的差距,很多情況下,都是先針對手機開發一套app,然後拷貝一份,修改布局以適應什麼超級大屏的。Fragment的初
 Android中SQLite應用詳解
上次我向大家介紹了SQLite的基本信息和使用過程,相信朋友們對SQLite已經有所了解了,那今天呢,我就和大家分享一下在Android中如何使用SQLite。現在的主流
 Android中View實現彈性滑動的方法——Android開發藝術探索筆記
介紹彈性滑動也就是漸進式滑動,實現彈性滑動的方法有很多,但是他們都有一個共同的思想:將一次大的滑動分成若干次小的滑動並在一段時間內完成。本文主要介紹三種彈性滑動方式,Sc
 微信號被封怎麼辦 微信號永久封號怎麼解封
微信被封號貌似是常有的事情,那麼微信號被封怎麼辦?小編將在本文告訴大家如何自助解封,讓大家的微信賬號再次使用起來。當然啦,解封以後大家一定要查看關於微信封號