編輯:關於Android編程
在開發中,或許一個業務需求中會出現很多系統控件組合成的布局,並且經常需要復用。
比如下圖中 qq或者微博的title欄,在一款app中,可能不同的界面 類似的view要出現很多次,這個時候 就可以設計自己的view控件,就稱為組合控件吧。
 創建靈活的模板,通過調用自己的view,提高開發效率、降低耦合度。好處不言而喻
這邊以微博的title為例,創建一個組合控件

首先分析一下,上圖微博的當前頁面似乎包含了三四個控件,具體看你要怎麼做了:

ImageButton、TextView+DrwableRight、ImageButton

或者是 ImageButton、TextView+ImageView、ImageButton。
這邊以三個控件為例,創建一個布局,在裡面添加三個控件,然後控制其屬性
創建控件為控件添加自定義屬性:
在資源文件res-values文件夾下創建一個xml文件attrs,這時候可以考慮一下控件中需要哪些屬性,比如(左邊的控件是否可見、中間的text文本、整個title的背景等等),可以根據需求去添加。
創建控件,並加入系統自帶控件
使用布局加入控件,並關聯
創建一個布局
//使用布局添加
    private void initUiViews(Context context) {
        //關聯布局
        View.inflate(context, R.layout.layout_title_bar, this);
        ibLeft = (ImageButton) findViewById(R.id.ib_left);
        ibRight = (ImageButton) findViewById(R.id.ib_right);
        tvTitle = (TextView) findViewById(R.id.tv_title);
    }
使用代碼加入控件,並關聯
 private void initCodeViews(Context context) {
        ibRight = new ImageButton(context);
        ibLeft = new ImageButton(context);
        tvTitle = new TextView(context);
        //控件new出來後  接下來設置三個控件的大小 位置  並加入到當前的布局
        mleftLayoutParams = new LayoutParams(ViewGroup.LayoutParams.WRAP_CONTENT, ViewGroup.LayoutParams.WRAP_CONTENT);
        mleftLayoutParams.addRule(RelativeLayout.ALIGN_PARENT_START, TRUE);
        addView(ibLeft, mleftLayoutParams);

        mrightLayoutParams = new LayoutParams(ViewGroup.LayoutParams.WRAP_CONTENT, ViewGroup.LayoutParams.WRAP_CONTENT);
        mrightLayoutParams.addRule(RelativeLayout.ALIGN_PARENT_END, TRUE);
        addView(ibRight, mrightLayoutParams);

        mtextLayoutParams = new LayoutParams(ViewGroup.LayoutParams.WRAP_CONTENT, ViewGroup.LayoutParams.WRAP_CONTENT);
        mtextLayoutParams.addRule(RelativeLayout.CENTER_HORIZONTAL, TRUE);
        mtextLayoutParams.addRule(RelativeLayout.CENTER_VERTICAL, TRUE);
        addView(tvTitle, mtextLayoutParams);

    }
兩種用法應該是一樣的,可以挑一個方便的,個人認為用ui比較方便
    //關聯屬性
    private void contactAttrs() {
        //關聯屬性後 只要在引用控件的xml中設置centerText就可以,其他屬性也是一樣
        tvTitle.setText(mCenterTextViewText);
        //右側的icon是否顯示,這邊簡單舉例 需要靈活設置圖片 還需要自己封裝一個方法
        tvTitle.setCompoundDrawables(null,
                null,
                mIsShowCenterIconToRight ? getResources().getDrawable(R.drawable.ic_launcher) : null,
                null);

        //這個屬性設置的是當前控件的背景,這個控件繼承了RelativeLayout,所以直接調用this裡的方法
        this.setBackground(mBackground);

        ibLeft.setImageDrawable(mLeftDrawble);
        ibRight.setImageDrawable(mLeftDrawble);
    }
到這一部 靜態布局已經做好了
在layout中使用控件
直接在布局中引用

事件處理、代碼控制控件屬性
為了復用,可以定義一個回調接口進行各種操作
 //設置中間文本內容
    public void setCenterText(String text){
        tvTitle.setText(text);
    }

    public void setmCallback(TitleBarCliclCallback mCallback) {
        this.mCallback = mCallback;
    }

    //按鈕監聽回調
    public interface TitleBarCliclCallback {
        public void leftClick();

        public void rightClick();
    }

    private void setListener() {
        ibLeft.setOnClickListener(new OnClickListener() {
            @Override
            public void onClick(View v) {
                mCallback.leftClick();
            }
        });
        ibRight.setOnClickListener(new OnClickListener() {
            @Override
            public void onClick(View v) {
                mCallback.rightClick();
            }
        });
    }
在MainActivity中使用
  mTitleBar = (TitleBar) findViewById(R.id.titlebar);
        mTitleBar.setmCallback(new TitleBar.TitleBarCliclCallback() {
            @Override
            public void leftClick() {
                Toast.makeText(MainActivity.this,"leftClick",Toast.LENGTH_SHORT).show();

            }

            @Override
            public void rightClick() {
                Toast.makeText(MainActivity.this,"rightClick",Toast.LENGTH_SHORT).show();
            }
        });

        mTitleBar.setCenterText("mainActivity");
    }
下面是控件完整代碼
public class TitleBar extends RelativeLayout {

    private String mCenterTextViewText;
    private boolean mIsShowCenterIconToRight;
    private Drawable mBackground;
    private Drawable mLeftDrawble;
    private Drawable mRightDrawble;
    private ImageButton ibLeft, ibRight;
    private TextView tvTitle;

    private LayoutParams mleftLayoutParams, mrightLayoutParams, mtextLayoutParams;

    //有自定義的屬性,要用到attrs。所以需要兩個參數的構造方法
    public TitleBar(Context context, AttributeSet attrs) {
        super(context, attrs);

        initAttrs(attrs);
        initCodeViews(context);
//        initUiViews(context);
        contactAttrs();
    }

    //關聯屬性
    private void contactAttrs() {
        //關聯屬性後 只要在引用控件的xml中設置centerText就可以,其他屬性也是一樣
        tvTitle.setText(mCenterTextViewText);
        //右側的icon是否顯示,這邊簡單舉例 需要靈活設置圖片 還需要自己封裝一個方法
        tvTitle.setCompoundDrawables(null,
                null,
                mIsShowCenterIconToRight ? getResources().getDrawable(R.drawable.ic_launcher) : null,
                null);

        //這個屬性設置的是當前控件的背景,這個控件繼承了RelativeLayout,所以直接調用this裡的方法
        this.setBackground(mBackground);

        ibLeft.setImageDrawable(mLeftDrawble);
        ibRight.setImageDrawable(mLeftDrawble);
    }

    //使用ui的方式加入空間
    private void initUiViews(Context context) {
        //關聯布局
        View.inflate(context, R.layout.layout_title_bar, this);
        ibLeft = (ImageButton) findViewById(R.id.ib_left);
        ibRight = (ImageButton) findViewById(R.id.ib_right);
        tvTitle = (TextView) findViewById(R.id.tv_title);


    }

    //與initUiViews 方法作用一致 可以挑一個用 個人認為用ui加入比較方便
    //使用代碼加入控件,並關聯屬性
    private void initCodeViews(Context context) {
        ibRight = new ImageButton(context);
        ibLeft = new ImageButton(context);
        tvTitle = new TextView(context);
        //控件有了  接下來要設置控件大小 位置  並加入到當前的布局
        mleftLayoutParams = new LayoutParams(ViewGroup.LayoutParams.WRAP_CONTENT, ViewGroup.LayoutParams.WRAP_CONTENT);
        mleftLayoutParams.addRule(RelativeLayout.ALIGN_PARENT_START, TRUE);
        addView(ibLeft, mleftLayoutParams);

        mrightLayoutParams = new LayoutParams(ViewGroup.LayoutParams.WRAP_CONTENT, ViewGroup.LayoutParams.WRAP_CONTENT);
        mrightLayoutParams.addRule(RelativeLayout.ALIGN_PARENT_END, TRUE);
        addView(ibRight, mrightLayoutParams);

        mtextLayoutParams = new LayoutParams(ViewGroup.LayoutParams.WRAP_CONTENT, ViewGroup.LayoutParams.WRAP_CONTENT);
        mtextLayoutParams.addRule(RelativeLayout.CENTER_HORIZONTAL, TRUE);
        mtextLayoutParams.addRule(RelativeLayout.CENTER_VERTICAL, TRUE);
        addView(tvTitle, mtextLayoutParams);

    }

    //獲取到在attrs中創建的各個屬性
    private void initAttrs(AttributeSet attrs) {
        final TypedArray a = getContext().obtainStyledAttributes(attrs, R.styleable.TitleBar);
        //TitleBar_centerText 是系統生成的屬性名默認格式 聯想就能找到了 對應xml中TitleBar下的centerText
        //這個屬性返回的是String,其他的屬性寫法一樣
        mCenterTextViewText = a.getString(R.styleable.TitleBar_centerText);
        //默認值false
        mIsShowCenterIconToRight = a.getBoolean(R.styleable.TitleBar_centerIsShowRightIcon, false);
        mBackground = a.getDrawable(R.styleable.TitleBar_titleBackground);
        mLeftDrawble = a.getDrawable(R.styleable.TitleBar_leftImageDrwable);
        mRightDrawble = a.getDrawable(R.styleable.TitleBar_rightImageDrwable);

        //用完a後 回收TypedArray 節省資源
        a.recycle();
    }
}
 Android開發(29) Android 錯誤處理二
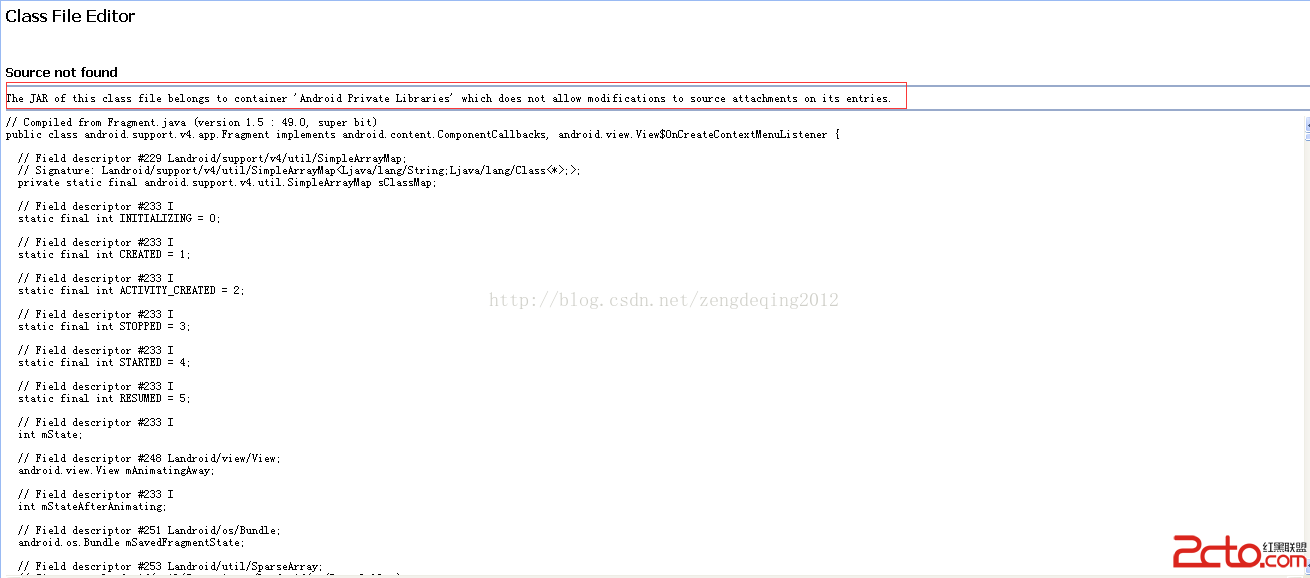
一 問題描述: 查看android源碼時提示: The JAR of this class file belongs to container ‘Android
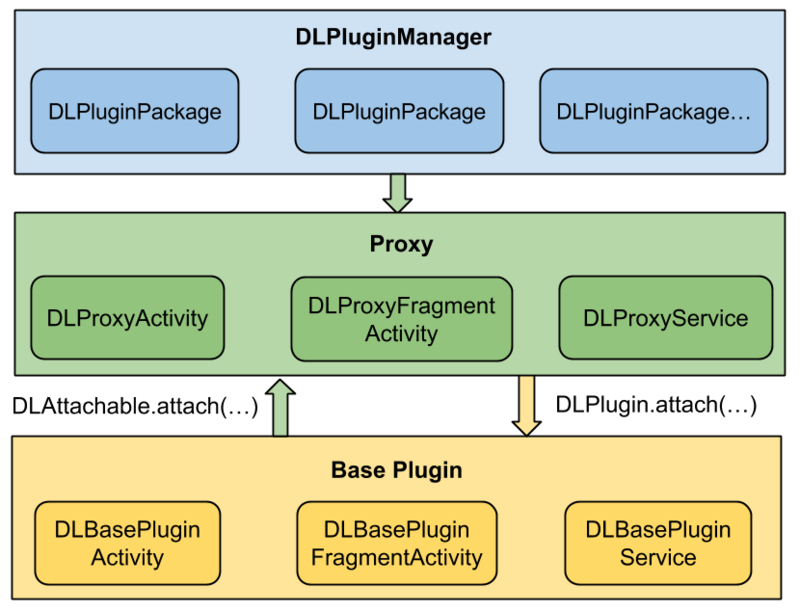 拆輪子之動態加載DynamicLoadApk
動態加載是什麼應用在運行的時候通過加載一些本地不存在的可執行文件實現一些特定的功能,Android中動態加載的核心思想是動態調用外部的Dex文件,極端的情況下,Andro
 Android Activity 橫豎屏切換的生命周期
前言在開發中常要處理橫豎屏切換,怎麼處理先看生命周期申明Activity 橫豎屏切換時需要回調兩個函數 ,所以在此將這個兩個函數暫時看成是Activity 橫豎屏切換的生
 Android開發之開發者頭條(一)啟動頁實現
廢話就不多說了,開始今天的正題,帶你實現開發者頭條APP的啟動頁。一.老規矩,先上效果圖從效果圖中我們可以看出,整個滑動的界面就是一個ViewPager實現,然後監聽Vi