編輯:關於Android編程
當程序意外退出時,可以去掉通知欄上顯示的圖標
1.創建TestNotificationActivity activity類,
package com.notioni.test.notification;
import android.app.Activity;
import android.content.Intent;
import android.os.Bundle;
import android.view.View;
public class TestNotificationActivity extends Activity implements View.OnClickListener{
/** Called when the activity is first created. */
private boolean mStart = false;
@Override
public void onCreate(Bundle savedInstanceState) {
super.onCreate(savedInstanceState);
setContentView(R.layout.main);
int[] ids = {R.id.btnShow,R.id.btnUpdate,R.id.btnRemove};
for(int i = 0; i < ids.length; i++){
findViewById(ids[i]).setOnClickListener(this);
}
mStart = false;
}
@Override
public void onClick(View v) {
switch(v.getId()){
case R.id.btnShow://顯示通知欄
mStart = true;
sendMsgToService(NotificationService.KEY_COMMAND_SHOW,mStart);
break;
case R.id.btnUpdate://修改通知欄內容
sendMsgToService(NotificationService.KEY_COMMAND_UPDATE,!mStart);
break;
case R.id.btnRemove:
mStart = false;//移除通知欄
sendMsgToService(NotificationService.KEY_COMMAND_REMOVE,mStart);
break;
}
}
@Override
protected void onDestroy() {
mStart = false;
sendMsgToService(NotificationService.KEY_COMMAND_REMOVE,mStart);
super.onDestroy();
}
private void sendMsgToService(String cmd,boolean isStart){
Intent intent = new Intent(this,NotificationService.class);
intent.setAction(NotificationService.ACTION_NOTIFICATION_CONTROL);
intent.putExtra(NotificationService.COMMAND_KEY, cmd);
intent.putExtra(NotificationService.TIME_KEY, isStart);
startService(intent);
}
}
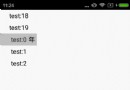
2.main.xml 顯示幾個button,用來演示效果
<?xml version="1.0" encoding="utf-8"?>
<LinearLayout xmlns:android="http://schemas.android.com/apk/res/android"
android:layout_width="fill_parent"
android:layout_height="fill_parent"
android:orientation="vertical" >
<Button
android:id="@+id/btnShow"
android:layout_width="fill_parent"
android:layout_height="100dip"
android:text="@string/notification_show"
/>
<Button
android:id="@+id/btnUpdate"
android:layout_width="fill_parent"
android:layout_height="100dip"
android:text="@string/notification_update"
/>
<Button
android:id="@+id/btnRemove"
android:layout_width="fill_parent"
android:layout_height="100dip"
android:text="@string/notification_remove"
/>
</LinearLayout>
3.NotificationService.java
對Notification顯示,修改,移除操作的核心類
package com.notioni.test.notification;
import android.app.Notification;
import android.app.PendingIntent;
import android.app.Service;
import android.content.Intent;
import android.os.IBinder;
import android.os.SystemClock;
import android.util.Log;
import android.widget.RemoteViews;
public class NotificationService extends Service {
private static final String TAG = "NotificationService";
public static final String ACTION_NOTIFICATION_CONTROL = "action_notification_control";
public static final String COMMAND_KEY = "cmd_key";
public static final String KEY_COMMAND_SHOW = "show_notification";
public static final String KEY_COMMAND_UPDATE = "update_notification";
public static final String KEY_COMMAND_REMOVE = "remove_notification";
public static final String TIME_KEY = "time_key";
public static final int NOTIFICATIN_ID = 100;
private Notification mNotification;
private long mTime;
@Override
public IBinder onBind(Intent intent) {
// TODO Auto-generated method stub
return null;
}
@Override
public void onCreate() {
super.onCreate();
}
@Override
public int onStartCommand(Intent intent, int flags, int startId) {
String action = intent.getAction();
//Log.i(TAG, "[onStartCommand] action:"+action);
if(ACTION_NOTIFICATION_CONTROL.equals(action)){
String cmd = intent.getStringExtra(COMMAND_KEY);
boolean isStart = intent.getBooleanExtra(TIME_KEY, false);
Log.i(TAG, "[onStartCommand] action:"+action+",cmd:"+cmd+",isStart:"+isStart);
if(KEY_COMMAND_SHOW.equals(cmd)){
showNotification(isStart);
}else if(KEY_COMMAND_UPDATE.equals(cmd)){
updateNotification(isStart);
}else if(KEY_COMMAND_REMOVE.equals(cmd)){
removeNotification();
}
}else{
Log.e(TAG, "illegality action:"+action);
}
return super.onStartCommand(intent, flags, startId);
}
/*
* 顯示在通知欄
*/
private void showNotification(boolean isStart){
createNotification(isStart);
}
/*
* 修改通知欄顯示
*/
private void updateNotification(boolean isStart){
createNotification(isStart);
}
/*
* 從通知欄移除
*/
public void removeNotification(){
stopForeground(true);
mTime = 0;
stopSelf();
}
/*
* 創建Notification對象
*/
public void createNotification(boolean started){
if(mNotification == null){
mNotification = new Notification();
mNotification.icon = R.drawable.ic_launcher;
mNotification.flags |=Notification.FLAG_ONGOING_EVENT;//表示正處於活動中
Intent intent = new Intent(this,TestNotificationActivity.class);
//這裡要加入此Flags,作用:當你通過點擊通知欄來喚起Activity時,對應的Activity啟動模式要為android:launchMode="singleTop"
//於此Flag一起使用,可以保證你要啟動的Activity不會重新啟動,在一個堆棧只有一個對應的實例對象
//使用這個標志,如果正在啟動的Activity的Task已經在運行的話,那麼,新的Activity將不會啟動;代替的,當前Task會簡單的移入前台。
intent.setFlags(Intent.FLAG_ACTIVITY_NEW_TASK);
PendingIntent pendingIntent = PendingIntent.getActivity(this, 0, intent, 0);
mNotification.contentIntent = pendingIntent;
RemoteViews contentView = new RemoteViews(getPackageName(), R.layout.notification_layout);
contentView.setImageViewResource(R.id.icon, R.drawable.ic_launcher);
mNotification.contentView = contentView;
mTime = SystemClock.elapsedRealtime();
}
long time = mTime;
mNotification.contentView.setChronometer(R.id.text1, time, null, started);
mNotification.contentView.setTextViewText(R.id.text2, getString(started?R.string.time_running:R.string.time_pause));
//使用服務來啟動通知欄,這樣的好處時,
//1.當應用程序在後台運行時,startForeground可以使本應用優先級提高,不至於被系統殺掉
//2.當應用被異常掛掉時,可以保證通知欄對應的圖標被系統移除
startForeground(NOTIFICATIN_ID, mNotification);
}
}
4. notification_layout.xml文件
<?xml version="1.0" encoding="utf-8"?>
<LinearLayout xmlns:android="http://schemas.android.com/apk/res/android"
android:orientation="horizontal"
android:baselineAligned="false"
android:gravity="center_vertical"
android:layout_width="match_parent"
android:layout_height="65sp"
android:background="@android:drawable/status_bar_item_background"
android:id="@+id/layoutMain"
>
<ImageView android:id="@+id/icon"
android:layout_width="wrap_content"
android:layout_height="wrap_content"
android:paddingLeft="4dip"
android:layout_marginRight="6dip" />
<LinearLayout
android:layout_width="wrap_content"
android:layout_height="wrap_content"
android:orientation="vertical"
>
<Chronometer android:id="@+id/text1"
android:textColor="?android:attr/textColorPrimaryInverse"
android:textStyle="bold"
android:textSize="18sp"
android:layout_width="wrap_content"
android:layout_height="wrap_content"
android:singleLine="true"
/>
<TextView android:id="@+id/text2"
android:textColor="#ff6b6b6b"
android:textSize="14sp"
android:layout_width="wrap_content"
android:layout_height="wrap_content"
android:singleLine="true"
/>
</LinearLayout>
</LinearLayout>
5.AndroidManifest.xml
<?xml version="1.0" encoding="utf-8"?>
<manifest xmlns:android="http://schemas.android.com/apk/res/android"
package="com.notioni.test.notification"
android:versionCode="1"
android:versionName="1.0" >
<application
android:icon="@drawable/ic_launcher"
android:label="@string/app_name" >
<activity
android:name=".TestNotificationActivity"
android:launchMode="singleTop"
android:label="@string/app_name" >
<intent-filter>
<action android:name="android.intent.action.MAIN" />
<category android:name="android.intent.category.LAUNCHER" />
</intent-filter>
</activity>
<service android:name=".NotificationService" android:exported="false"></service>
</application>
</manifest>
總結:通知欄采用Service中的startForeground方法去顯示到狀態欄,
而不采用NotificationManager中的notify的好處有以下兩點
1. 當應用程序轉入後台運行時startForeground方法可以提高應用程序的運行等級,不至於被系統殺掉
2. 當應用程序由於異常或其他未知的情況下,終止,ActivityManagerService會移除通知欄的圖標,不會導致程序已經關閉而圖標還顯示在通知欄
對startForeground的簡單分析說明,此方法會調用ActivityManagerService.java類的setServiceForeground方法,此方法會保存Notification對象,並調用NotificationManger中的notify將通知顯示到狀態欄,然後設置Service是forground= ture
當應用程序異常退出時ActivityManagerService會監聽到應用死亡,根據保存的Notification對象可以去掉通知欄上的顯示圖標
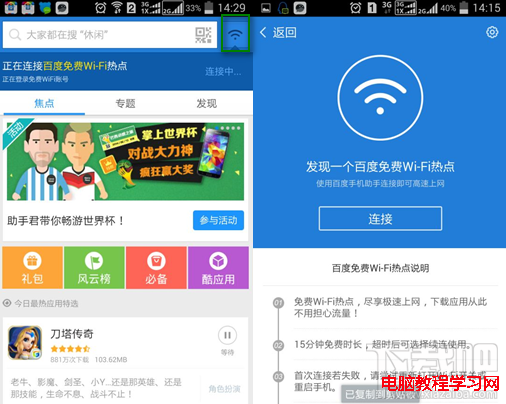 百度手機助手連接Chinanet免費無線上網免密碼教程
百度手機助手已經與中國電信達成深度合作協議,在全國范圍內推出免費WIFI服務。只要有中國電信Chinanet wifi熱點地方,百度手機助手用戶都可以免費連
 Android系統應用---Notification之一:Notification概述及使用
通知機制 是Android和用戶交互,提高APP活躍度的重要手段,可以將一些重要的信息通過通知展示給用戶,比如說新的聊天消息或者日歷事件。Notification的設計理
 Android簡易實戰教程--第二十四話《畫畫板》
今天完成一個畫畫板。首先來個布局: 可見,要分紅綠色,而且還要保存最後畫的圖片。 看一下主活動代碼: package com.it
 Android自定義實現循環滾輪控件WheelView
首先呈上Android循環滾輪效果圖: 現在很多地方都用到了滾輪布局WheelView,比如在選擇生日的時候,風格類似系統提供的DatePickerDialog