編輯:關於Android編程

這裡推薦的做法是使用android.text.*;和android.text.style.*;下面的組件來實現RichText:也即在同一個TextView中設置不同的字體風格。對於某些應用,比如文本編輯,記事本,彩信,短信等地方,還必須使用這些組件才能達到想到的顯示效果。
主要的基本工具類有android.text.Spanned; android.text.SpannableString; android.text.SpannableStringBuilder;使用這些類來代替常規String。SpannableString和SpannableStringBuilder可以用來設置不同的Span,這些Span便是用於實現Rich Text,比如粗體,斜體,前景色,背景色,字體大小,字體風格等等,android.text.style.*中定義了很多的Span類型可供使用。
這是相關的API的Class General Hierarchy:
因為Spannable等最終都實現了CharSequence接口,所以可以直接把SpannableString和SpannableStringBuilder通過TextView.setText()設置給TextView。
使用方法
當要顯示Rich Text信息的時候,可以使用創建一個SpannableString或SpannableStringBuilder,它們的區別在於SpannableString像一個String一樣,構造對象的時候傳入一個String,之後再無法更改String的內容,也無法拼接多個SpannableString;而SpannableStringBuilder則更像是StringBuilder,它可以通過其append()方法來拼接多個String:
復制代碼 代碼如下:
SpannableString word = new SpannableString("The quick fox jumps over the lazy dog");
SpannableStringBuilder multiWord = new SpannableStringBuilder();
multiWord.append("The Quick Fox");
multiWord.append("jumps over");
multiWord.append("the lazy dog");
創建完Spannable對象後,就可以為它們設置Span來實現想要的Rich Text了,常見的Span有:
•AbsoluteSizeSpan(int size) ---- 設置字體大小,參數是絕對數值,相當於Word中的字體大小
•RelativeSizeSpan(float proportion) ---- 設置字體大小,參數是相對於默認字體大小的倍數,比如默認字體大小是x, 那麼設置後的字體大小就是x*proportion,這個用起來比較靈活,proportion>1就是放大(zoom in), proportion<1就是縮小(zoom out)
•ScaleXSpan(float proportion) ---- 縮放字體,與上面的類似,默認為1,設置後就是原來的乘以proportion,大於1時放大(zoon in),小於時縮小(zoom out)
•BackgroundColorSpan(int color) ----背景著色,參數是顏色數值,可以直接使用android.graphics.Color裡面定義的常量,或是用Color.rgb(int, int, int)
•ForegroundColorSpan(int color) ----前景著色,也就是字的著色,參數與背景著色一致
•TypefaceSpan(String family) ----字體,參數是字體的名字比如“sans", "sans-serif"等
•StyleSpan(Typeface style) -----字體風格,比如粗體,斜體,參數是android.graphics.Typeface裡面定義的常量,如Typeface.BOLD,Typeface.ITALIC等等。
•StrikethroughSpan----如果設置了此風格,會有一條線從中間穿過所有的字,就像被劃掉一樣
對於這些Sytle span在使用的時候通常只傳上面所說明的構造參數即可,不需要設置其他的屬性,如果需要的話,也可以對它們設置其他的屬性,詳情可以參見<文檔>。
SpannableString和SpannableStringBuilder都有一個設置上述Span的方法:
復制代碼 代碼如下:
/**
* Set the style span to Spannable, such as SpannableString or SpannableStringBuilder
* @param what --- the style span, such as StyleSpan
* @param start --- the starting index of characters to which the style span to apply
* @param end --- the ending index of characters to which the style span to apply
* @param flags --- the flag specified to control
*/
setSpan(Object what, int start, int end, int flags);
其中參數what是要設置的Style span,start和end則是標識String中Span的起始位置,而 flags是用於控制行為的,通常設置為0或Spanned中定義的常量,常用的有:
•Spanned.SPAN_EXCLUSIVE_EXCLUSIVE --- 不包含兩端start和end所在的端點
•Spanned.SPAN_EXCLUSIVE_INCLUSIVE --- 不包含端start,但包含end所在的端點
•Spanned.SPAN_INCLUSIVE_EXCLUSIVE --- 包含兩端start,但不包含end所在的端點
•Spanned.SPAN_INCLUSIVE_INCLUSIVE--- 包含兩端start和end所在的端點
這裡理解起來就好像數學中定義區間,開區間還是閉區間一樣的。還有許多其他的Flag,可以參考<這裡>。這裡要重點說明下關於參數0,有很多時候,如果設置了上述的參數,那麼Span會從start應用到Text結尾,而不是在start和end二者之間,這個時候就需要使用Flag 0。
Linkify
另外,也可以對通過TextView.setAutoLink(int)設置其Linkify屬性,其用處在於,TextView會自動檢查其內容,會識別出phone number, web address or email address,並標識為超鏈接,可點擊,點擊後便跳轉到相應的應用,如Dialer,Browser或Email。Linkify有幾個常用選項,更多的請參考<文檔>
•Linkify.EMAIL_ADDRESS -- 僅識別出TextView中的Email在址,標識為超鏈接,點擊後會跳到Email,發送郵件給此地址
•Linkify.PHONE_NUMBERS -- 僅識別出TextView中的電話號碼,標識為超鏈接,點擊後會跳到Dialer,Call這個號碼
•Linkify.WEB_URLS-- 僅識別出TextView中的網址,標識為超鏈接,點擊後會跳到Browser打開此URL
•Linkify.ALL -- 這個選項是識別出所有系統所支持的特殊Uri,然後做相應的操作
權衡選擇
個人認為軟件開發中最常見的問題不是某個技巧怎麼使用的問題,而是何時該使用何技巧的問題,因為實現同一個目標可能有N種不同的方法,就要權衡利弊,選擇最合適的一個,正如常言所雲,沒有最好的,只有最適合的。如前面所討論的,要想用不同的字體展現不同的信息可能的解法,除了用Style Span外還可以用多個TextView。那麼就需要總結下什麼時候該使用StyleSpan,什麼時候該使用多個TextView:
1.如果顯示的是多個不同類別的信息,就應該使用多個TextView,這樣也方便控制和改變各自的信息,例子就是默認LockScreen上面的日期和充電信息,因為它們所承載不同的信息,所以應該使用多個TextView來分別呈現。
2.如果顯示的是同一類信息,或者同一個信息,那麼應該使用StyleSpan。比如,短信息中,要把聯系人的相關信息突出顯示;或是想要Highlight某些信息等。
3.如果要實現Rich text,沒辦法,只能使用Style span。
4.如果要實現某些特效,也可以考慮使用StyleSpan。設置不同的字體風格只是Style span的初級應用,如果深入研究,可以發現很多奇妙的功效。
實例
復制代碼 代碼如下:
<?xml version="1.0" encoding="utf-8"?>
<LinearLayout
xmlns:android="http://schemas.android.com/apk/res/android"
android:layout_width="wrap_content"
android:layout_height="wrap_content"
android:orientation="vertical">
<ScrollView
android:layout_width="fill_parent"
android:layout_height="wrap_content">
<LinearLayout
android:layout_width="fill_parent"
android:layout_height="wrap_content"
android:orientation="vertical">
<TextView
android:id="@+id/text_view_font_1"
android:layout_width="fill_parent"
android:layout_height="wrap_content"
/>
<TextView
android:id="@+id/text_view_font_2"
android:layout_width="fill_parent"
android:layout_height="wrap_content"
/>
<TextView
android:id="@+id/text_view_font_3"
android:layout_width="fill_parent"
android:layout_height="wrap_content"
/>
<TextView
android:id="@+id/text_view_font_4"
android:layout_width="fill_parent"
android:layout_height="wrap_content"
/>
<TextView
android:id="@+id/text_view_font_5"
android:layout_width="fill_parent"
android:layout_height="wrap_content"
/>
</LinearLayout>
</ScrollView>
</LinearLayout>
Source code:
復制代碼 代碼如下:
package com.android.effective;
import java.util.regex.Matcher;
import java.util.regex.Pattern;
import android.app.Activity;
import android.graphics.Color;
import android.graphics.Typeface;
import android.os.Bundle;
import android.text.Spannable;
import android.text.SpannableString;
import android.text.SpannableStringBuilder;
import android.text.style.AbsoluteSizeSpan;
import android.text.style.BackgroundColorSpan;
import android.text.style.ForegroundColorSpan;
import android.text.style.QuoteSpan;
import android.text.style.RelativeSizeSpan;
import android.text.style.ScaleXSpan;
import android.text.style.StrikethroughSpan;
import android.text.style.StyleSpan;
import android.text.style.TypefaceSpan;
import android.text.style.URLSpan;
import android.text.util.Linkify;
import android.widget.TextView;
public class TextViewFontActivity extends Activity {
@Override
public void onCreate(Bundle bundle) {
super.onCreate(bundle);
setContentView(R.layout.textview_font_1);
// Demonstration of basic SpannableString and spans usage
final TextView textWithString = (TextView) findViewById(R.id.text_view_font_1);
String w = "The quick fox jumps over the lazy dog";
int start = w.indexOf('q');
int end = w.indexOf('k') + 1;
Spannable word = new SpannableString(w);
word.setSpan(new AbsoluteSizeSpan(22), start, end,
Spannable.SPAN_INCLUSIVE_INCLUSIVE);
word.setSpan(new StyleSpan(Typeface.BOLD), start, end,
Spannable.SPAN_INCLUSIVE_INCLUSIVE);
word.setSpan(new BackgroundColorSpan(Color.RED), start, end,
Spannable.SPAN_INCLUSIVE_INCLUSIVE);
textWithString.setText(word);
// Demonstration of basic SpannableStringBuilder and spans usage
final TextView textWithBuilder = (TextView) findViewById(R.id.text_view_font_2);
SpannableStringBuilder word2 = new SpannableStringBuilder();
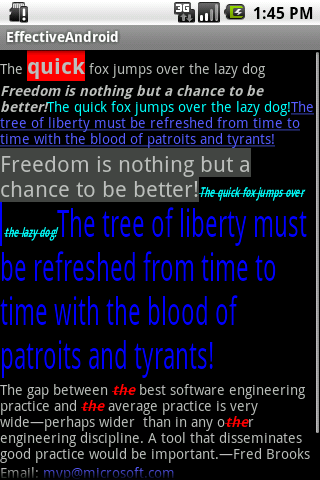
final String one = "Freedom is nothing but a chance to be better!";
final String two = "The quick fox jumps over the lazy dog!";
final String three = "The tree of liberty must be refreshed from time to time with " +
"the blood of patroits and tyrants!";
word2.append(one);
start = 0;
end = one.length();
word2.setSpan(new StyleSpan(Typeface.BOLD_ITALIC), start, end, Spannable.SPAN_EXCLUSIVE_EXCLUSIVE);
word2.append(two);
start = end;
end += two.length();
word2.setSpan(new ForegroundColorSpan(Color.CYAN), start, end,
Spannable.SPAN_EXCLUSIVE_EXCLUSIVE);
word2.append(three);
start = end;
end += three.length();
word2.setSpan(new URLSpan(three), start, end, Spannable.SPAN_EXCLUSIVE_EXCLUSIVE);
textWithBuilder.setText(word2);
// Troubleshooting when using SpannableStringBuilder
final TextView textTroubles = (TextView) findViewById(R.id.text_view_font_3);
SpannableStringBuilder word3 = new SpannableStringBuilder();
start = 0;
end = one.length();
// Caution: must first append or set text to SpannableStringBuilder or SpannableString
// then set the spans to them, otherwise, IndexOutOfBoundException is thrown when setting spans
word3.append(one);
// For AbsoluteSizeSpan, the flag must be set to 0, otherwise, it will apply this span to until end of text
word3.setSpan(new AbsoluteSizeSpan(22), start, end, 0);//Spannable.SPAN_INCLUSIVE_INCLUSIVE);
// For BackgroundColorSpanSpan, the flag must be set to 0, otherwise, it will apply this span to end of text
word3.setSpan(new BackgroundColorSpan(Color.DKGRAY), start, end, 0); //Spannable.SPAN_INCLUSIVE_INCLUSIVE);
word3.append(two);
start = end;
end += two.length();
word3.setSpan(new TypefaceSpan("sans-serif"), start, end,
Spannable.SPAN_INCLUSIVE_INCLUSIVE);
// TODO: sometimes, flag must be set to 0, otherwise it will apply the span to until end of text
// which MIGHT has nothing to do with specific span type.
word3.setSpan(new StyleSpan(Typeface.BOLD_ITALIC), start, end, 0);//Spannable.SPAN_INCLUSIVE_INCLUSIVE);
word3.setSpan(new ScaleXSpan(0.618f), start, end, Spannable.SPAN_INCLUSIVE_INCLUSIVE);
word3.setSpan(new StrikethroughSpan(), start, end, 0);//Spannable.SPAN_INCLUSIVE_INCLUSIVE);
word3.setSpan(new ForegroundColorSpan(Color.CYAN), start, end, Spannable.SPAN_INCLUSIVE_INCLUSIVE);
word3.setSpan(new QuoteSpan(), start, end, 0); //Spannable.SPAN_INCLUSIVE_INCLUSIVE);
word3.append(three);
start = end;
end += three.length();
word3.setSpan(new RelativeSizeSpan((float) Math.E), start, end, Spannable.SPAN_INCLUSIVE_INCLUSIVE);
word3.setSpan(new ForegroundColorSpan(Color.BLUE), start, end, Spannable.SPAN_INCLUSIVE_INCLUSIVE);
textTroubles.setText(word3);
// Highlight some patterns
final String four = "The gap between the best software engineering " +
"practice and the average practice is very wide¡ªperhaps wider " +
" than in any other engineering discipline. A tool that disseminates " +
"good practice would be important.¡ªFred Brooks";
final Pattern highlight = Pattern.compile("the");
final TextView textHighlight = (TextView) findViewById(R.id.text_view_font_4);
SpannableString word4 = new SpannableString(four);
Matcher m = highlight.matcher(word4.toString());
while (m.find()) {
word4.setSpan(new StyleSpan(Typeface.BOLD_ITALIC), m.start(), m.end(),
Spannable.SPAN_INCLUSIVE_INCLUSIVE);
word4.setSpan(new ForegroundColorSpan(Color.RED), m.start(), m.end(),
Spannable.SPAN_INCLUSIVE_INCLUSIVE);
word4.setSpan(new StrikethroughSpan(), m.start(), m.end(),
Spannable.SPAN_INCLUSIVE_INCLUSIVE);
}
textHighlight.setText(word4);
// Set numbers, URLs and E-mail address to be clickable with TextView#setAutoLinkMask
final TextView textClickable = (TextView) findViewById(R.id.text_view_font_5);
final String contact = "Email: [email protected]\n" +
"Phone: +47-24885883\n" +
"Fax: +47-24885883\n" +
"HTTP: www.microsoft.com/mvp.asp";
// Set the attribute first, then set the text. Otherwise, it won't work
textClickable.setAutoLinkMask(Linkify.ALL); // or set 'android:autoLink' in layout xml
textClickable.setText(contact);
}
}
The results:
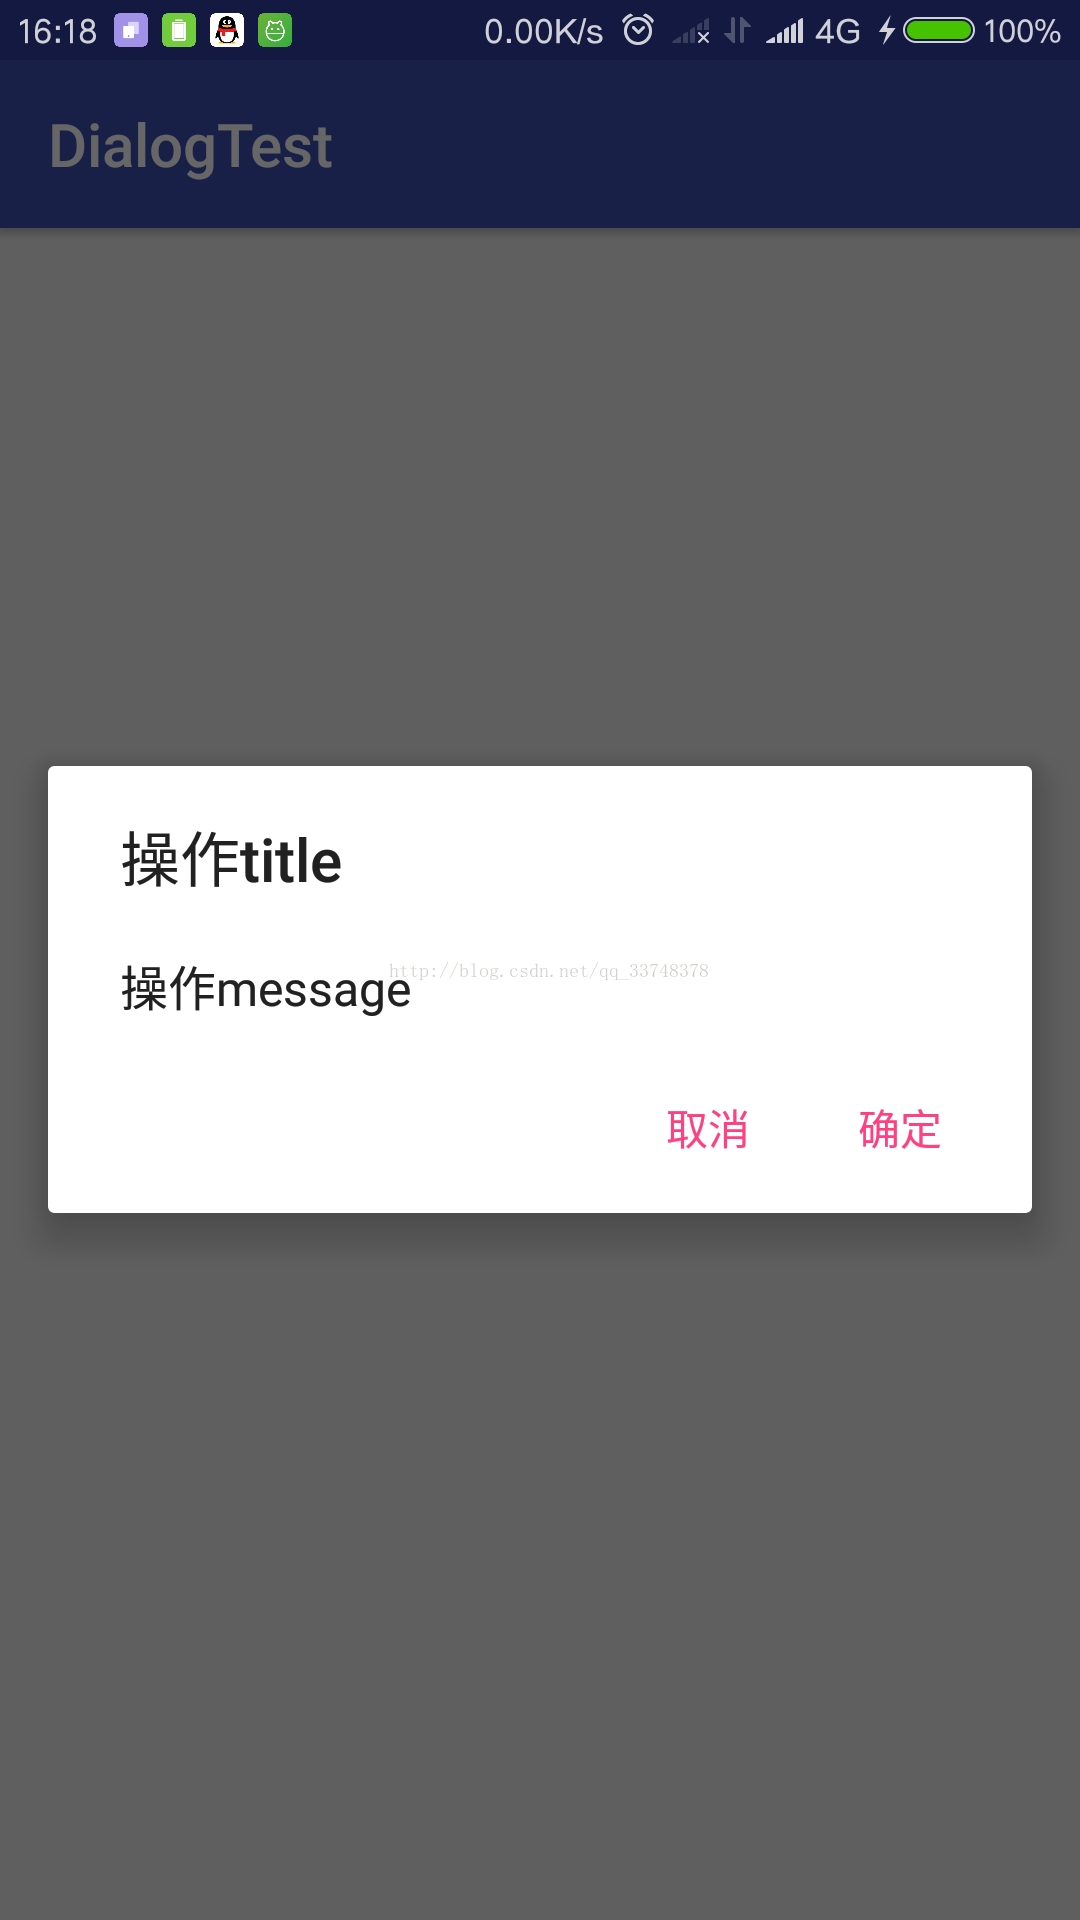 android AlertDialog多種使用方法詳解
當你的應用需要顯示一個進度條或需要用戶對信息進行確認時,可以使用alertDialog來完成。下面來介紹常用的四種AlertDialog。1、普通對話框package c
 Android中Android Virtual Device(AVD)使用教程
AVD的全稱為:Android Virtual Device,就是Android運行的虛擬設備,他是Android的模擬器識別。建立的Android要運行,必須創建AVD
 Android權限
系統權限 在運行時請求權限系統權限 Android是一個權限分離的操作系統,每個應用使用不同的系統身份運行(Linux用戶ID和群組ID)。系統的不同部分也被分隔進不同
 教你制作Android中炫酷的ViewPagerIndicator(不僅仿MIUI)
1、概述今天給大家帶來一個ViewPagerIndicator的制作,相信大家在做tabIndicator的時候,大多數人都用過TabPageIndicator,並且很多