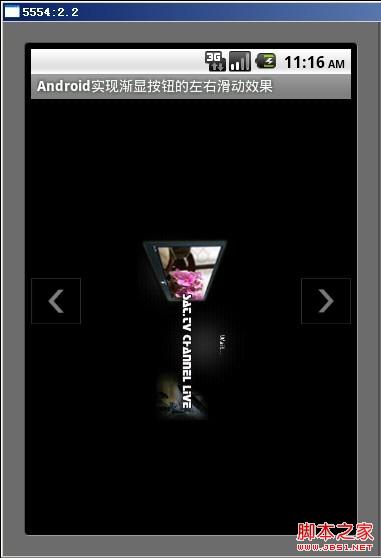
先看下運行效果:

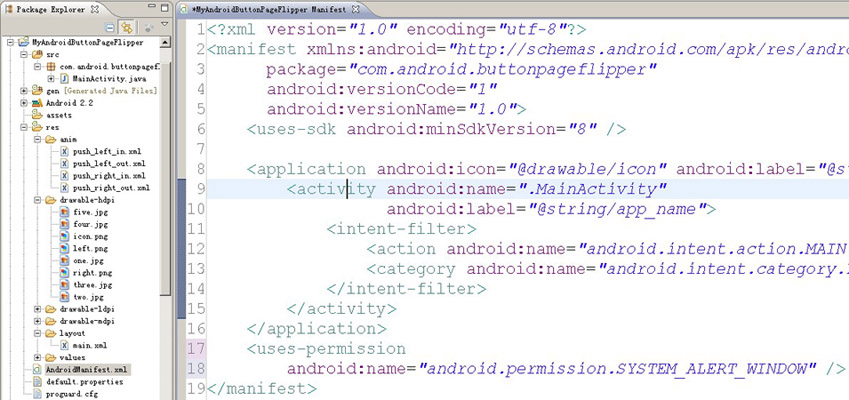
程序結構:
MainActivity文件中代碼:
復制代碼 代碼如下:
package com.android.buttonpageflipper;
import android.app.Activity;
import android.graphics.PixelFormat;
import android.os.Bundle;
import android.os.Handler;
import android.os.Message;
import android.view.Gravity;
import android.view.MotionEvent;
import android.view.View;
import android.view.WindowManager;
import android.view.WindowManager.LayoutParams;
import android.widget.ImageView;
import android.widget.ViewFlipper;
/**
* Android實現帶漸顯按鈕的左右滑動效果
* @Description: 自然狀態下按鈕不可見,觸摸屏幕時顯示按鈕
*
* @FileName: MainActivity.java
*
* @Package com.android.buttonpageflipper
*
* @Author Hanyonglu
*
*/
public class MainActivity extends Activity {
//聲明兩個按鈕,分別代表向左和向右滑動
private ImageView btnLeft=null;
private ImageView btnRight=null;
//設置WindowManager
private WindowManager wm=null;
private WindowManager.LayoutParams wmParams=null;
//ImageView的alpha值
private int mAlpha = 0;
private boolean isHide;
private ViewFlipper viewFlipper = null;
/** Called when the activity is first created. */
@Override
public void onCreate(Bundle savedInstanceState) {
super.onCreate(savedInstanceState);
setContentView(R.layout.main);
setTitle("Android實現漸顯按鈕的左右滑動效果");
viewFlipper = (ViewFlipper) this.findViewById(R.id.myViewFlipper);
//初始化左右按鈕
initImageButtonView();
}
/**
* 初始化懸浮按鈕
*/
private void initImageButtonView(){
//獲取WindowManager
wm=(WindowManager)getApplicationContext().getSystemService("window");
//設置LayoutParams相關參數
wmParams = new WindowManager.LayoutParams();
//設置window type
wmParams.type=LayoutParams.TYPE_PHONE;
//設置圖片格式,效果為背景透明
wmParams.format=PixelFormat.RGBA_8888;
//設置Window flag參數
wmParams.flags=LayoutParams.FLAG_NOT_TOUCH_MODAL
| LayoutParams.FLAG_NOT_FOCUSABLE;
//設置x、y初始值
wmParams.x=0;
wmParams.y=0;
//設置窗口長寬數據
wmParams.width=50;
wmParams.height=50;
//創建左右按鈕
createLeftButtonView();
createRightButtonView();
}
/**
* 設置左邊按鈕
*/
private void createLeftButtonView(){
btnLeft=new ImageView(this);
btnLeft.setImageResource(R.drawable.left);
btnLeft.setAlpha(0);
btnLeft.setOnClickListener(new View.OnClickListener() {
public void onClick(View arg0) {
//上一個圖像
viewFlipper.setInAnimation(MainActivity.this, R.anim.push_left_in);
viewFlipper.setOutAnimation(MainActivity.this, R.anim.push_left_out);
viewFlipper.showPrevious();
}
});
//調整窗口
wmParams.gravity=Gravity.LEFT|Gravity.CENTER_VERTICAL;
//顯示圖像
wm.addView(btnLeft, wmParams);
}
/**
* 設置右邊按鈕
*/
private void createRightButtonView(){
btnRight=new ImageView(this);
btnRight.setImageResource(R.drawable.right);
btnRight.setAlpha(0);
btnRight.setOnClickListener(new View.OnClickListener() {
public void onClick(View arg0) {
//下一個圖像
viewFlipper.setInAnimation(MainActivity.this, R.anim.push_right_in);
viewFlipper.setOutAnimation(MainActivity.this, R.anim.push_right_out);
viewFlipper.showNext();
}
});
//調整窗口
wmParams.gravity=Gravity.RIGHT|Gravity.CENTER_VERTICAL;
//顯示圖像
wm.addView(btnRight, wmParams);
}
/**
* 設置按鈕漸顯效果
*/
private Handler mHandler = new Handler()
{
public void handleMessage(Message msg) {
if(msg.what==1 && mAlpha<255){
//通過設置不透明度設置按鈕的漸顯效果
mAlpha += 50;
if(mAlpha>255)
mAlpha=255;
btnLeft.setAlpha(mAlpha);
btnLeft.invalidate();
btnRight.setAlpha(mAlpha);
btnRight.invalidate();
if(!isHide && mAlpha<255)
mHandler.sendEmptyMessageDelayed(1, 100);
}else if(msg.what==0 && mAlpha>0){
mAlpha -= 10;
if(mAlpha<0)
mAlpha=0;
btnLeft.setAlpha(mAlpha);
btnLeft.invalidate();
btnRight.setAlpha(mAlpha);
btnRight.invalidate();
if(isHide && mAlpha>0)
mHandler.sendEmptyMessageDelayed(0, 800);
}
}
};
private void showImageButtonView(){
isHide = false;
mHandler.sendEmptyMessage(1);
}
private void hideImageButtonView(){
new Thread(){
public void run() {
try {
Thread.sleep(1500);
isHide = true;
mHandler.sendEmptyMessage(0);
} catch (Exception e) {
}
}
}.start();
}
@Override
public boolean onTouchEvent(MotionEvent event) {
switch (event.getAction()) {
case MotionEvent.ACTION_MOVE:
case MotionEvent.ACTION_DOWN:
showImageButtonView();
break;
case MotionEvent.ACTION_UP:
hideImageButtonView();
break;
}
return true;
}
@Override
public void onDestroy(){
super.onDestroy();
//在程序退出(Activity銷毀)時銷毀窗口
wm.removeView(btnLeft);
wm.removeView(btnRight);
}
}
main.xml文件中代碼:
復制代碼 代碼如下:
<?xml version="1.0" encoding="utf-8"?>
<LinearLayout xmlns:android="http://schemas.android.com/apk/res/android" android:layout_width="fill_parent" android:layout_height="fill_parent" android:orientation="vertical">
<ViewFlipper
android:id="@+id/myViewFlipper"
android:layout_width="fill_parent"
android:layout_height="fill_parent">
<!-- 第一個頁面 -->
<LinearLayout
android:layout_width="fill_parent"
android:layout_height="fill_parent"
android:gravity="center">
<ImageView
android:layout_width="wrap_content"
android:layout_height="wrap_content"
android:src="@drawable/one"
android:gravity="center" />
</LinearLayout>
<!-- 第二個頁面 -->
<LinearLayout
android:layout_width="fill_parent"
android:layout_height="fill_parent"
android:gravity="center">
<ImageView
android:layout_width="wrap_content"
android:layout_height="wrap_content"
android:src="@drawable/two"
android:gravity="center" />
</LinearLayout>
<!-- 第三個頁面 -->
<LinearLayout
android:layout_width="fill_parent"
android:layout_height="fill_parent"
android:gravity="center">
<ImageView
android:layout_width="wrap_content"
android:layout_height="wrap_content"
android:src="@drawable/three"
android:gravity="center" />
</LinearLayout>
<!-- 第四個頁面 -->
<LinearLayout
android:layout_width="fill_parent"
android:layout_height="fill_parent"
android:gravity="center">
<ImageView
android:layout_width="wrap_content"
android:layout_height="wrap_content"
android:src="@drawable/four"
android:gravity="center" />
</LinearLayout>
<!-- 第五個頁面 -->
<LinearLayout
android:layout_width="fill_parent"
android:layout_height="fill_parent"
android:gravity="center">
<ImageView
android:layout_width="wrap_content"
android:layout_height="wrap_content"
android:src="@drawable/five"
android:gravity="center" />
</LinearLayout>
</ViewFlipper>
</LinearLayout>
push_left_in.xml文件中代碼:
復制代碼 代碼如下:
<?xml version="1.0" encoding="utf-8"?>
<set xmlns:android="http://schemas.android.com/apk/res/android">
<translate android:fromXDelta="100%p" android:toXDelta="0"
android:duration="500" />
<alpha android:fromAlpha="0.1" android:toAlpha="1.0"
android:duration="500" />
</set>
push_left_out.xml文件中代碼:
復制代碼 代碼如下:
<?xml version="1.0" encoding="utf-8"?>
<set xmlns:android="http://schemas.android.com/apk/res/android">
<translate android:fromXDelta="0" android:toXDelta="-100%p"
android:duration="500" />
<alpha android:fromAlpha="1.0" android:toAlpha="0.1"
android:duration="500" />
</set>
push_right_in.xml文件中代碼:
復制代碼 代碼如下:
<?xml version="1.0" encoding="utf-8"?>
<set xmlns:android="http://schemas.android.com/apk/res/android">
<translate android:fromXDelta="-100%p" android:toXDelta="0"
android:duration="500" />
<alpha android:fromAlpha="0.1" android:toAlpha="1.0"
android:duration="500" />
</set>
push_right_out.xml文件中代碼:
復制代碼 代碼如下:
<?xml version="1.0" encoding="utf-8"?>
<set xmlns:android="http://schemas.android.com/apk/res/android">
<translate android:fromXDelta="0" android:toXDelta="100%p"
android:duration="500" />
<alpha android:fromAlpha="1.0" android:toAlpha="0.1"
android:duration="500" />
</ set>
最後,別忘記了在配置文件中設置權限。
示例下載:點擊下載
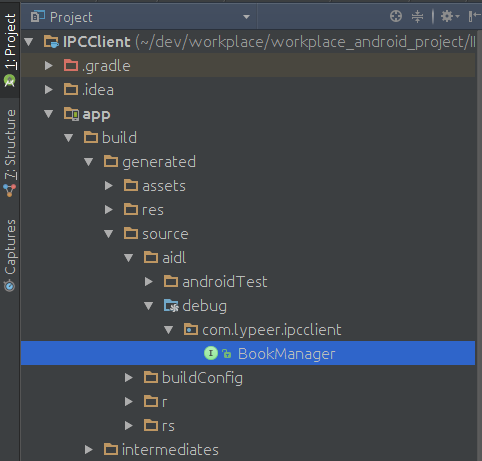 Android:學習AIDL,這一篇文章就夠了(下)
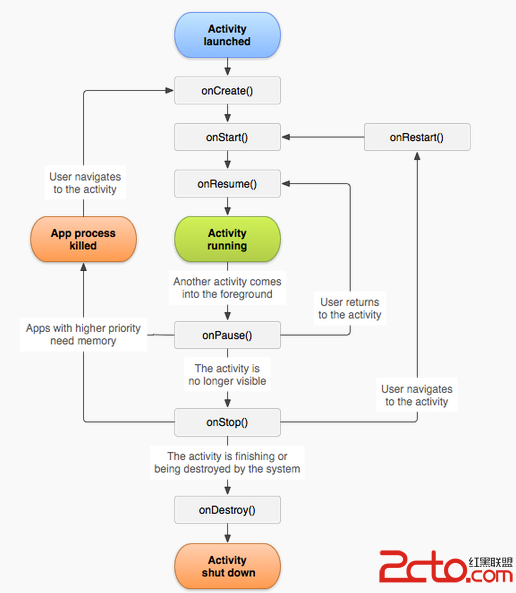 Android_06_Activity的生命周期
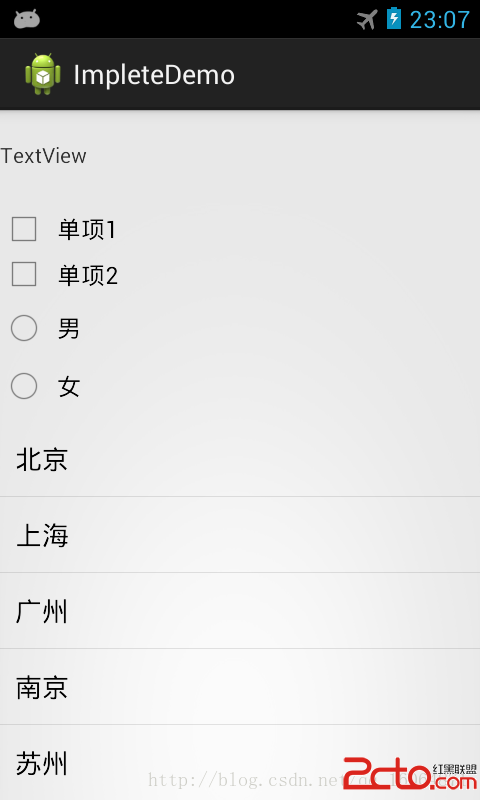 Android 常用控件接口監聽
 Android用PopupWindow實現自定義Dailog